How to deploy Node.js app to Digital Ocean droplet with free Continuous Integration
The most complete step-by-step guide on how I deploy servers with a lightning fast and free CI


Hello Internet! I’ve been using this way of deploying my servers to Digital Ocean droplets for a while now (deployed over 40 different web services, database layers, telegram bots, etc.) — and thought that it might be a good idea to describe the process.
We will start with my Node.js + TypeScript + Koa + MongoDB starter that you can clone from here. It’s a backend starter that is free to use (MIT licensed) and that has everything you need set up: authentication, router, server, TypeScript (yay, types!), database ORM (also in TypeScript). You can download this starter, fill out environment variables (secrets, DB URI, social network app IDs, etc.), and when it successfully runs, follow this tutorial to deploy it. Or you can use your existing app (doesn’t even have to be Node.js) if you wish so — this tutorial is pretty versatile.
Any part of this tutorial can be omitted or substituted with your own solution. This comprehensive tech stack is presented within the tutorial just to simplify matters for the emerging developers. If you’re seasoned enough — feel free to only use what matters for you.
Creating Digital Ocean droplet
Alright, alright, here’s the deal, reader — here’s my referral link for Digital Ocean — if you register at Digital Ocean with it, you will get free $50 (it can last 10 months if you only use one $5/month droplet) and I will get $25 when you spend your first $25. Please, do register following this link, I have a number of Telegram bots to support. And who doesn’t like free $50 in credits, am I right?
This part of the tutorial can be substituted with AWS or Microsoft Cloud or another fancy cloud VPS service of your choice. If you use any other VPS provider, skip to the next section (just make sure to create some kind of Linux VPS and be able to SSH into it).
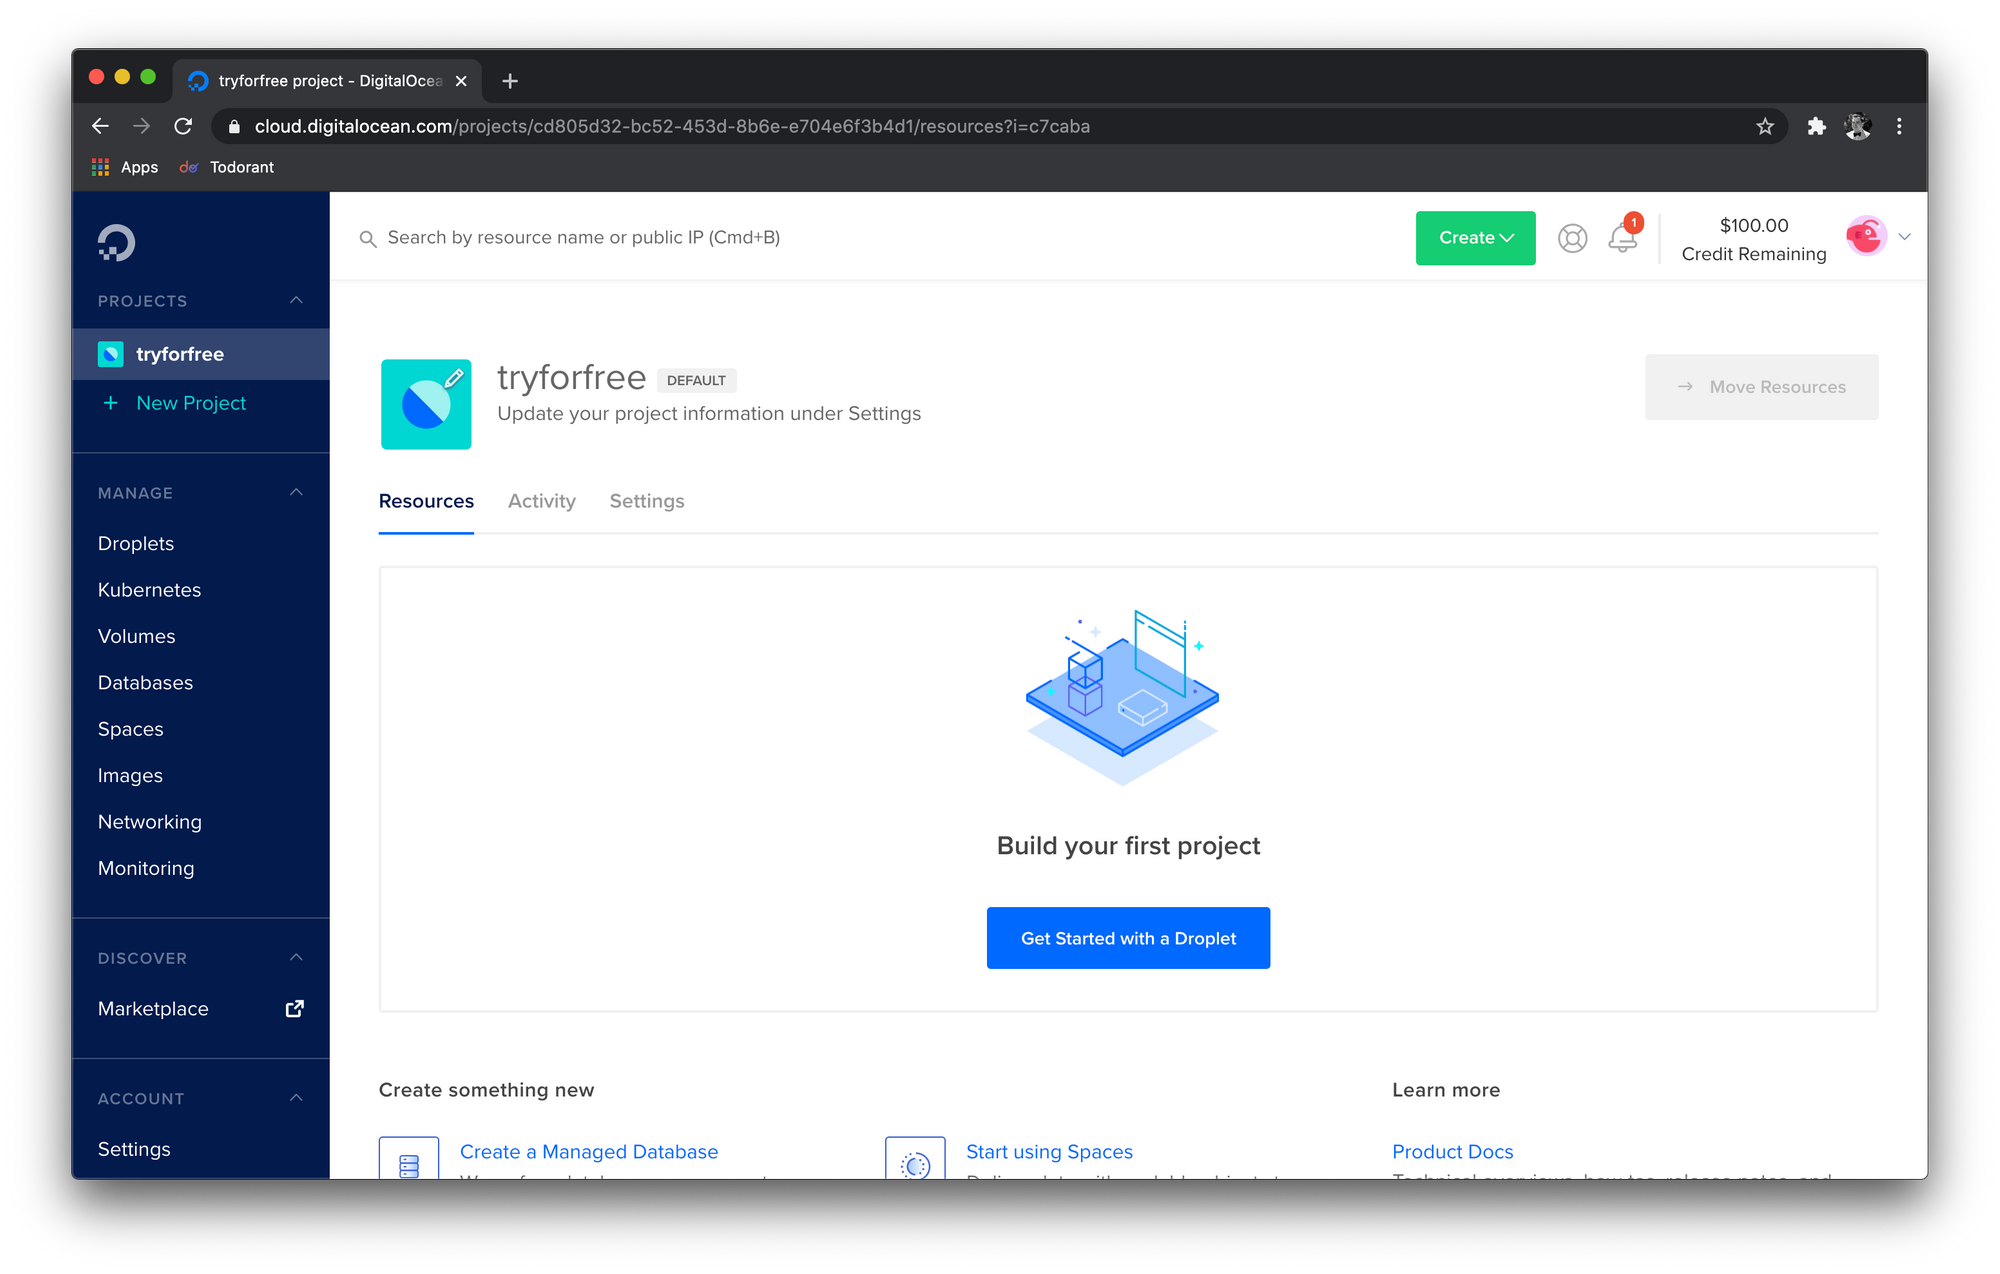
Follow my referral link and register an account with Digital Ocean. After this step, you will be presented by an empty screen with no projects yet.
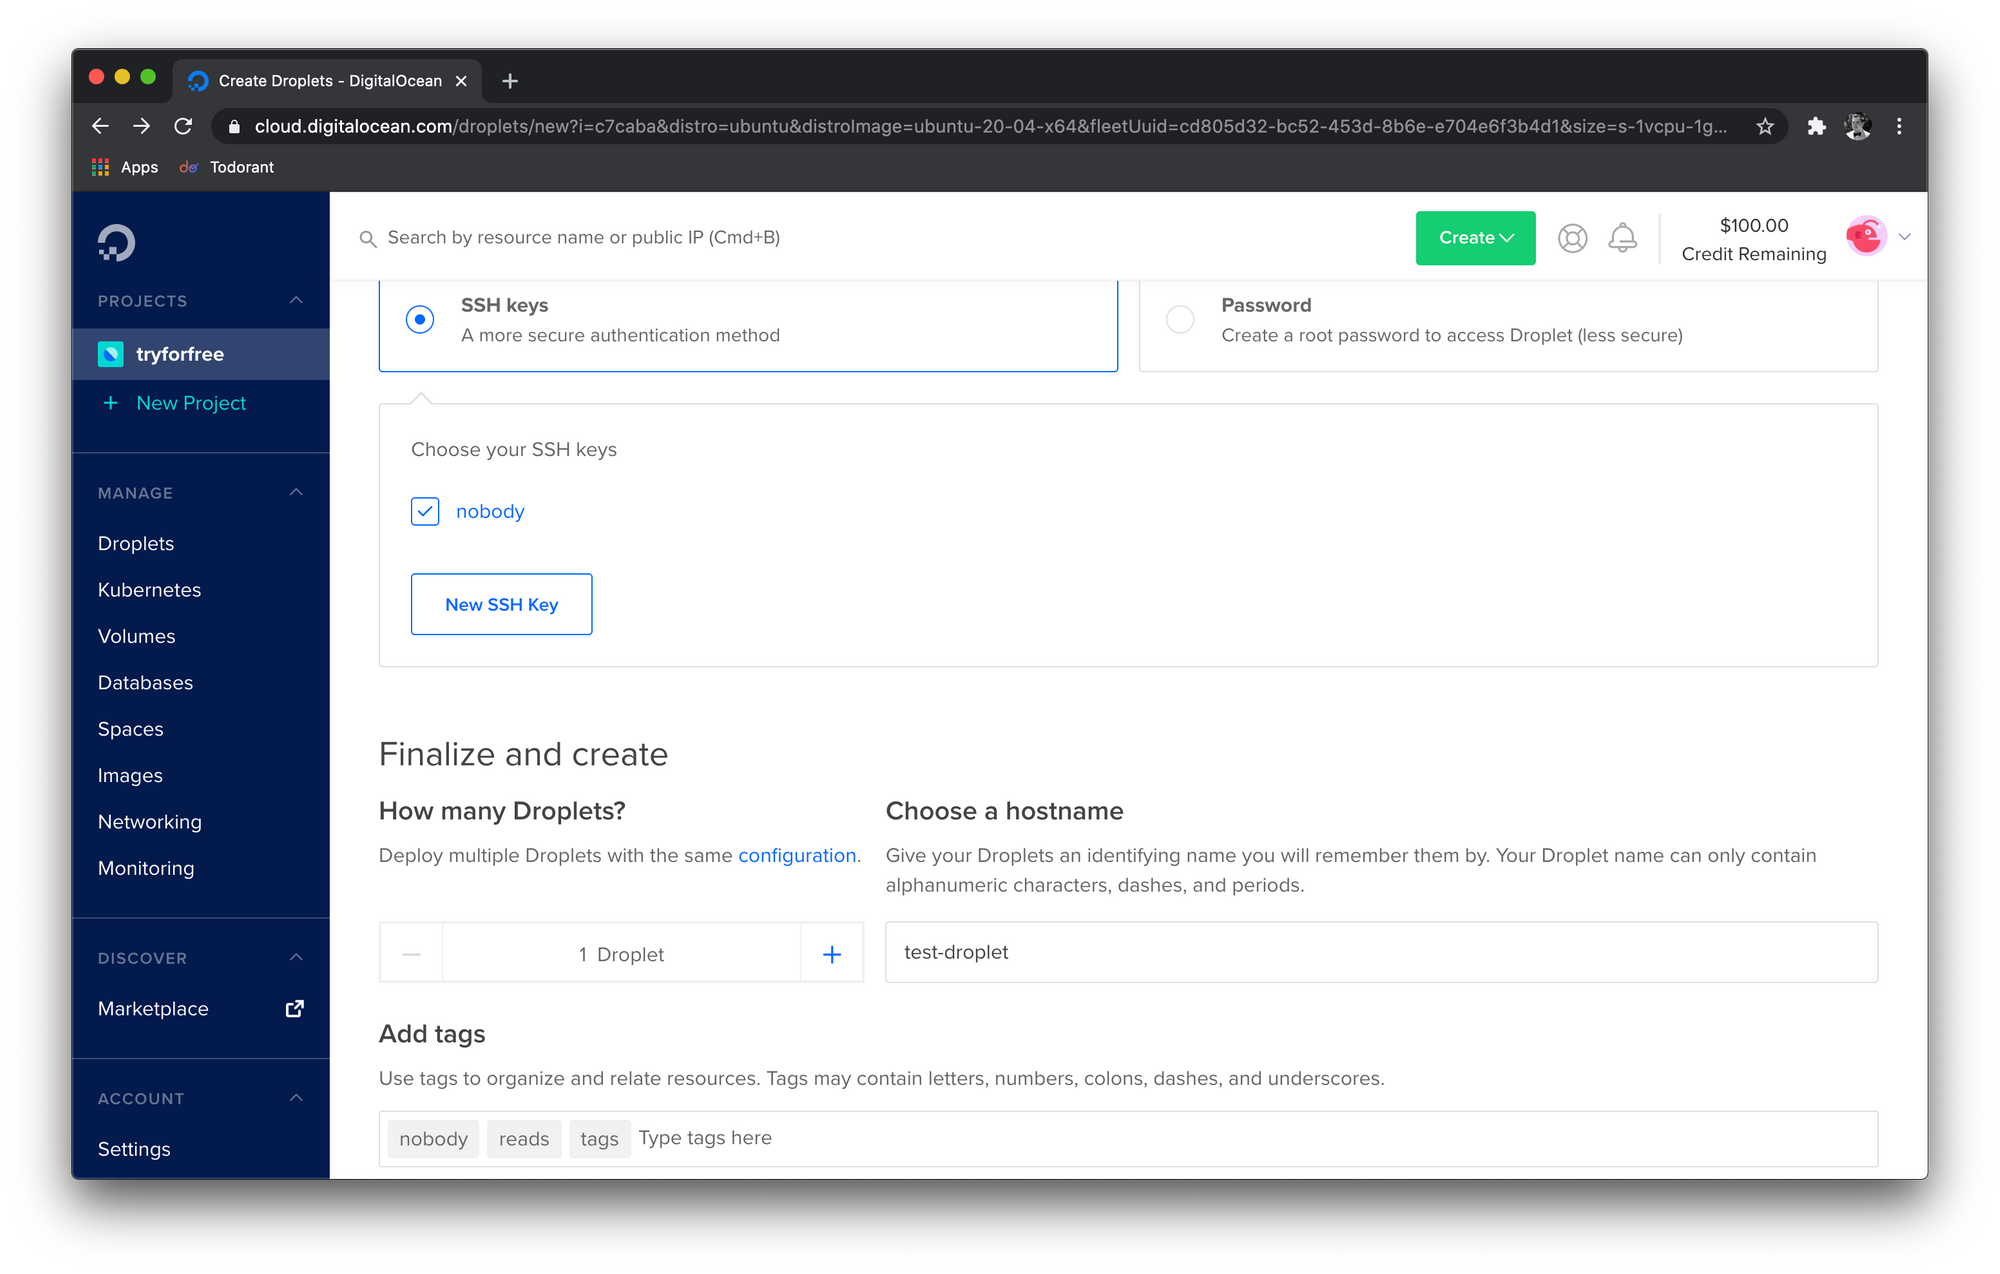
Create a new Droplet. I like to start with the latest Ubuntu and the smallest plan (you can always scale up later). Just make sure that when you scale you keep in mind that the only thing that can’t scale back is the storage of your droplet. So if you scale the storage up — you cannot go back.
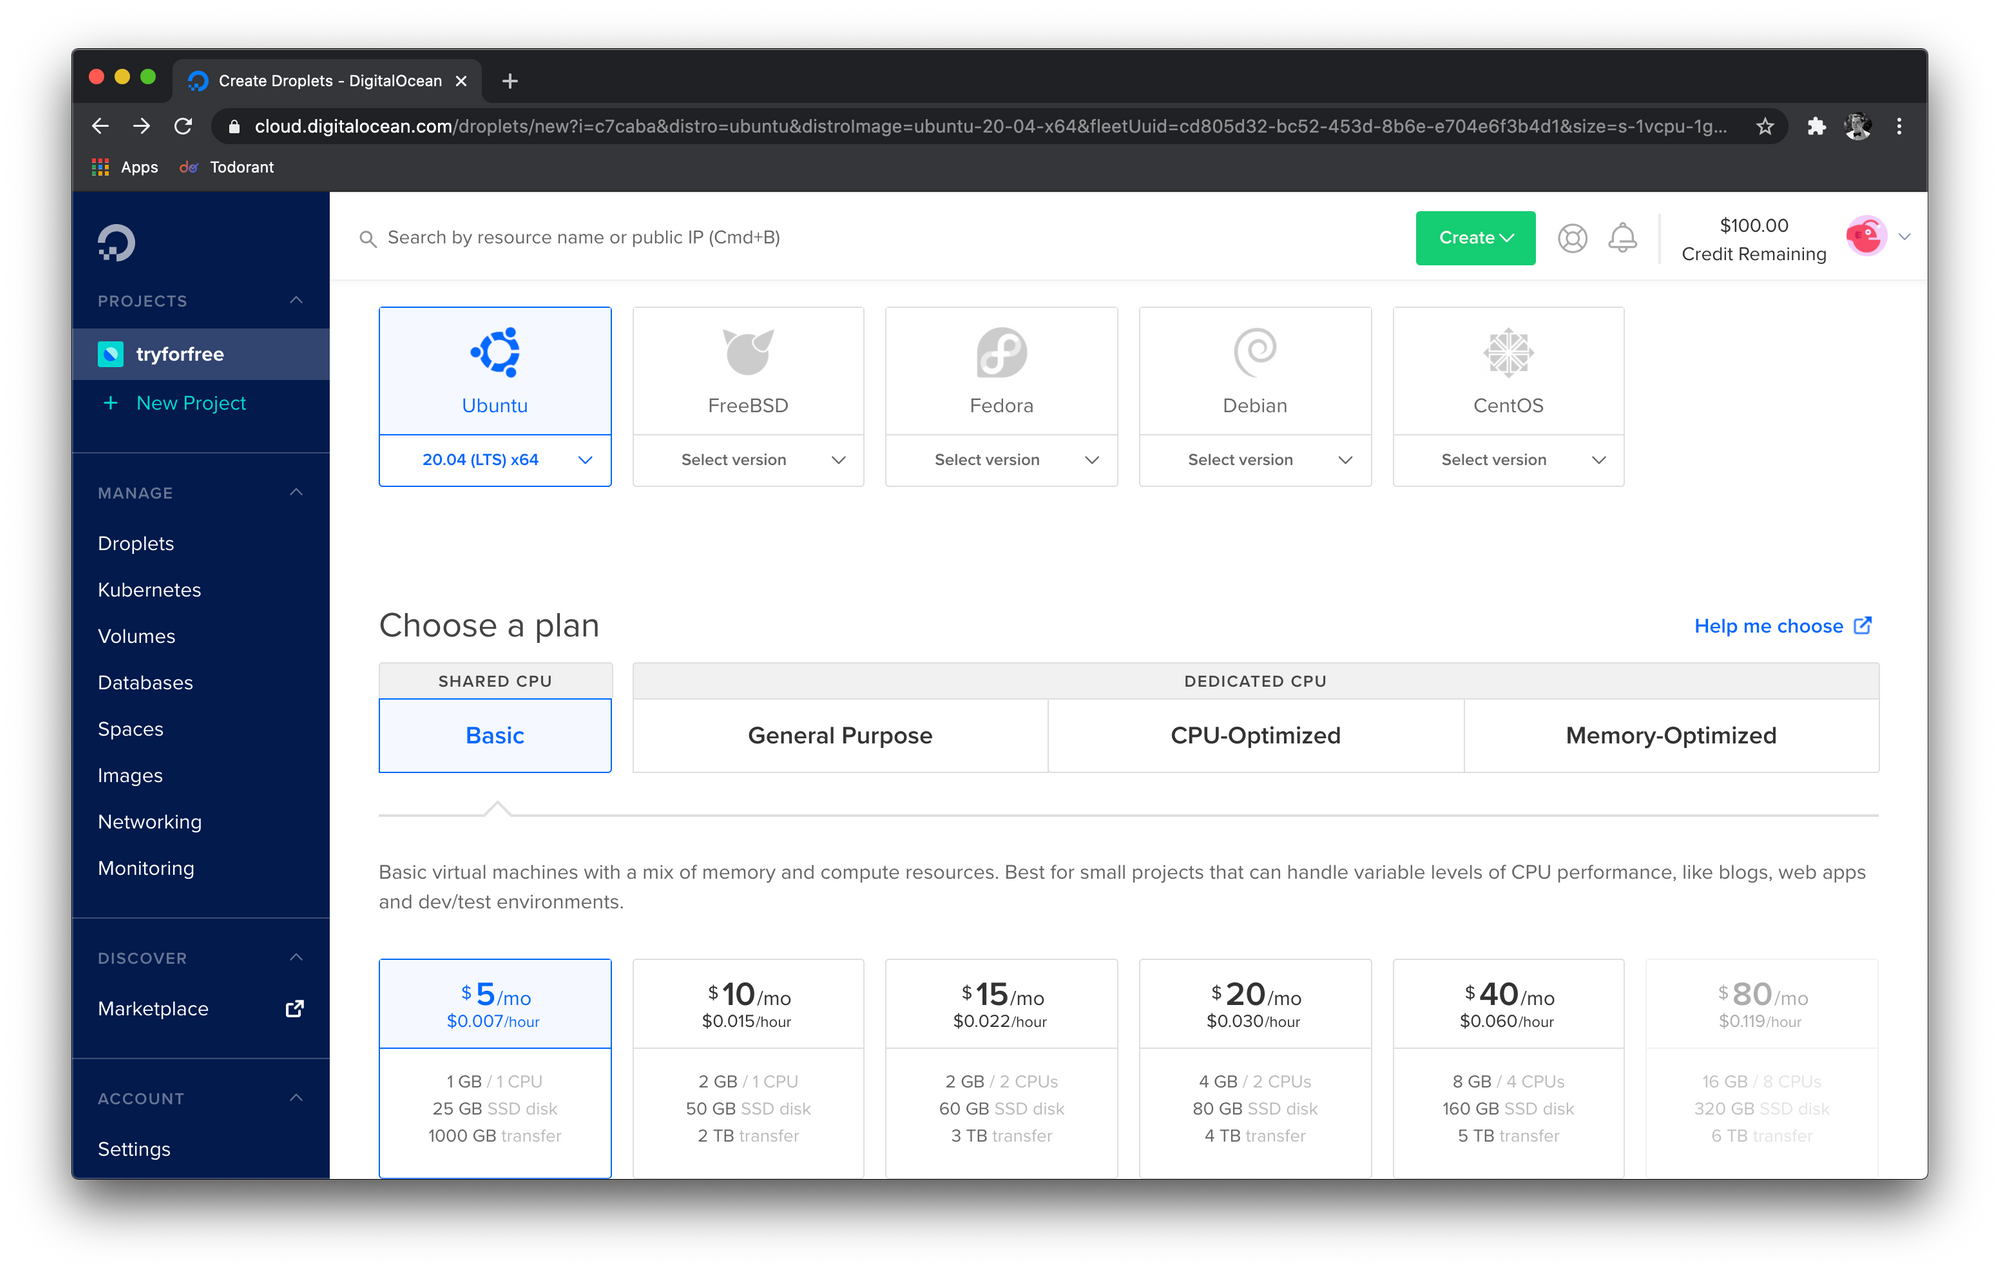
Don’t worry about the volumes — you will be able to add them later on the fly without troubles. Pick any region you want — I like to stick to Amsterdam because it seems like it has the lowest ping to the Telegram bot API servers. Turn on monitoring feature — it’s a cool thing to have, especially with the new type of email alerts that Digital Ocean has implemented.
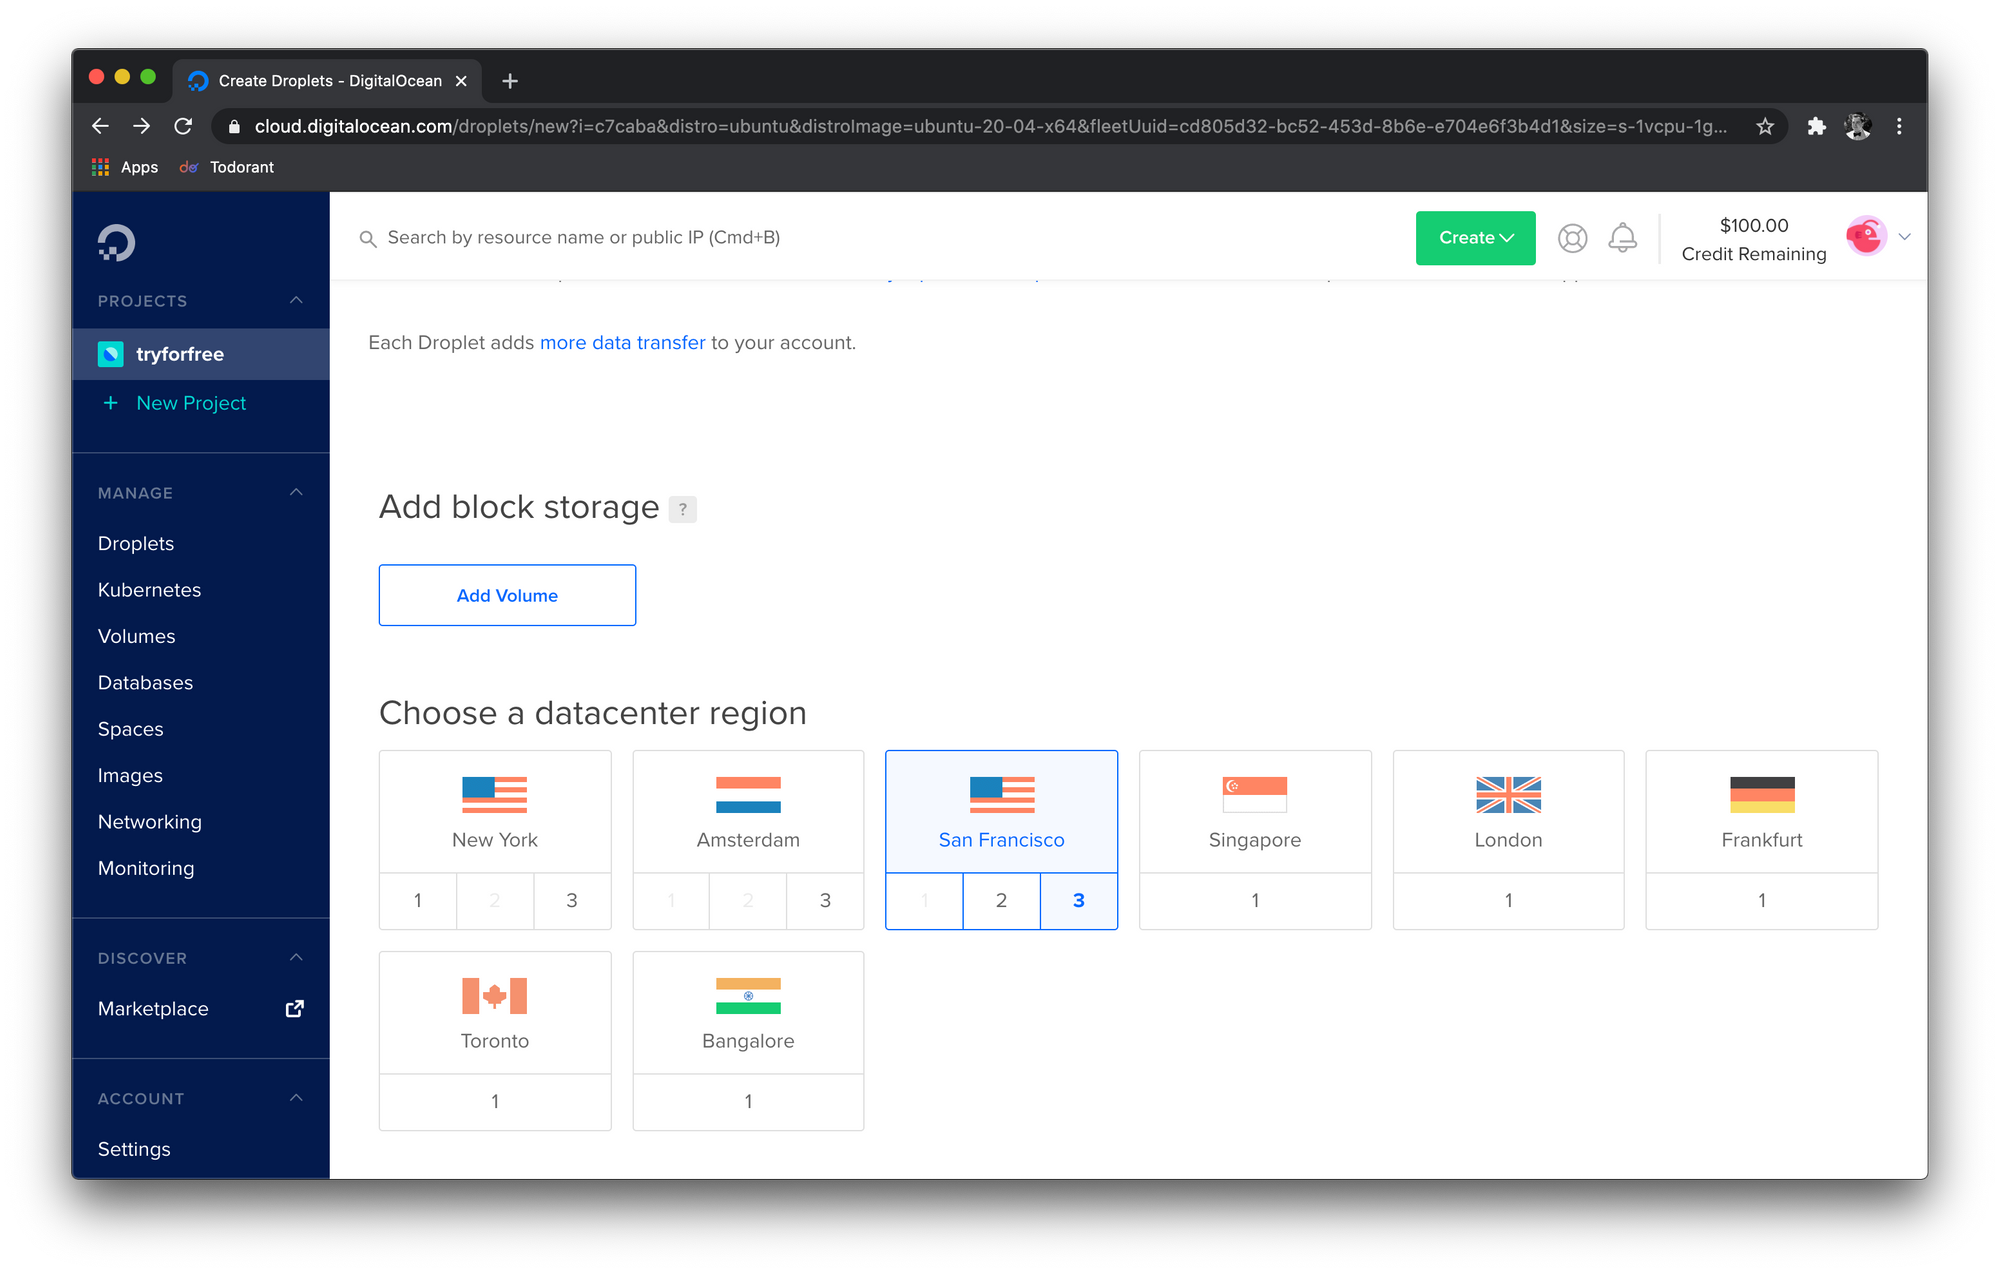
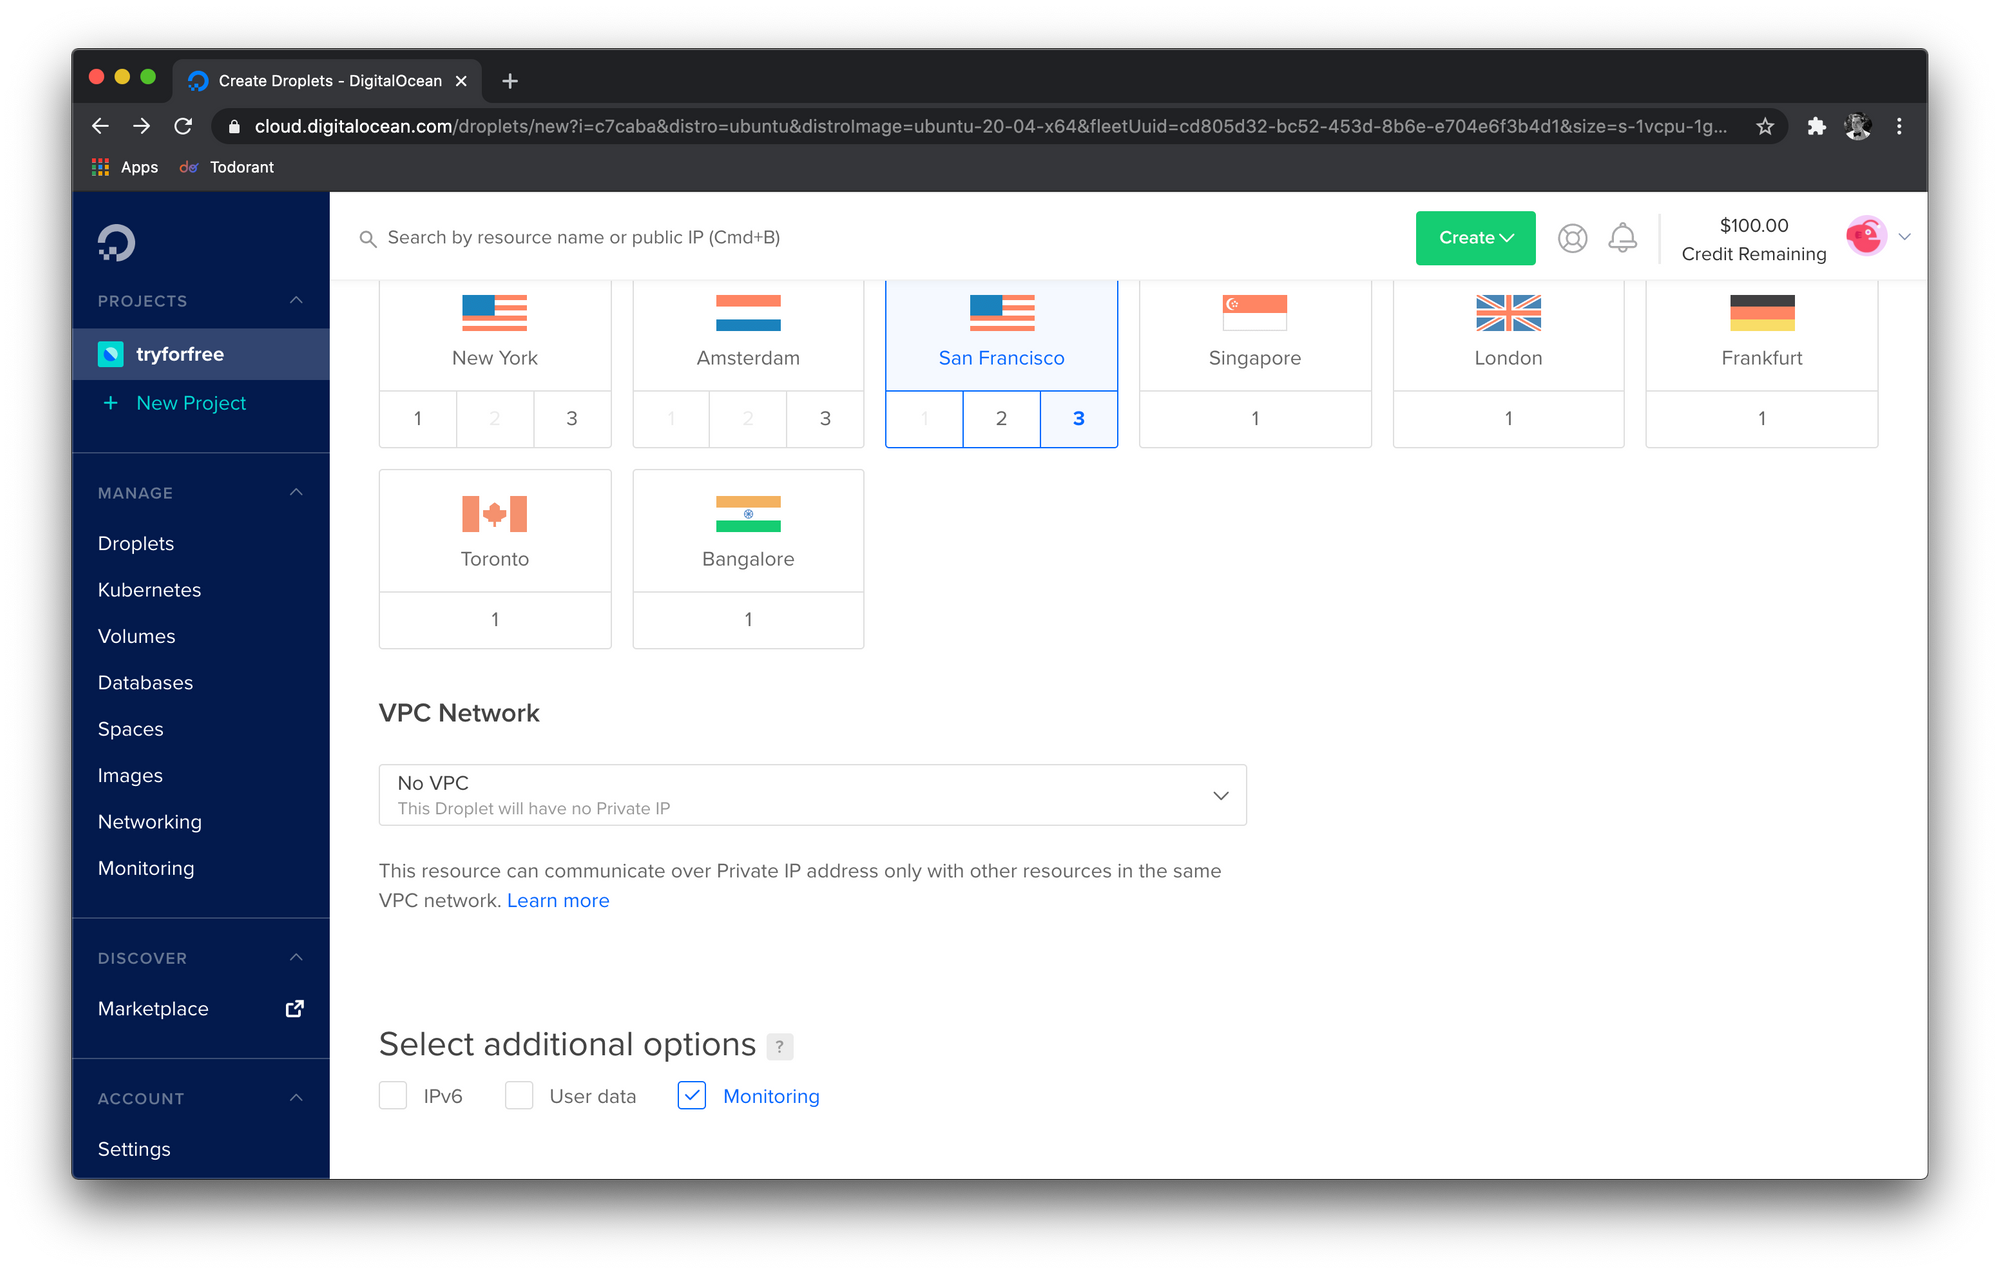
Now, generate an SSH key if you haven’t already. Check out this link with the tutorial on how to obtain one. You will need your public part of the SSH key, usually ~/.ssh/id_rsa.pub. Take the contents of this file and add it as a new SSH key during the droplet creation. Select SSH as your method of authentication — don’t be the guy who uses one-time passwords. Choose a name for your droplet, don’t be the guy who doesn’t rename the droplets. Add some tags if you wish, enable backups if you want (you know, there are two types of administrators: the ones who back up and the ones who back up now). Click the large button to create the droplet, wait a bit and here you go — you’ve got yourselves a server!
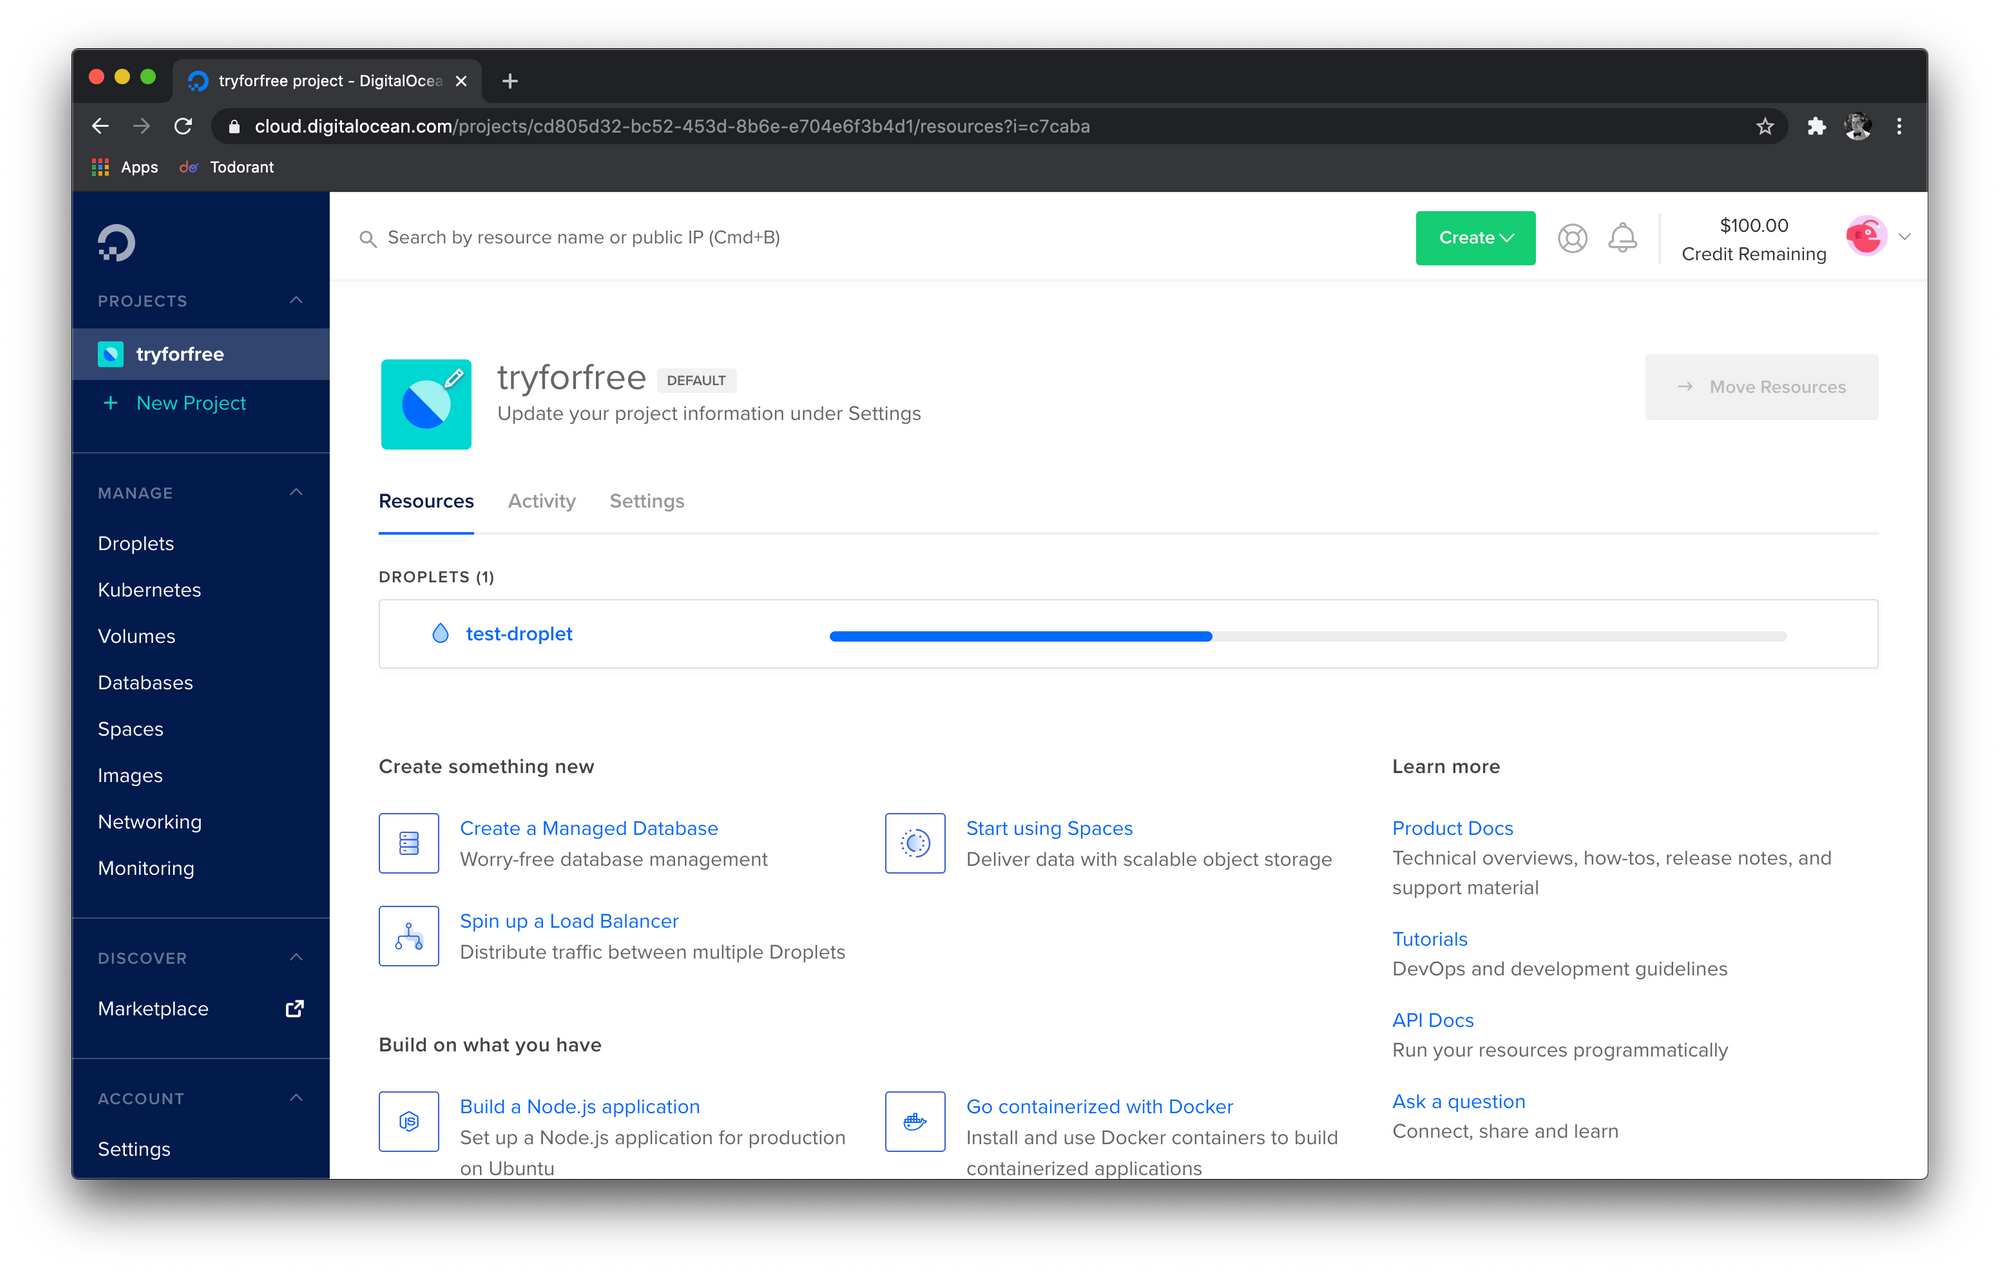
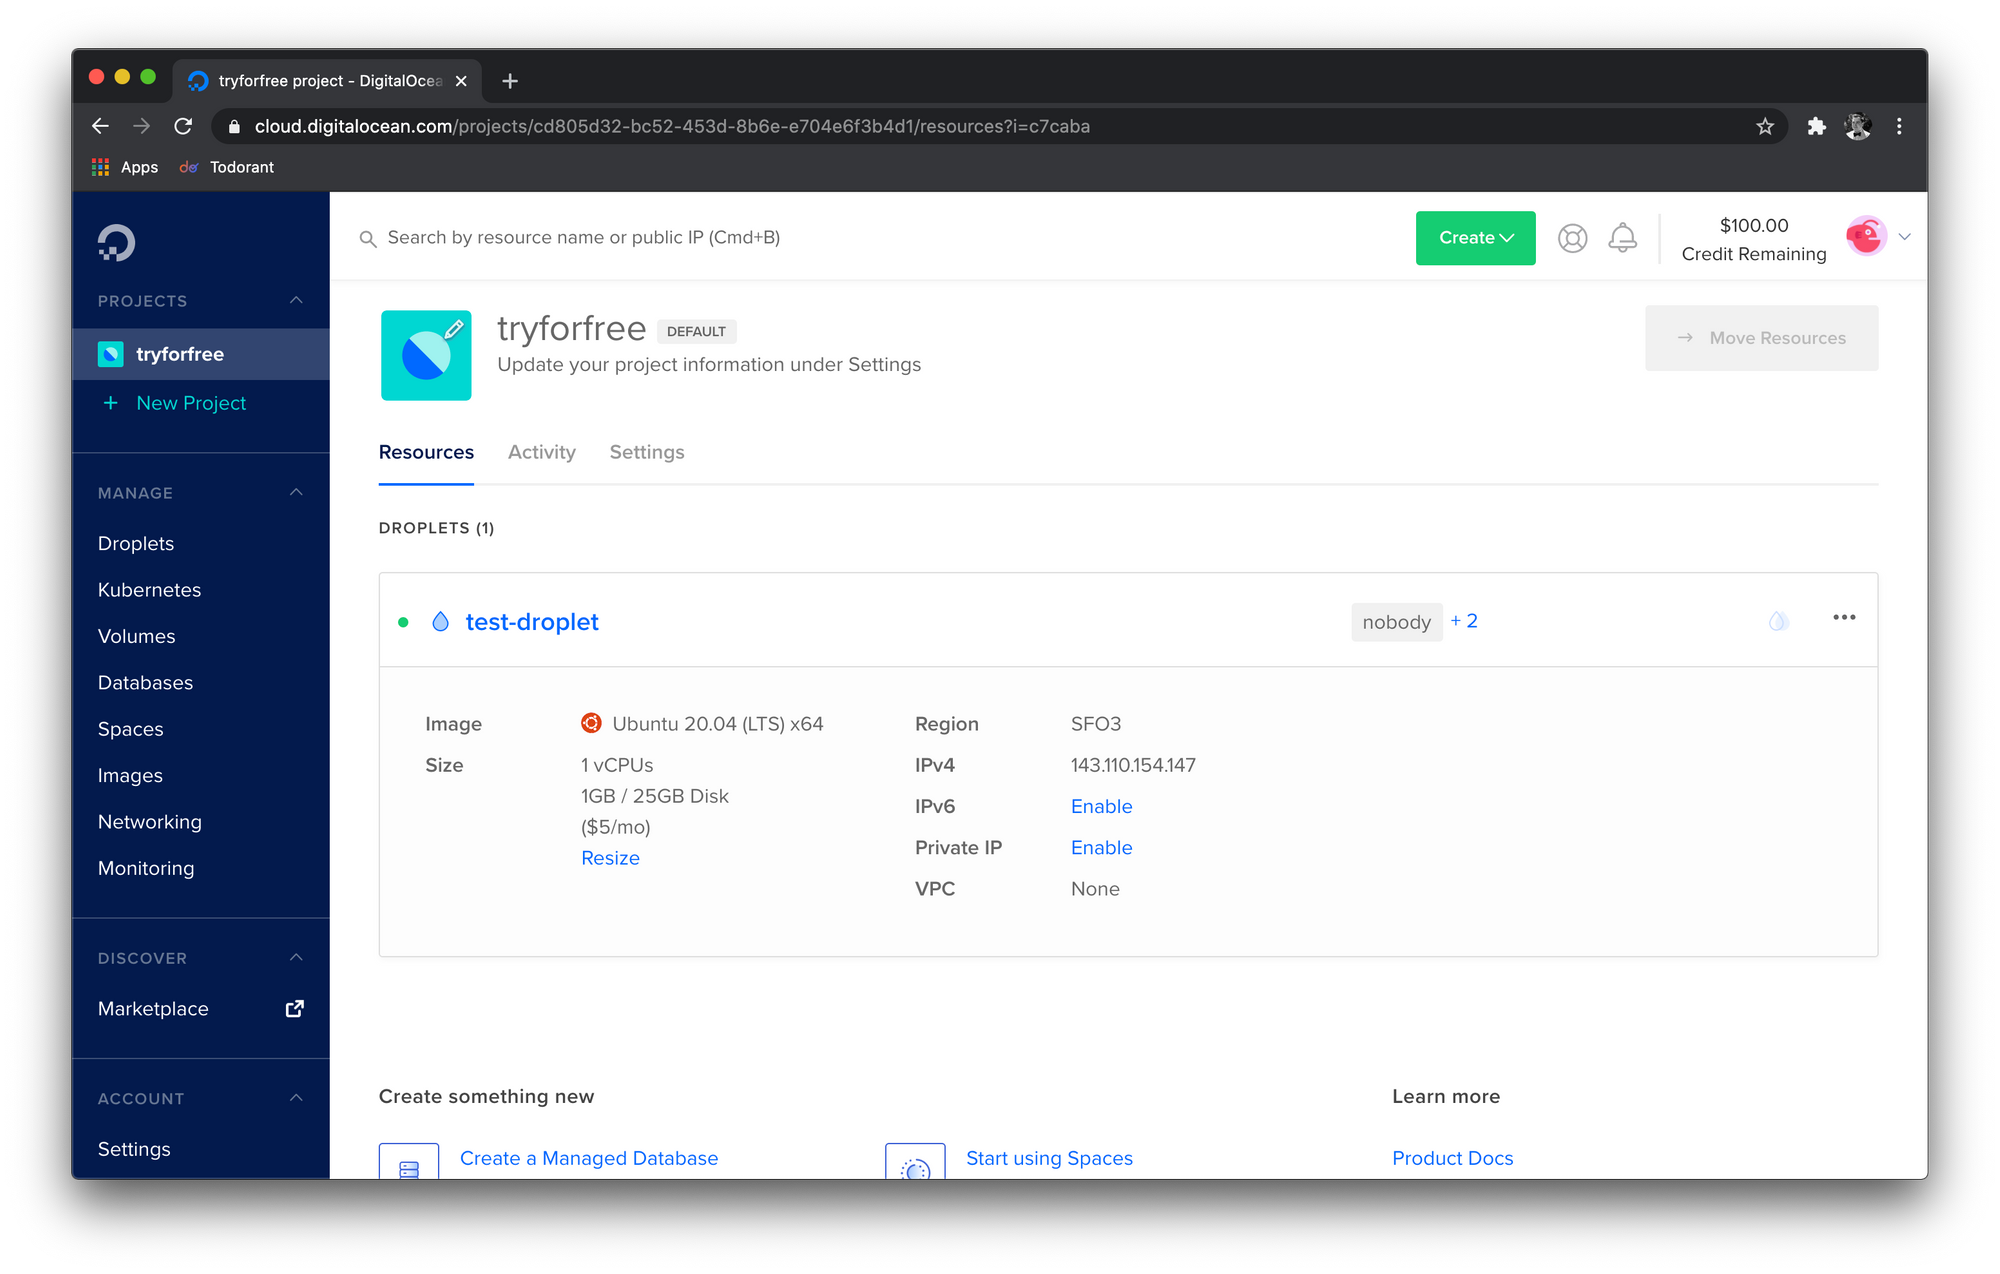
Note the IP address of your droplet. From now on — this is the thing you’re going to use most, you can forget about the Digital Ocean dashboard now, it has served its purpose. From now on, this tutorial is going to be compatible with any VPS servers running Ubuntu or other Linux distros.
Setting up the VPS
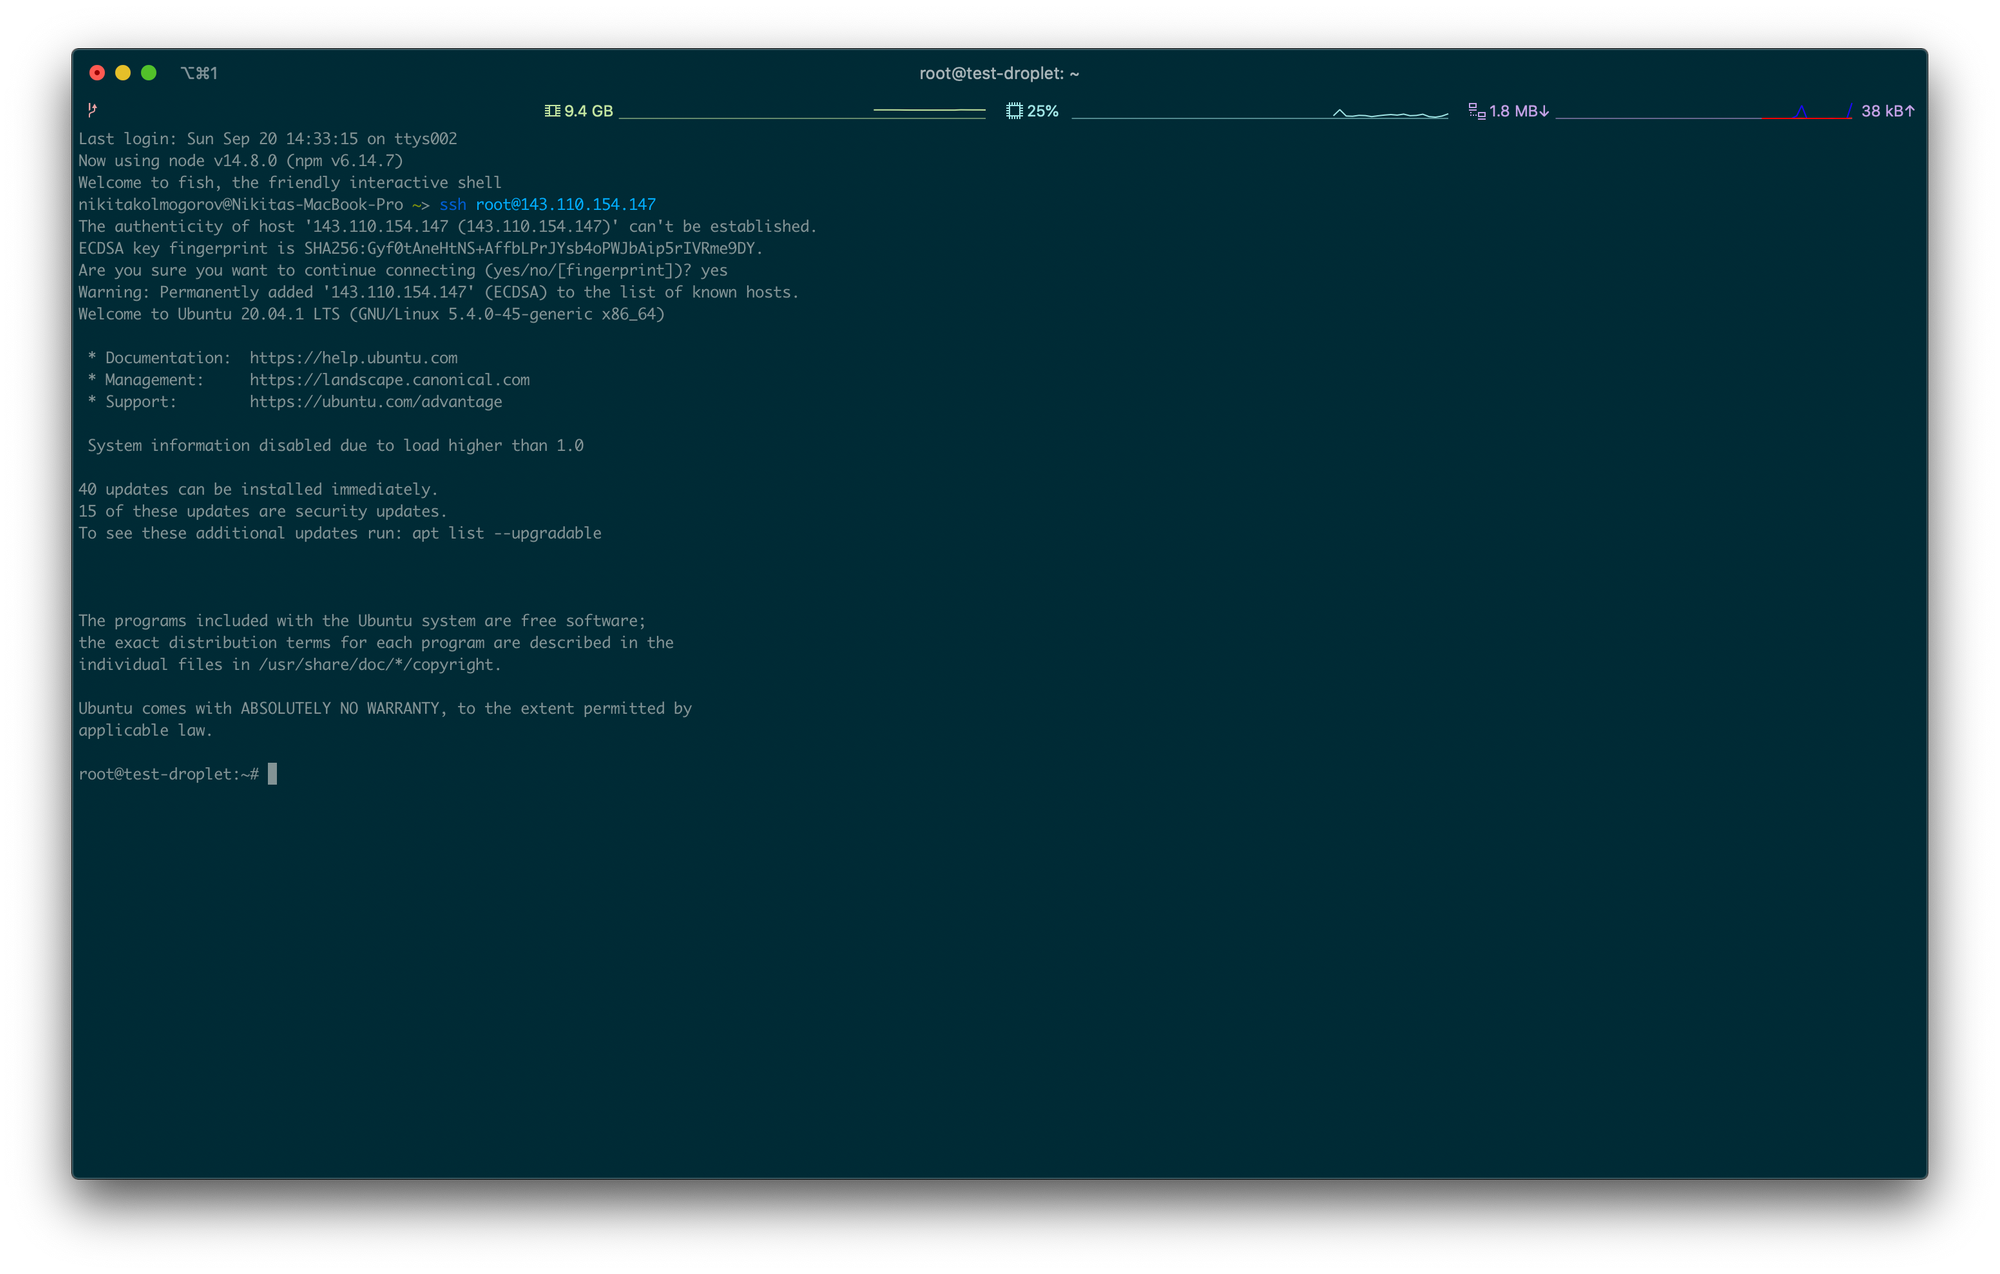
Ok, now SSH into your server. I usually do it like ssh [email protected] — obviously, you are going to have your own IP address of the VPS machine that you have created. Let's create another user, just so that we don't run everything from root!
Run the adduser bruh command. You can set up your own username insted of bruh, I just used it for the sake of this tutorial. From here down, change bruh in all commands to your username.
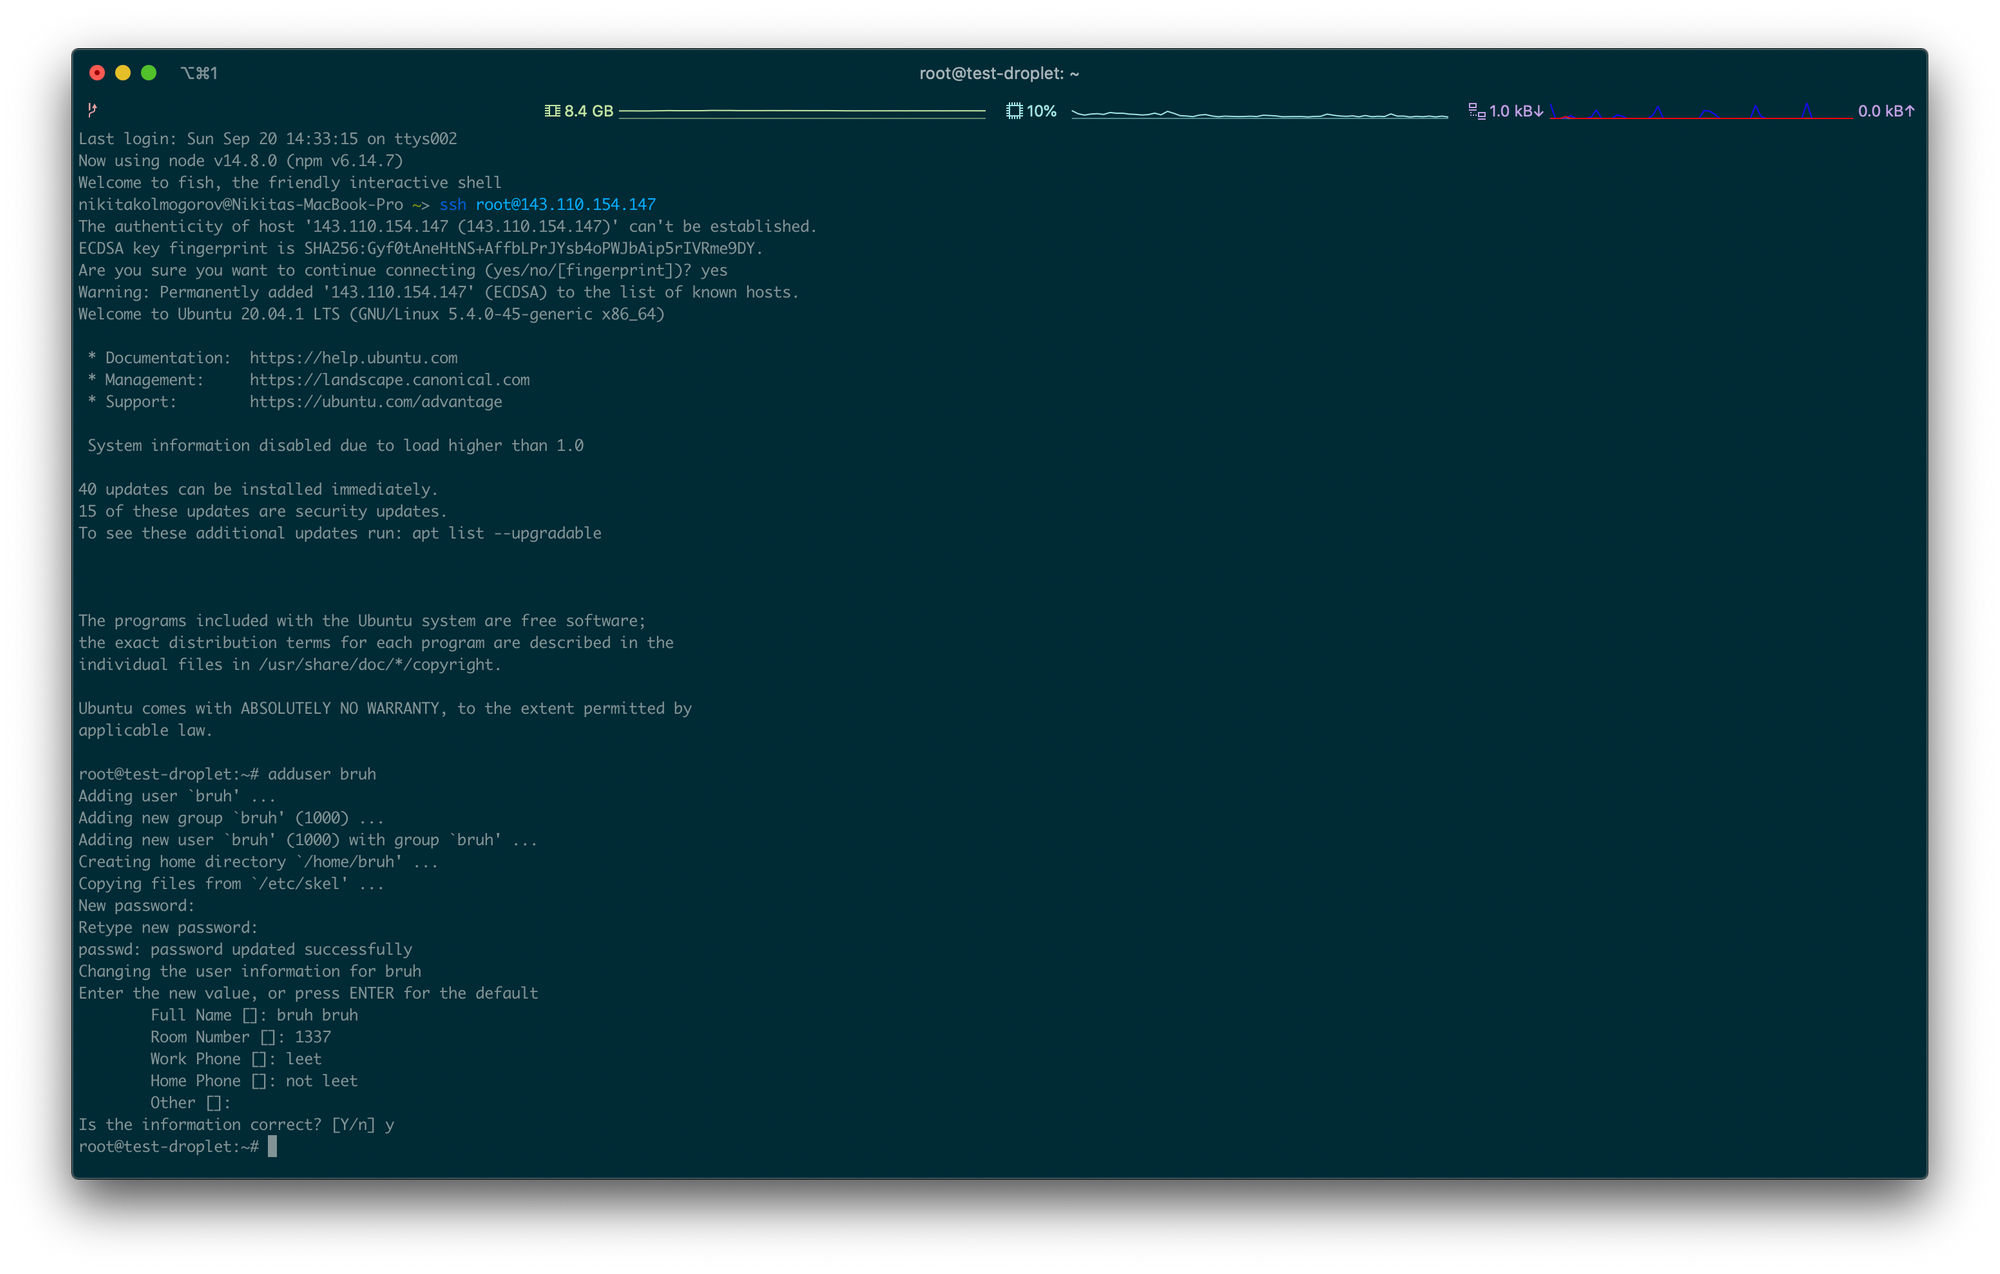
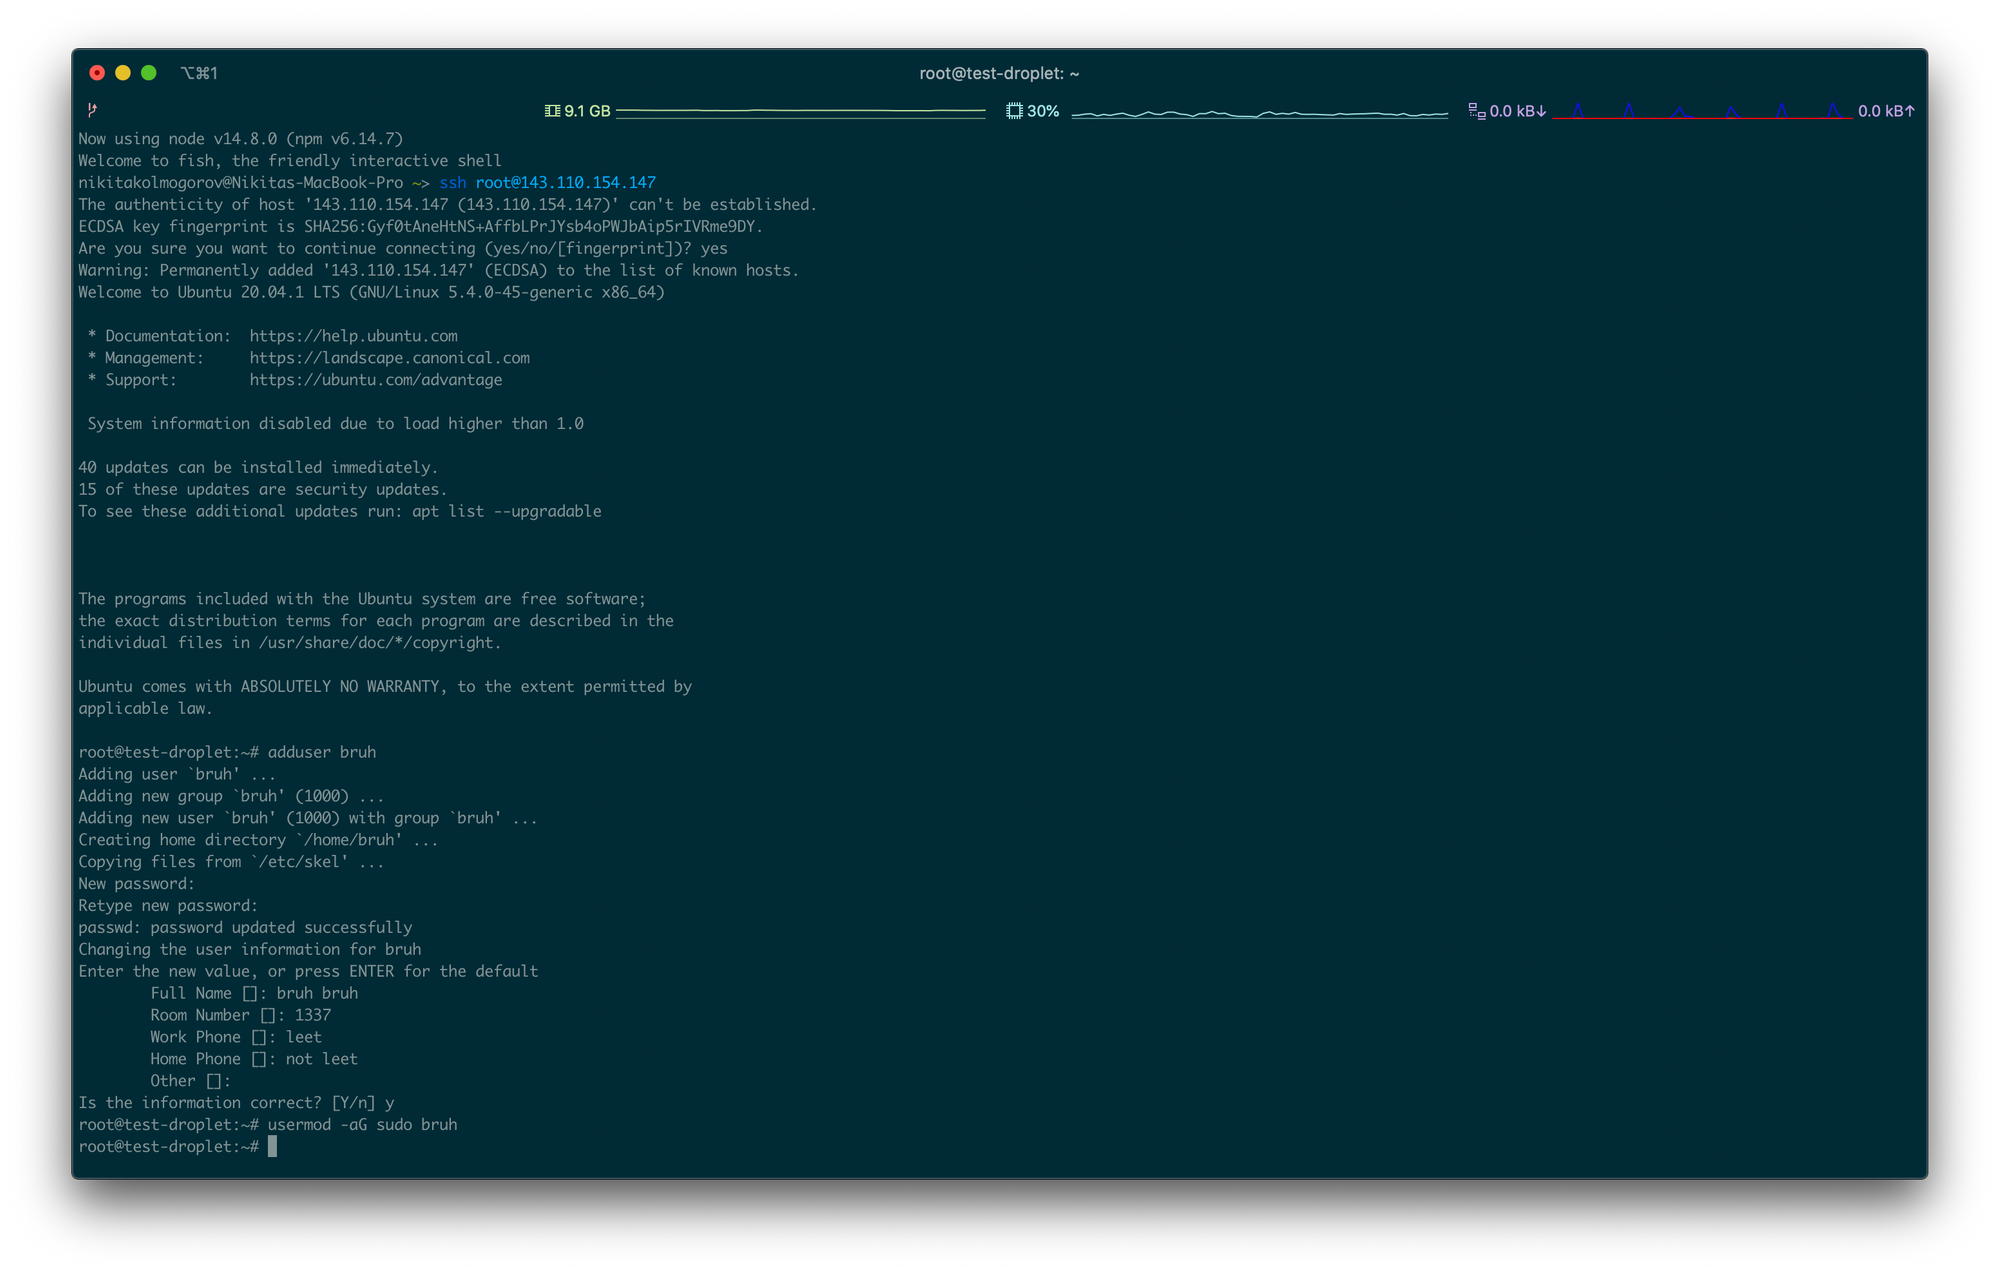
Note the password that you used. Now let's add this user to the sudo group. It's a special group of users who can run root commands with the keyword sudo. Run this: usermod -aG sudo bruh.
Right after that let's add our public SSH key to the new user as well. Run the following commands:
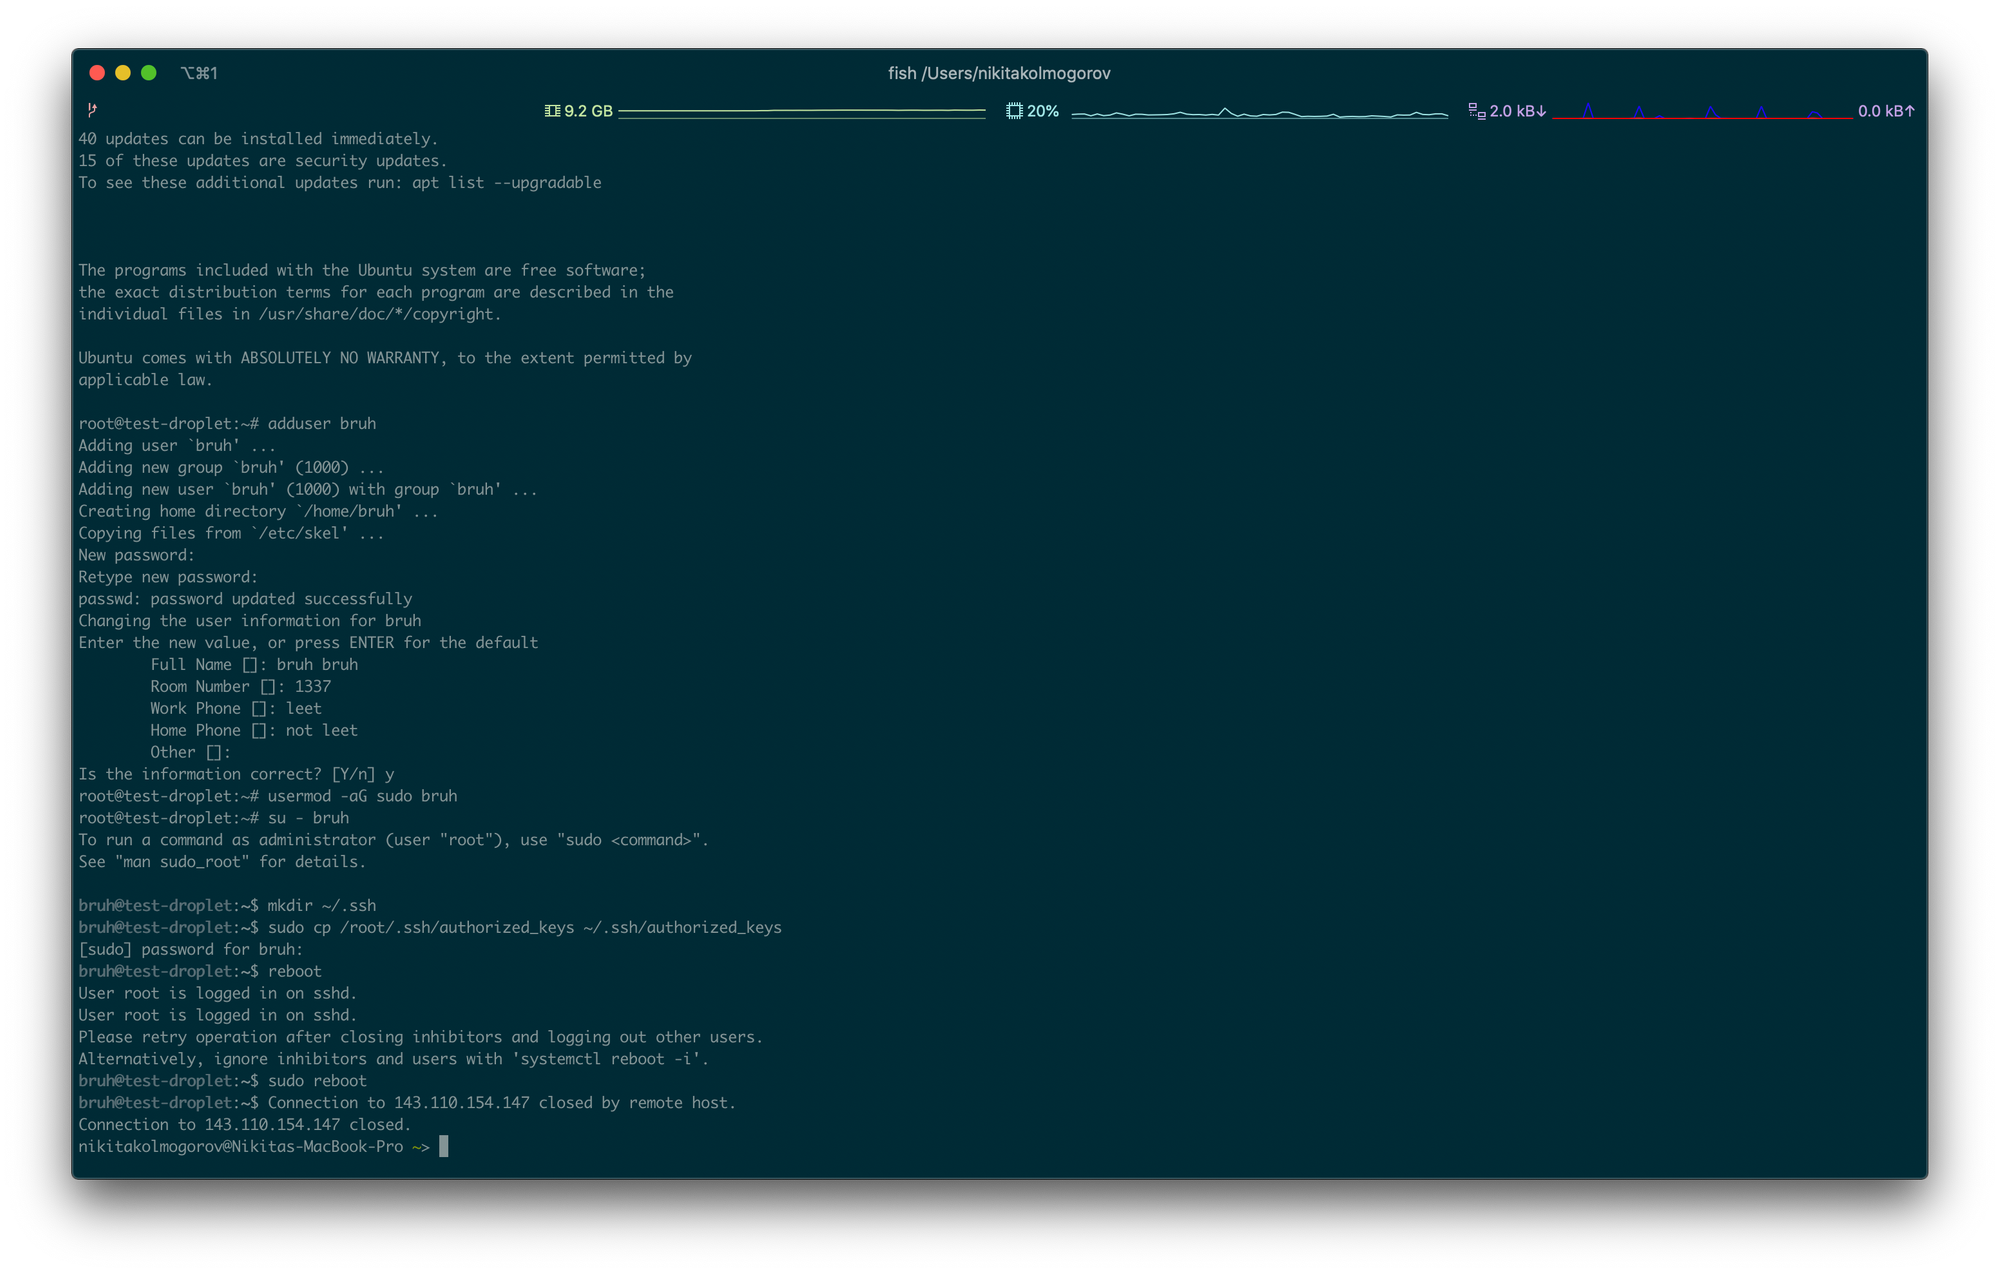
su - bruh

mkdir ~/.ssh

sudo cp /root/.ssh/authorized_keys ~/.ssh/authorized_keys

sudo chmod 700 ~/.ssh

sudo chmod 600 ~/.ssh/authorized_keys

sudo chown -R bruh:bruh ~/.ssh

sudo reboot
You will be prompted to enter the password for your user when copying authorized SSH keys from your root user to the user that you created. Don't forget to change the file permissions with chmod and chown! After you start the reboot, SSH will disconnect. You can also just restart the SSH service, but for now we'll just reboot the machine for the sake of simplicity.
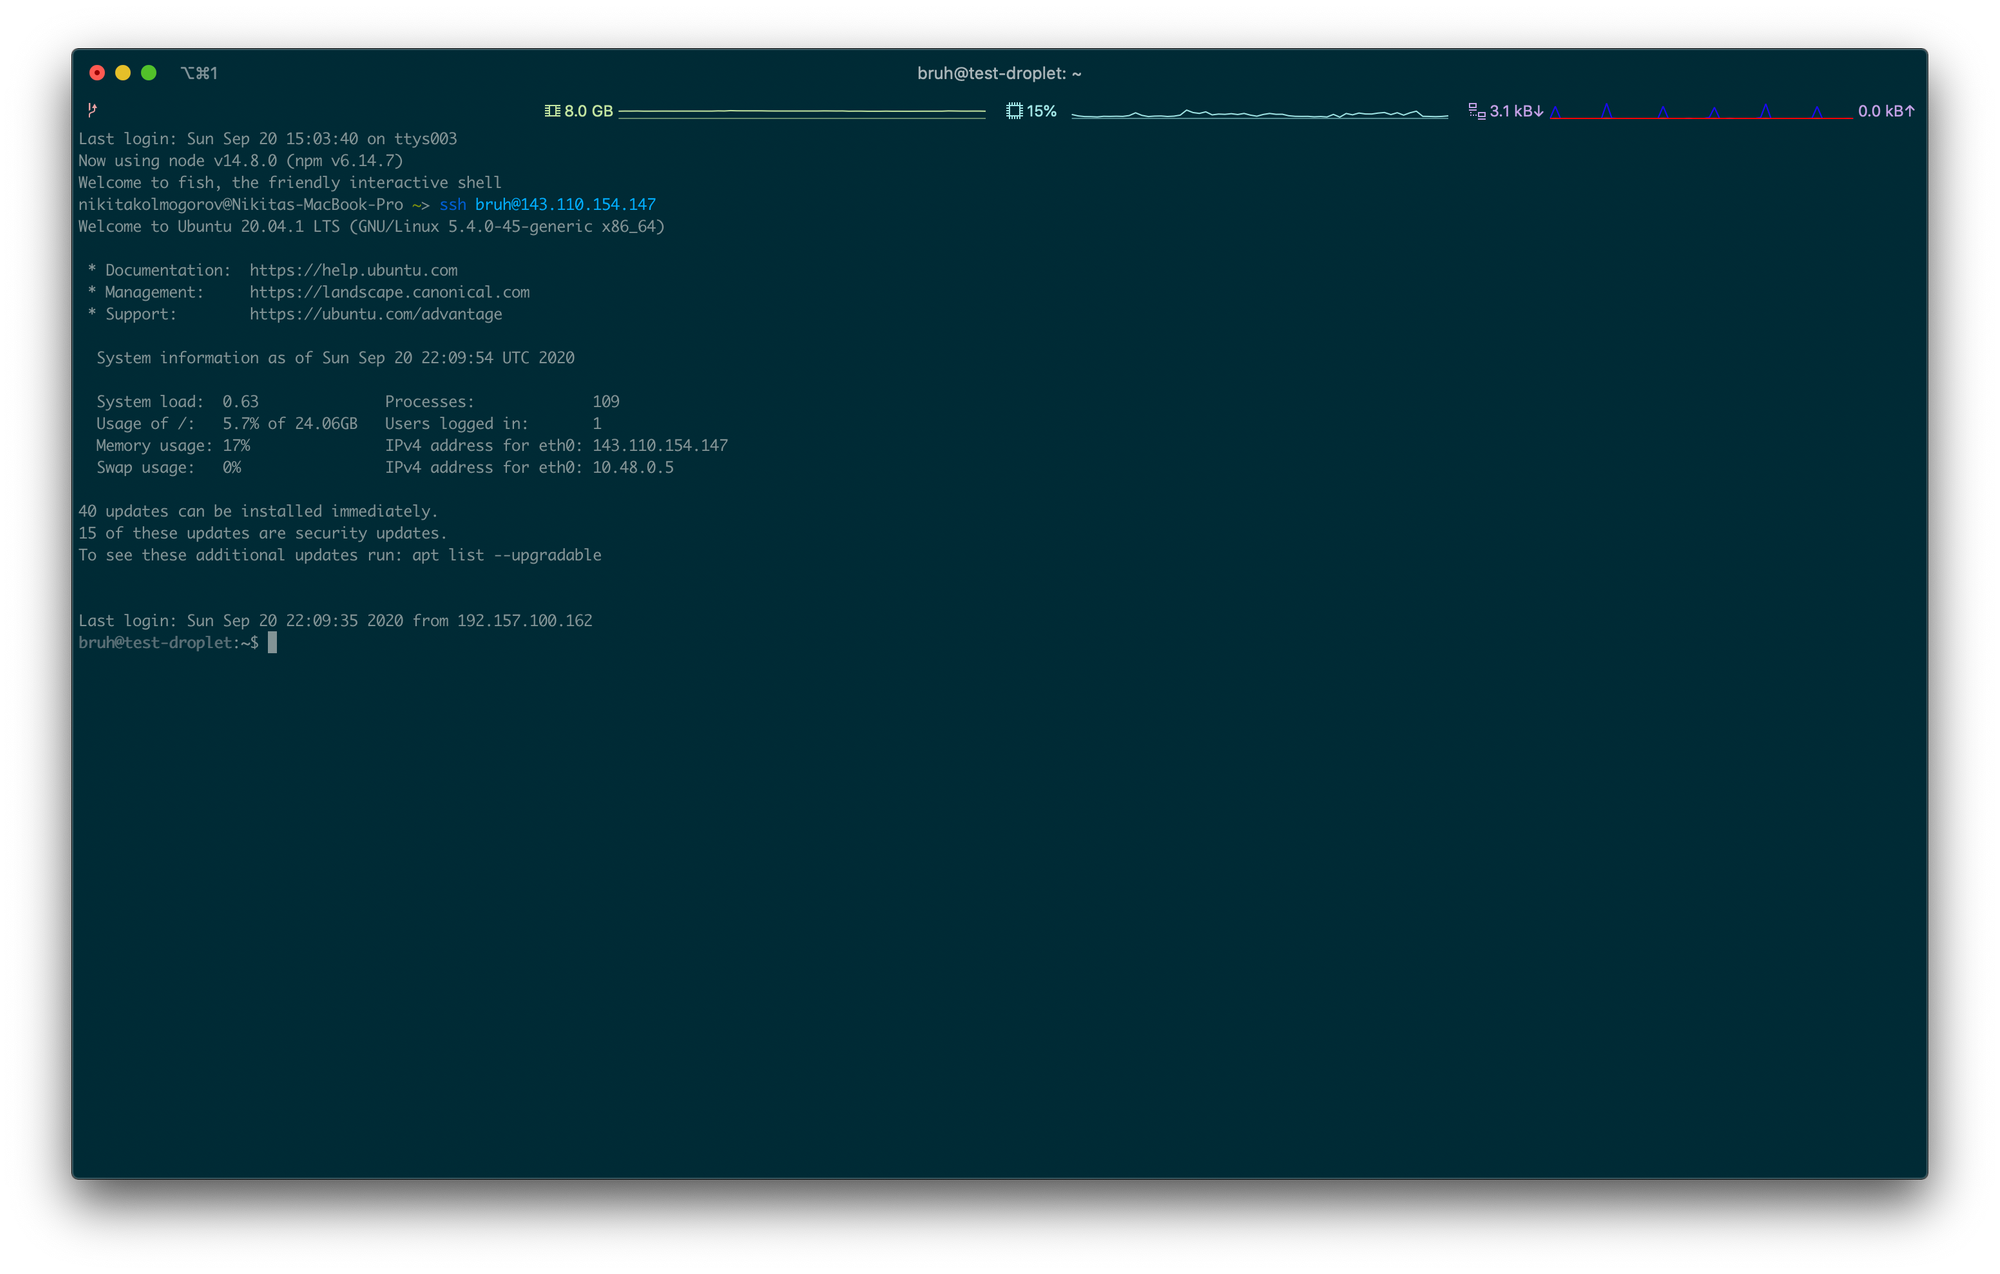
Let's SSH back to the server — but now with our newly created user! Do ssh [email protected]. Should work like magic.
Let’s install nvm, node, yarn, MongoDB — the tech stack used by my starter that you have downloaded earlier.
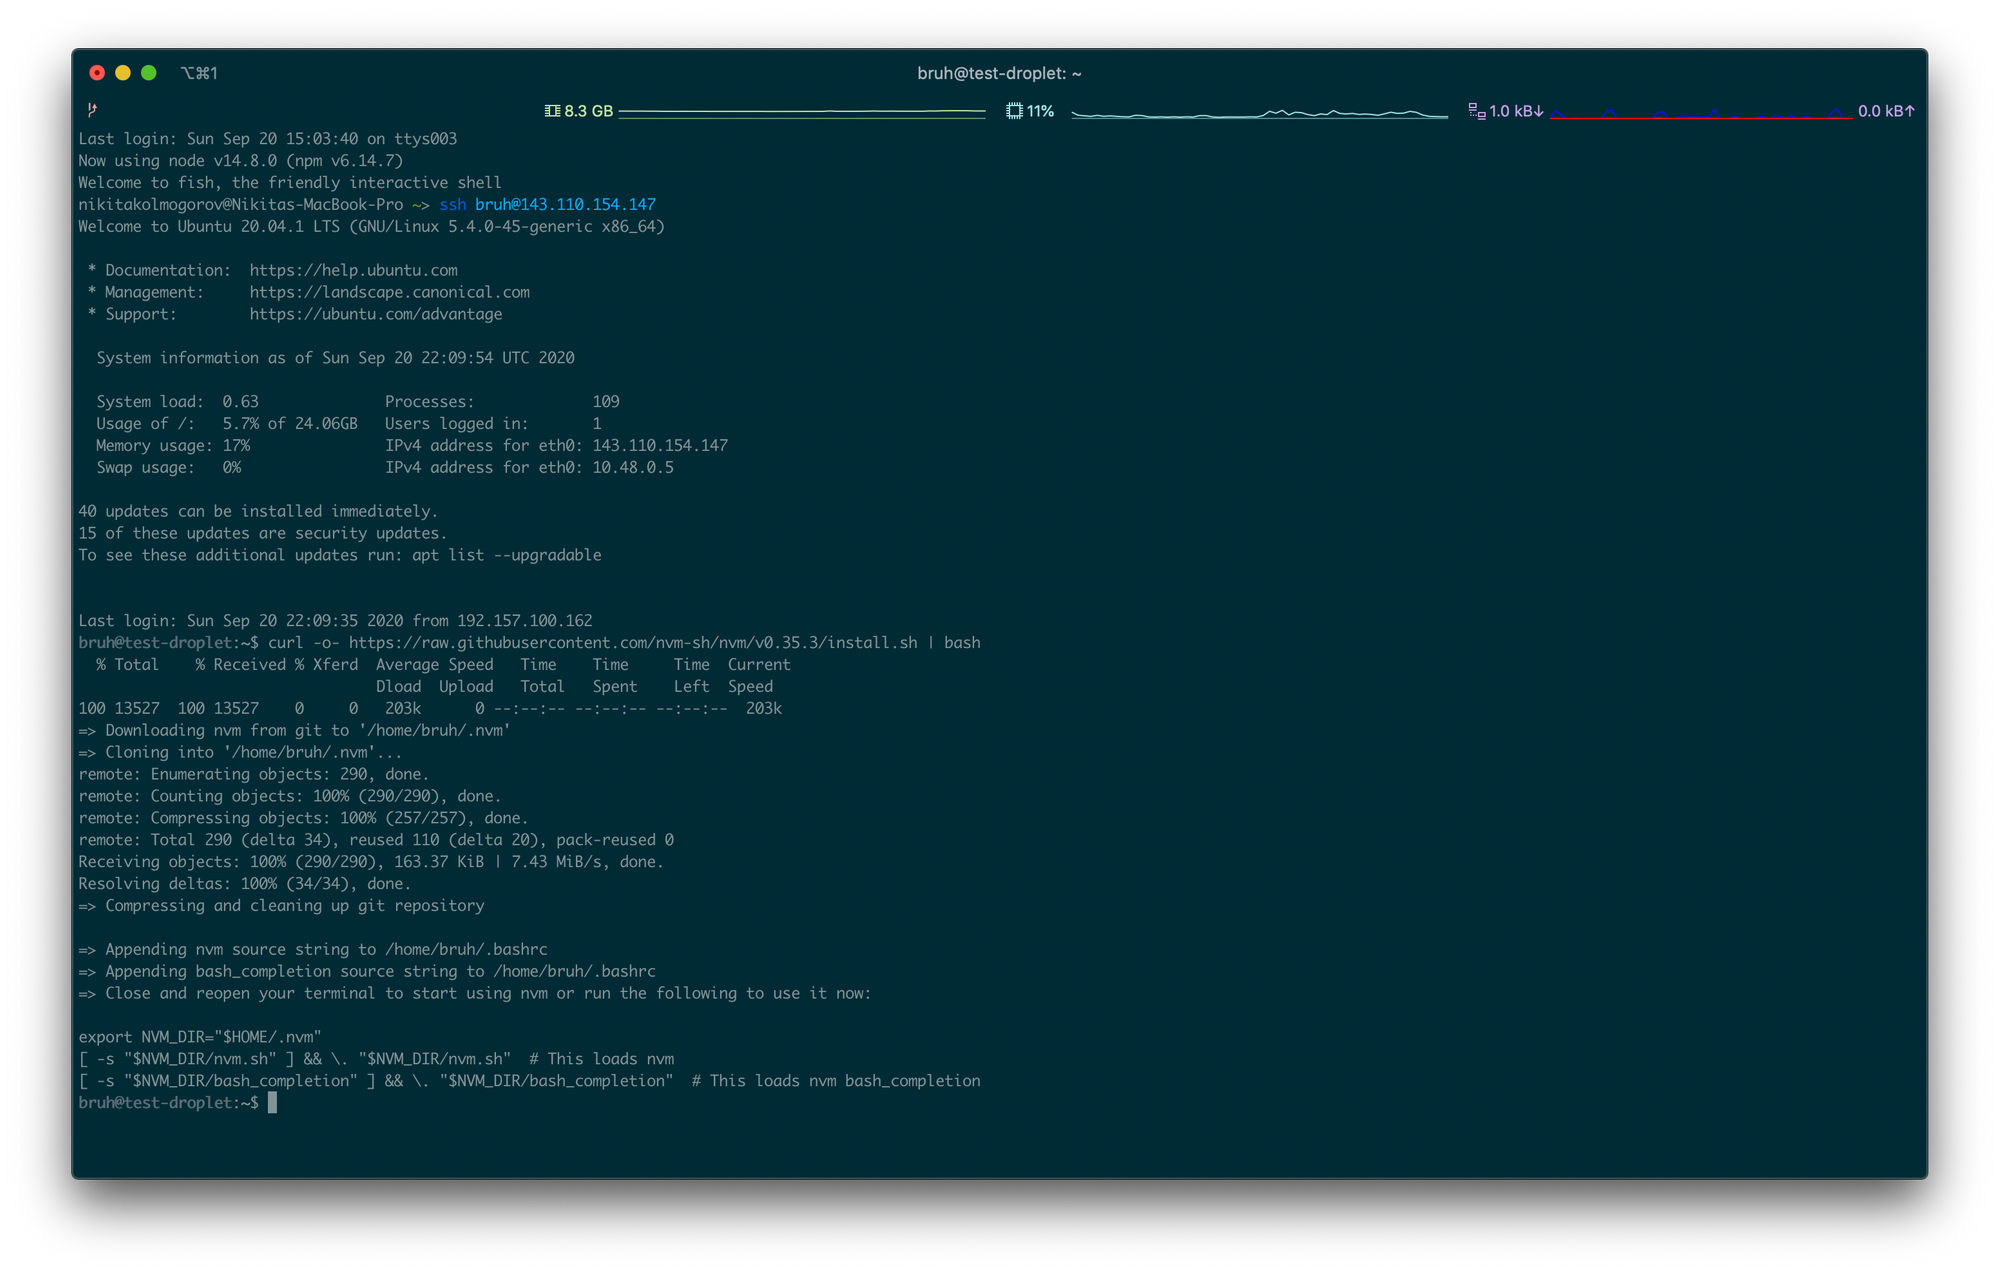
Installing nvm is simple. You just copy and paste the command from the official repo: curl -o- https://raw.githubusercontent.com/nvm-sh/nvm/v0.35.3/install.sh | bash. It’s better to copy the line from the repo though to download the latest version.
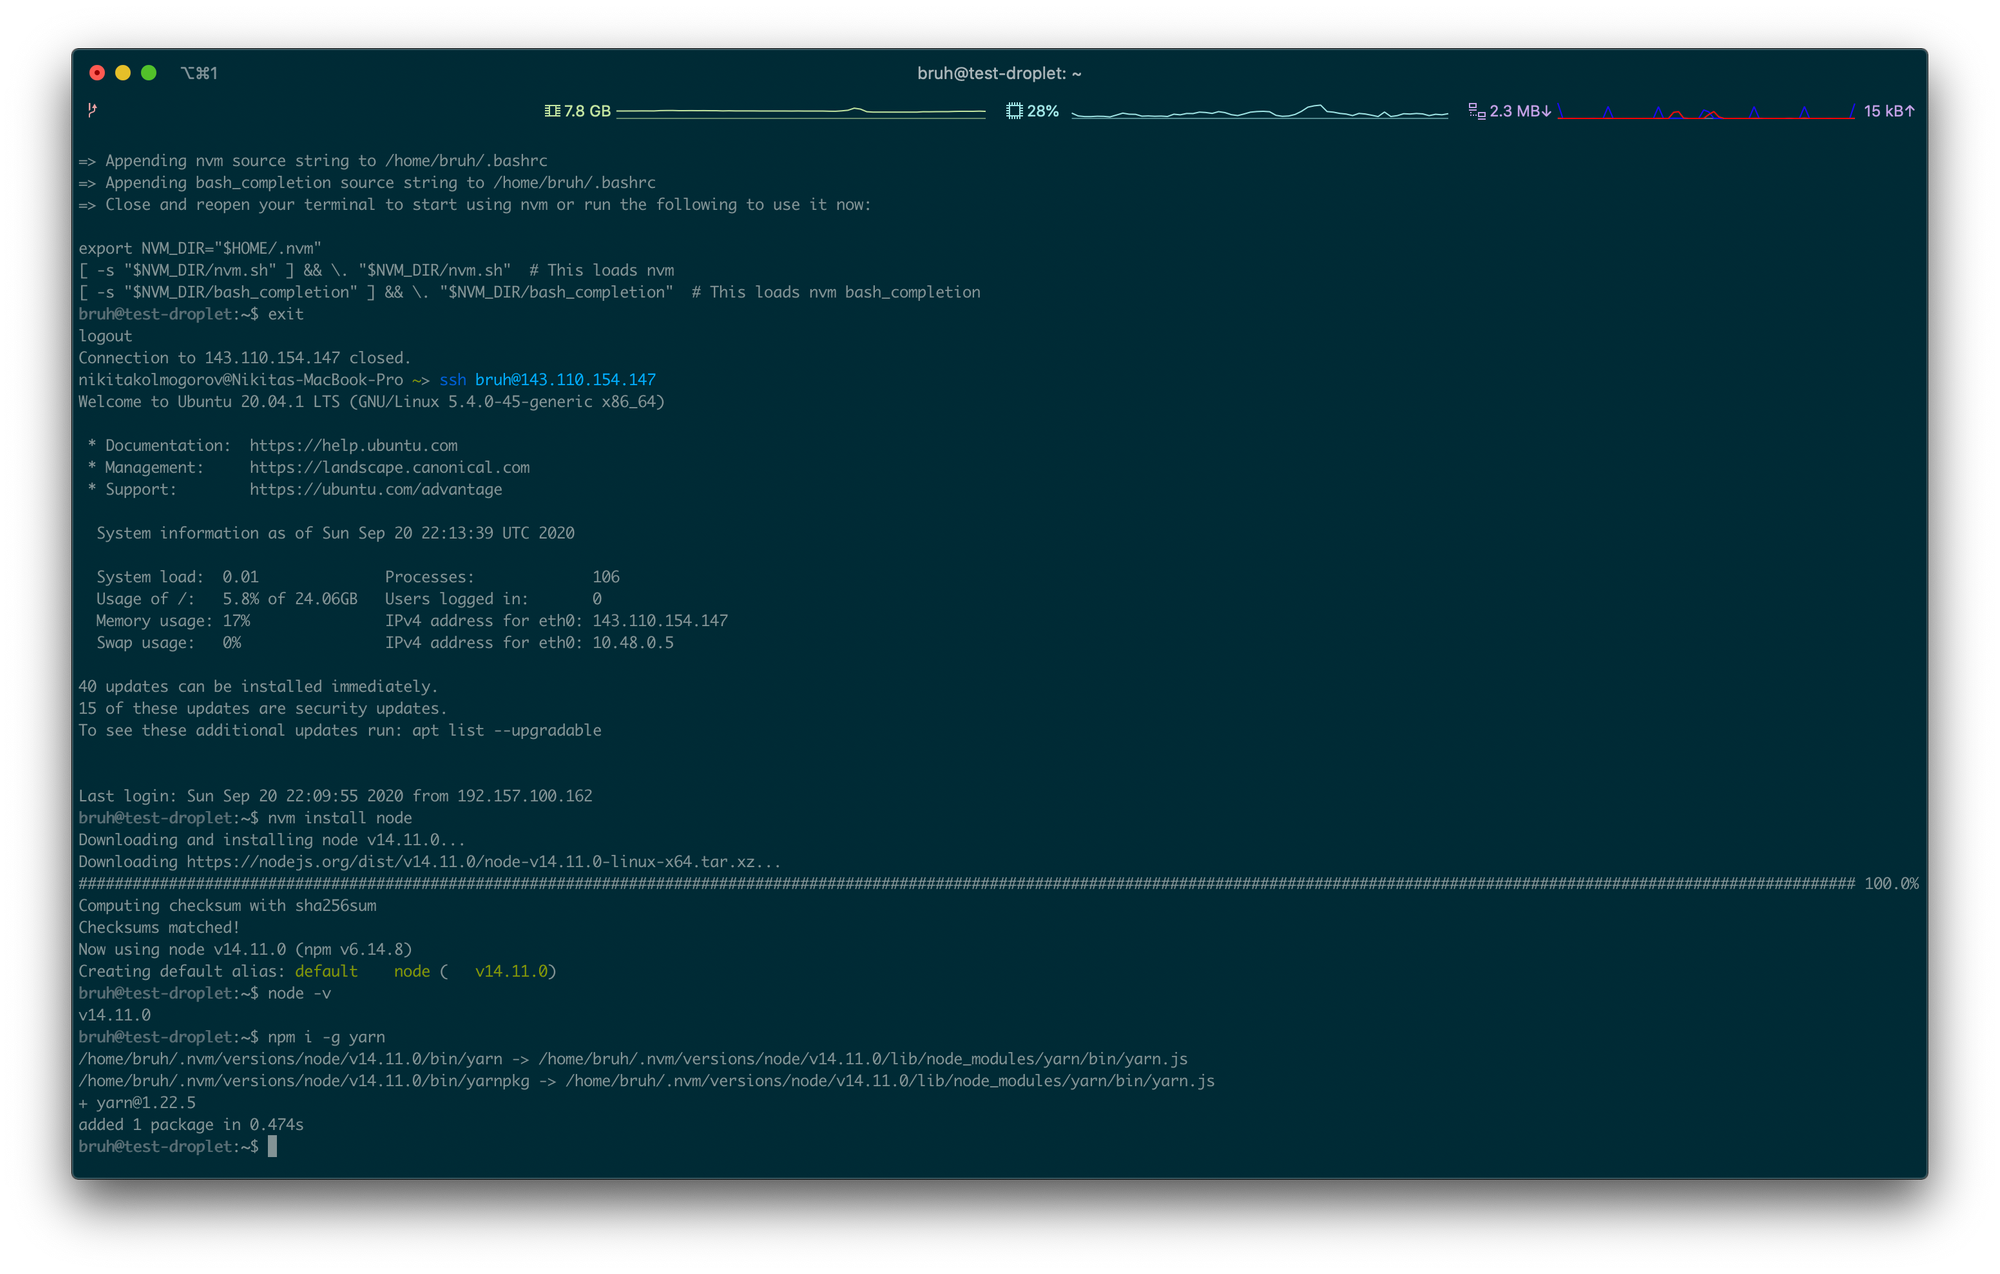
Relaunch your terminal (or just exit from your VPS) and SSH to your VPS again. Then do nvm install node to install the latest Node.js. It is this simple, yes. Run node -v to verify the installation.

Install yarn with the command npm i -g yarn. We will use yarn instead of npm, because this article is highly opinionated and the author thinks that yarn is a bit faster than npm.
Then just follow the most recent official documentation on how to install MongoDB on your Ubuntu VPS. But it all comes down to running a few commands:
wget -qO - https://www.mongodb.org/static/pgp/server-4.4.asc | sudo apt-key add -

echo "deb [ arch=amd64,arm64 ] https://repo.mongodb.org/apt/ubuntu focal/mongodb-org/4.4 multiverse" | sudo tee /etc/apt/sources.list.d/mongodb-org-4.4.list

sudo apt-get update

sudo apt-get install -y mongodb-org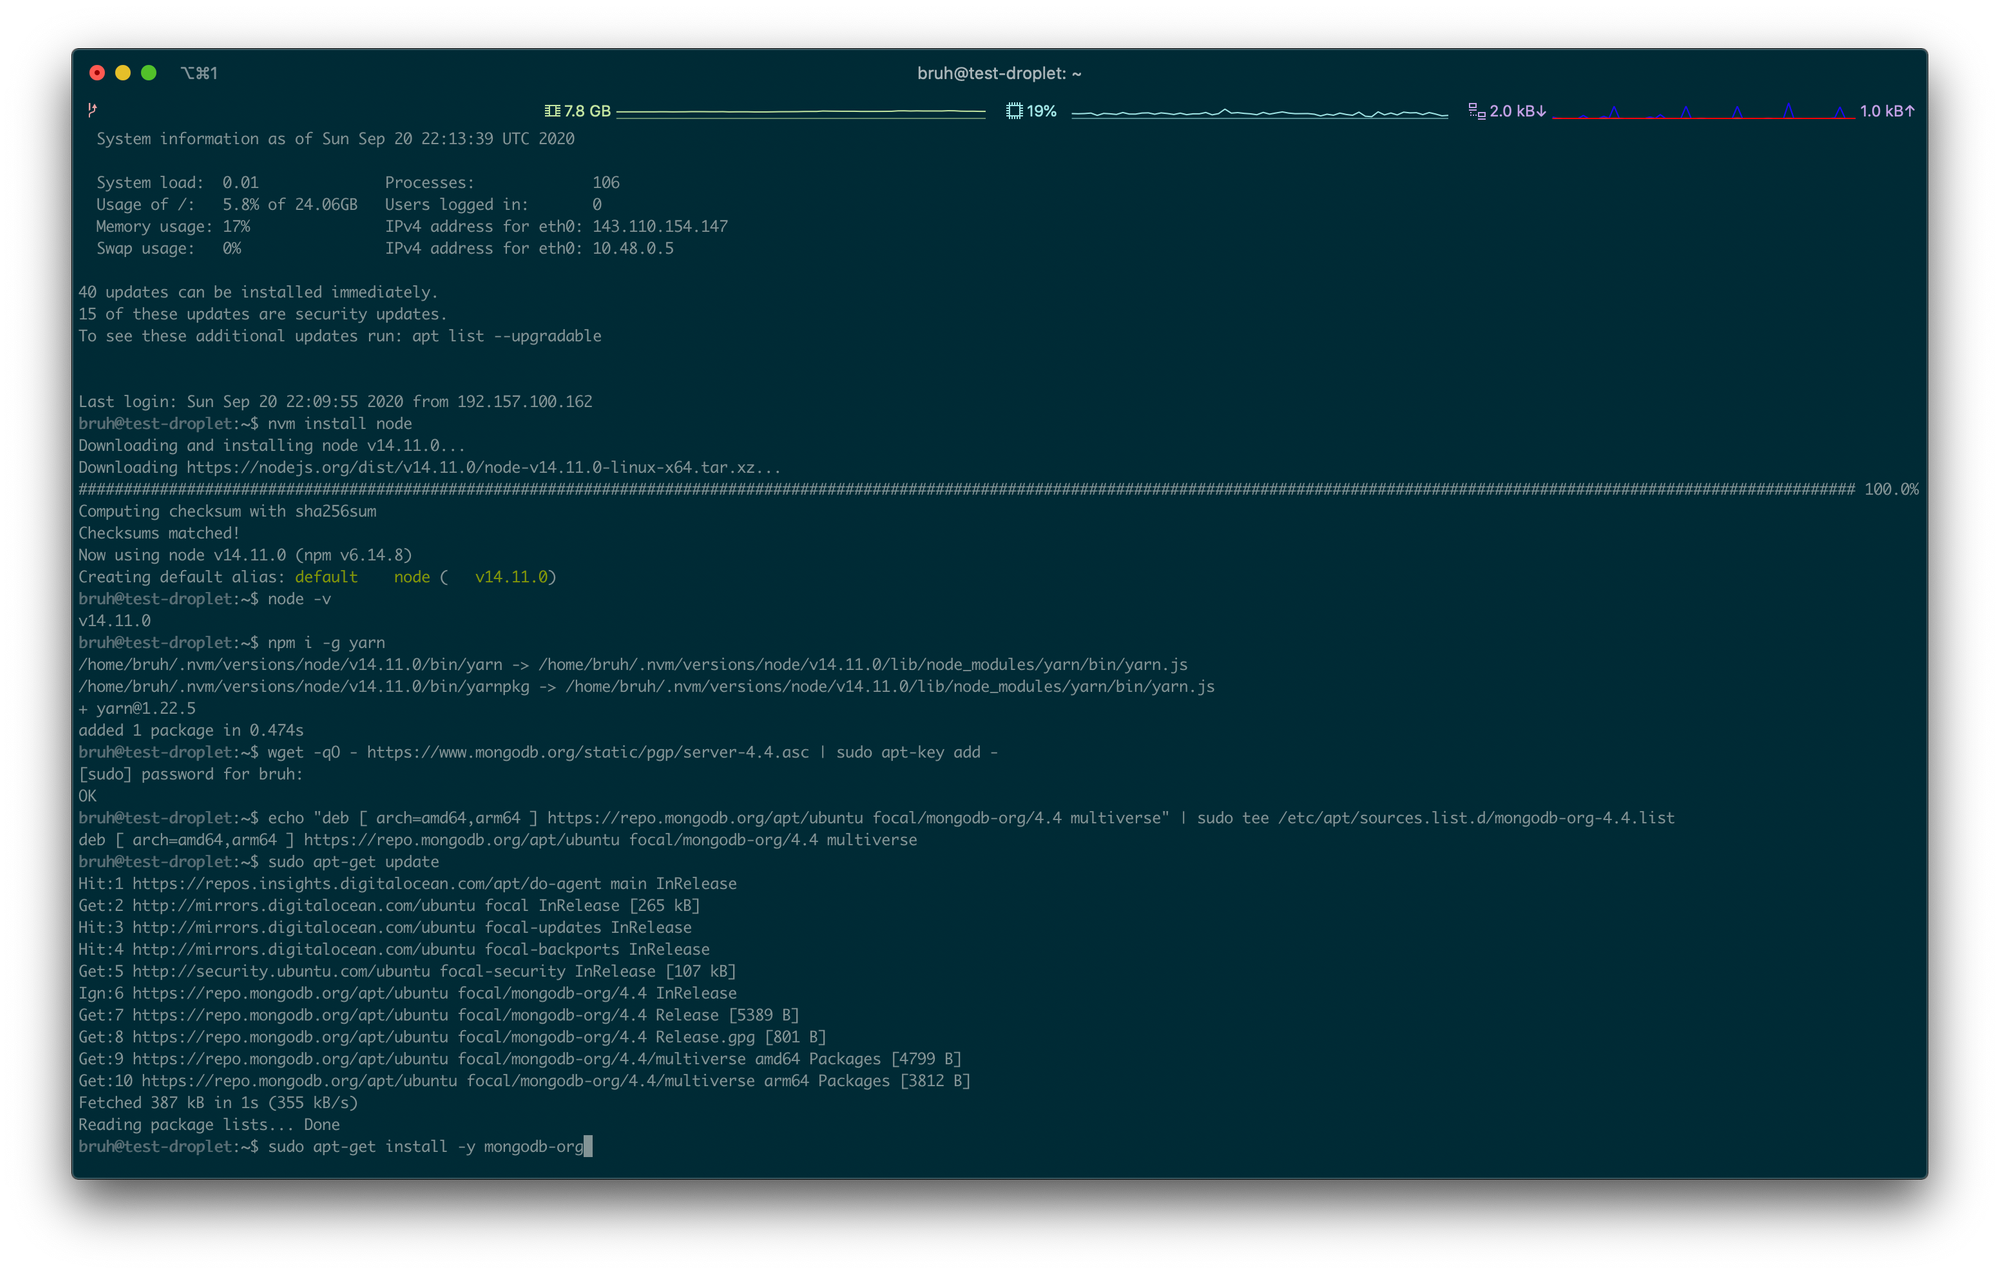
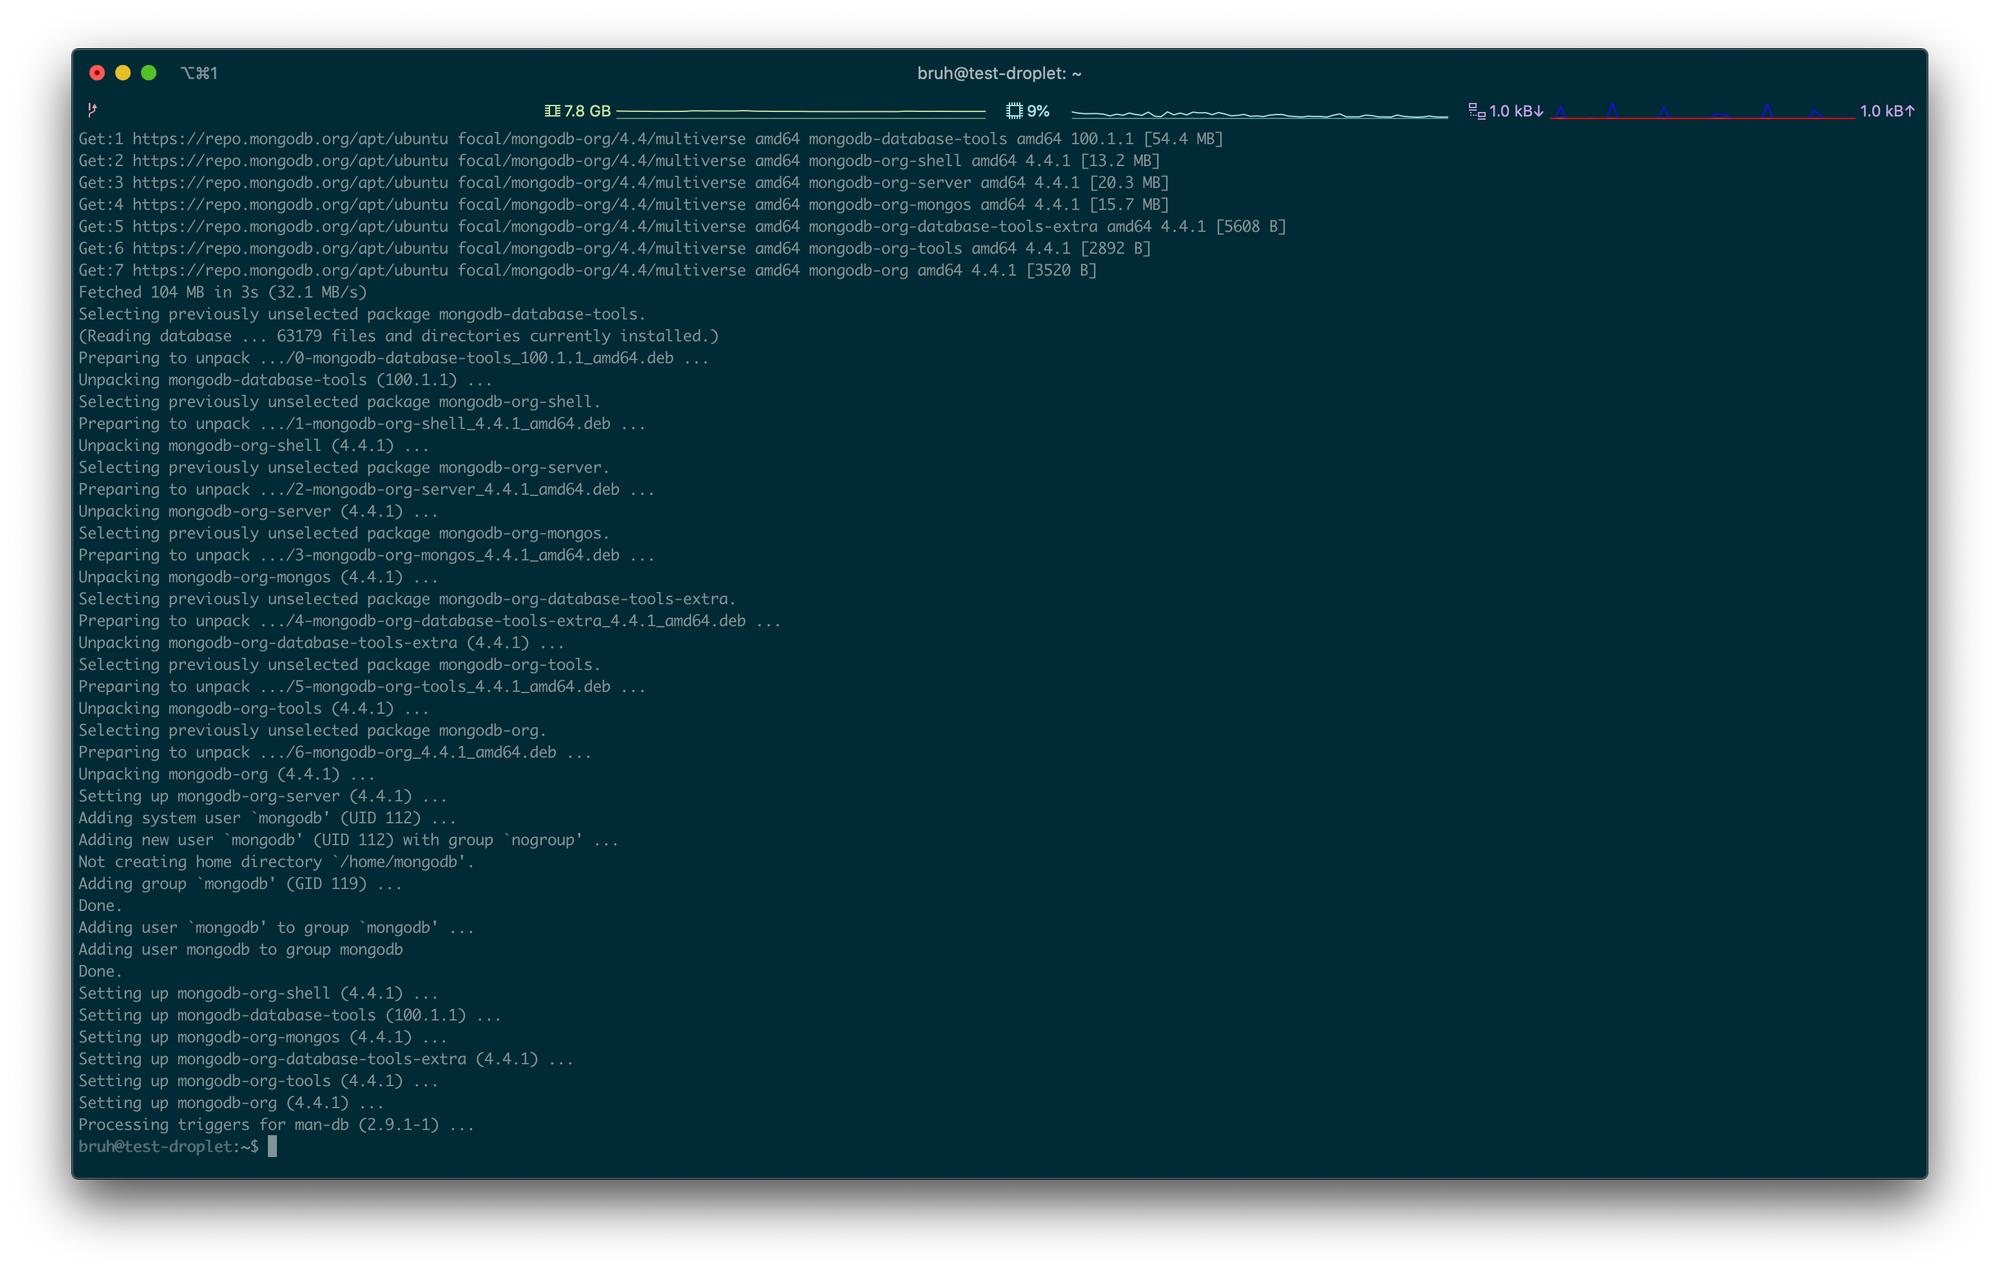
Setting up MongoDB
First, let's enable mongod service (read more about systemd services here) so that it runs 24/7 and restarts when it fails. Then we'll just check its status.
sudo systemctl enable mongod

sudo systemctl start mongod

sudo systemctl status mongod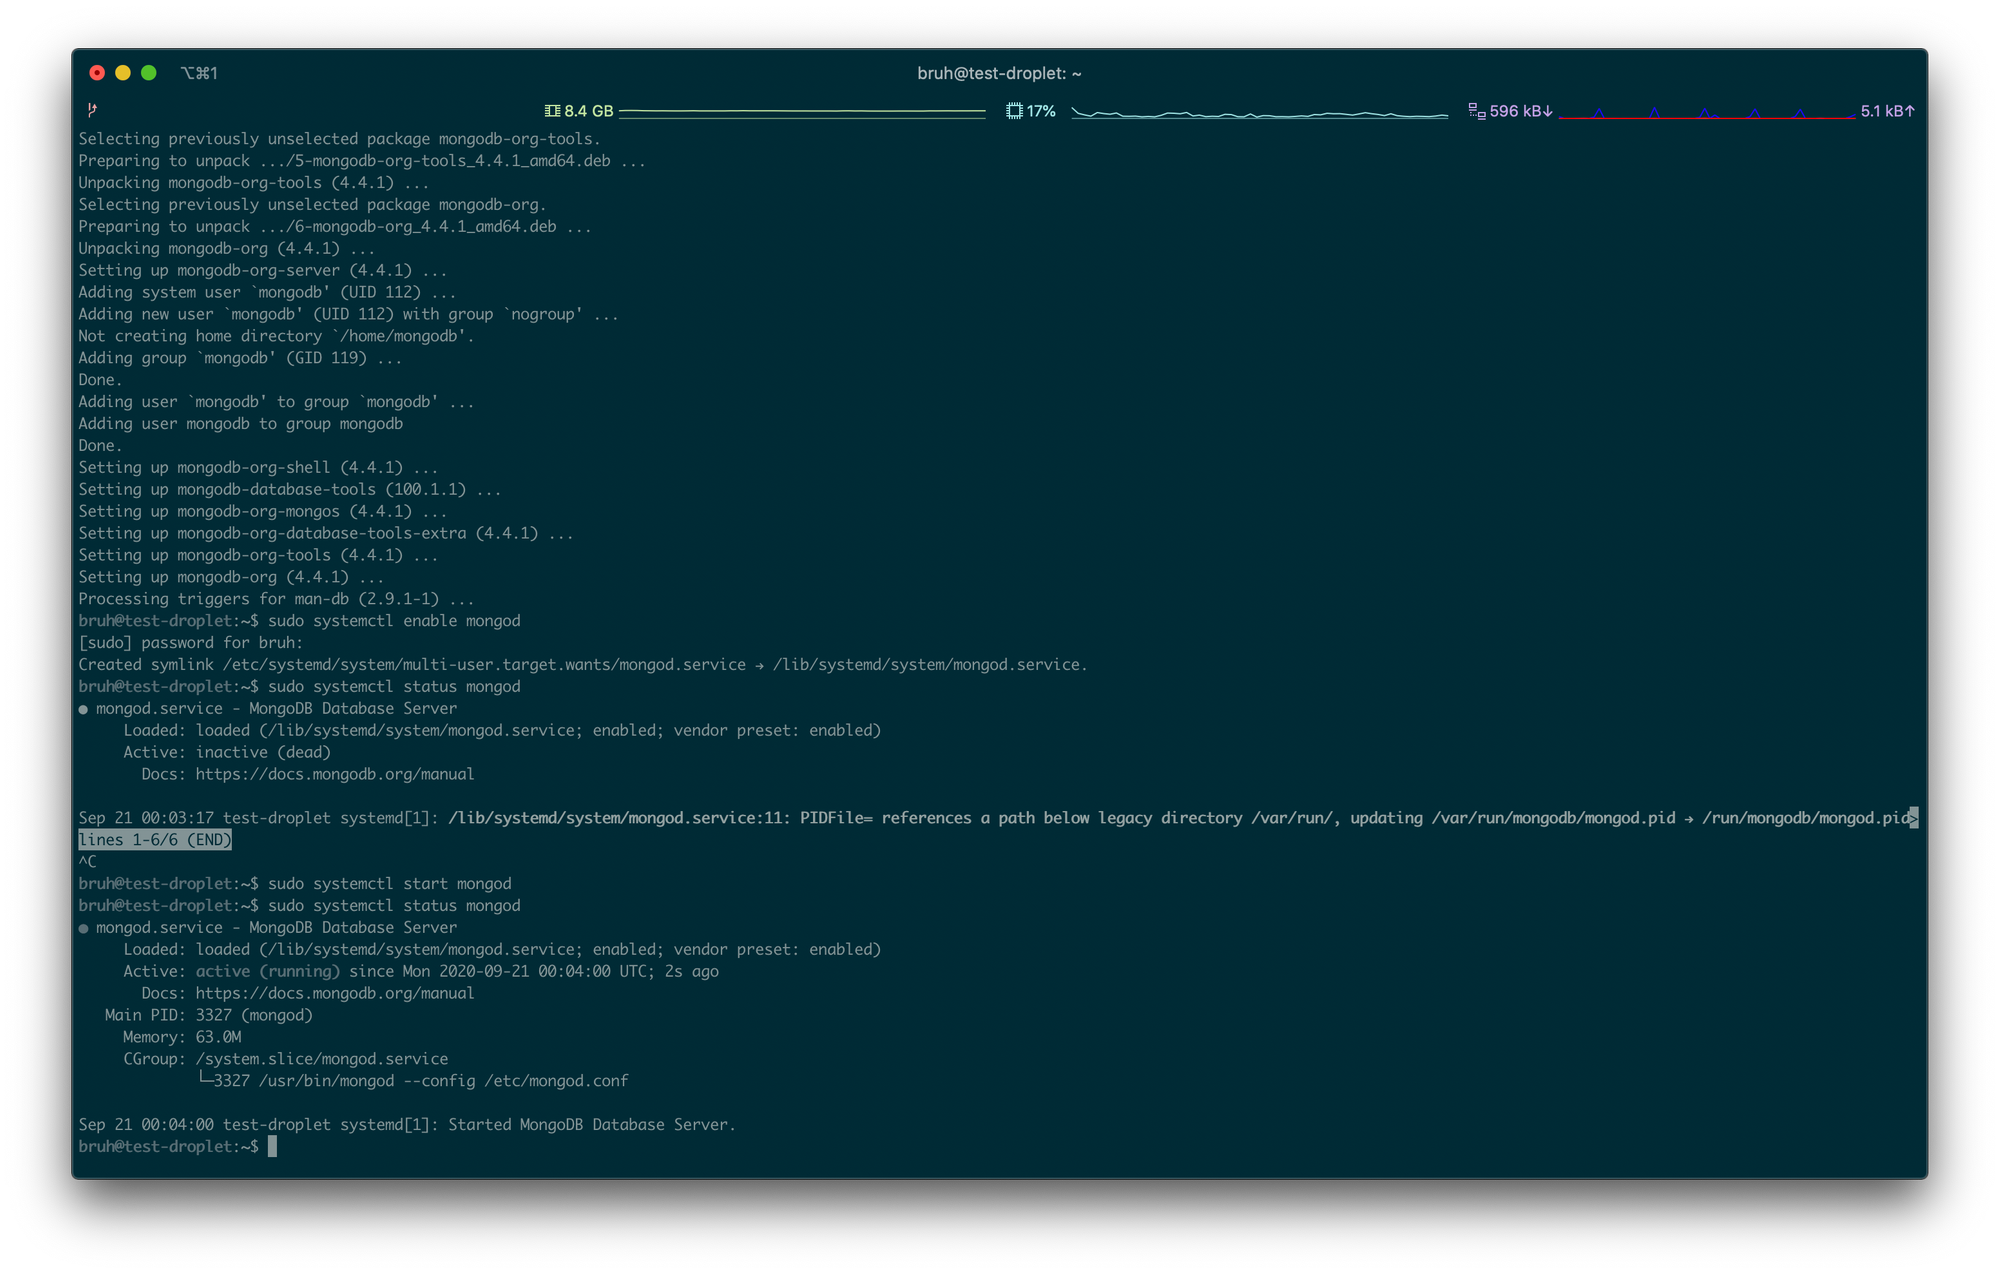
Now to the cool stuff. Let's create an admin user for our database. Open the Mongo shell with the command mongo on your server. Then, run the following commands. Obviously, change the username and the password.
use admin

db.createUser(
  {
      user: "bruh",
      pwd: "password",
      roles: [ "root" ]
  }
)

quit()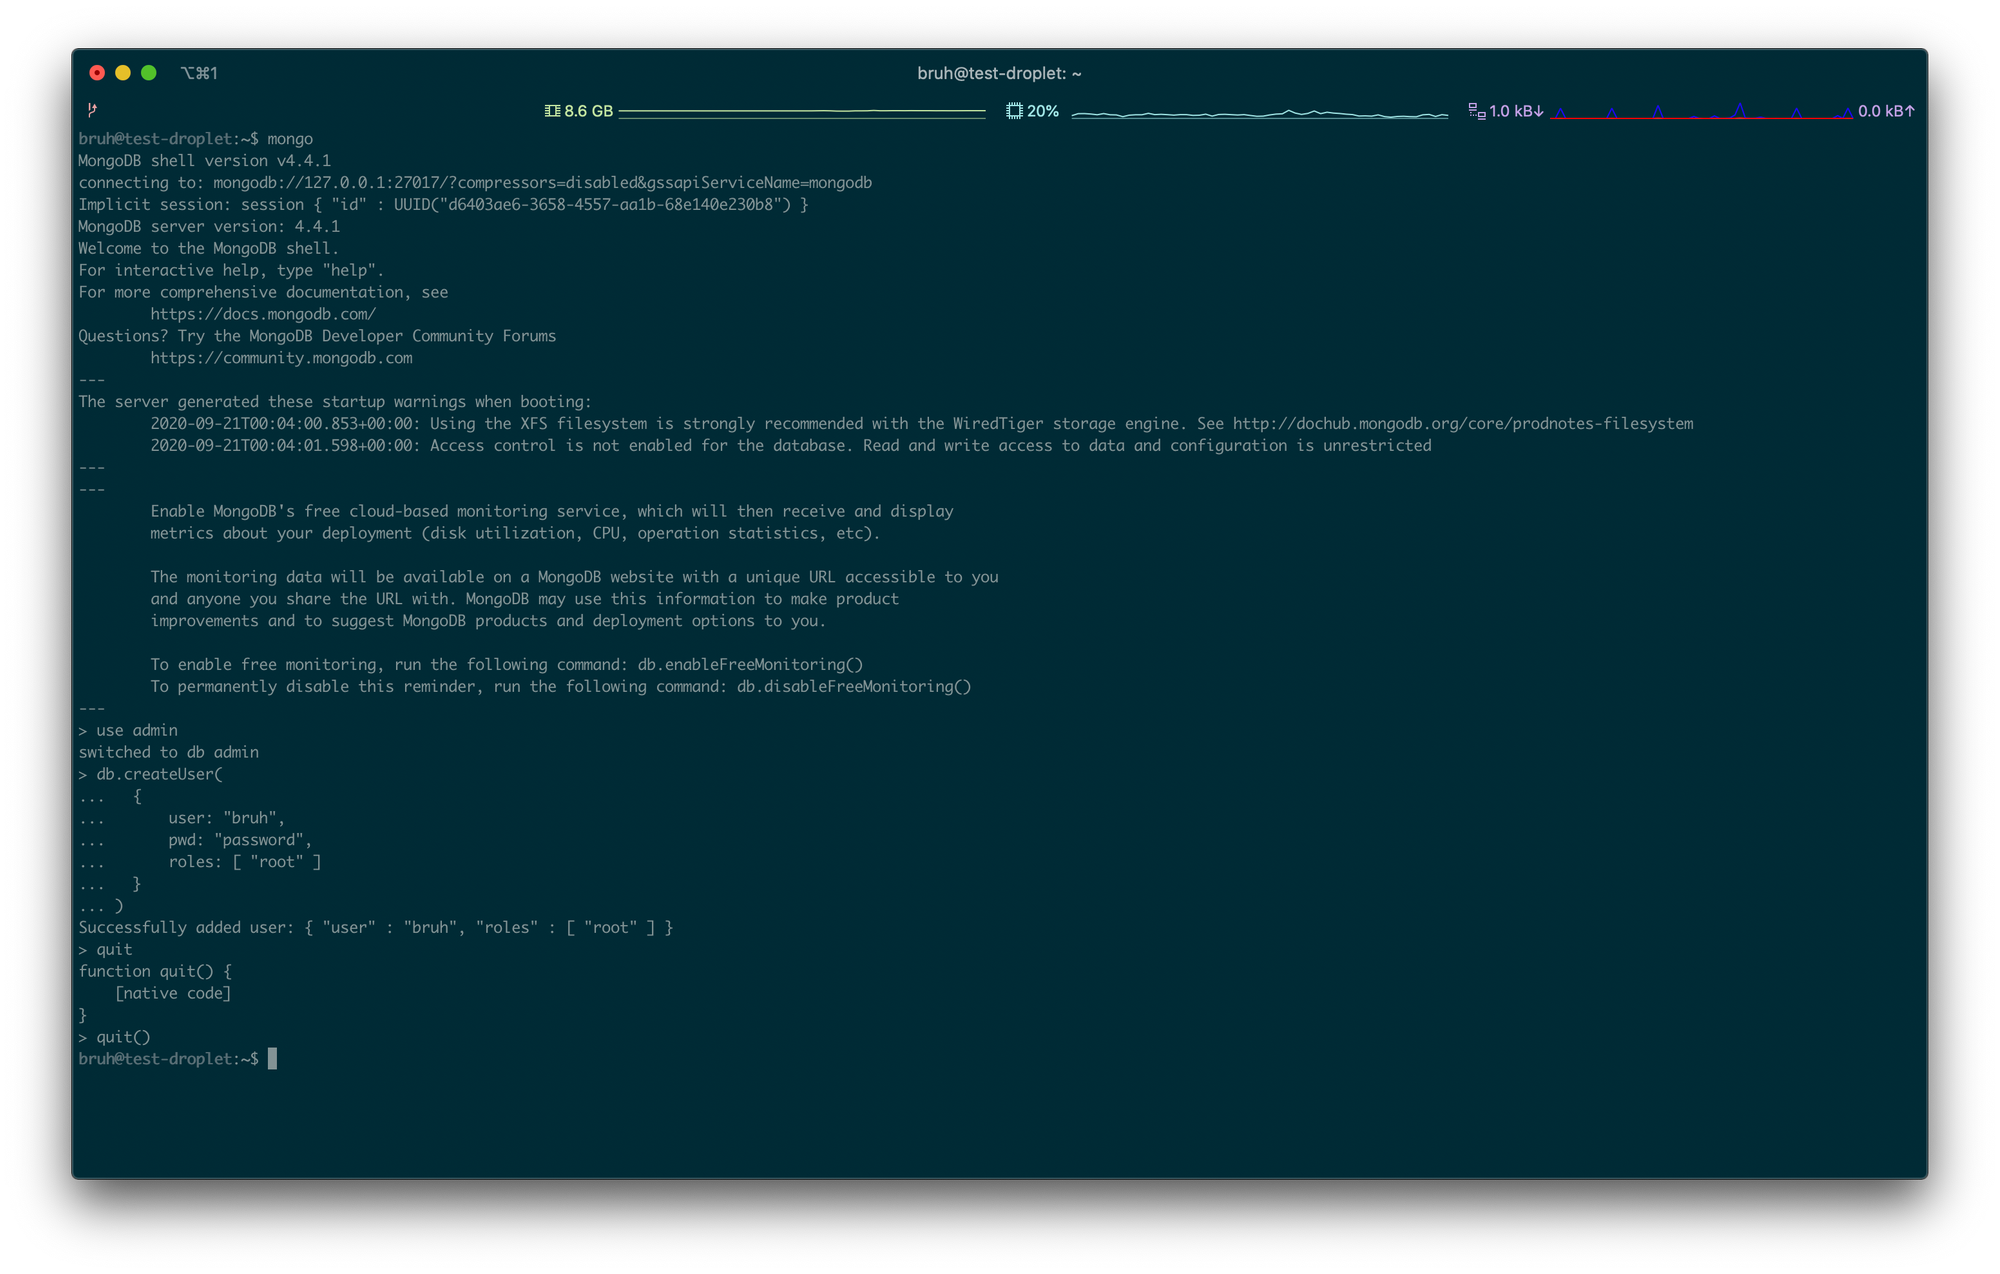
First command switches to the admin database (special database with the admin stuff), second creates a user with the allmighty database root priveleges. Note the password!
Next, open up Mongo configuration file with sudo nano /etc/mongod.conf and edit it to have the authentication on and the IP of the VPS listed in the bindIp section. You can read this tutorial if you don't know how to use nano. It's a must-read!
In the end, you should have a config file similar to the following one:
storage:
  dbPath: /var/lib/mongodb
  journal:
    enabled: true
systemLog:
  destination: file
  logAppend: true
  path: /var/log/mongodb/mongod.log
net:
  port: 27017
  bindIp: "127.0.0.1,143.110.154.147"
processManagement:
  timeZoneInfo: /usr/share/zoneinfo
security:
  authorization: "enabled"
Save the file and restart Mongo with the following commands.
sudo systemctl daemon-reload

sudo systemctl restart mongod.service
Great! Now your Mongo database should be secured with the password and accessible from the outside world! If you want to improve the security even more, check out this tutorial.
Now you can use a Mongo viewer of choice, I'll go with Robo 3T. It's free, it's open-source, so why not. Let's connect to our database!

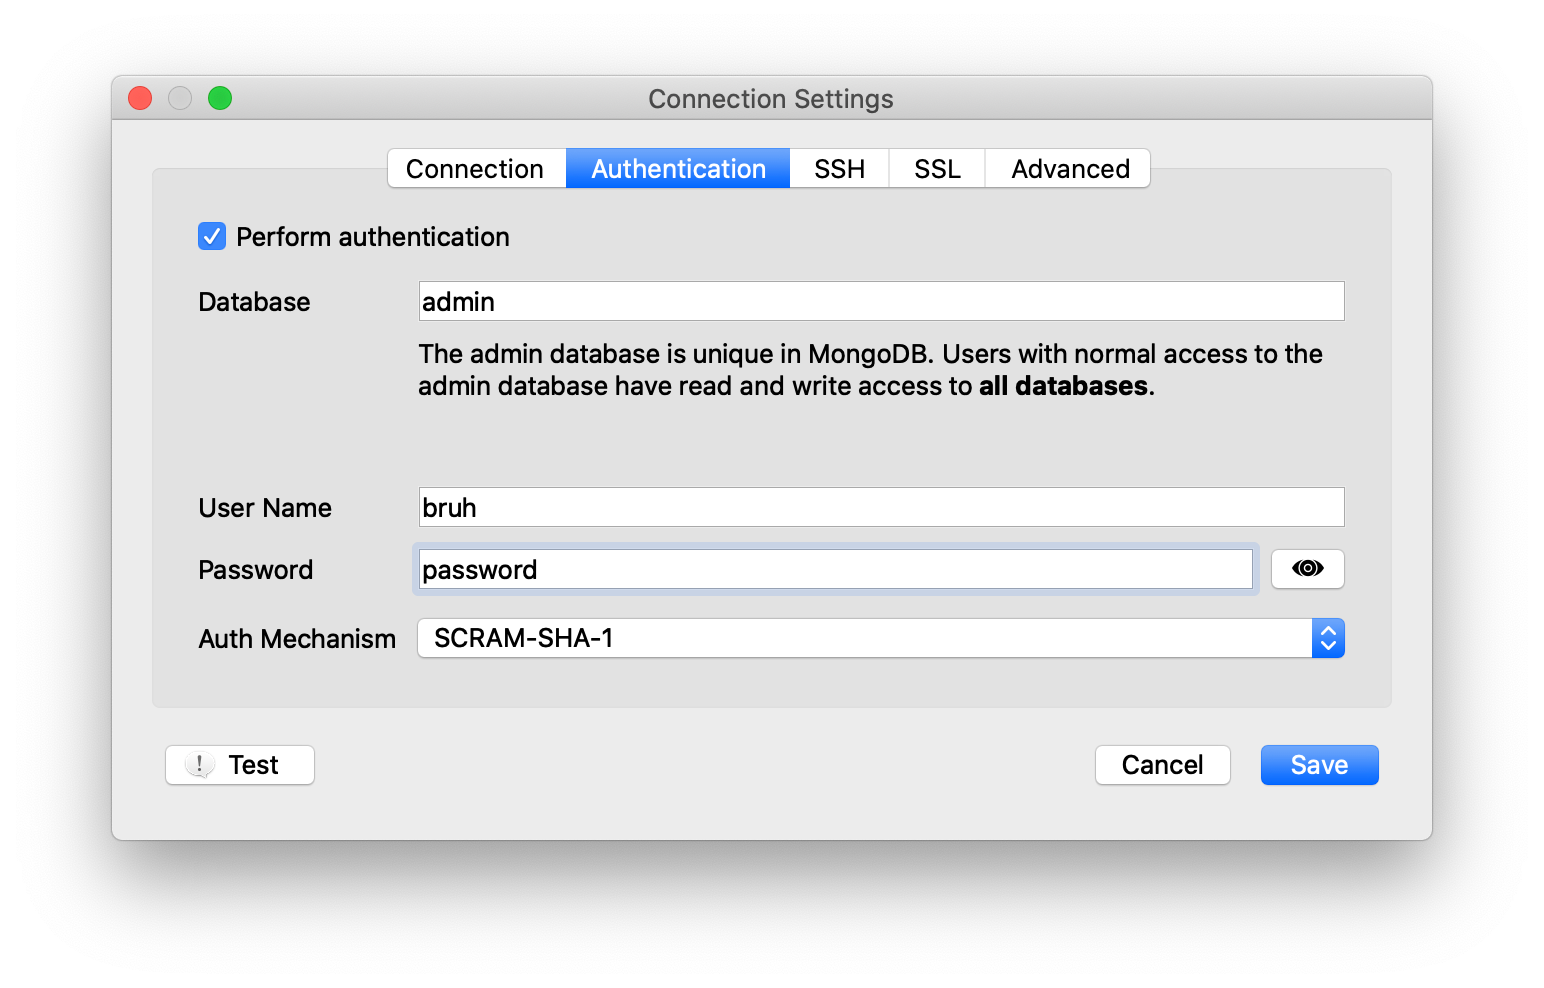
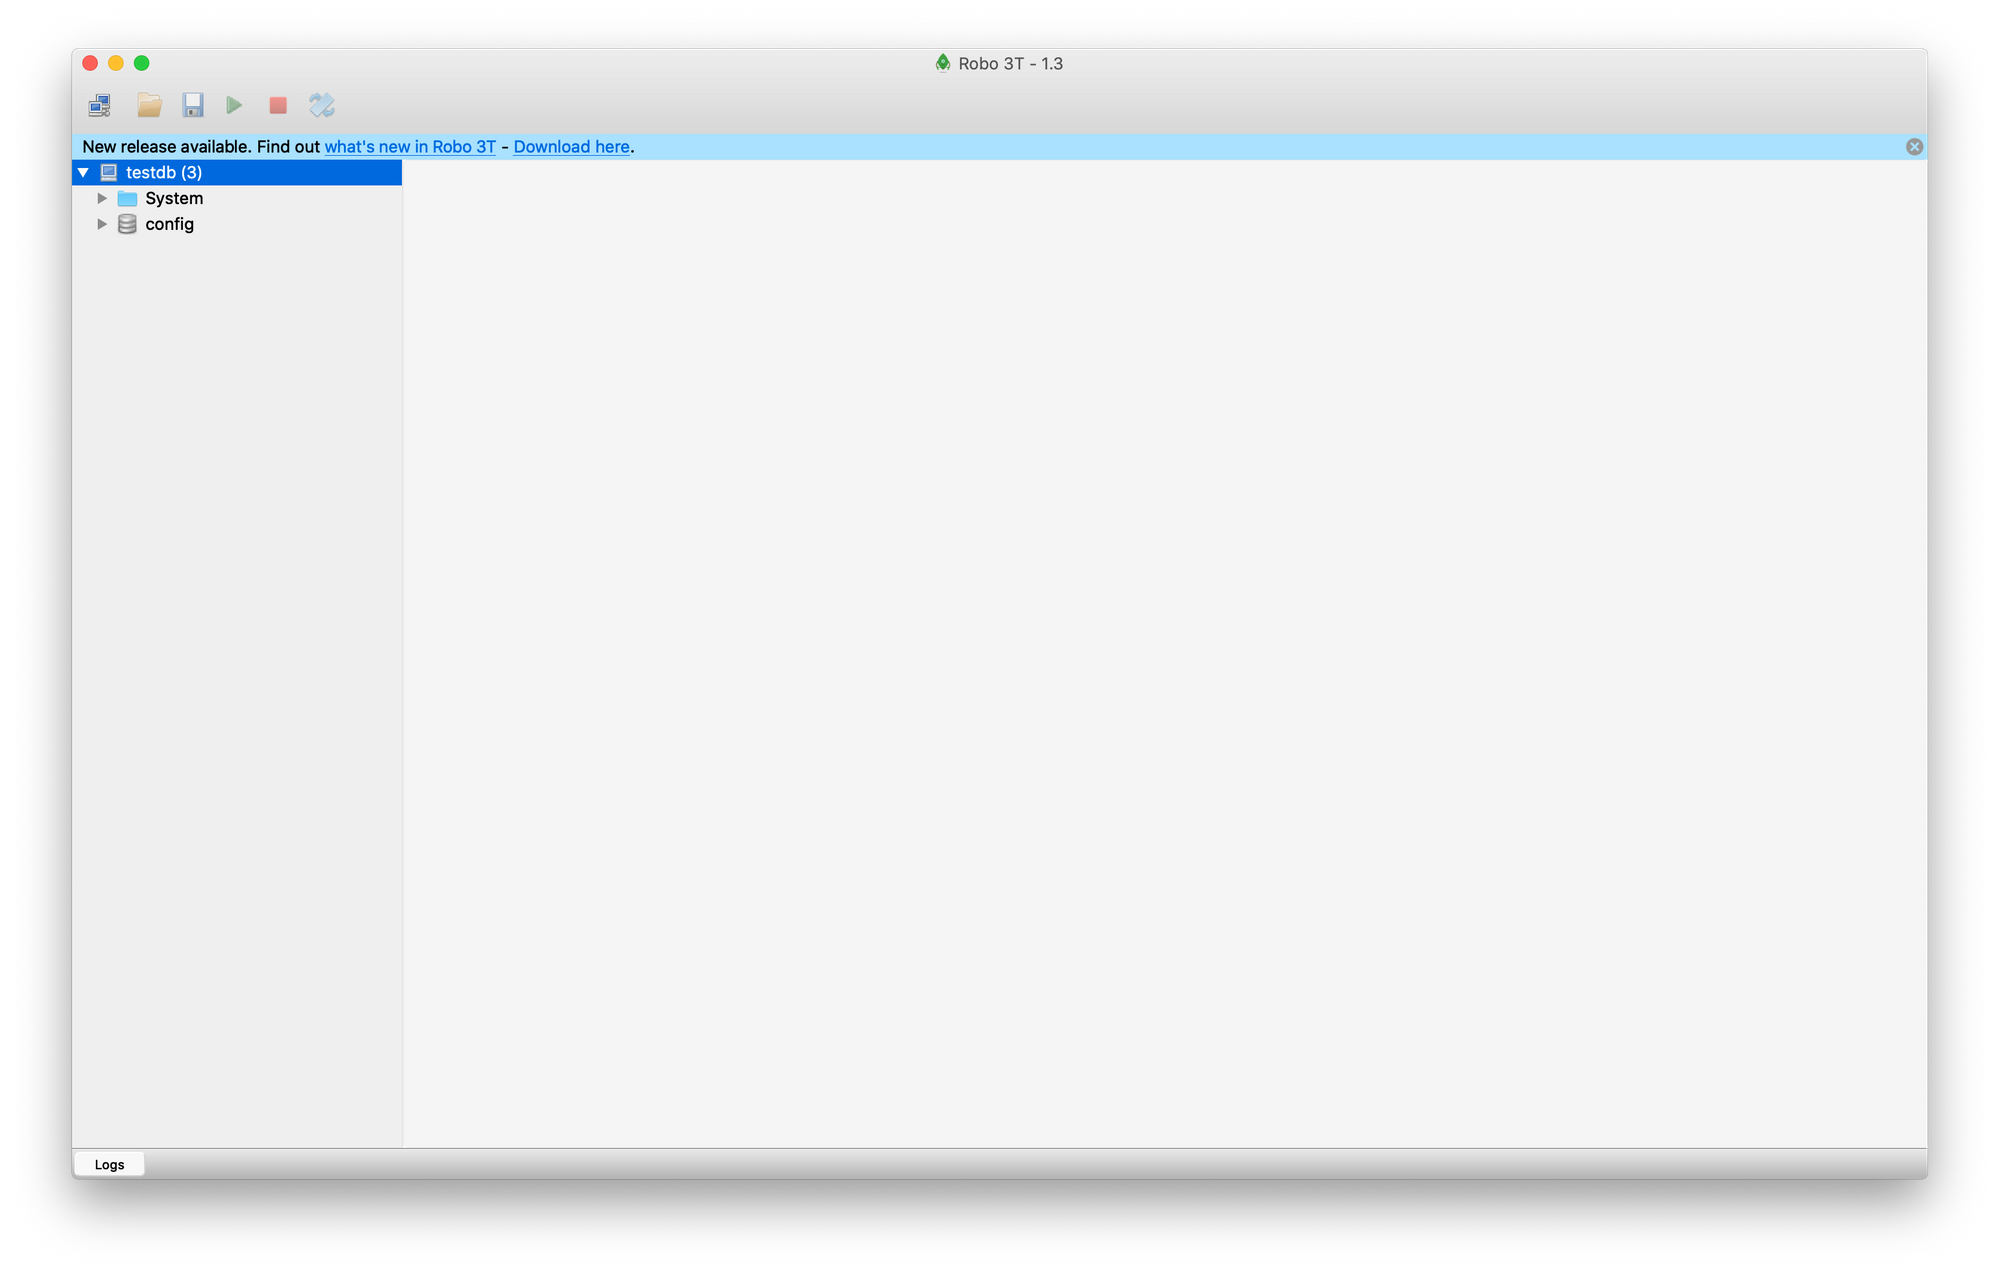
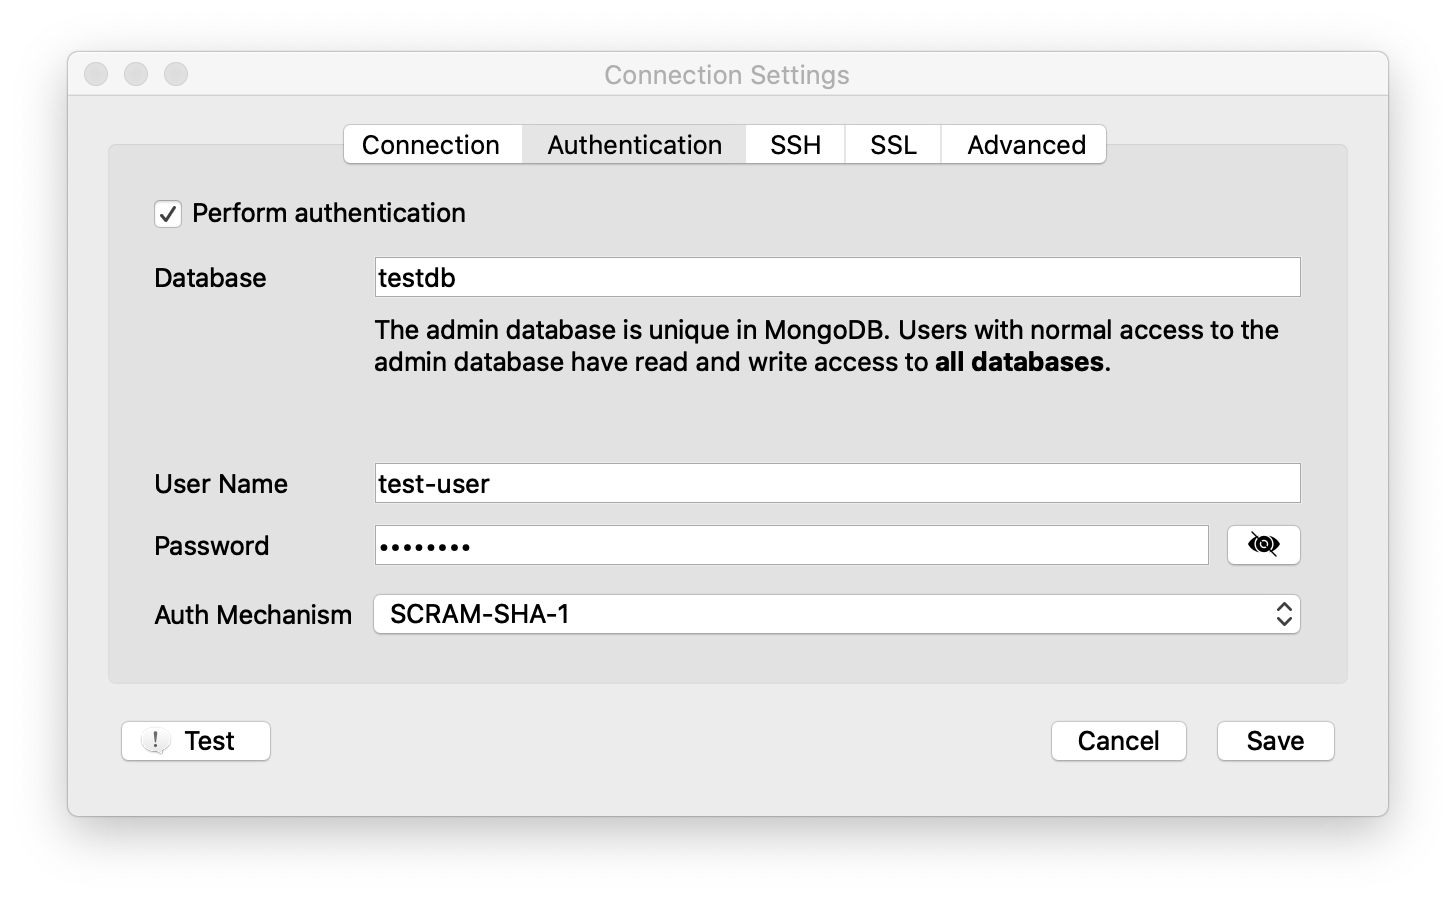
Let's create a database for our test project and add a user that is a bit less privileged.

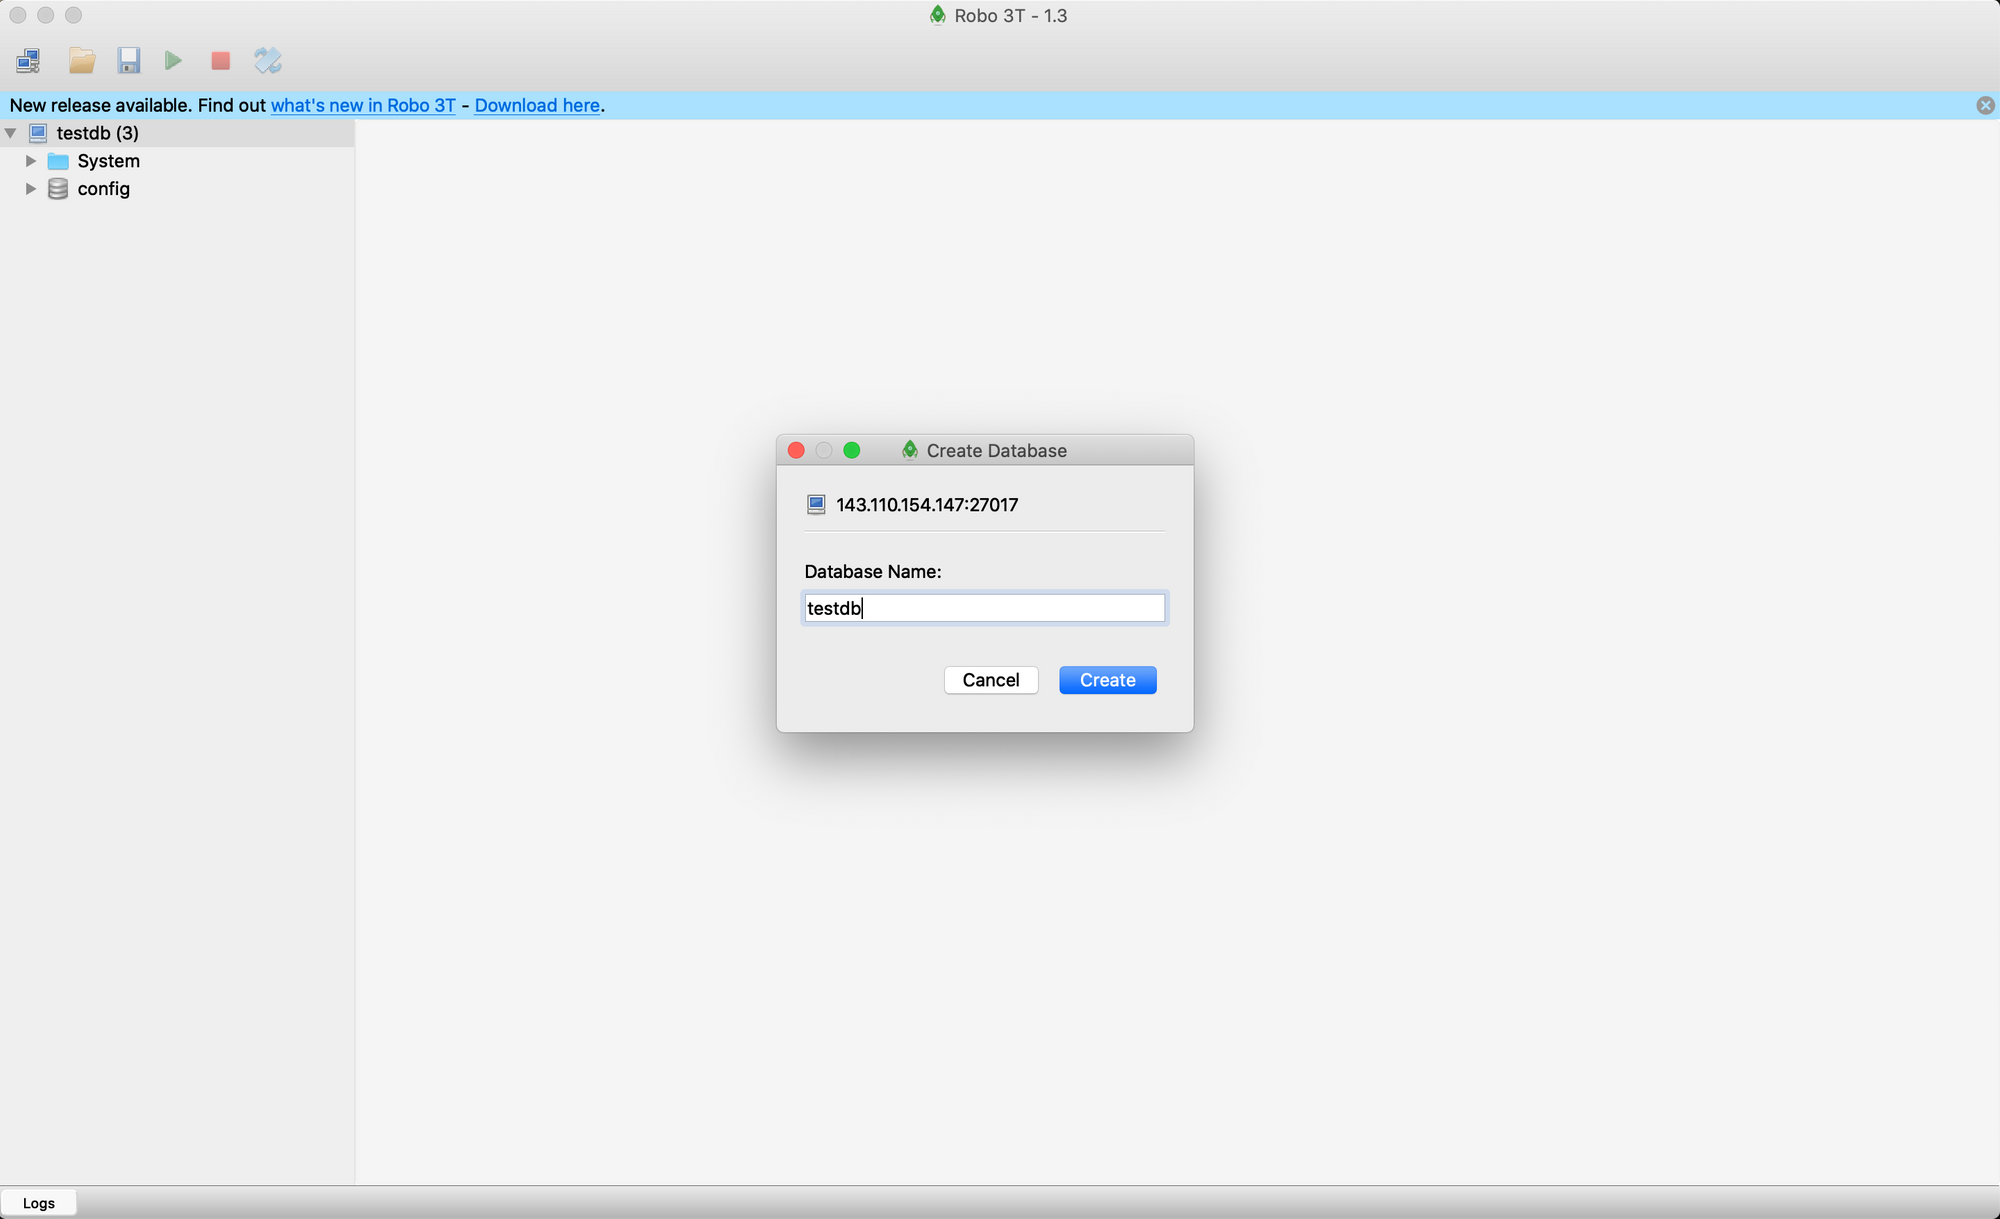
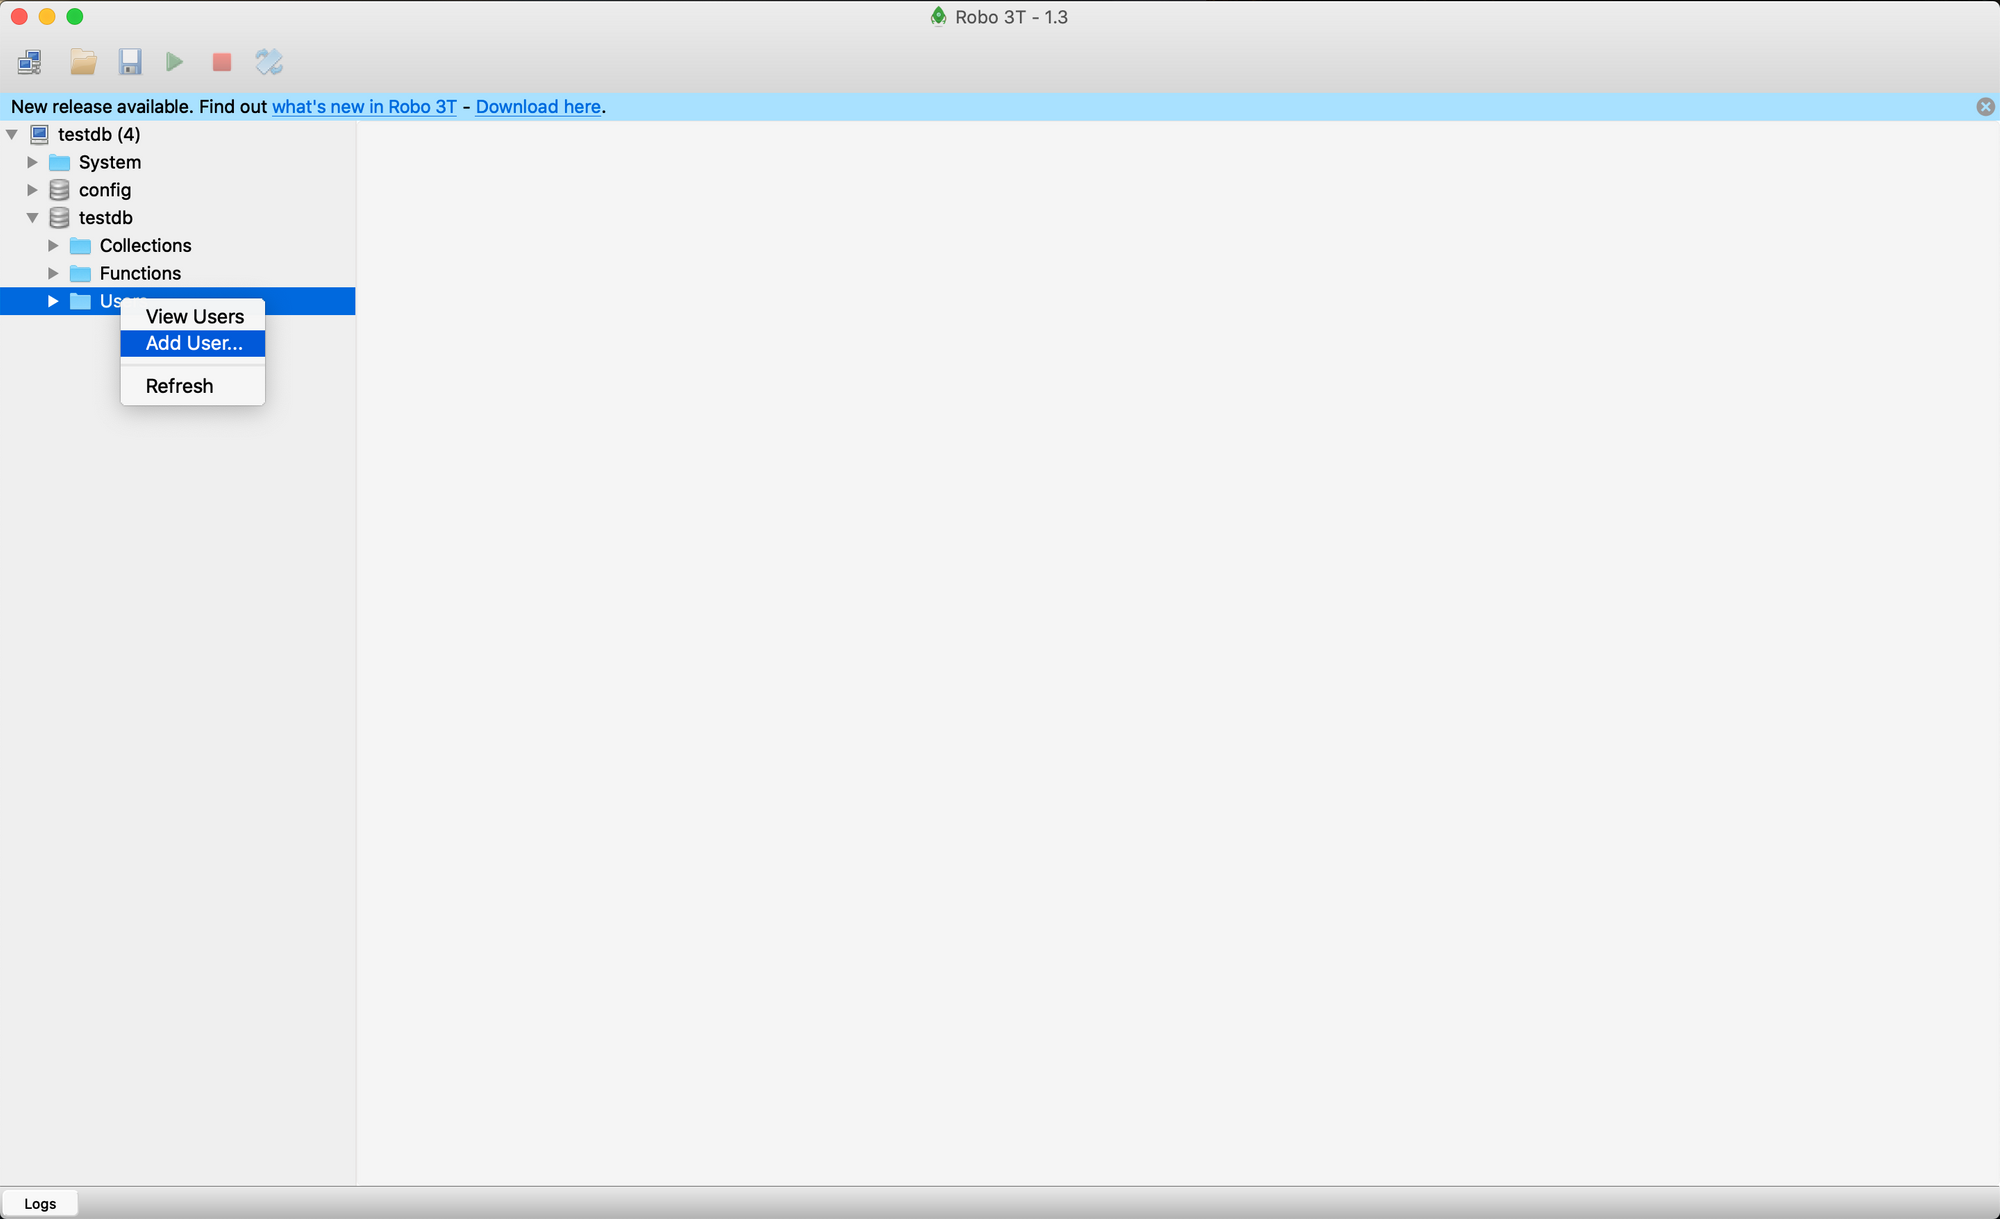
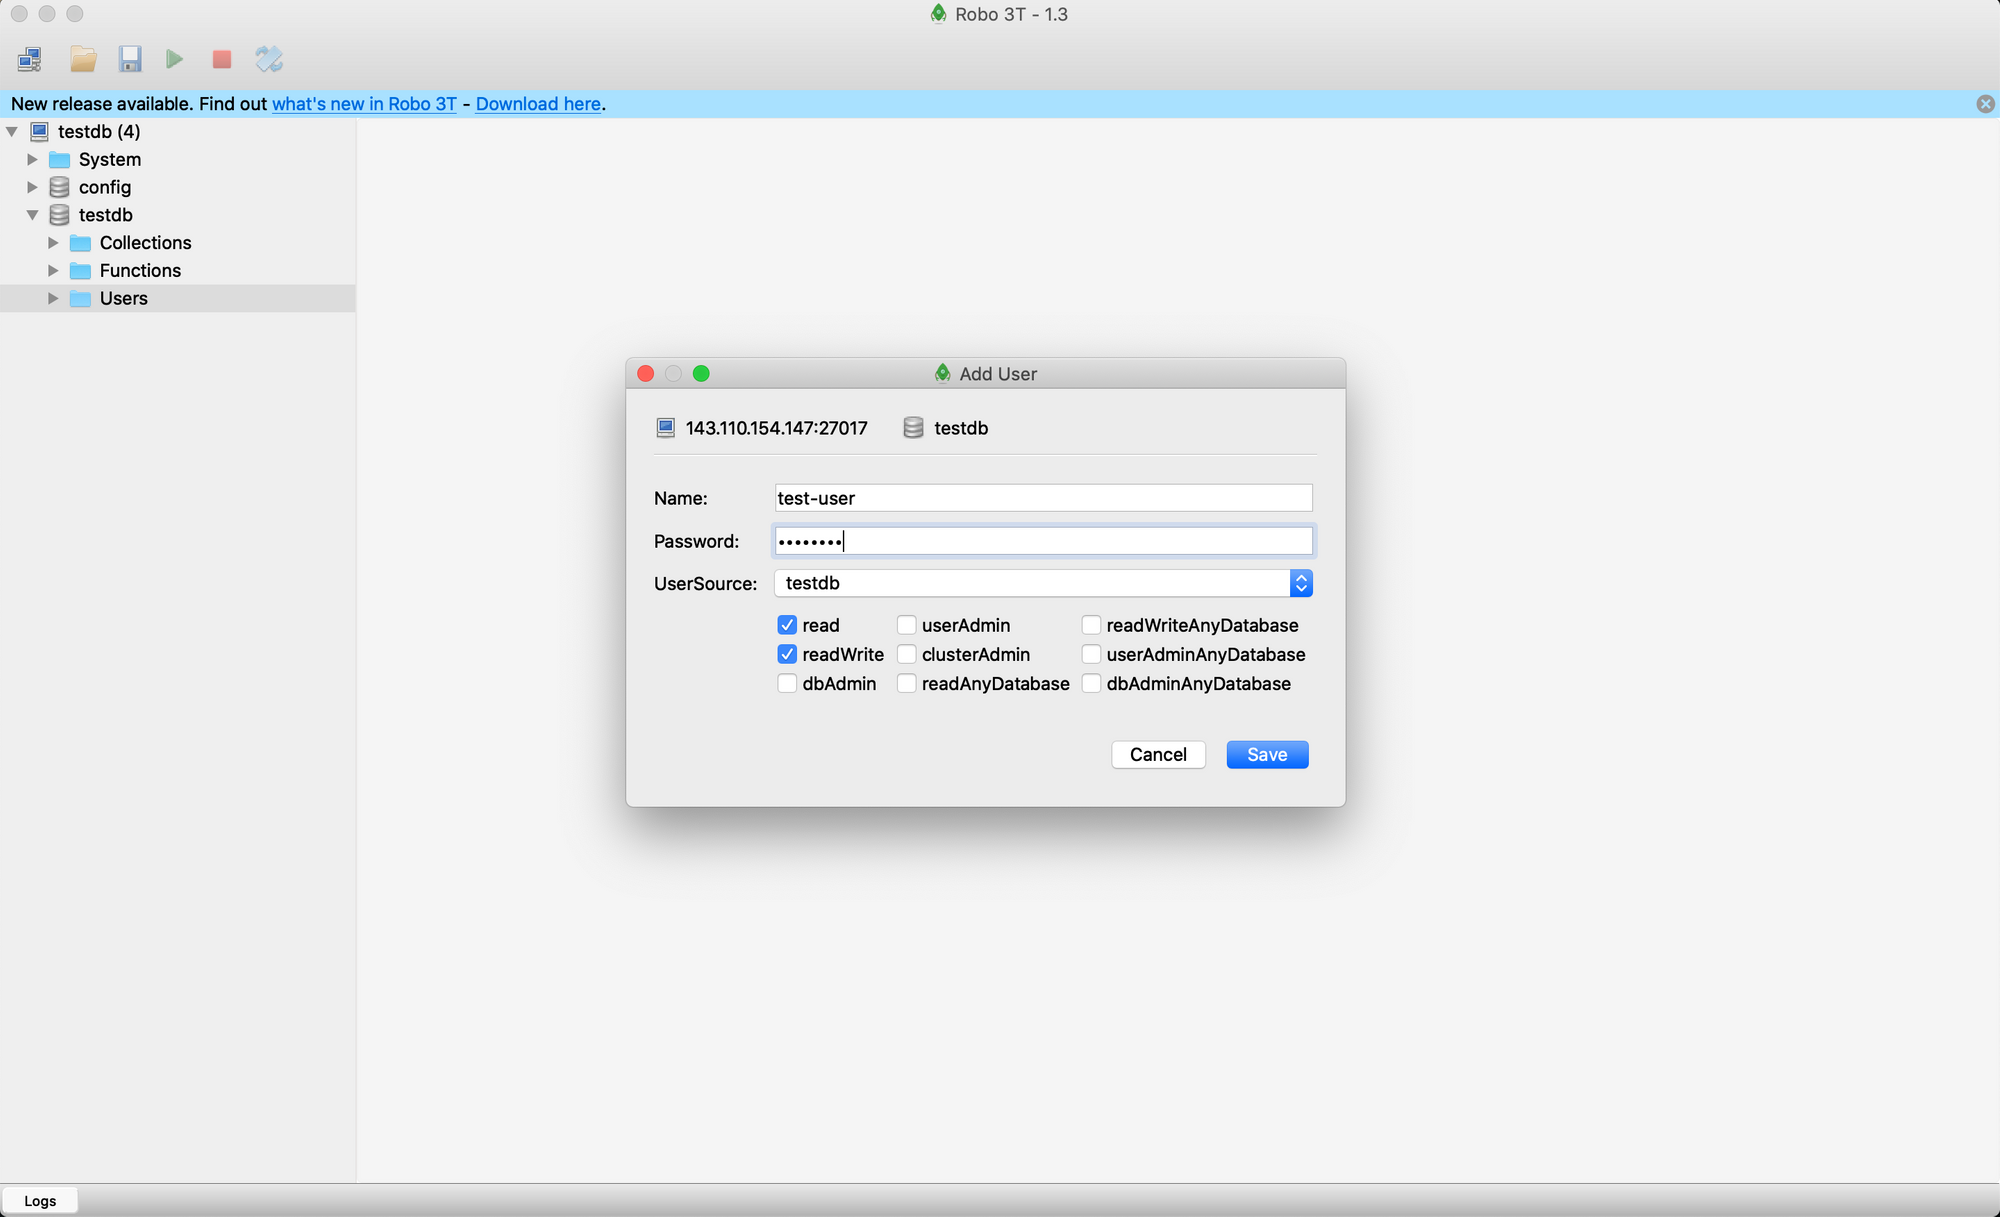
Robo 3T tends to crash after the user is added, but don't worry, just open it again
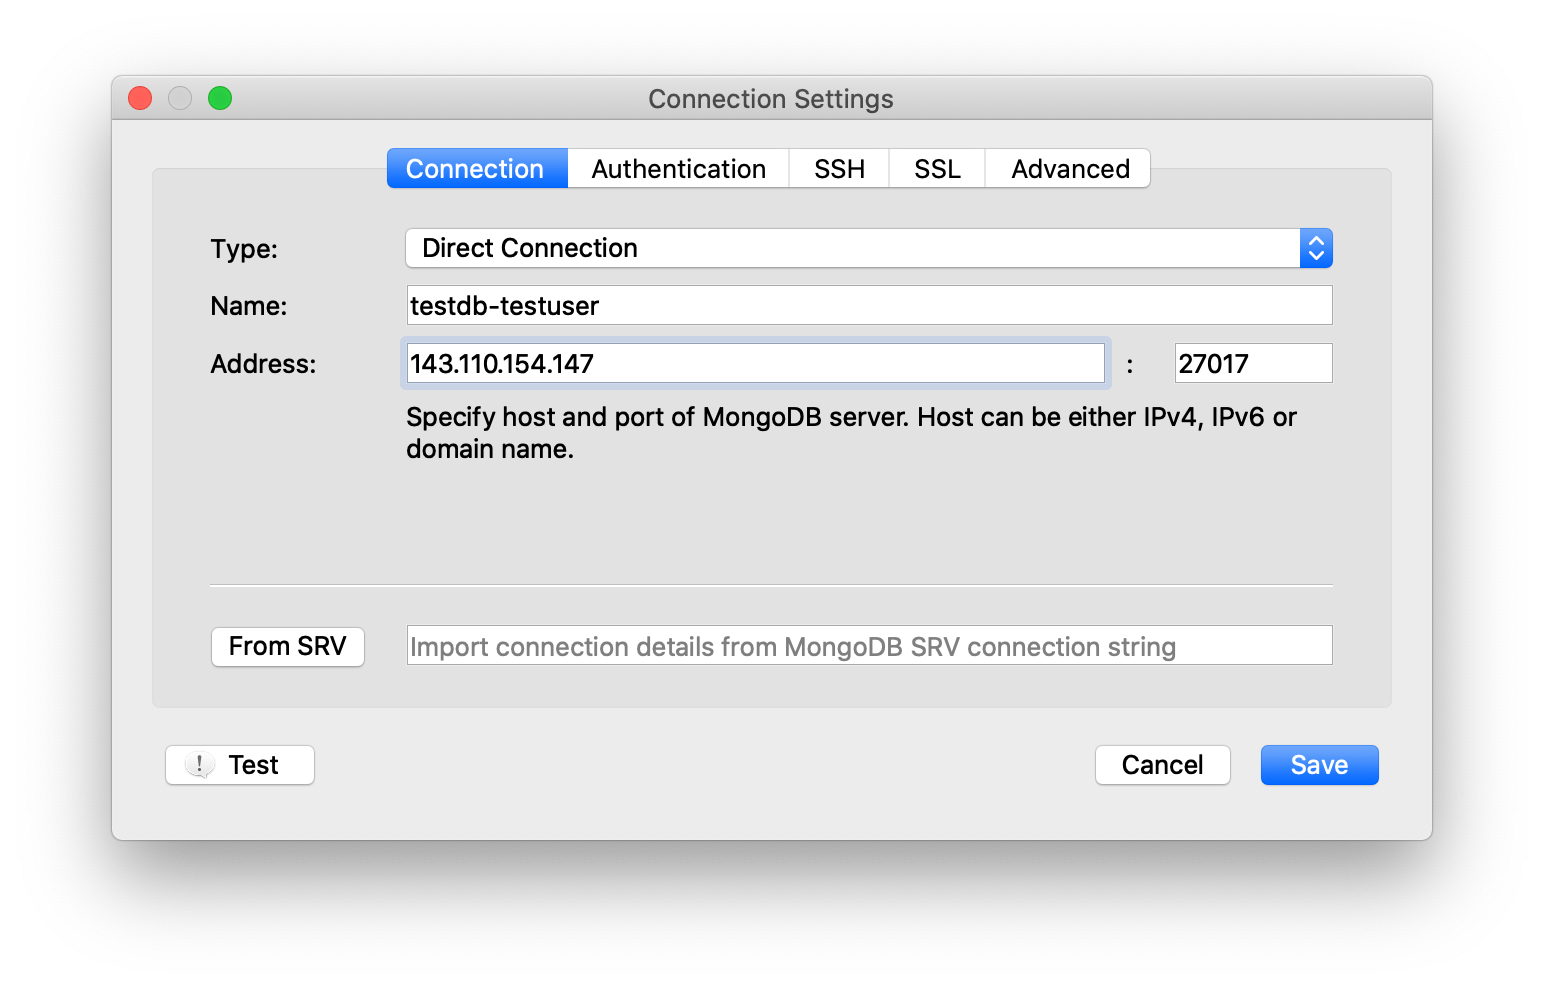
Now let's connect to the database with this user!
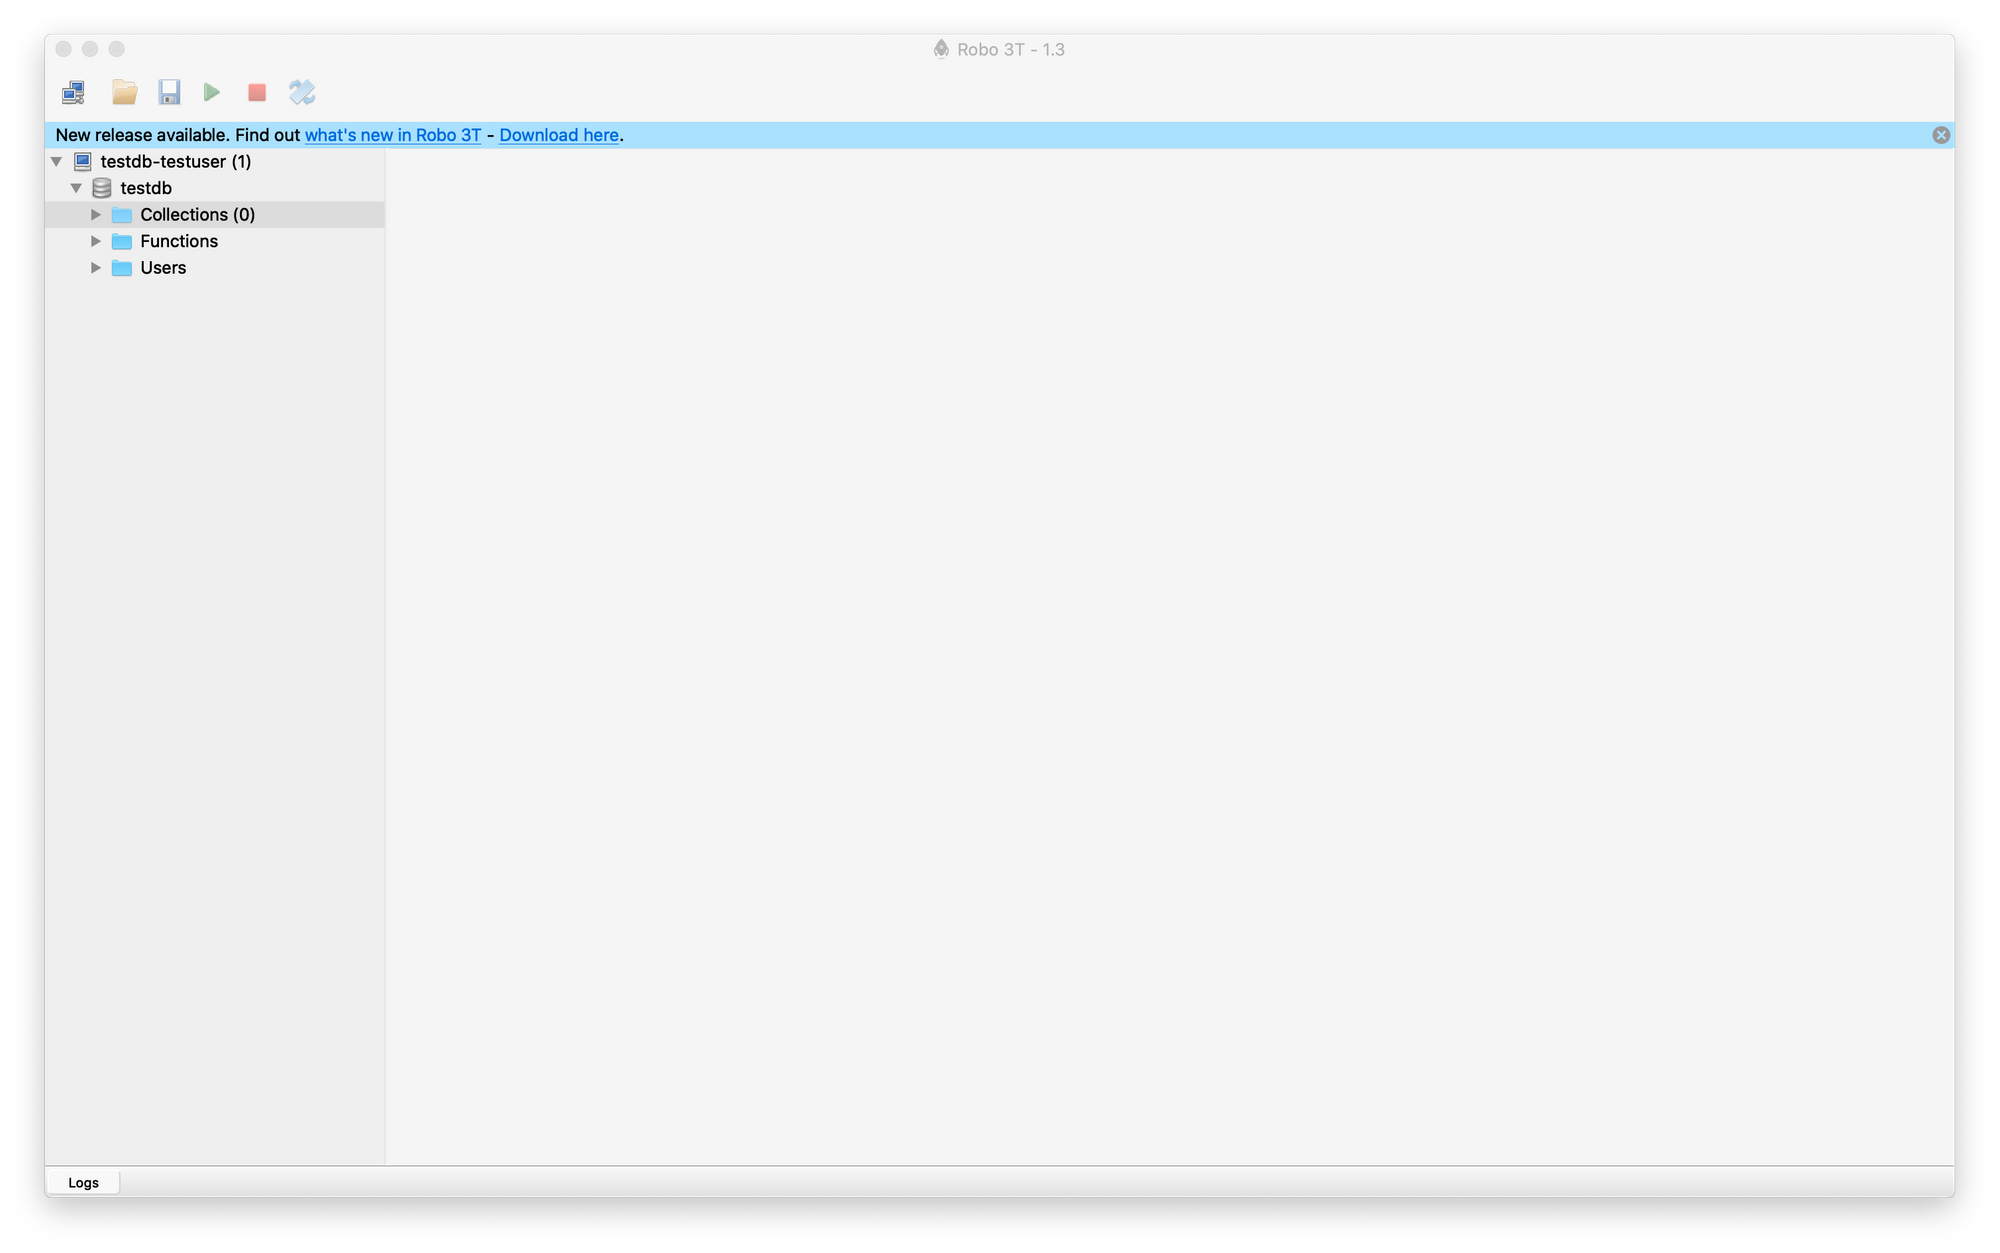
Magical! Everything should be working now. So far we have:
- A non-root sudo user to ssh into
- A secure MongoDB with a non-root user to read and write into the DB
- A way to look into the DB
Setting up your server
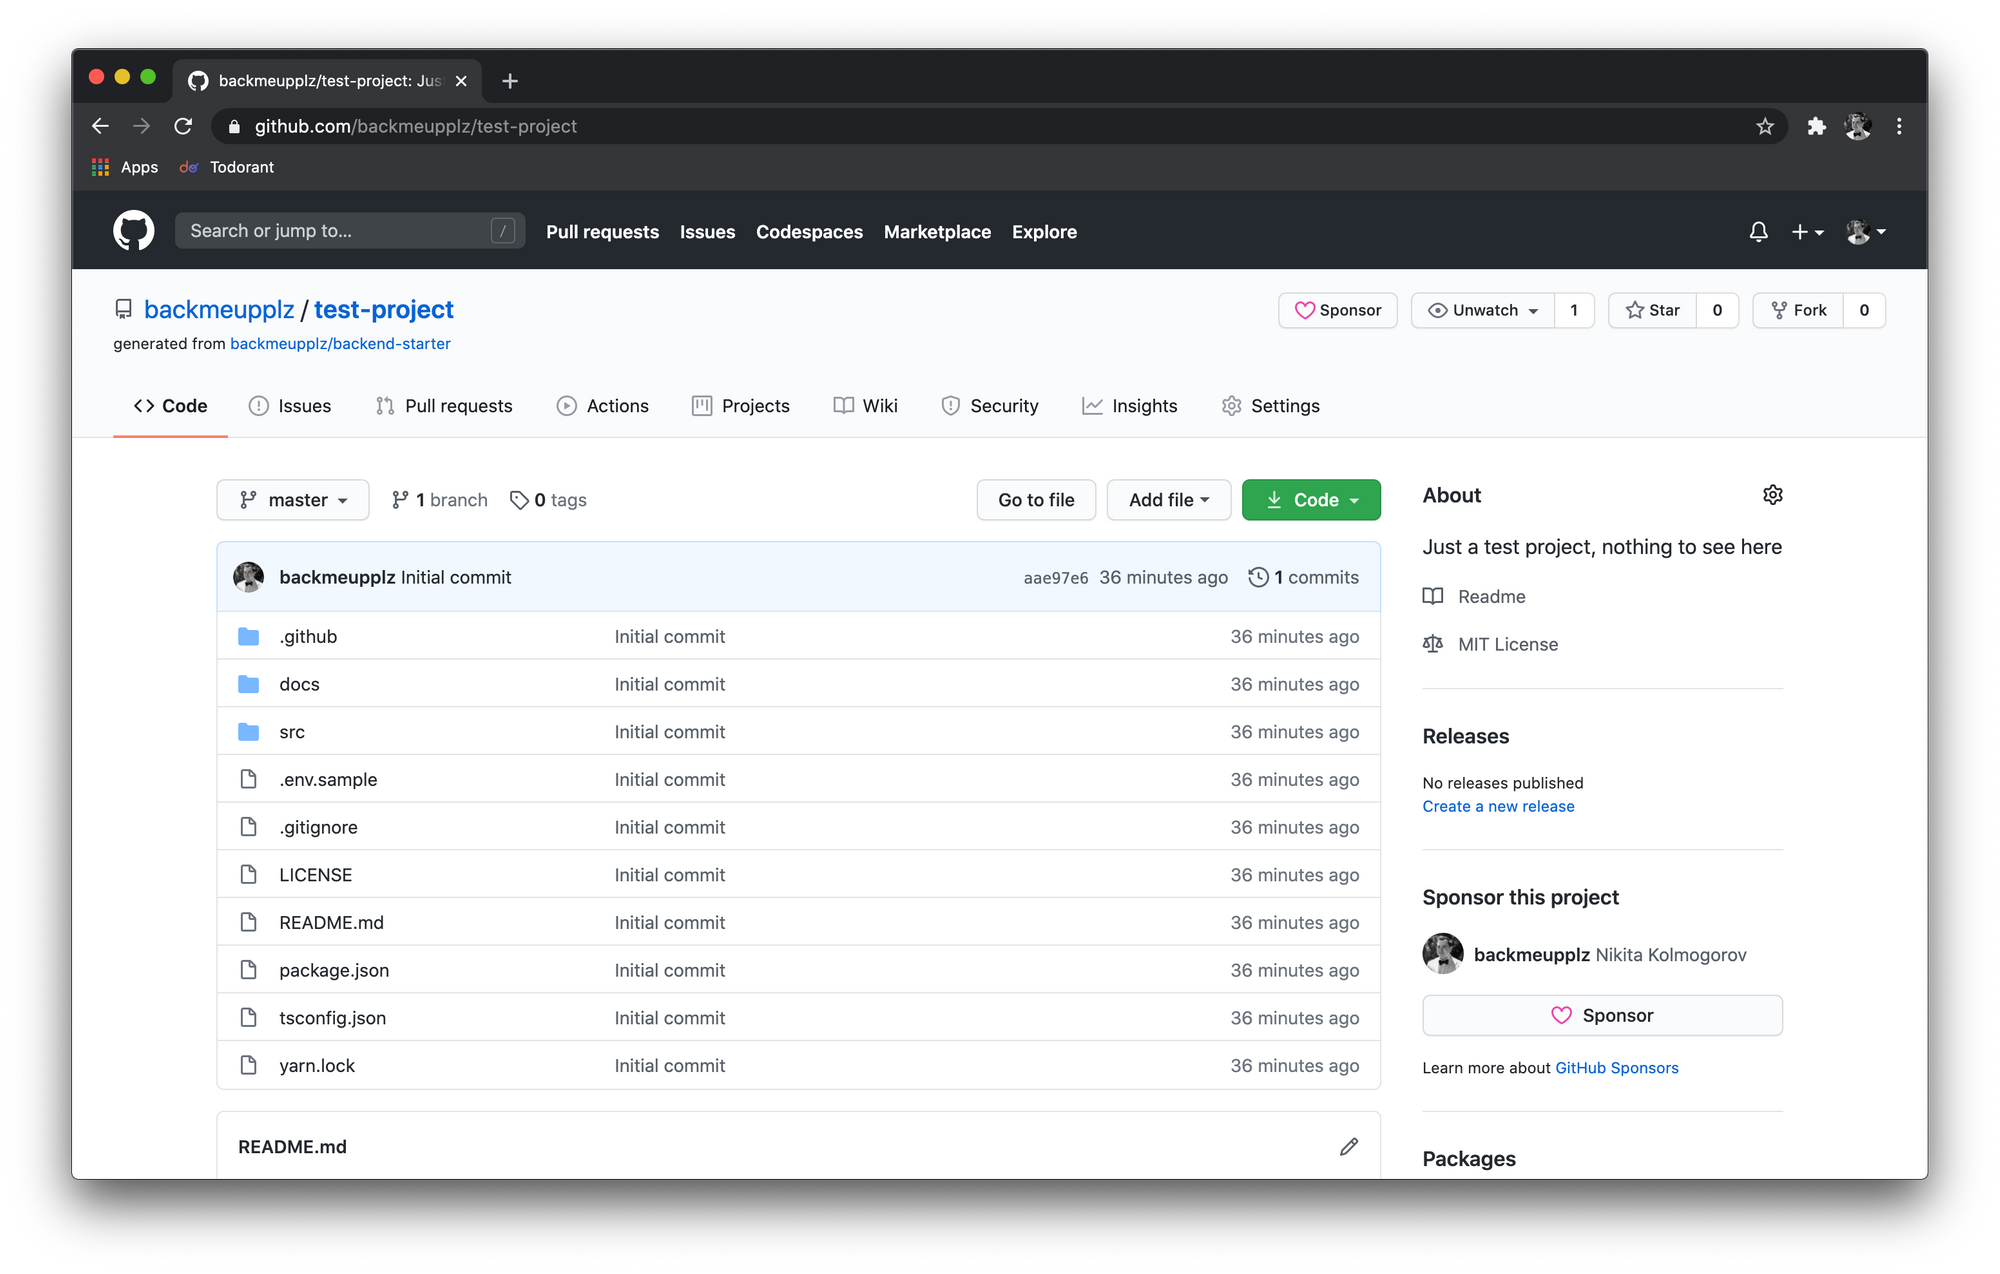
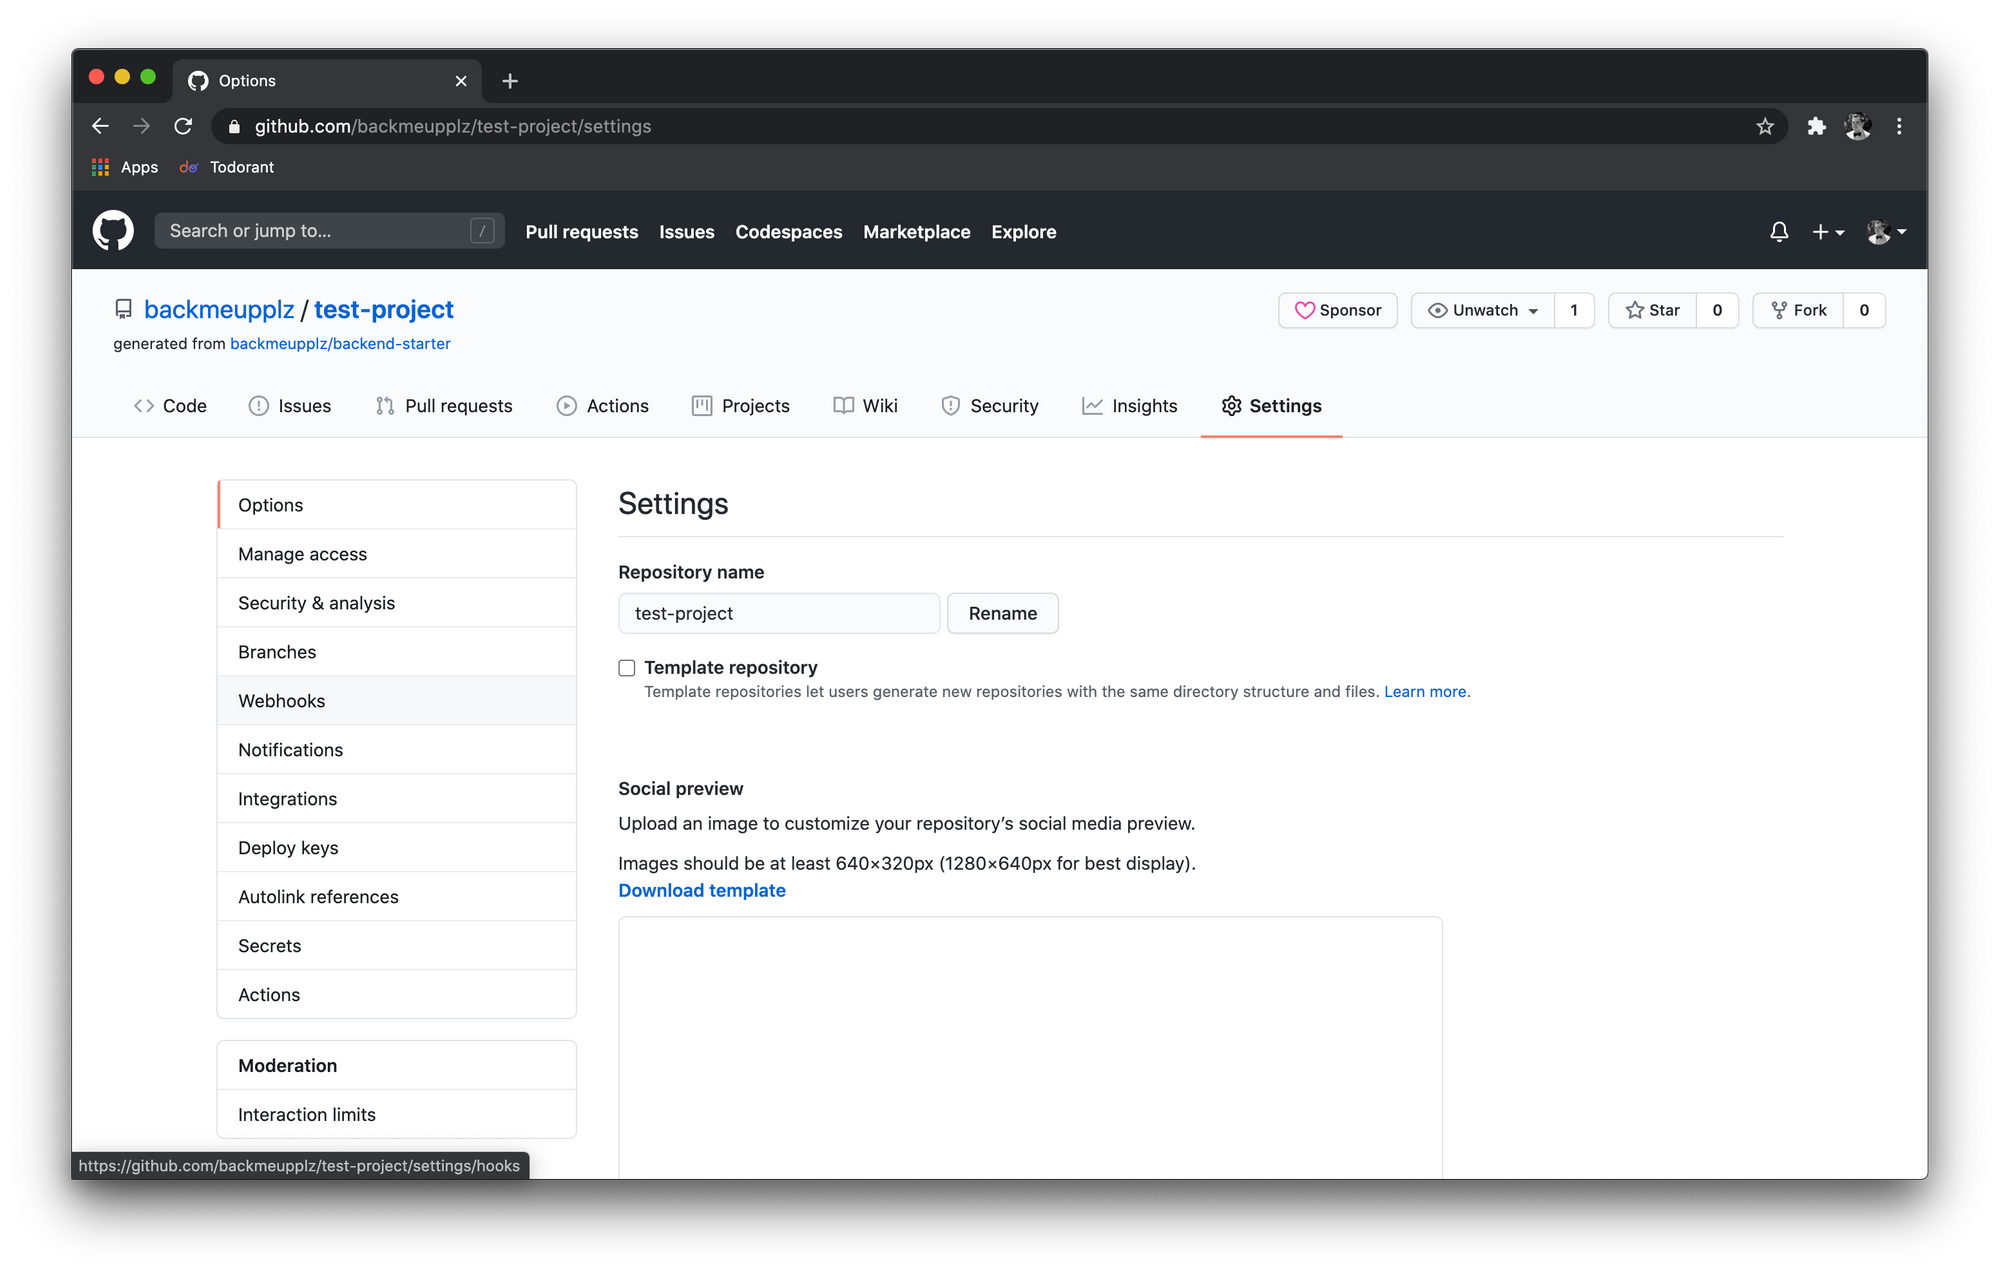
Go to my backend-starter repo and select "Use this template" option. This is going to be our starting point for the Node.js backend.
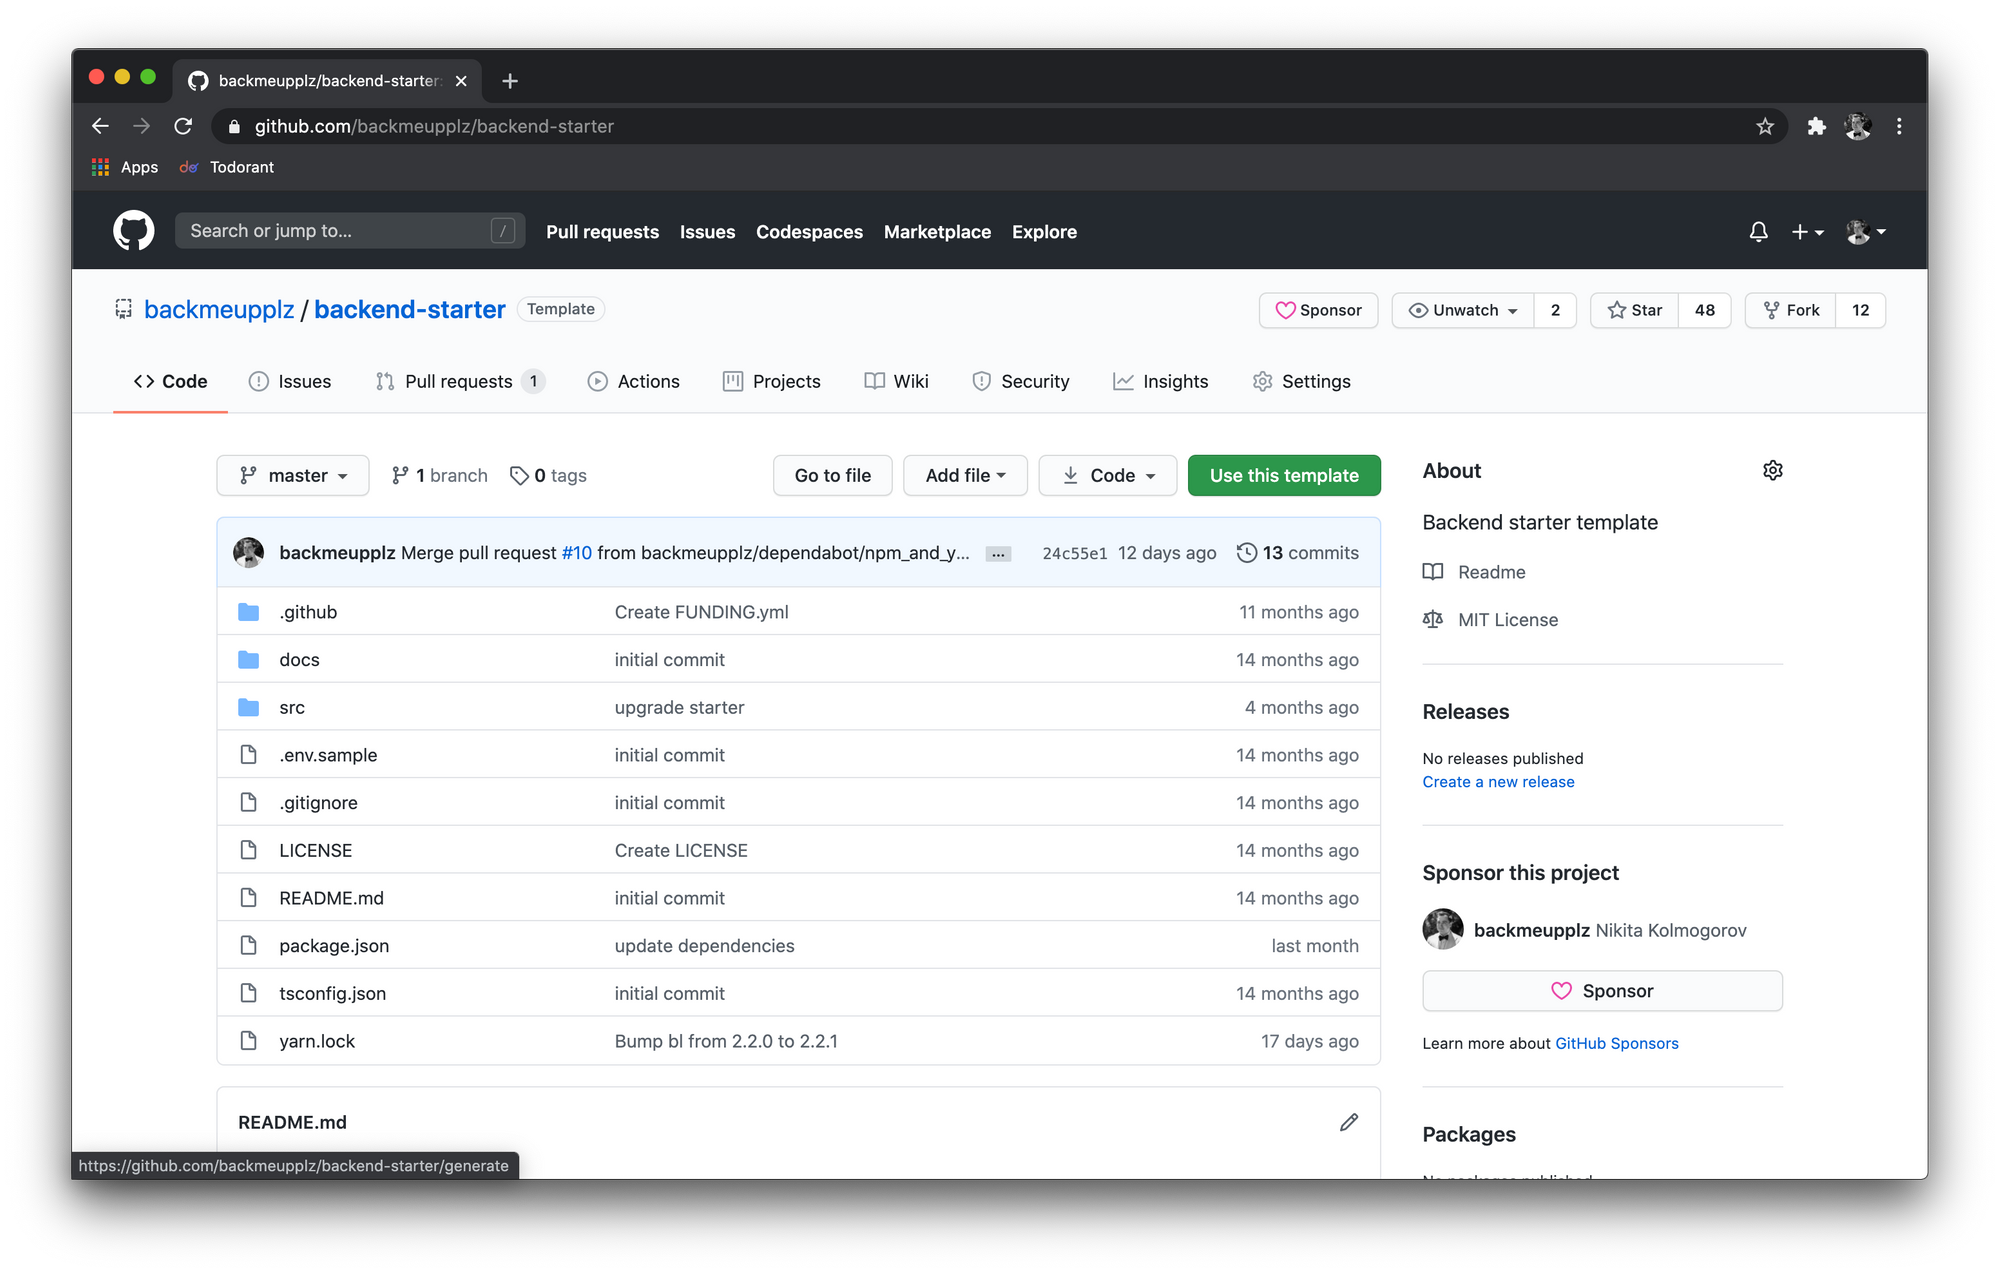
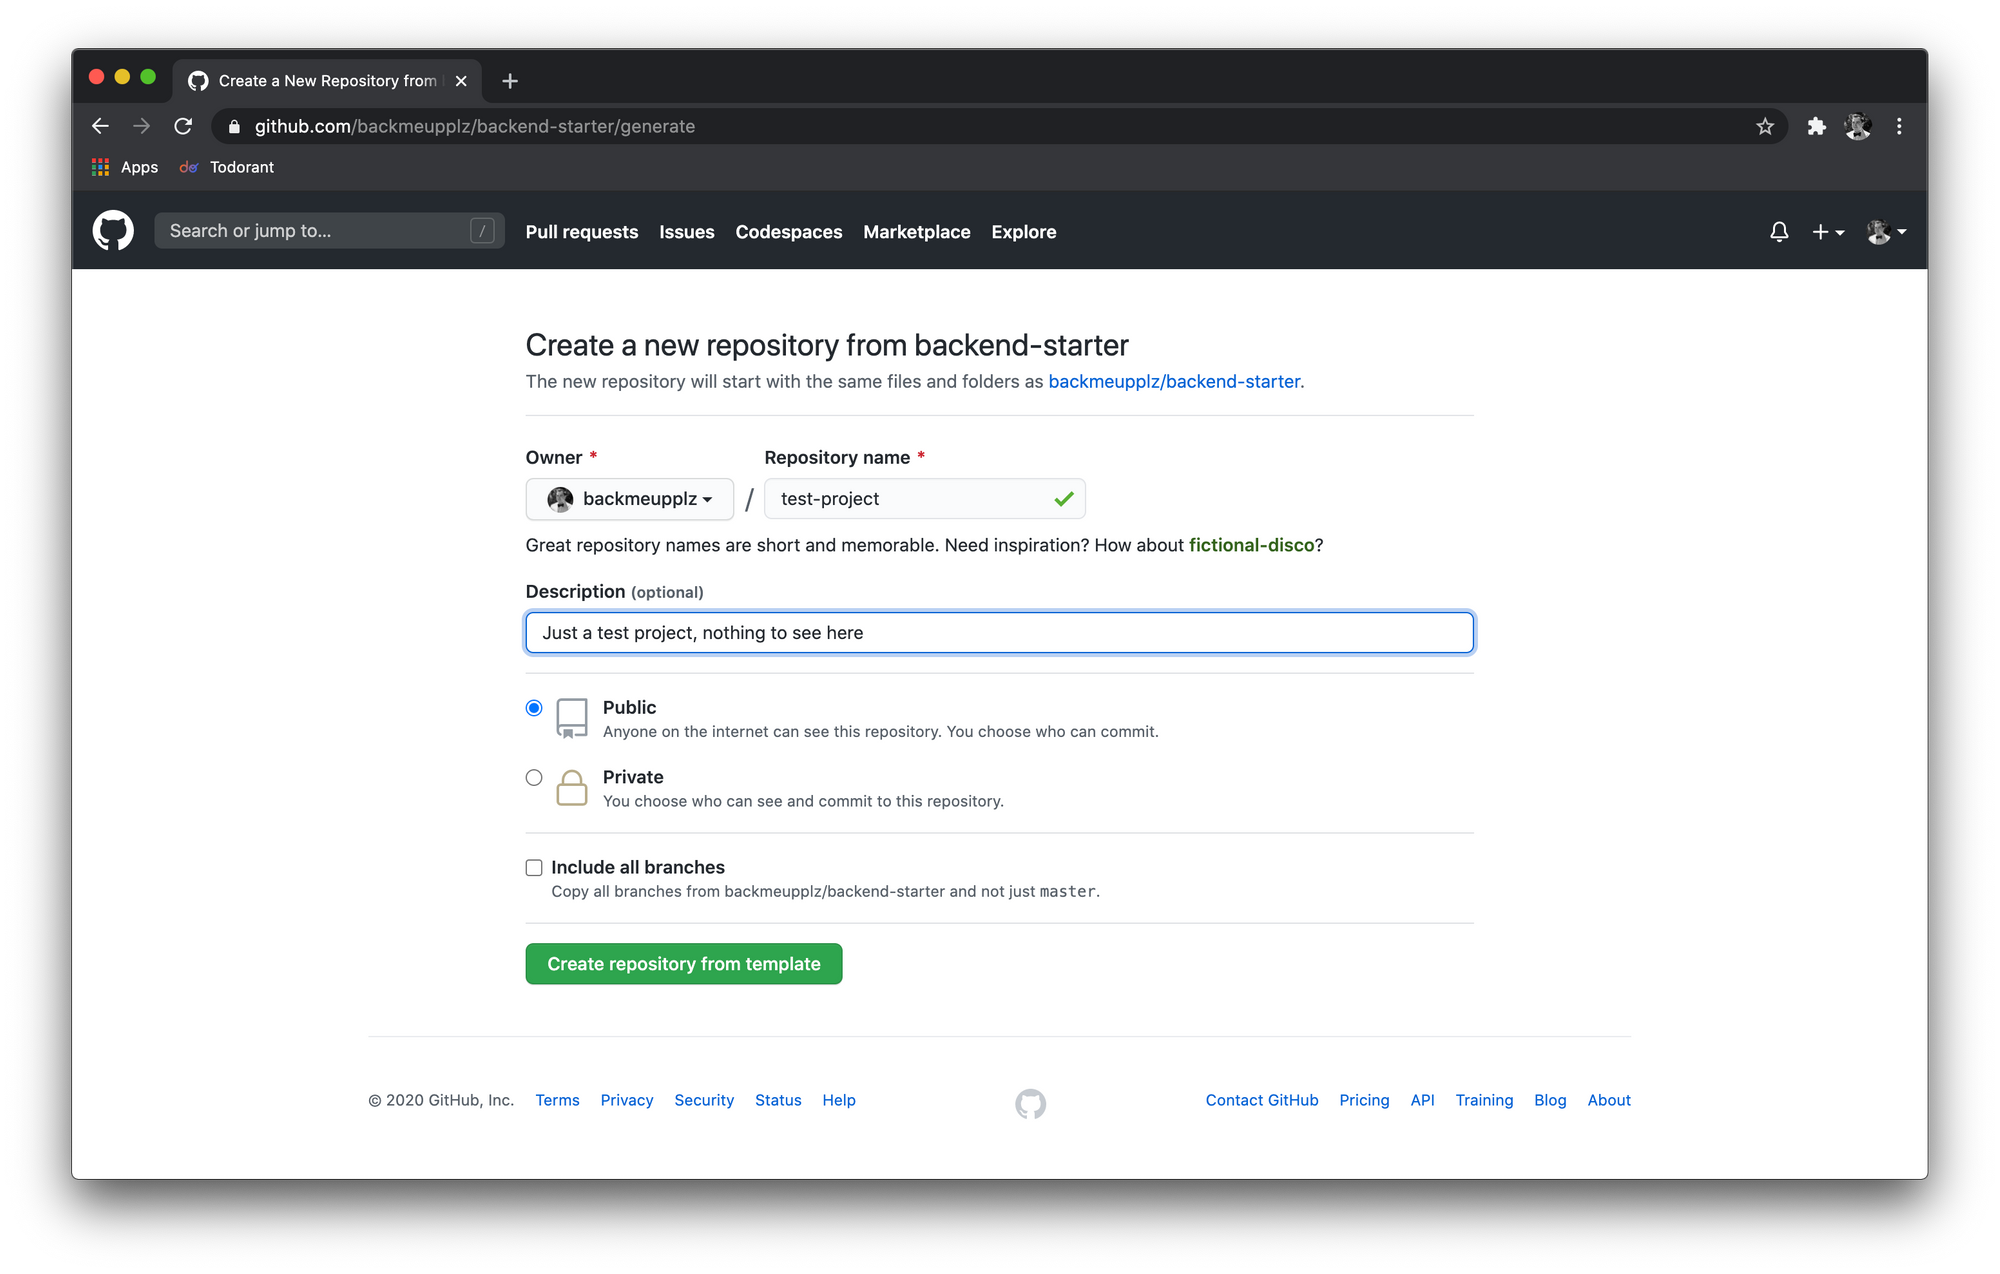
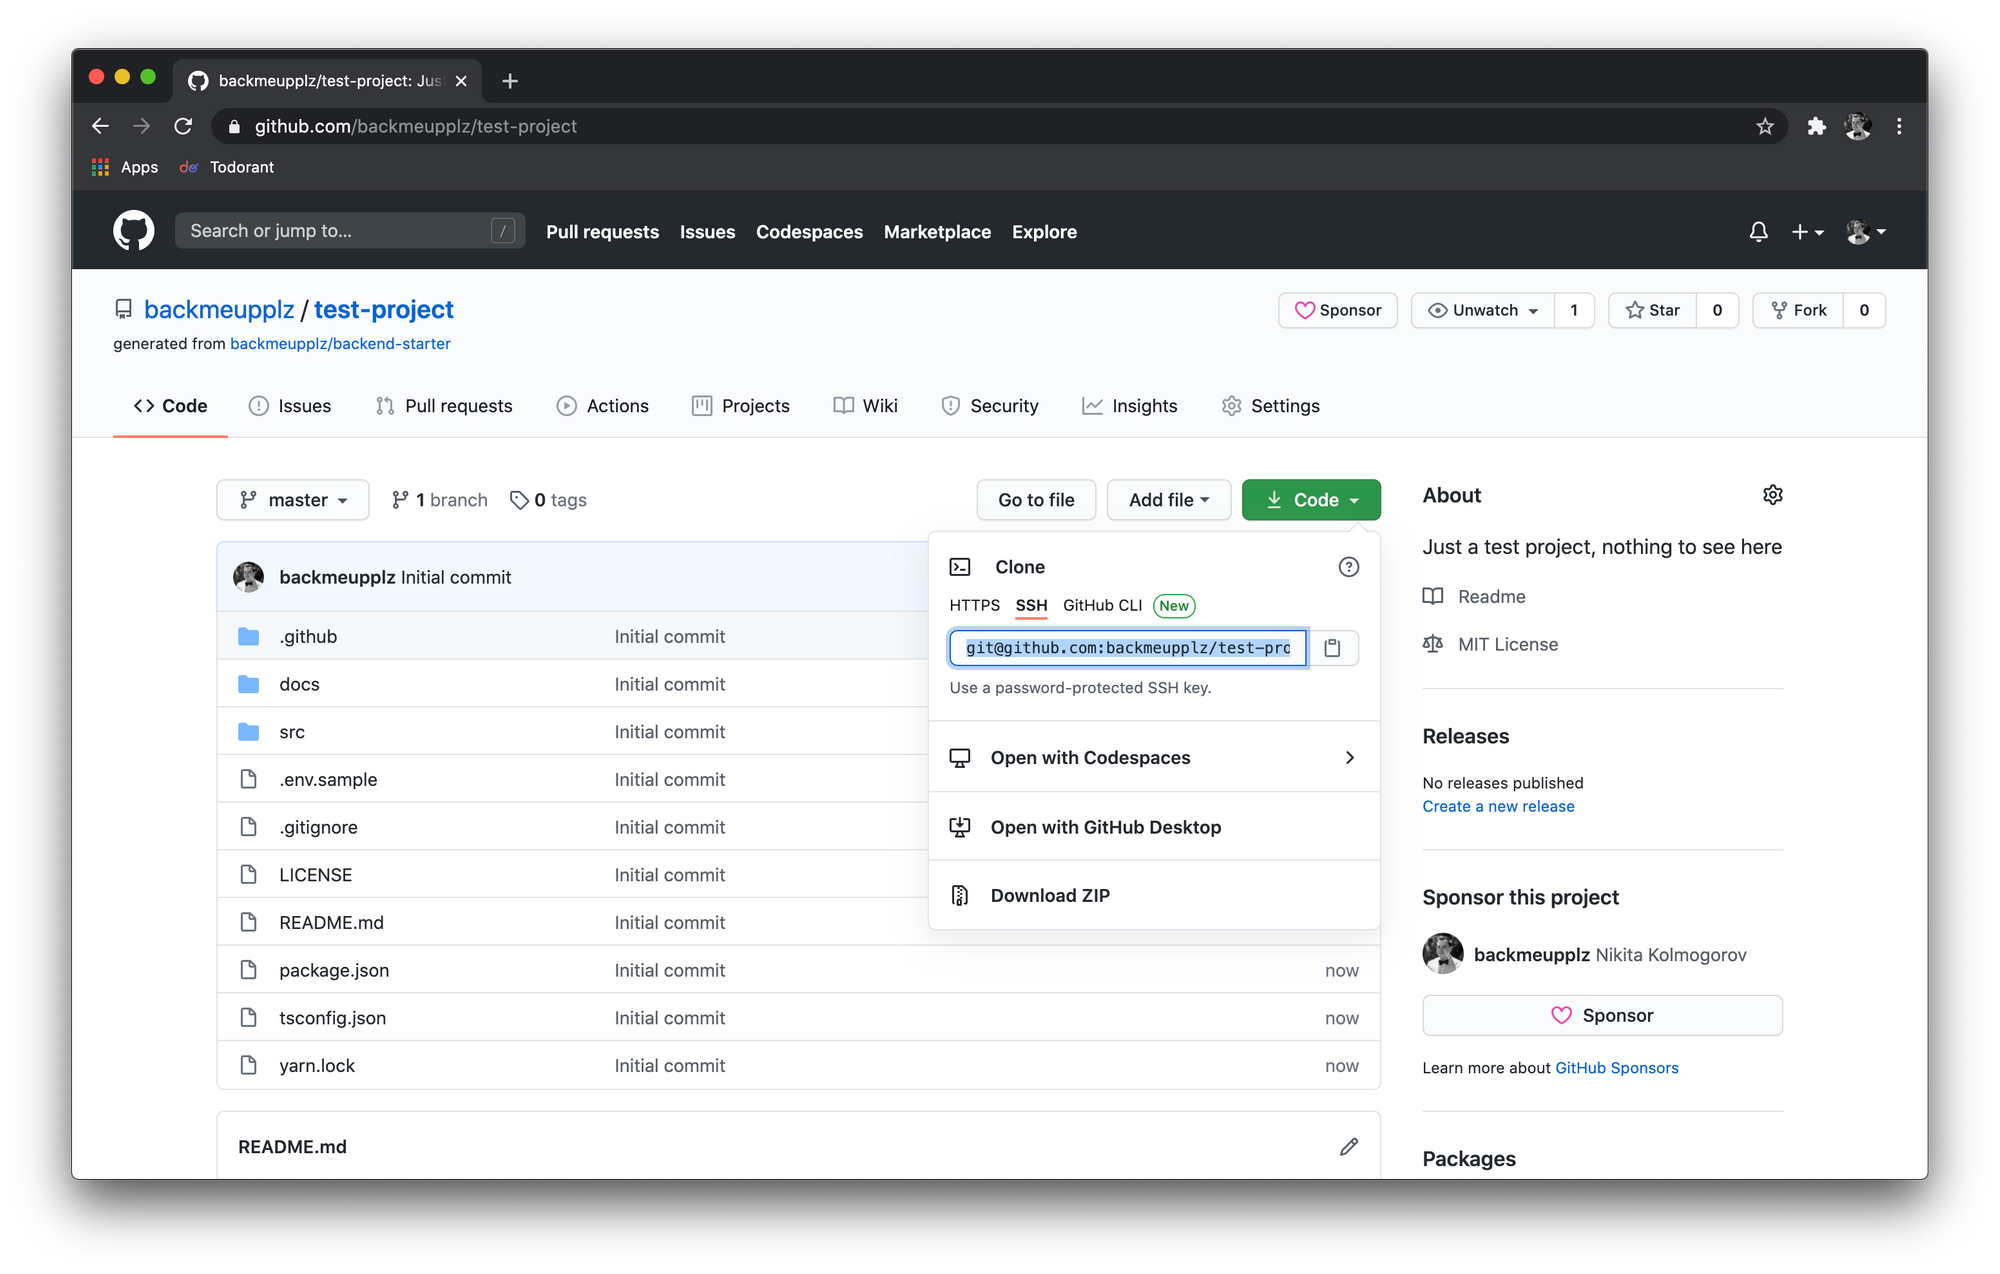
Congratulations, your code is live on GitHub and everyone can see it! We are going to use this repo as the source of truth for the server to look for what to deploy. You can instead have a private repo, obviously, but you'll have to add you VPS's public SSH key to your GitHub account here. You can read more about generating an SSH key here. Make sure to add an SSH key from your VPS and not from your machine.
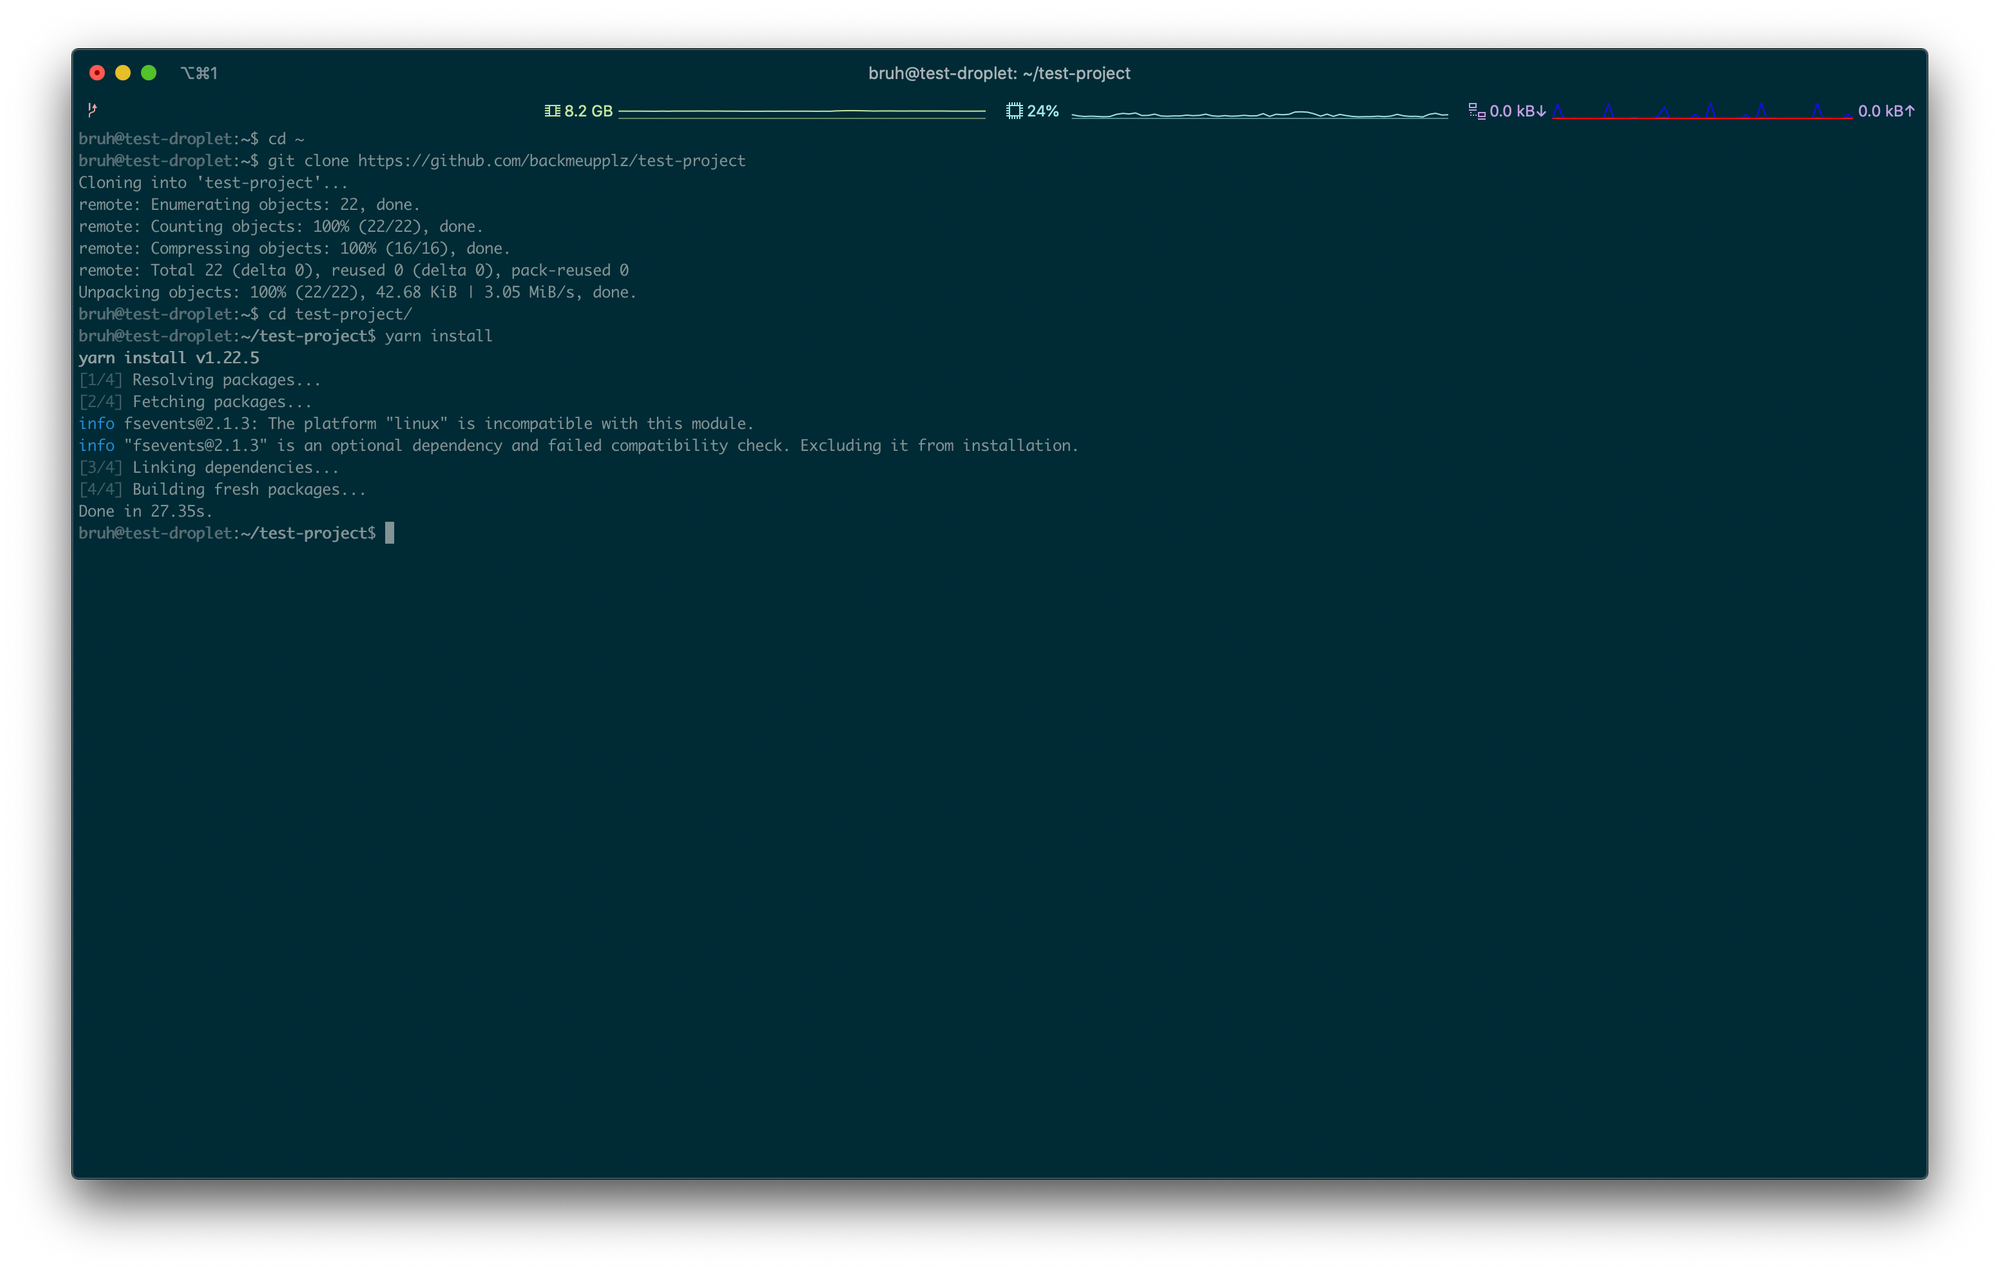
Let’s SSH to your VPS again, go to the home directory (hint: cd ~) and clone your code like git clone https://github.com/backmeupplz/test-project — obviously you can use SSL, and don’t forget to download your repo, not mine! Go to the cloned directory and run yarn install — should work like a charm.
Now let's create a service file /etc/systemd/system/test-project.service with the following content:
[Unit]
Description=Node.js service
After=mongodb.service

[Service]
WorkingDirectory=/home/bruh/test-project
ExecStart=/usr/bin/yarn distribute
Restart=always
RestartSec=3

[Install]
WantedBy=multi-user.target
Well, if we try to launch this service now, it won't work. Systemd services expect node and yarn binaries to be in the /usr/bin folder. However, we installed them with nvm and they are in the nvm folder. Let's add a couple of symlinks. You can wind the absolute route of any binary by running the command which. Follow the following example:
which yarn
> /home/bruh/.nvm/versions/node/v14.11.0/bin/yarn

sudo ln -s /home/bruh/.nvm/versions/node/v14.11.0/bin/yarn /usr/bin/yarn

which node
> /home/bruh/.nvm/versions/node/v14.11.0/bin/node

sudo ln -s /home/bruh/.nvm/versions/node/v14.11.0/bin/node /usr/bin/node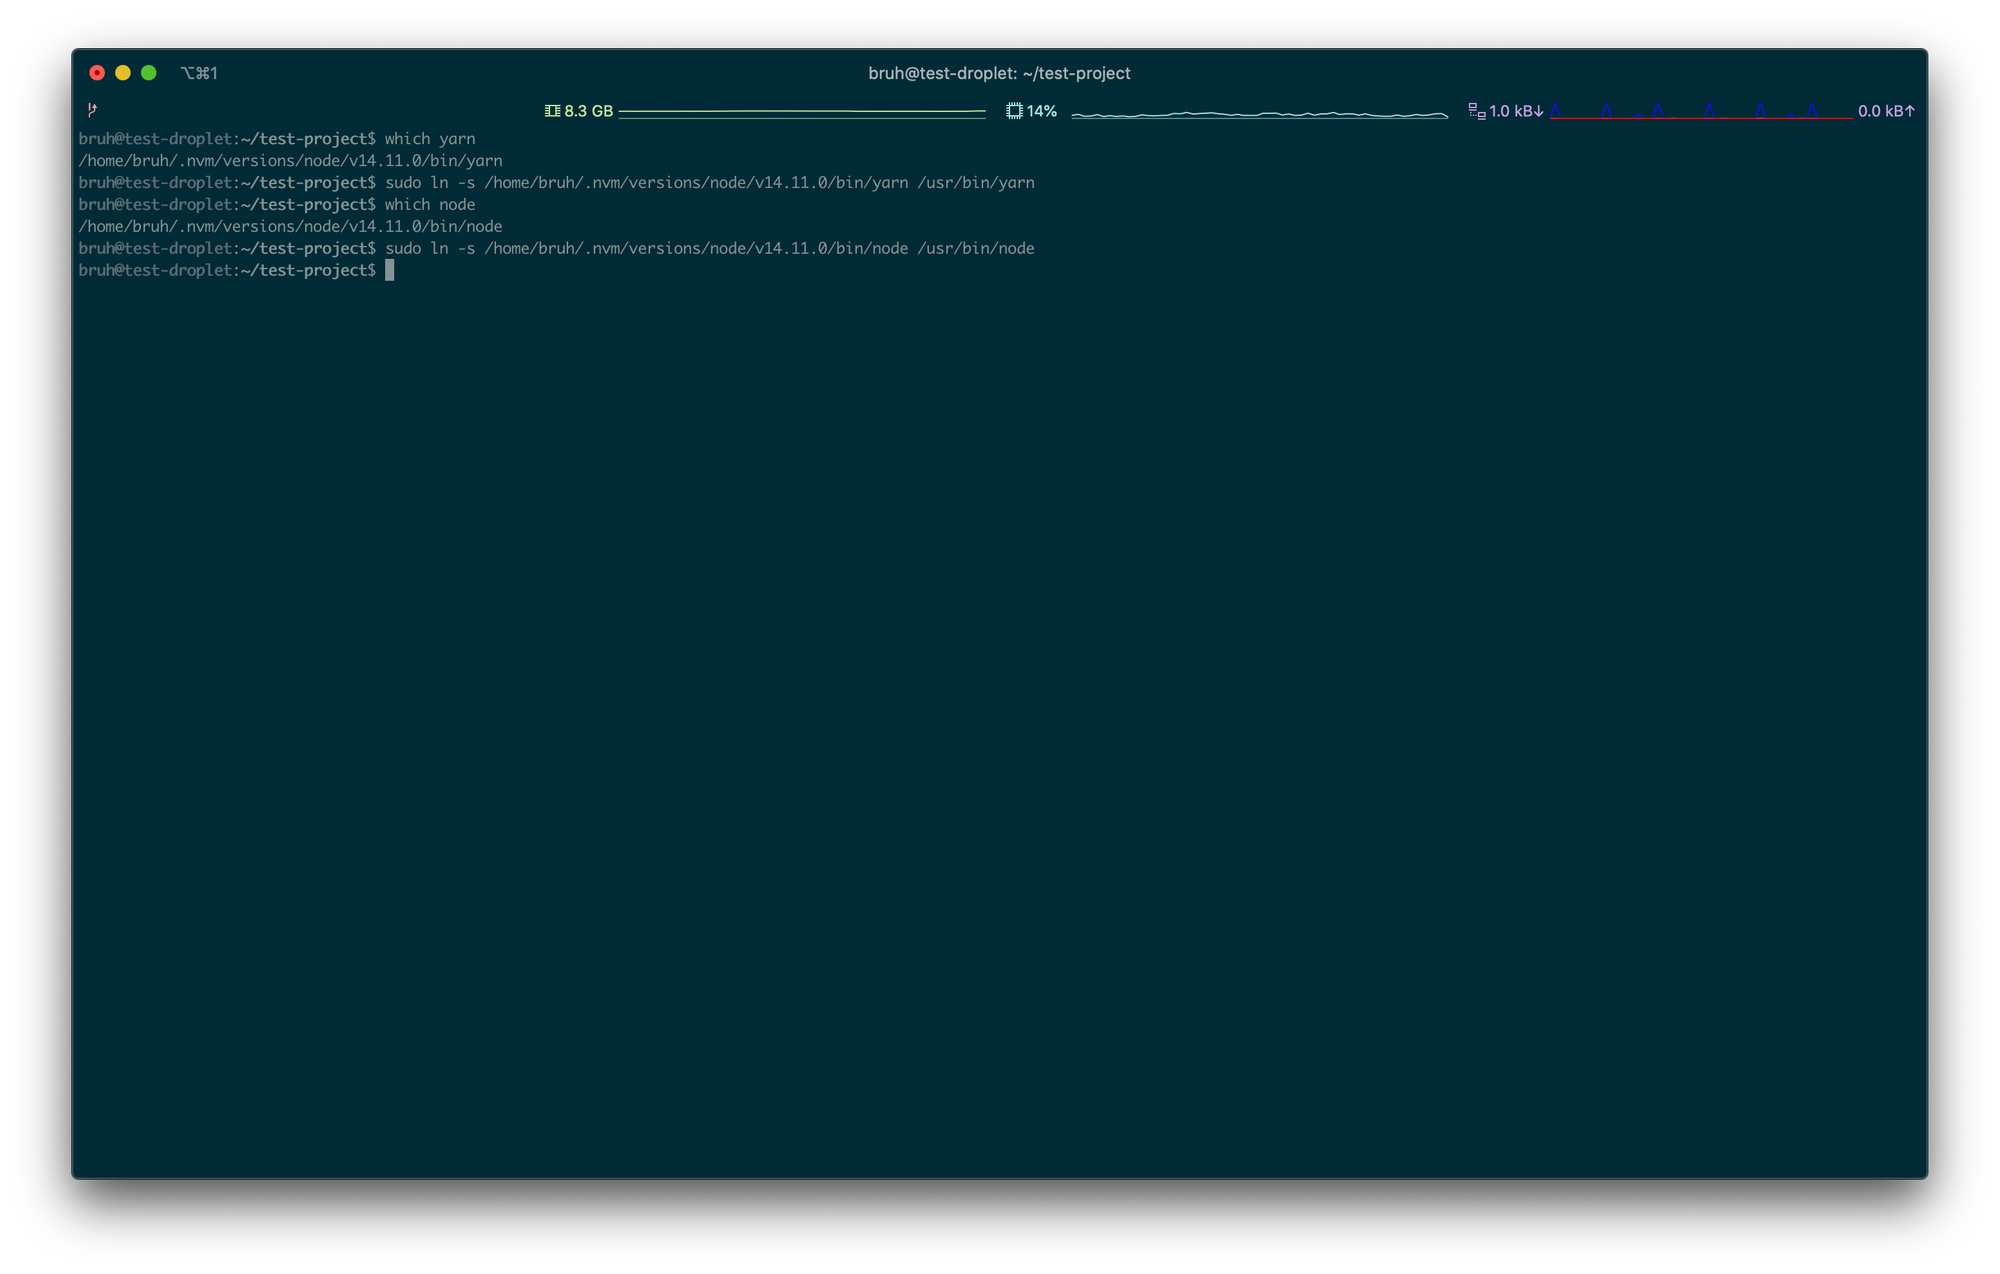
Almost there! But the server is still not ready to run. We have to create a special configuration file with the variables like tokens and Mongo URI. Create the .env file in you project directory ~/test-project/.env with similar content:
MONGO=mongodb://test-user:password@localhost:27017/testdb
JWT=123456789
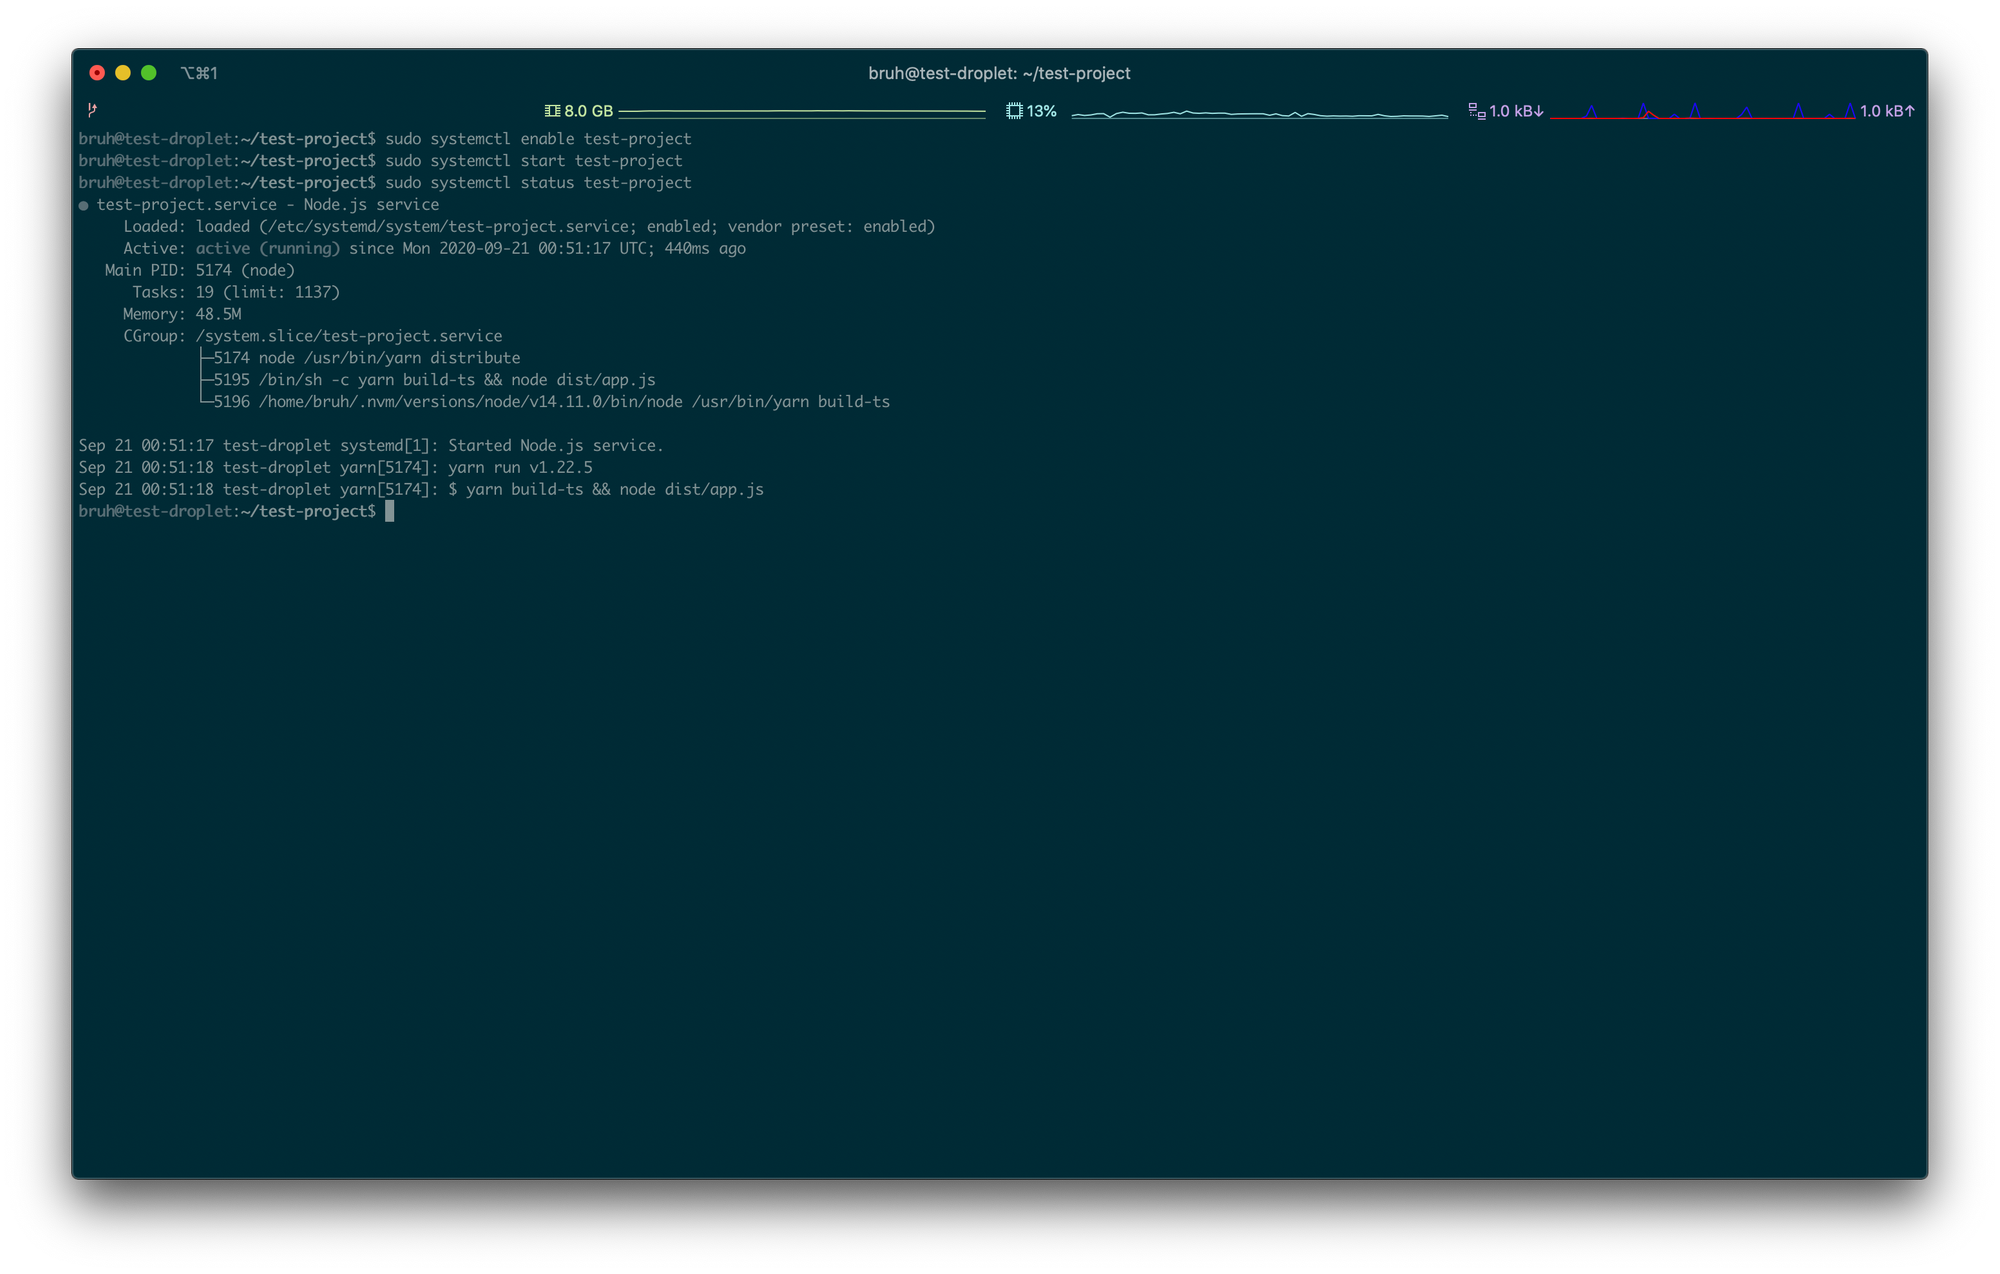
TELEGRAM_LOGIN_TOKEN=123456789Make sure to replace the username, passwords and tokens. Then finally enable the backend service by running the following commands:
sudo systemctl enable test-project

sudo systemctl start test-project

sudo systemctl status test-project
Don't forget that you are logged in as a user with no root priveleges! You will have to use sudo to write anywhere outside your home directory.
Ladies and gentlemen, it is live! You can even access your server 24/7 by simply sending it a get request from the browser!
Setting up Continuous Integration
The time has come, the pearl of this tutorial has arrived. But first, let me get it straight: there are plenty of the CI solutions on the market available right now. Free ones, open-source ones, proprietary ones — you just need to choose. All of them seemed either too expensive (not free), too complicated or too resource-demanding to me. So I’ve built one by myself getting inspiration from another feather-weight CI solution. Guess, I stripped it a bit and it became even lighter. So here we go, I present to you — ci-ninja!
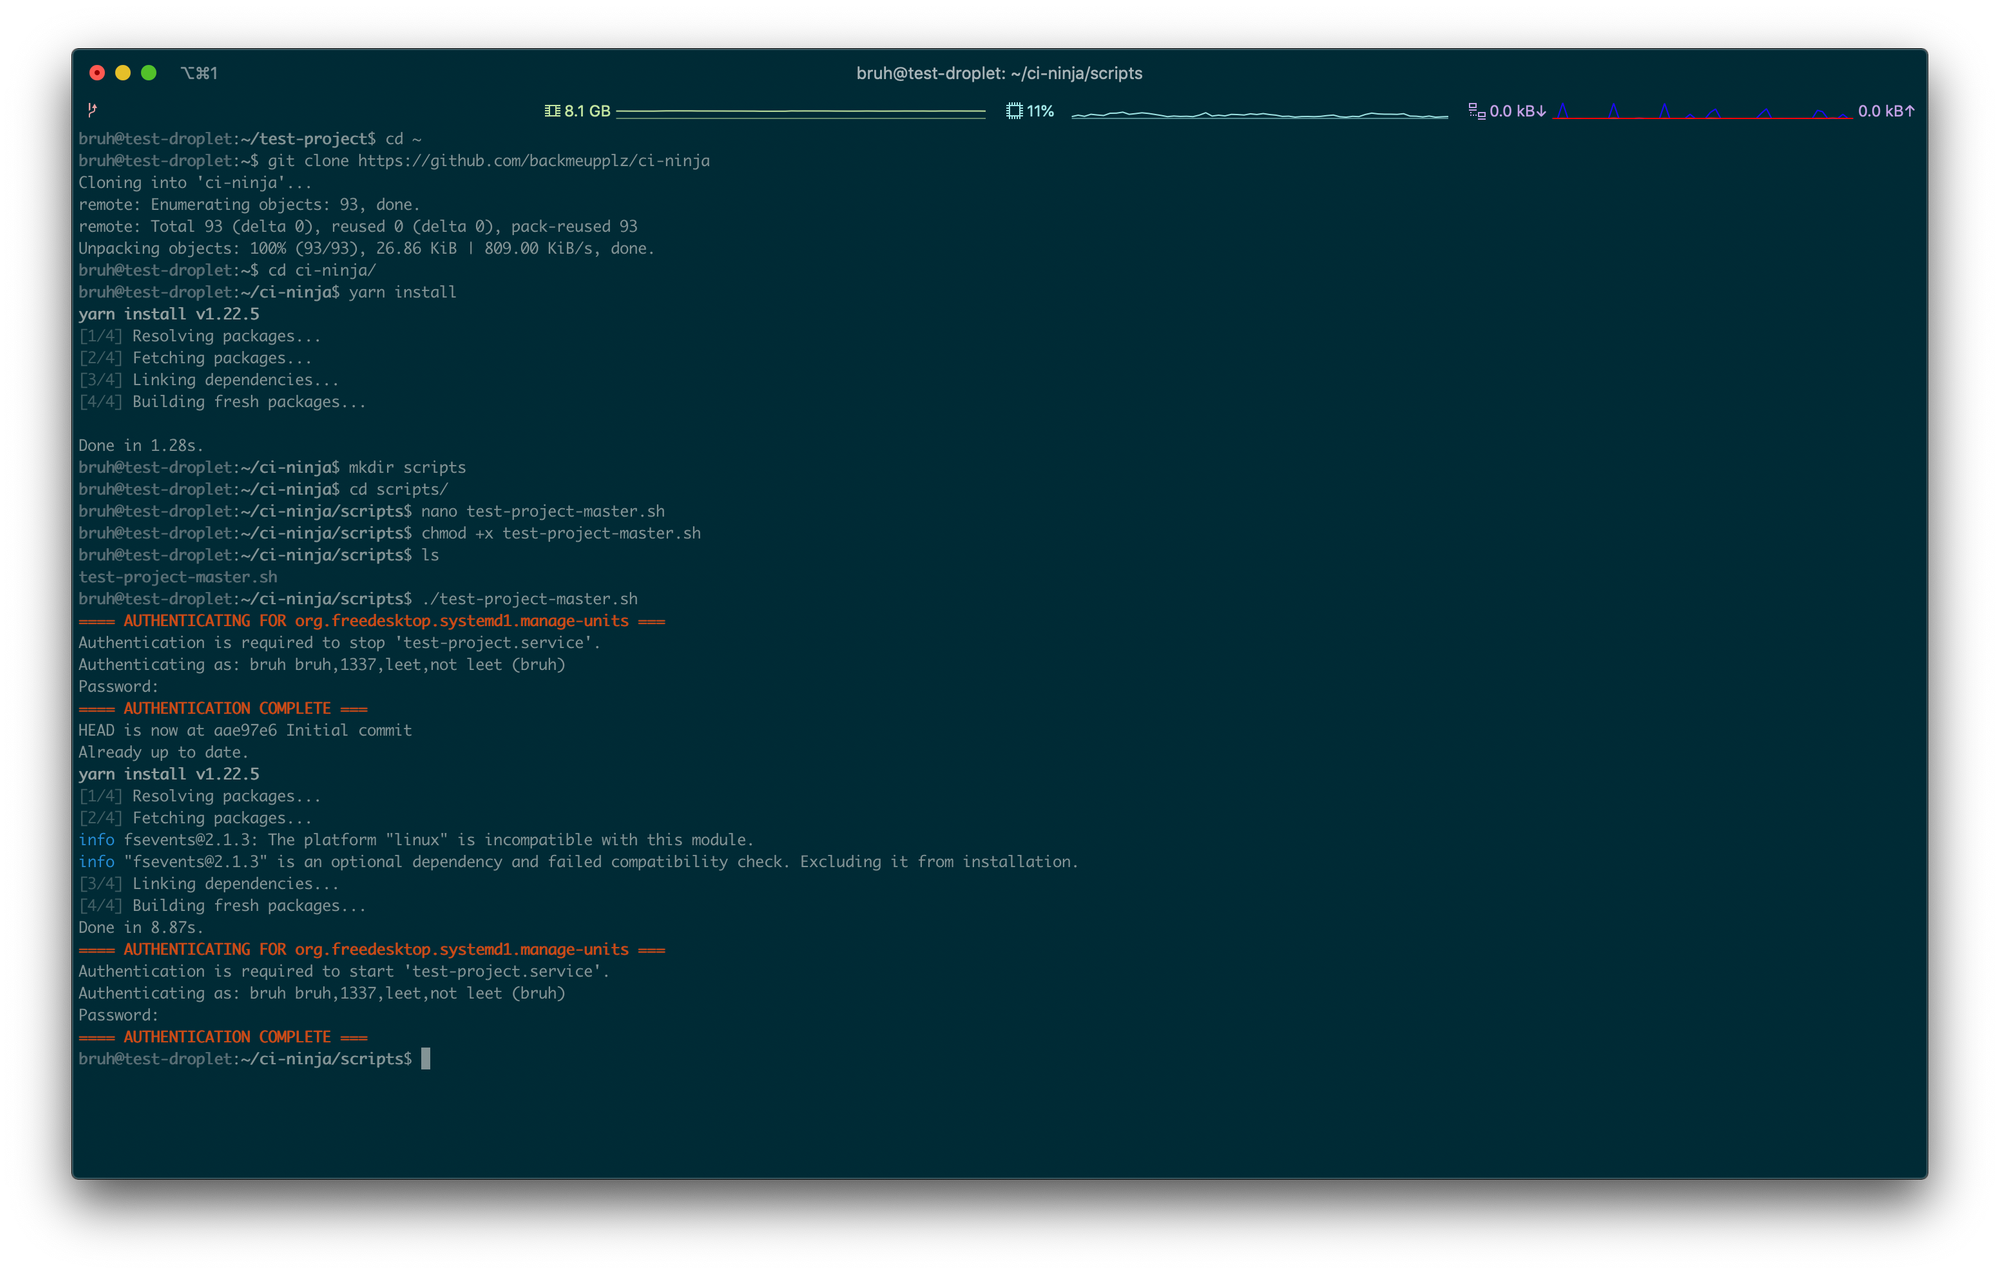
It’s stupidly simple to implement. Frankly, it is just a Node.js server that listens to a REST call and executes a bash script. That’s all, folks. Let’s add it to our existing VPS. Go to your ~ directory and clone ci-ninja. Then go inside the newly cloned ci-ninja folder and run yarn install. After that create a directory ~/ci-ninja/scripts and add a file ~/ci-ninja/scripts/test-project-master.sh with the following content:
systemctl stop test-project &&
cd /home/bruh/test-project &&
rm -rf node_modules &&
git reset --hard &&
git pull &&
yarn install &&
systemctl start test-project
Don’t forget to chmod +x test-project-master.sh so that ci-ninja can execute the script! And yes, this is how simple it is and you can add any other commands to this bash file — suit yourself. I usually chain all the commands with && and call a Telegram bot API so that the dedicated logging bot tells me whenever my services are deployed successfully. You can also run ./test-project-master.sh if you want to test if it works well.
Let’s make sure that ci-ninja runs at all times. Create /etc/systemd/system/ci-ninja.service file with the following content:
[Unit]
Description=ci-ninja service
After=network.target

[Service]
WorkingDirectory=/home/bruh/ci-ninja
ExecStart=/usr/bin/node /home/bruh/ci-ninja/index.js

[Install]
WantedBy=multi-user.target
Now let’s enable it, start it and test the status with the following commands:
sudo systemctl enable ci-ninja

sudo systemctl start ci-ninja

sudo systemctl status ci-ninja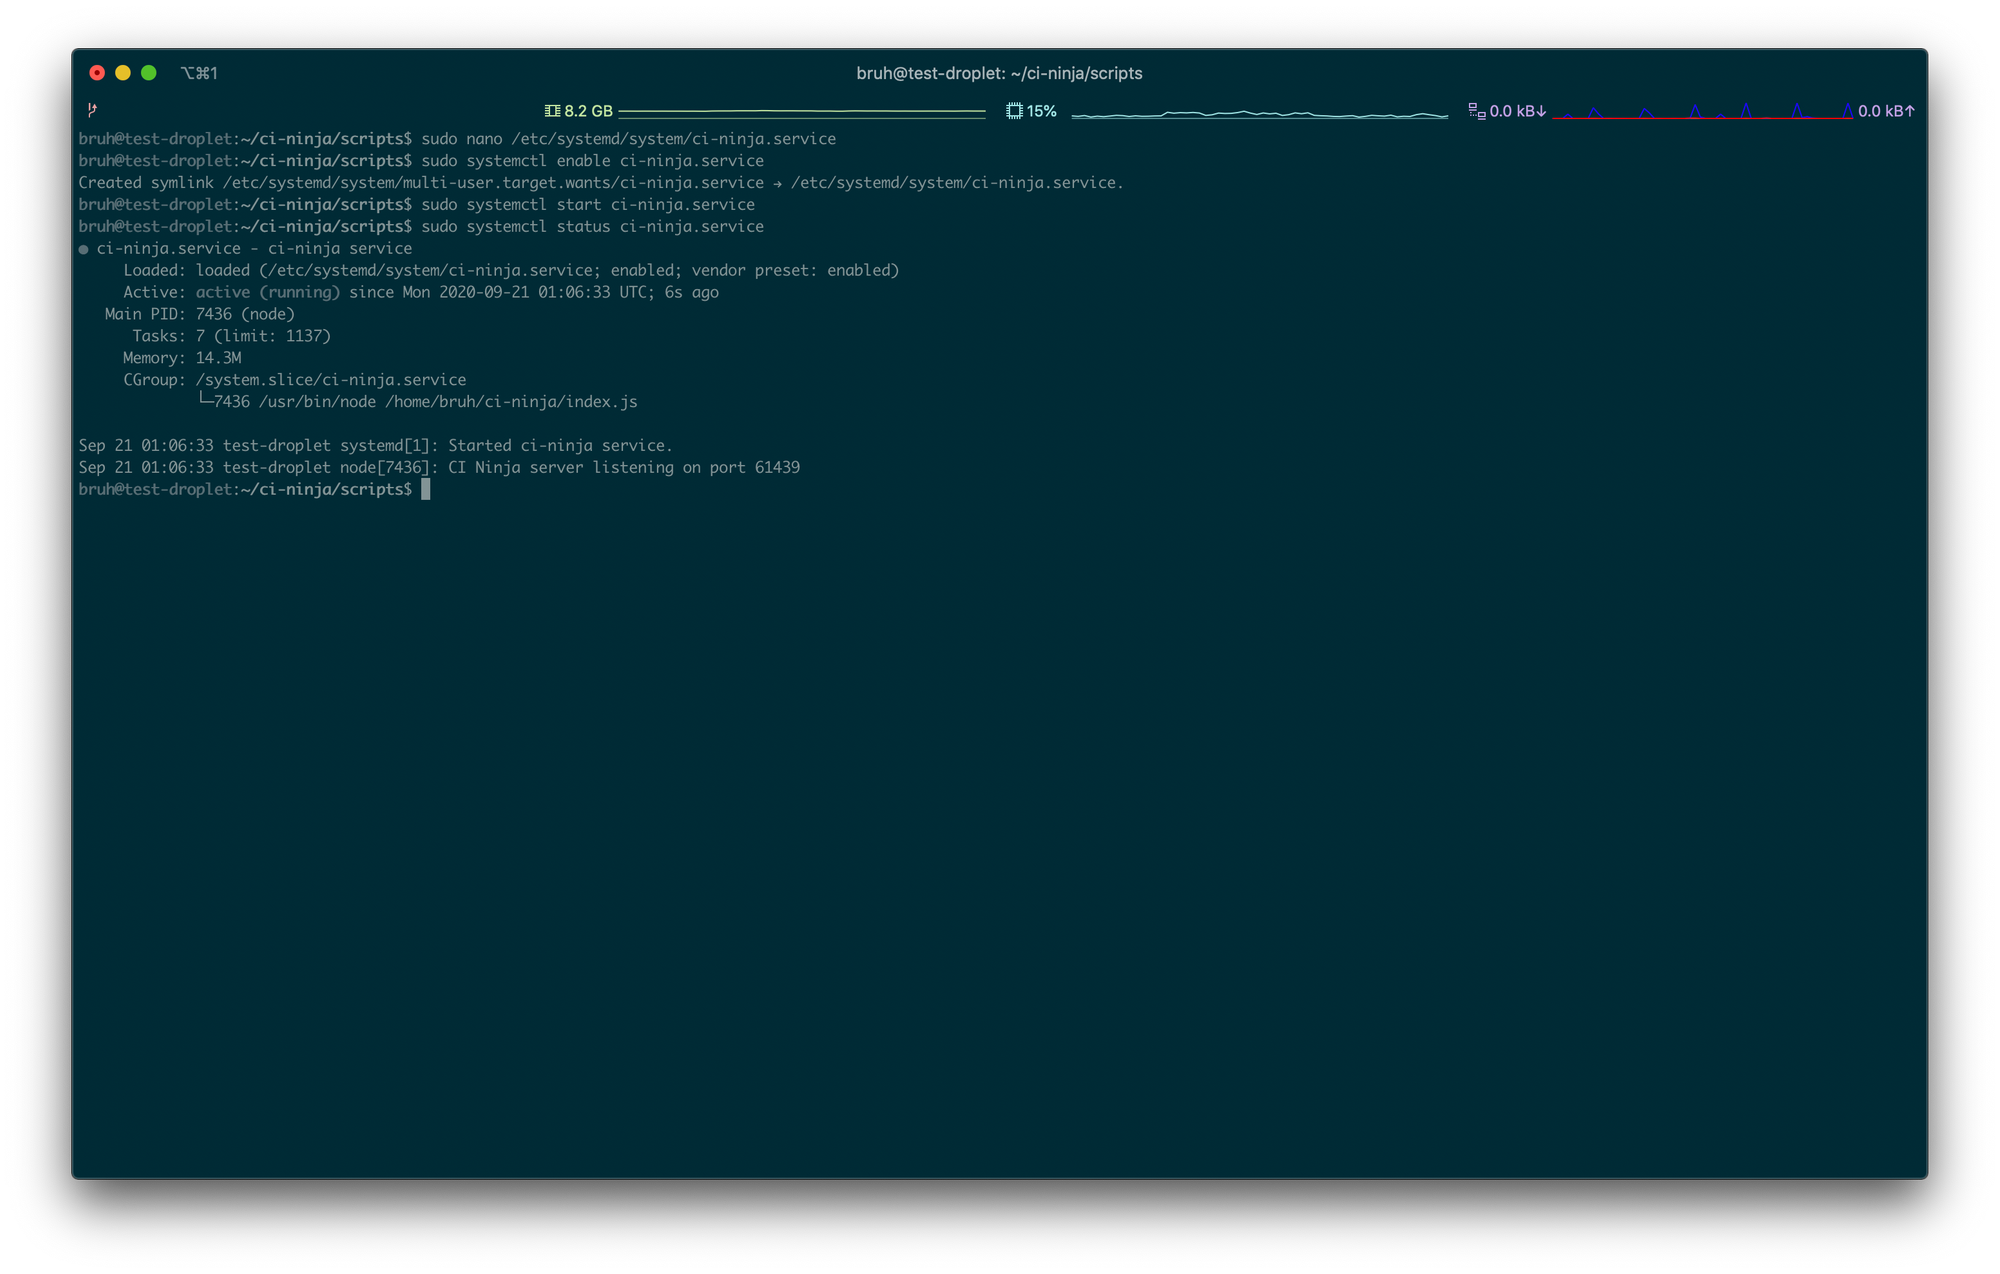
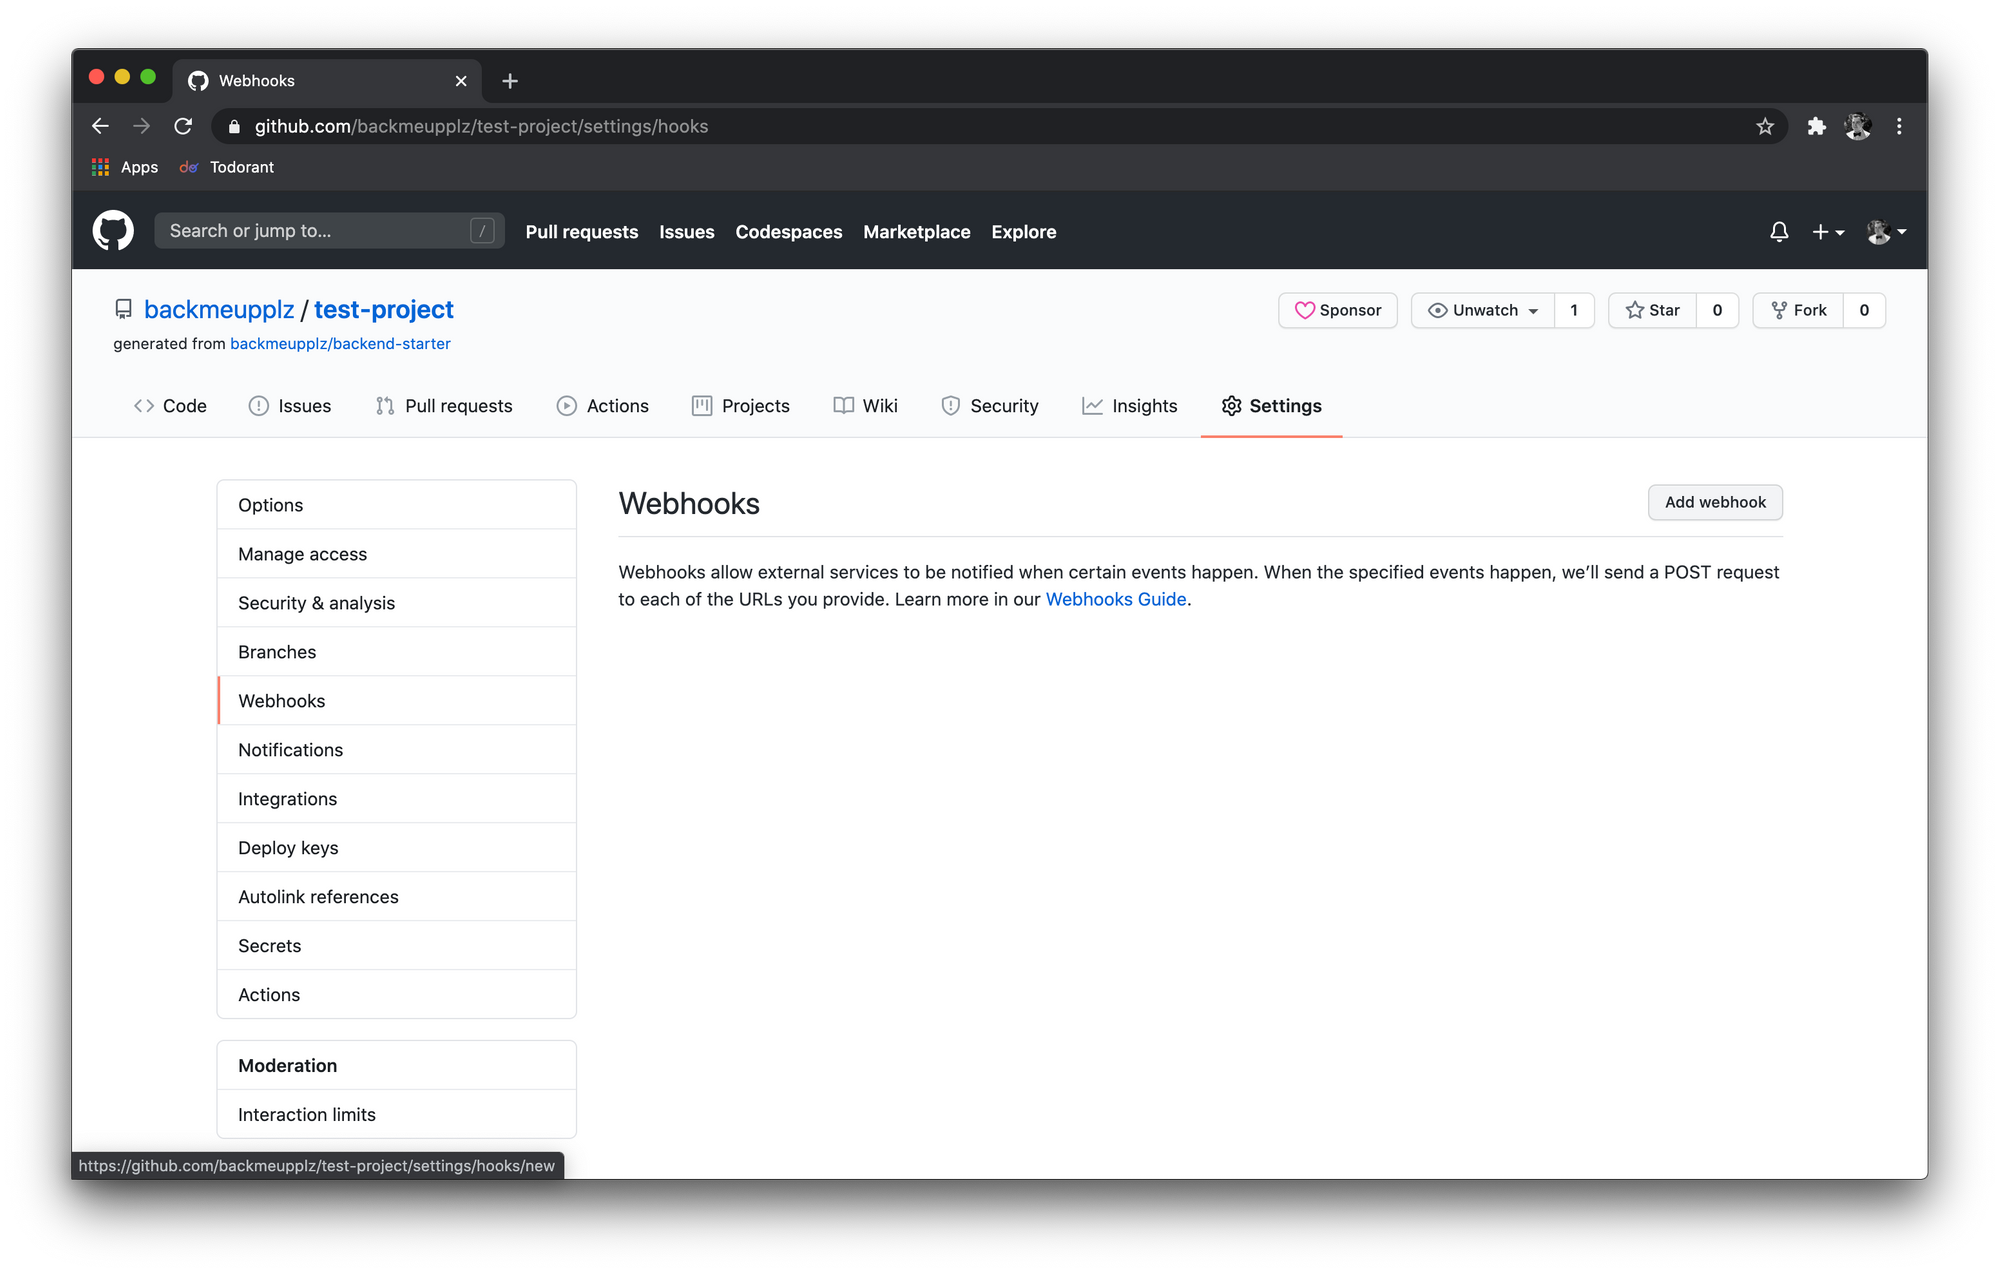
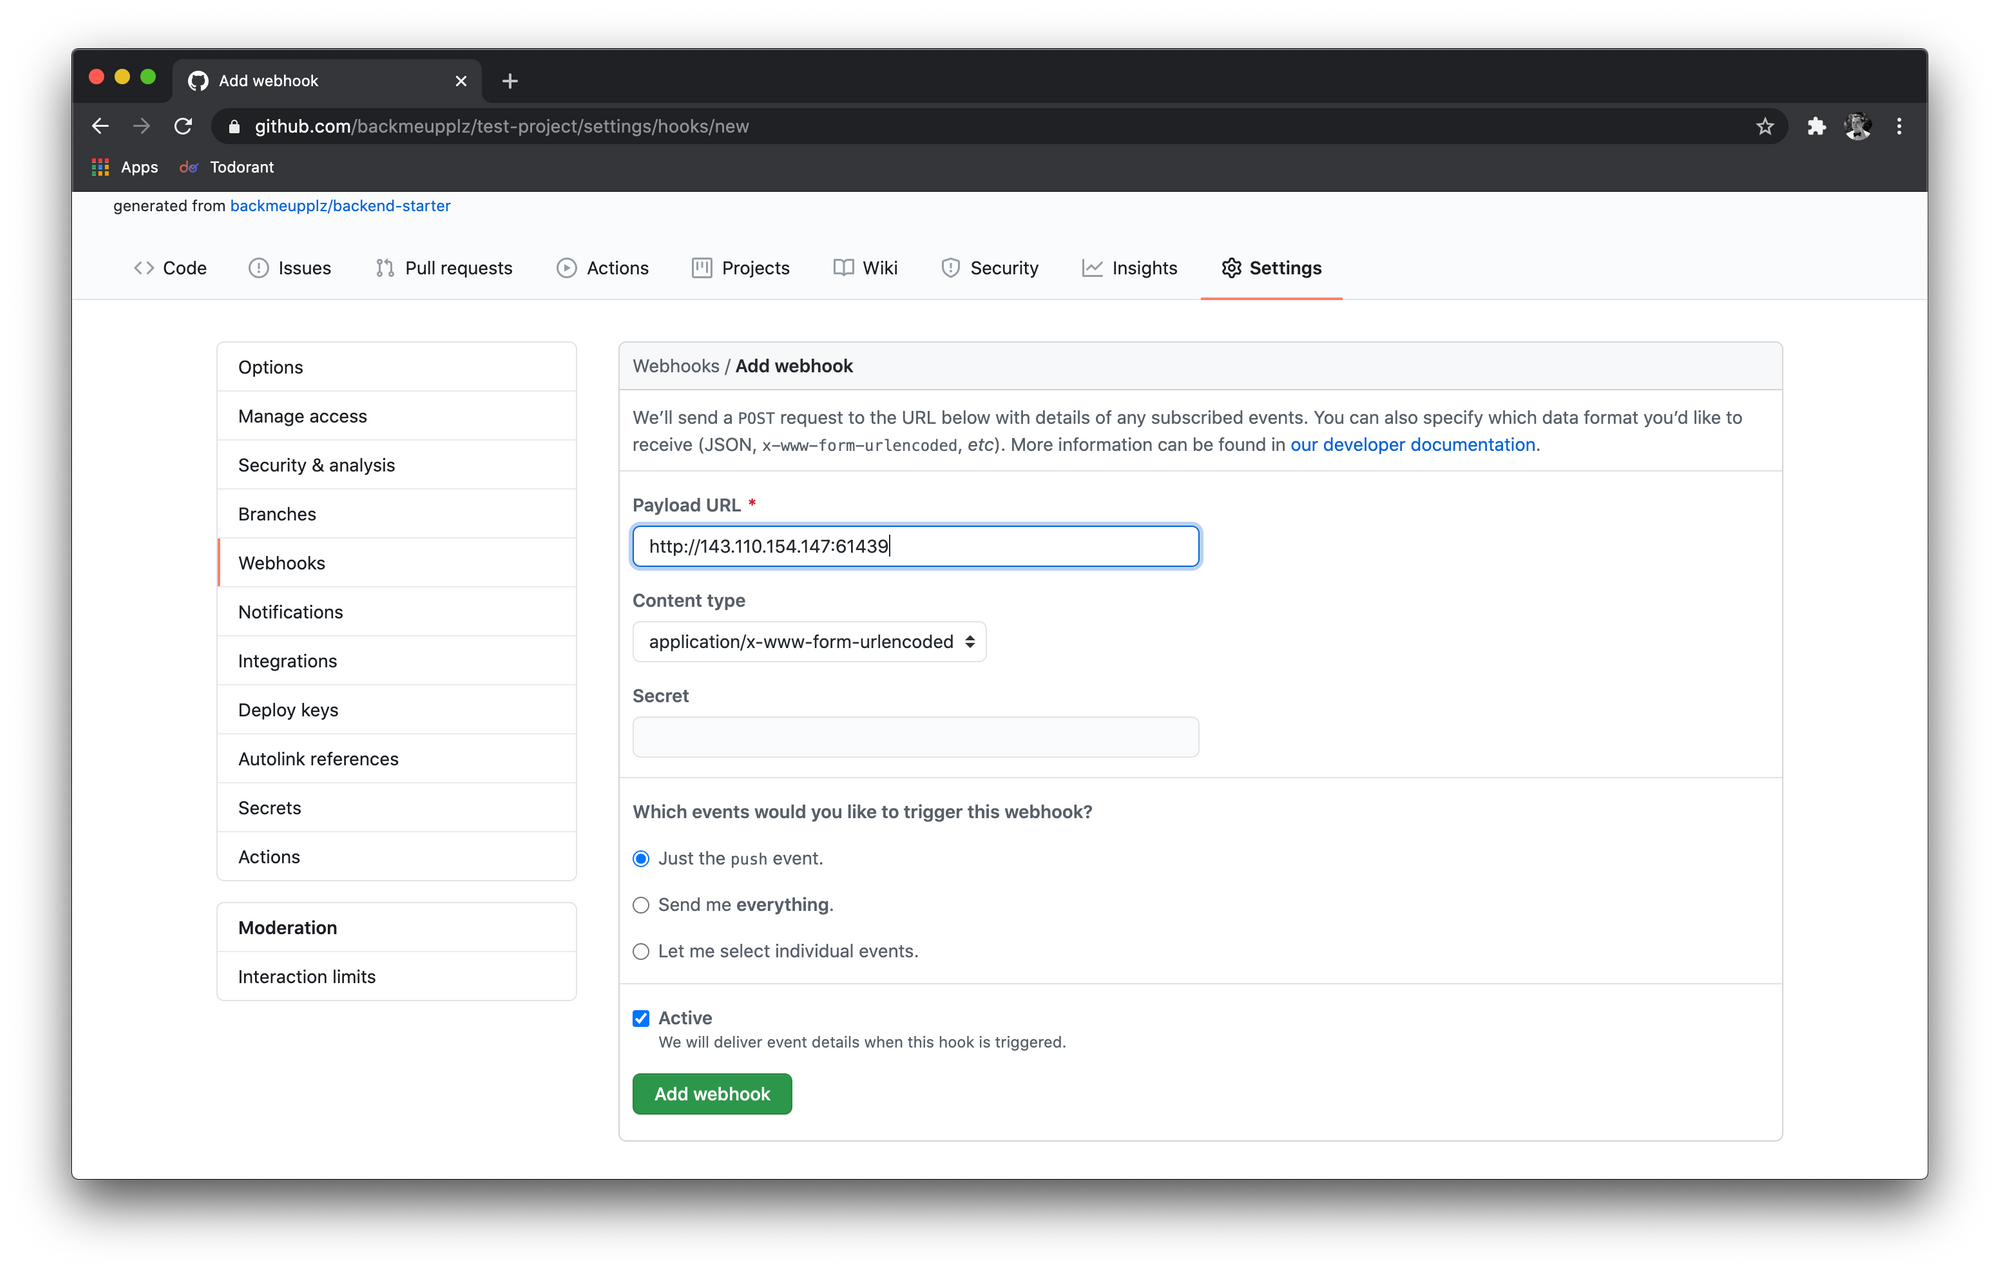
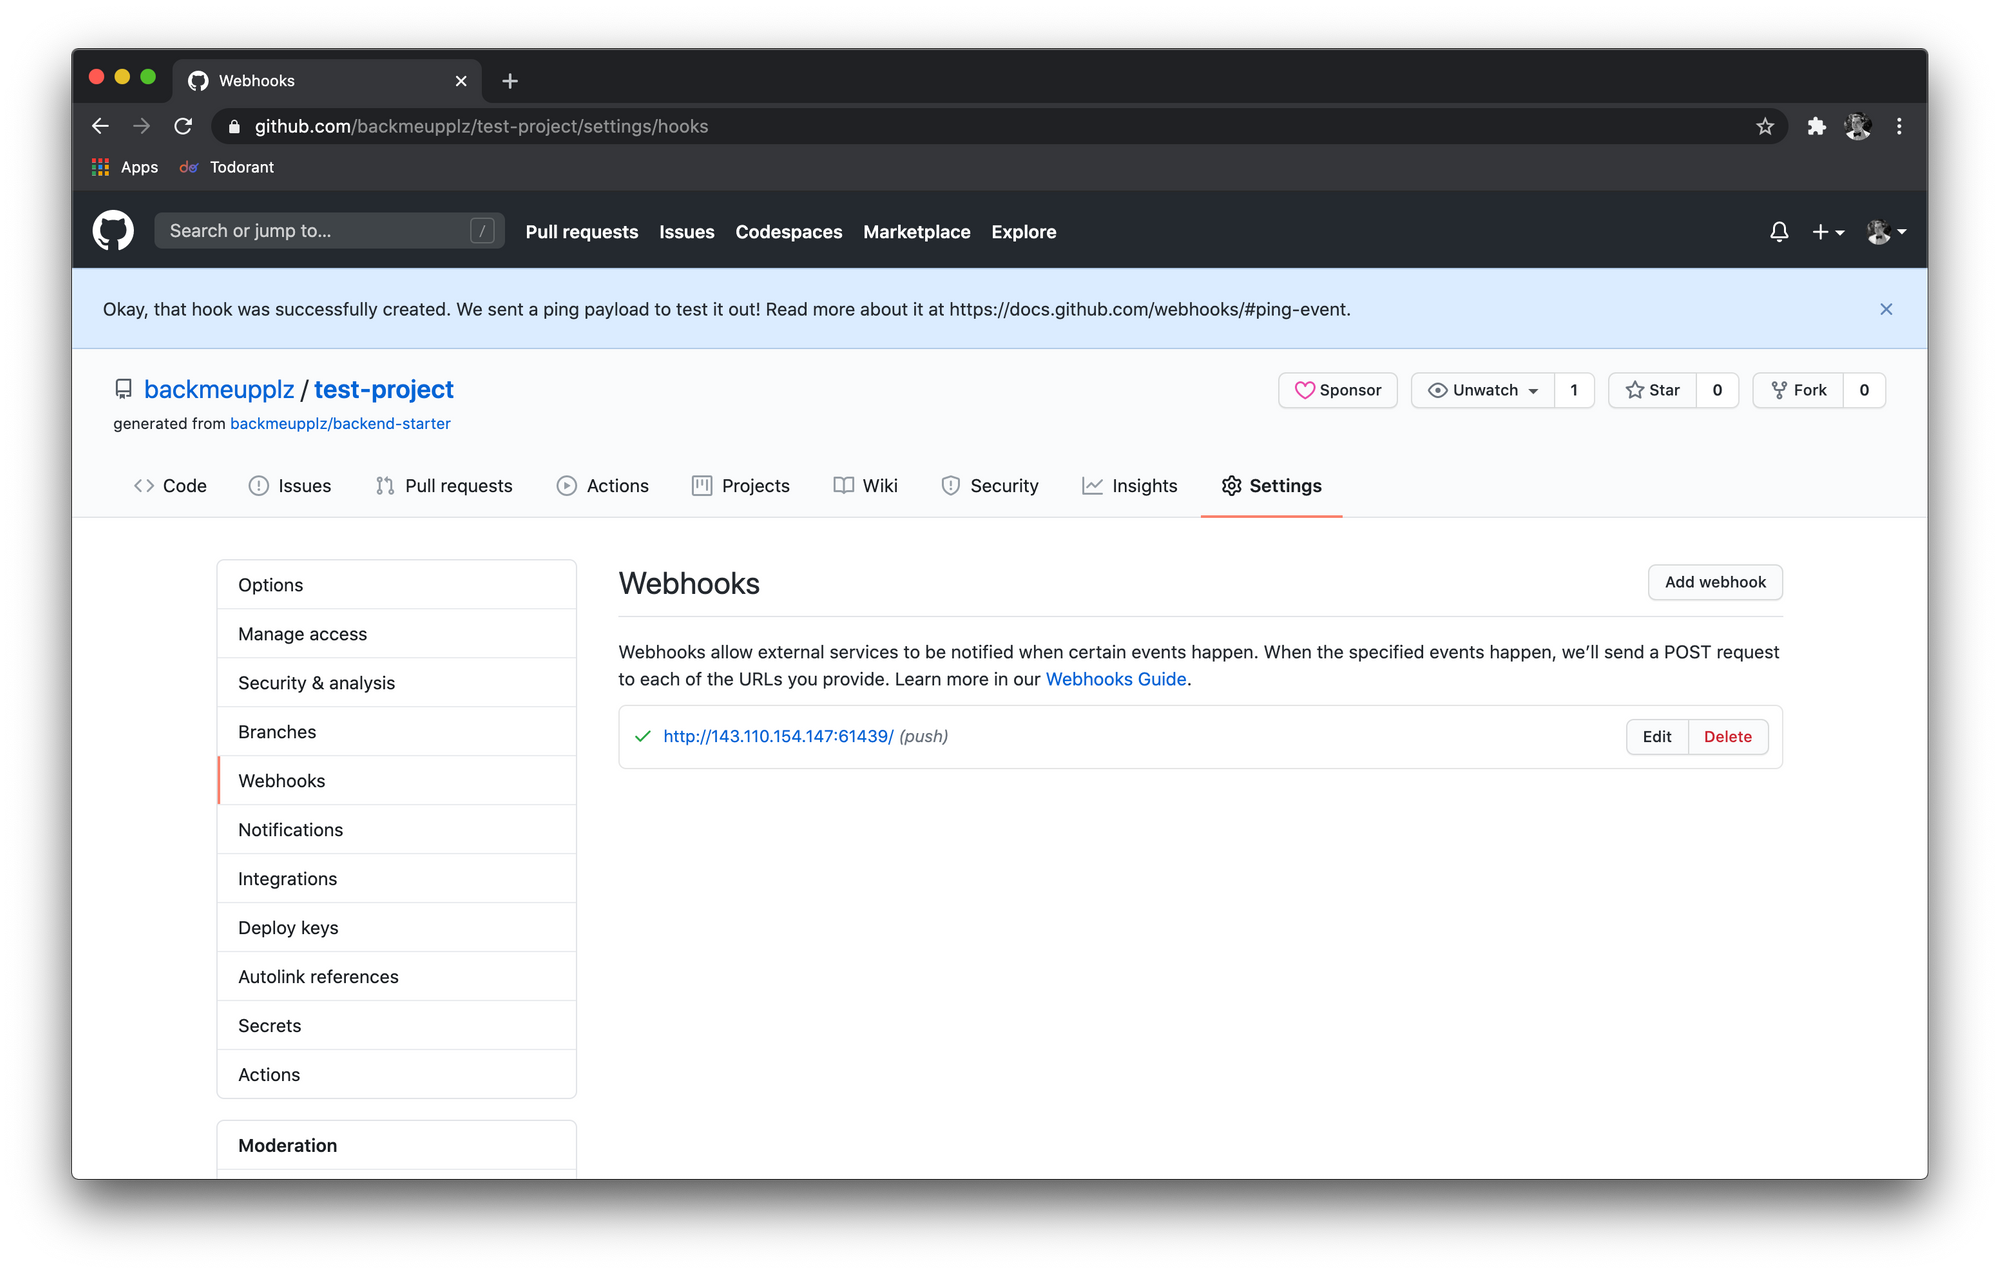
Now let’s call the test-project-master.sh script from GitHub every time we push a new change to master. Go to the GitHub repository that you created earlier, proceed to settings and go to the webhook setup. Put http://143.110.154.147:61439 as your URL (replacing the IP with yours) and select to only receive the push event. After adding this webhook, GitHub will try to connect to your server. If everything goes alright, GitHub will present you with a nice green checkmark beside the webhook that you’ve just created.
This is it! Now when you push to the master branch of your repository, your VPS will get a call from GitHub and launch the test-project-master.sh script that is going to update the code on VPS and reload the server. It is this simple, yes.
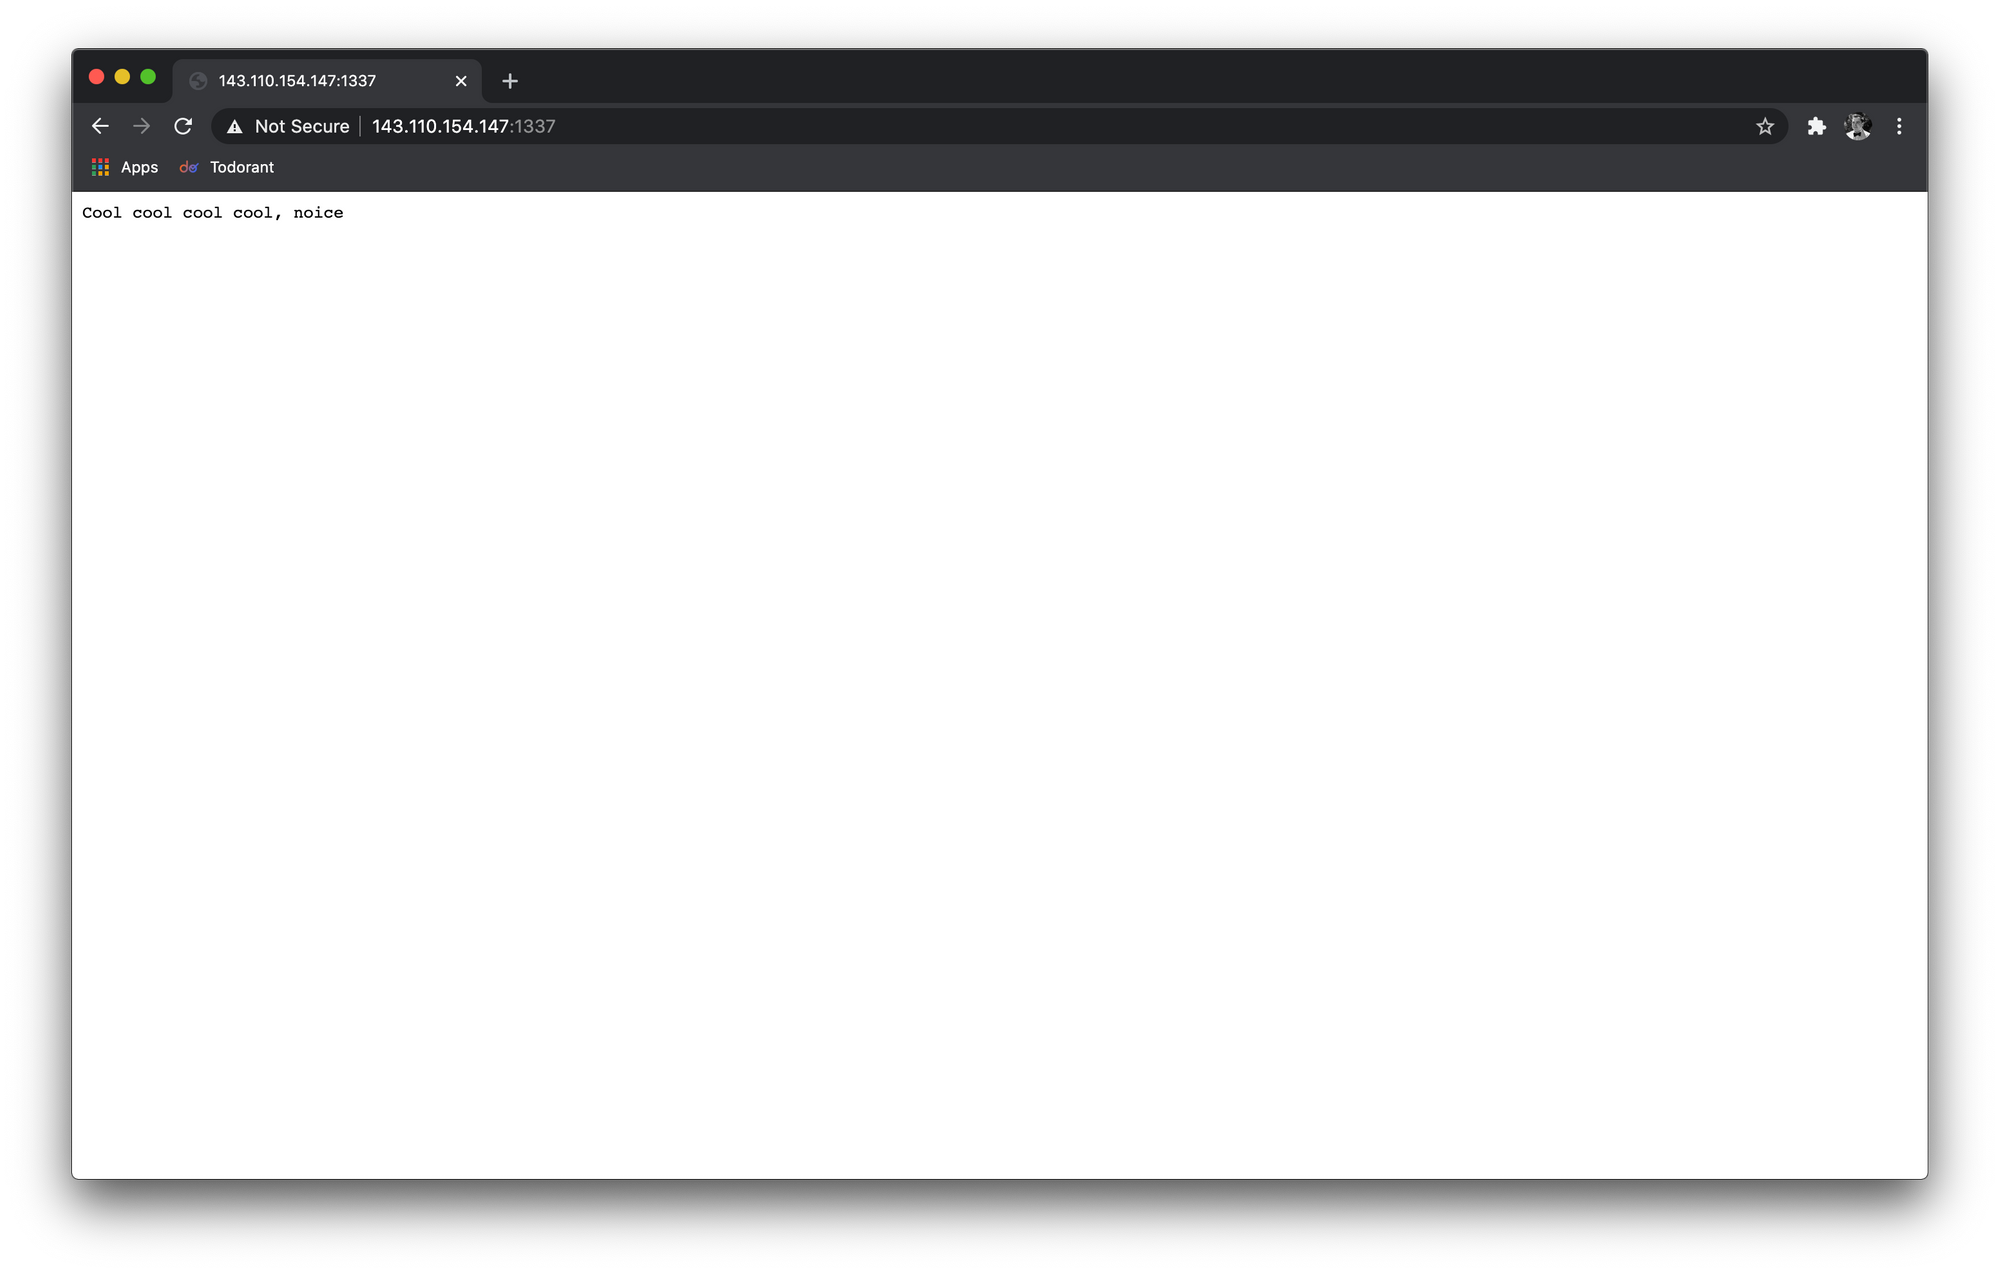
The only thing left is to test all of it. We are going to change my backend starter that we used before but you can change your files and push them if you have used your own code as a starter. Let’s run journalctl -u test-project -f to see logs of the server in real-time and let’s push some changes! It’s going to be pretty straightforward, just add a file to the local version of your project called src/controllers/public.ts with the following content:
import { Controller, Get } from 'koa-router-ts'
import { Context } from 'koa'
@Controller('/')
export default class {
@Get('/')
async facebook(ctx: Context) {
ctx.body = "Cool cool cool cool, noice"
}
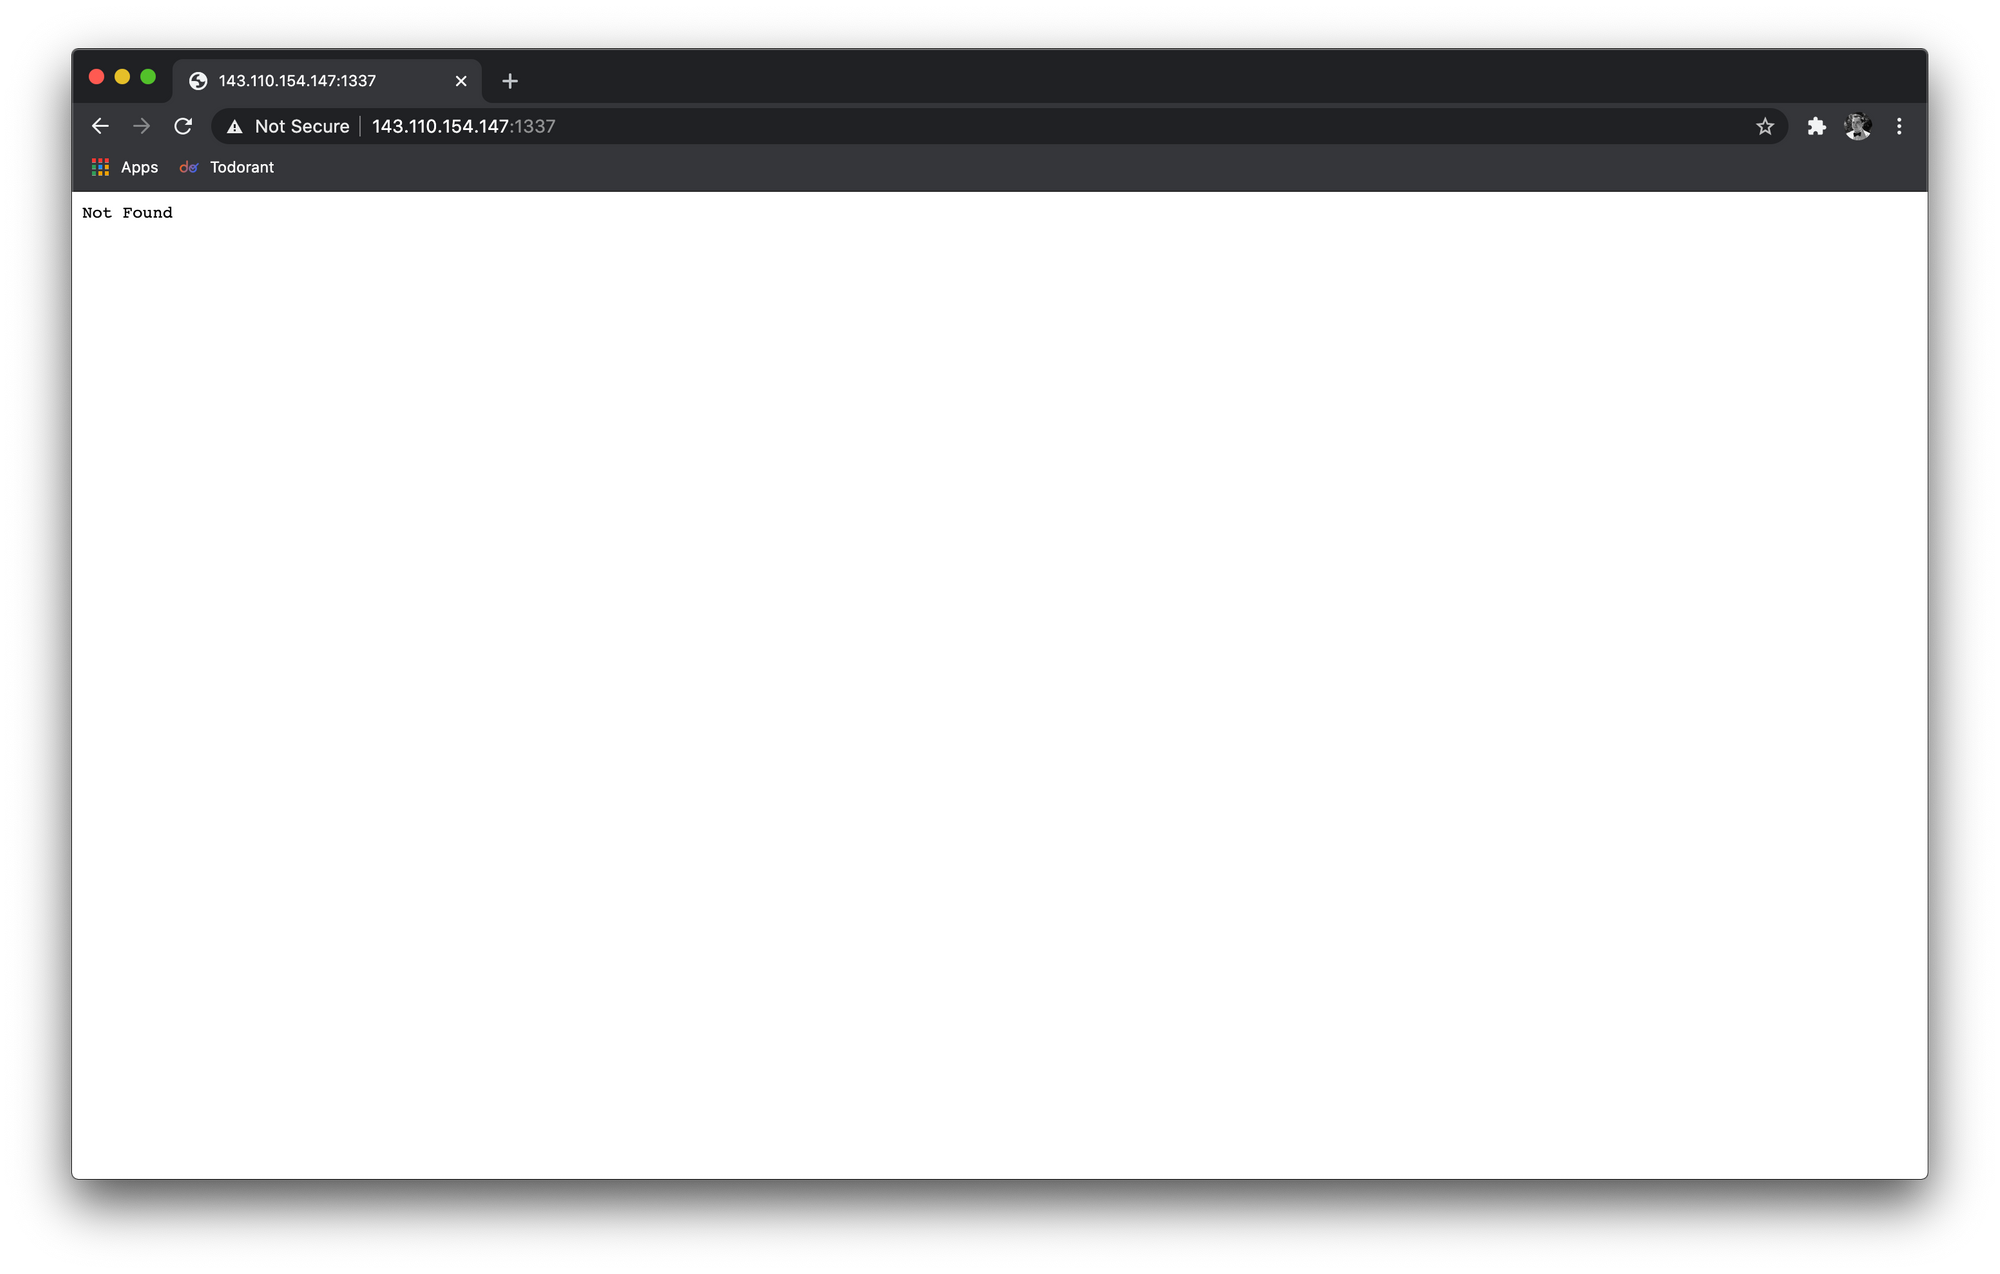
}Commit, push — and watch how ci-ninja does its magic. You can now proceed to http://178.128.252.62:1337 and see the new page that we’ve just created.
And you know what’s cool? Any change to themaster branch will instantly be deployed to the server! I mean, no matter how you change it — push to it, merge a pull request, somebody else pushes or merges into it — it will deploy automatically with no delay at all! And the only things you had to know were Node.js, Systemd and a bit of bash.
As a bonus, you can create multiple script files like test-project-develop.sh and test-project-staging.sh that will only respond to the corresponding branches. Also, using this approach you can deploy an almost infinite amount of web servers on the same droplet! I host ~10 or so bots on one $20/month droplet — thus, saving money.
Conclusion
That’s it, I hope I was able to show you how I deploy my servers to the cloud and have them running 24/7 without spending much money. If I had a typo, mistake or something doesn’t work — please, feel free to note that in the comments below.
Cheers!