How to setup Localizer for your product
In this article, I'll show you how to set up your own free open-source self-hosted crowd-translation service called Localizer


Localizer is a free open-source self-hosted crowd-translating platform with simple API. This article will explain how you can setup a website like localize.todorant.com and localize.borodutch.com in less than 30 minutes and enable your users to help you to translate your product as well as finally keep all of the translations centralized.
Localizer consists of two parts: backend (server) and frontend (user-facing interface like a website). This article will show you how to deploy the backend part to a Digital Ocean instance and the frontend part to GitHub Pages (yay, free hosting forever!)
Quick note: I’ve developed Localizer to support localizations for my project — Todorant.com. It’s a smart todo app that tricks primitive brain into completing tasks. Go check it out in case Localizer somehow helps you reduce the amount of work you do to maintain different localizations! Todorant also has iOS and Android apps avaliable.
Backend
We’ll get the difficult part out of the way first. I’m going to deploy the server to Digital Ocean and Ubuntu 20.04. You can use any other way to host the backend — Digital Ocean is just the one I use most of the time. Speaking about it, please, do register following my Digital Ocean referral link. You get $50 off, I get $25 off when you spend your first $25. This will support me (and Localizer) directly.
Follow my referral link and register an account with Digital Ocean. After this step, you will be presented by the empty screen with no projects yet.

Create a new Droplet. I like to start with the latest Ubuntu and the smallest plan (you can always scale up later). Just make sure that when you scale you keep in mind that the only thing that can’t scale back is the storage of your droplet. So if you scale the storage up — you cannot go back.

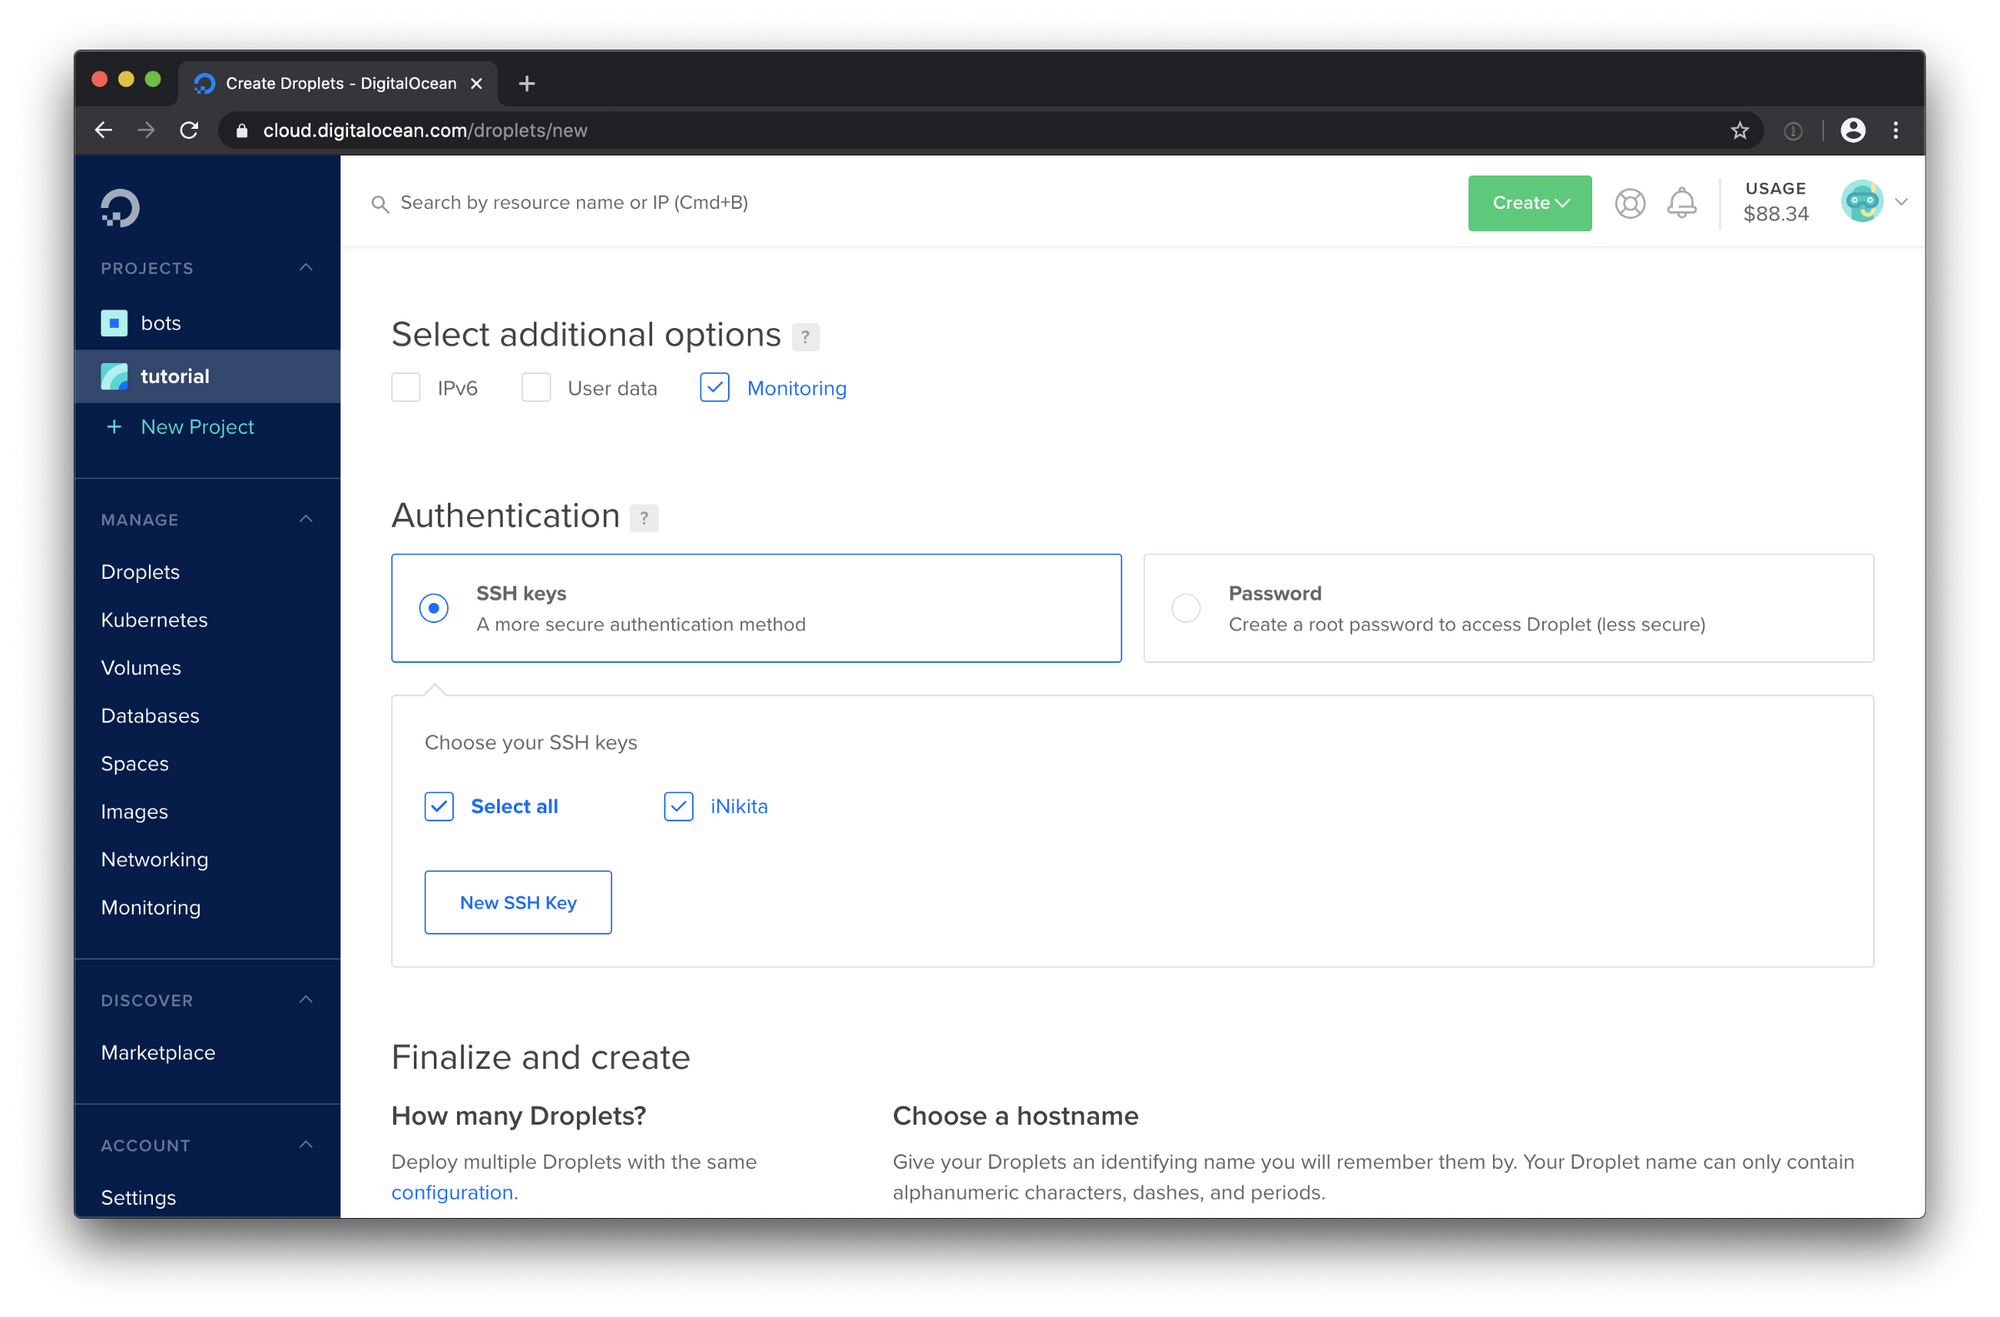
Don’t worry about the volumes — you will be able to add them later on the fly without troubles. Pick any region you want — I like to stick to Amsterdam because it seems like it has the lowest ping to the Telegram bot API servers. Turn on monitoring feature — it’s a cool thing to have, especially with the new type of email alerts that Digital Ocean has implemented.
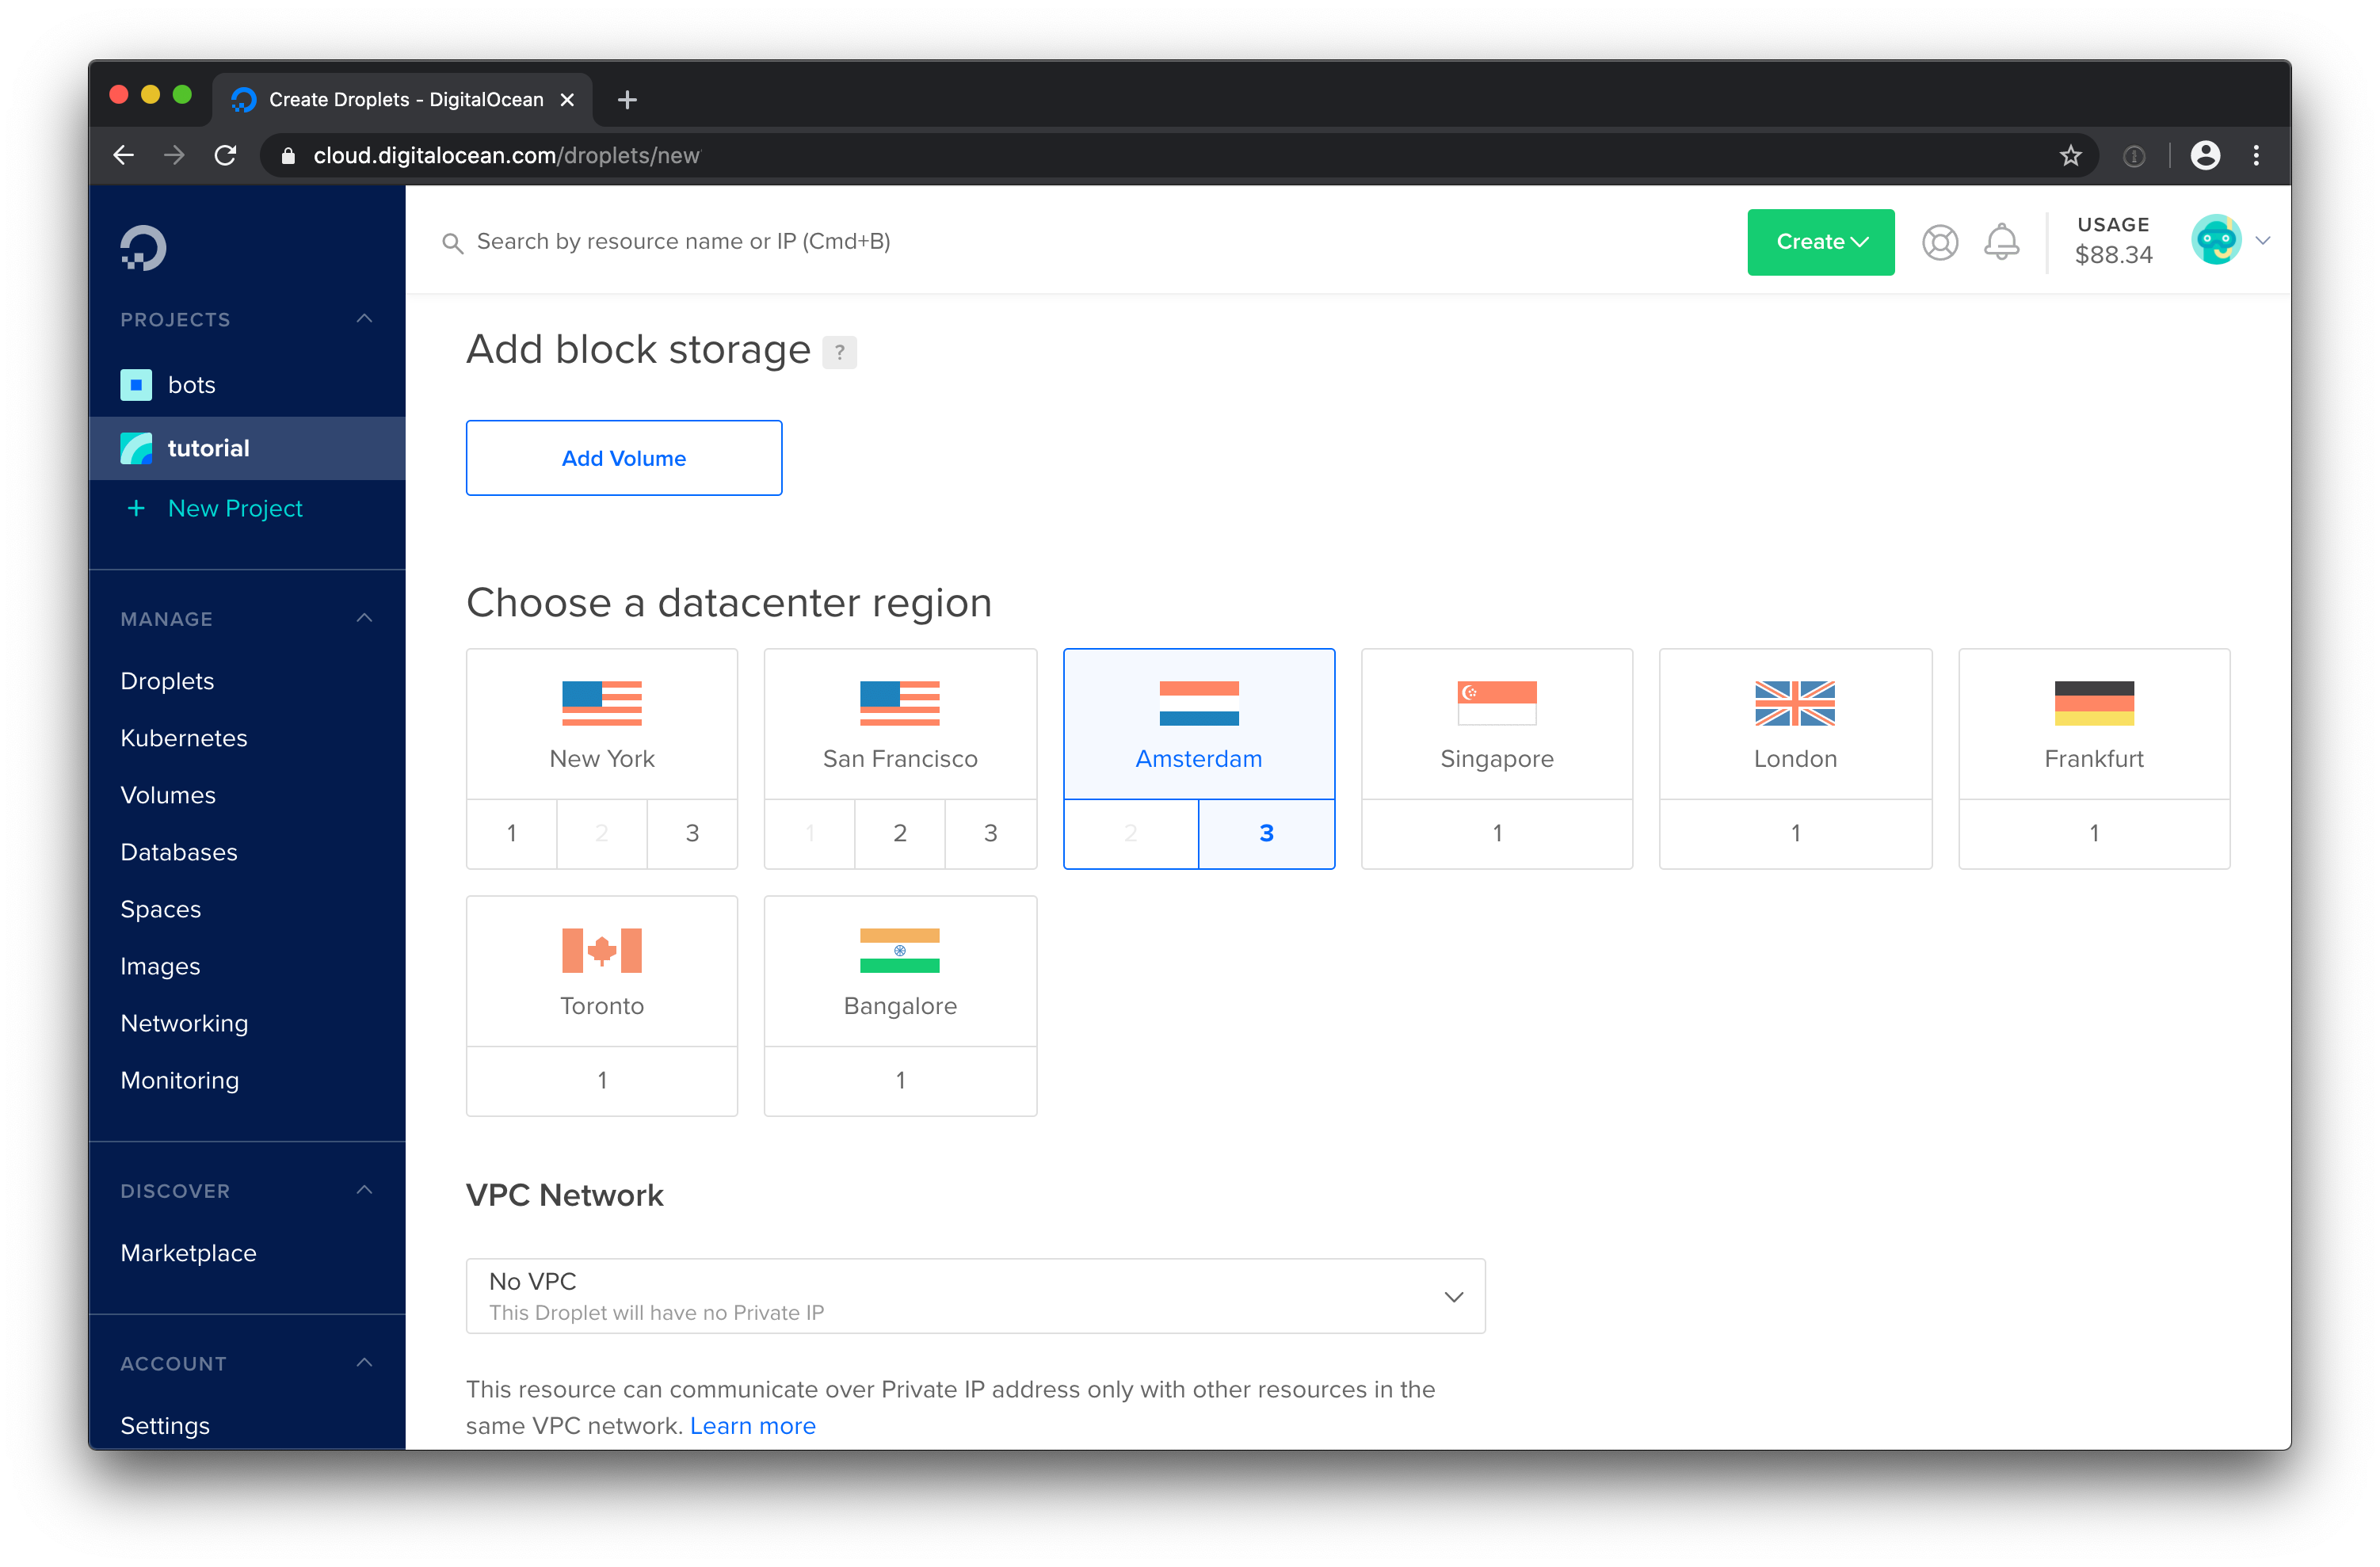
Now, generate an SSH key if you haven’t already. Check out this link with the tutorial on how to obtain one. You will need your public part of the SSH key, usually ~/.ssh/id_rsa.pub. Take the contents of this file and add it as a new SSH key during the droplet creation. Select SSH as your method of authentication — don’t be the guy who uses one-time passwords.
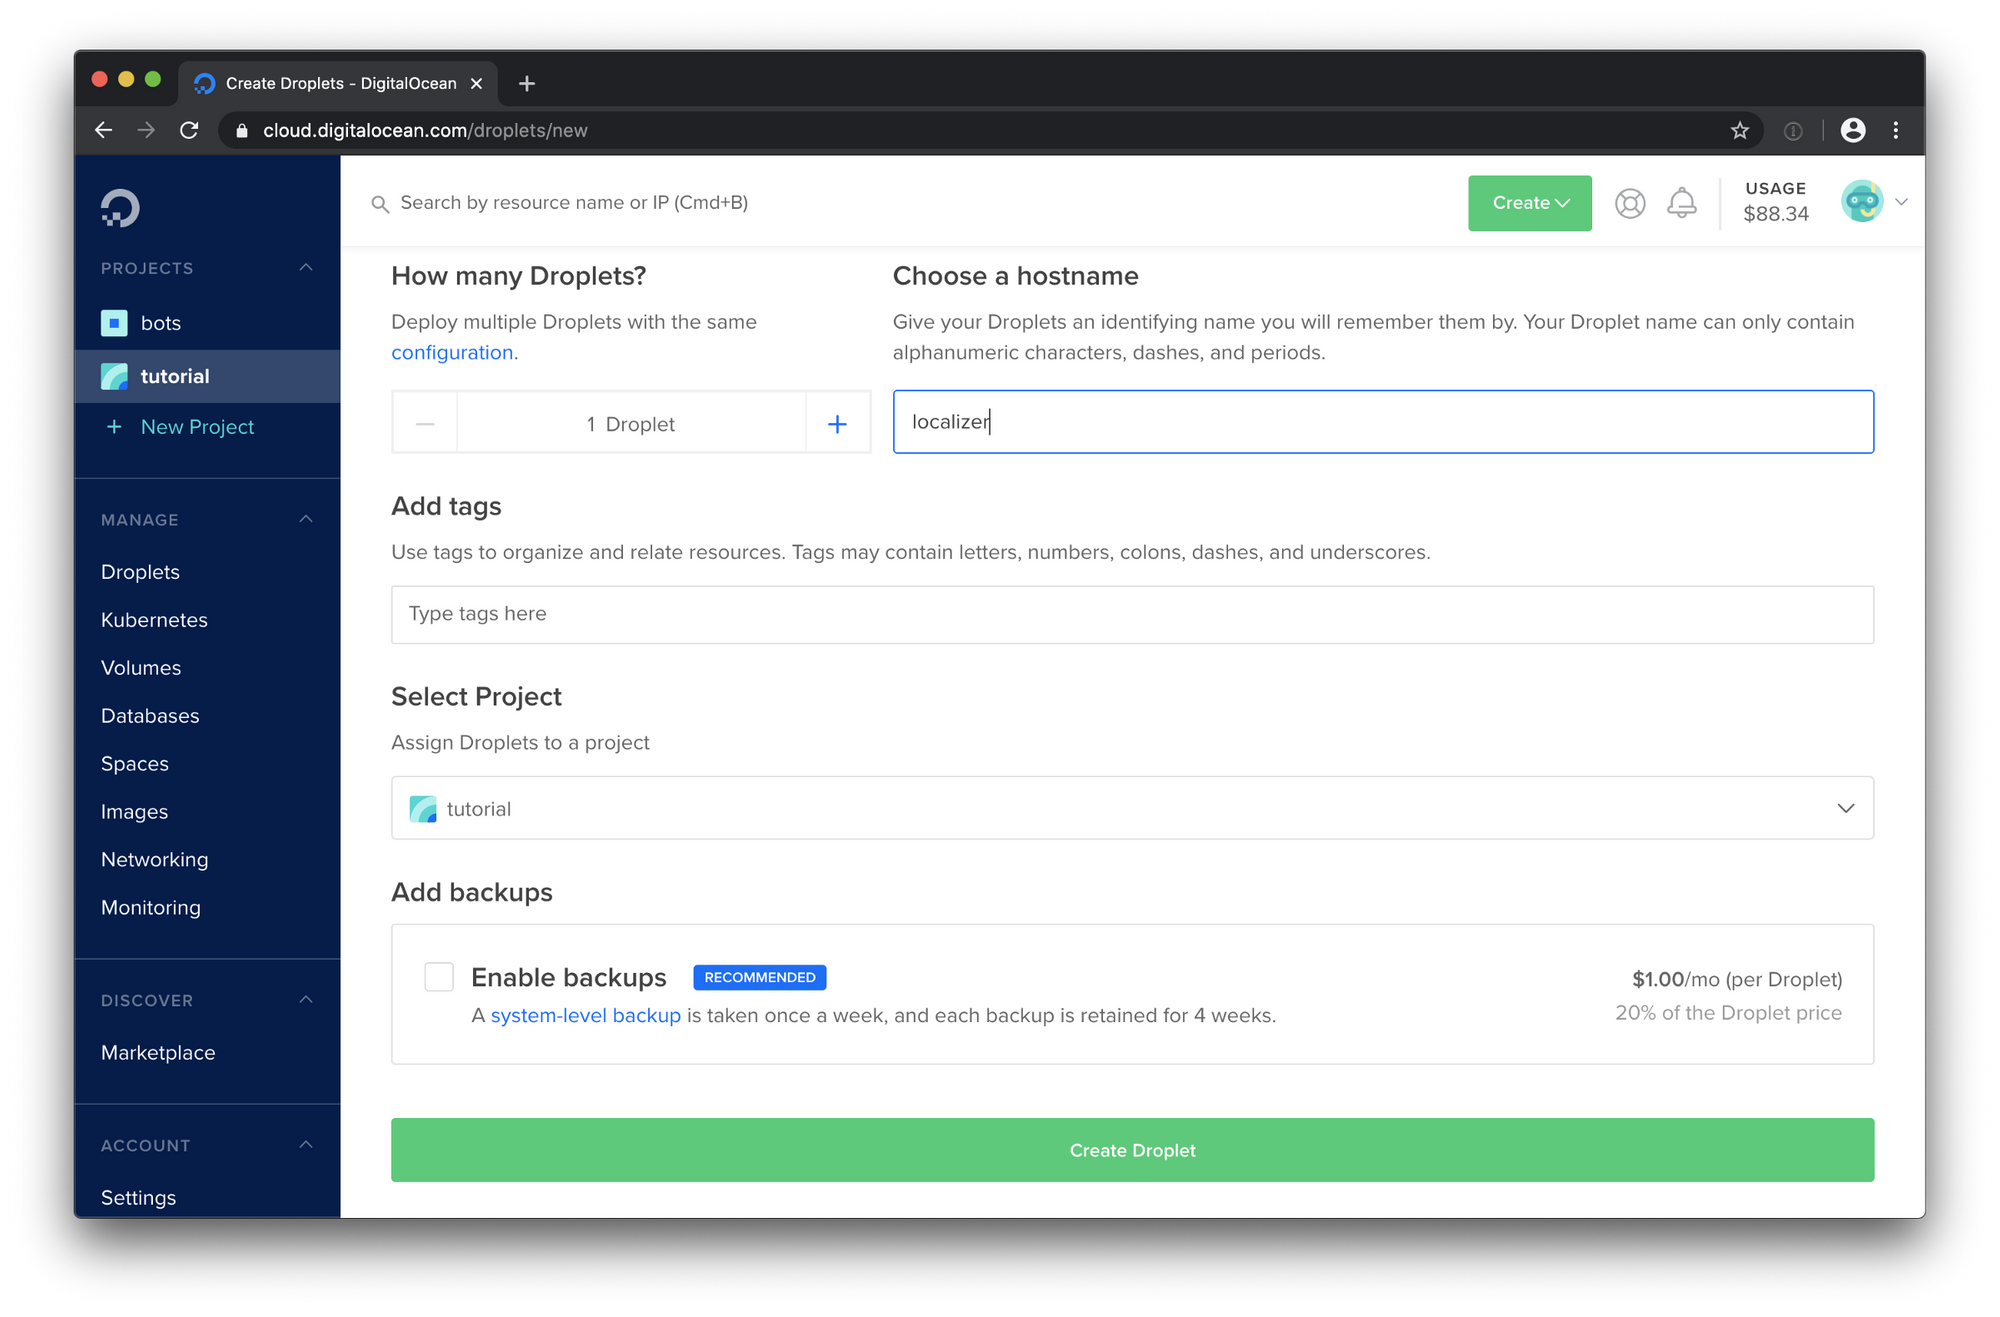
Choose a name for your droplet, don’t be the guy who doesn’t rename the droplets. Add some tags if you wish, enable backups if you want (you know, there are two types of administrators: the ones who back up and the ones who back up now). Click the large button to create the droplet, wait a bit and here you go — you’ve got yourselves a server!
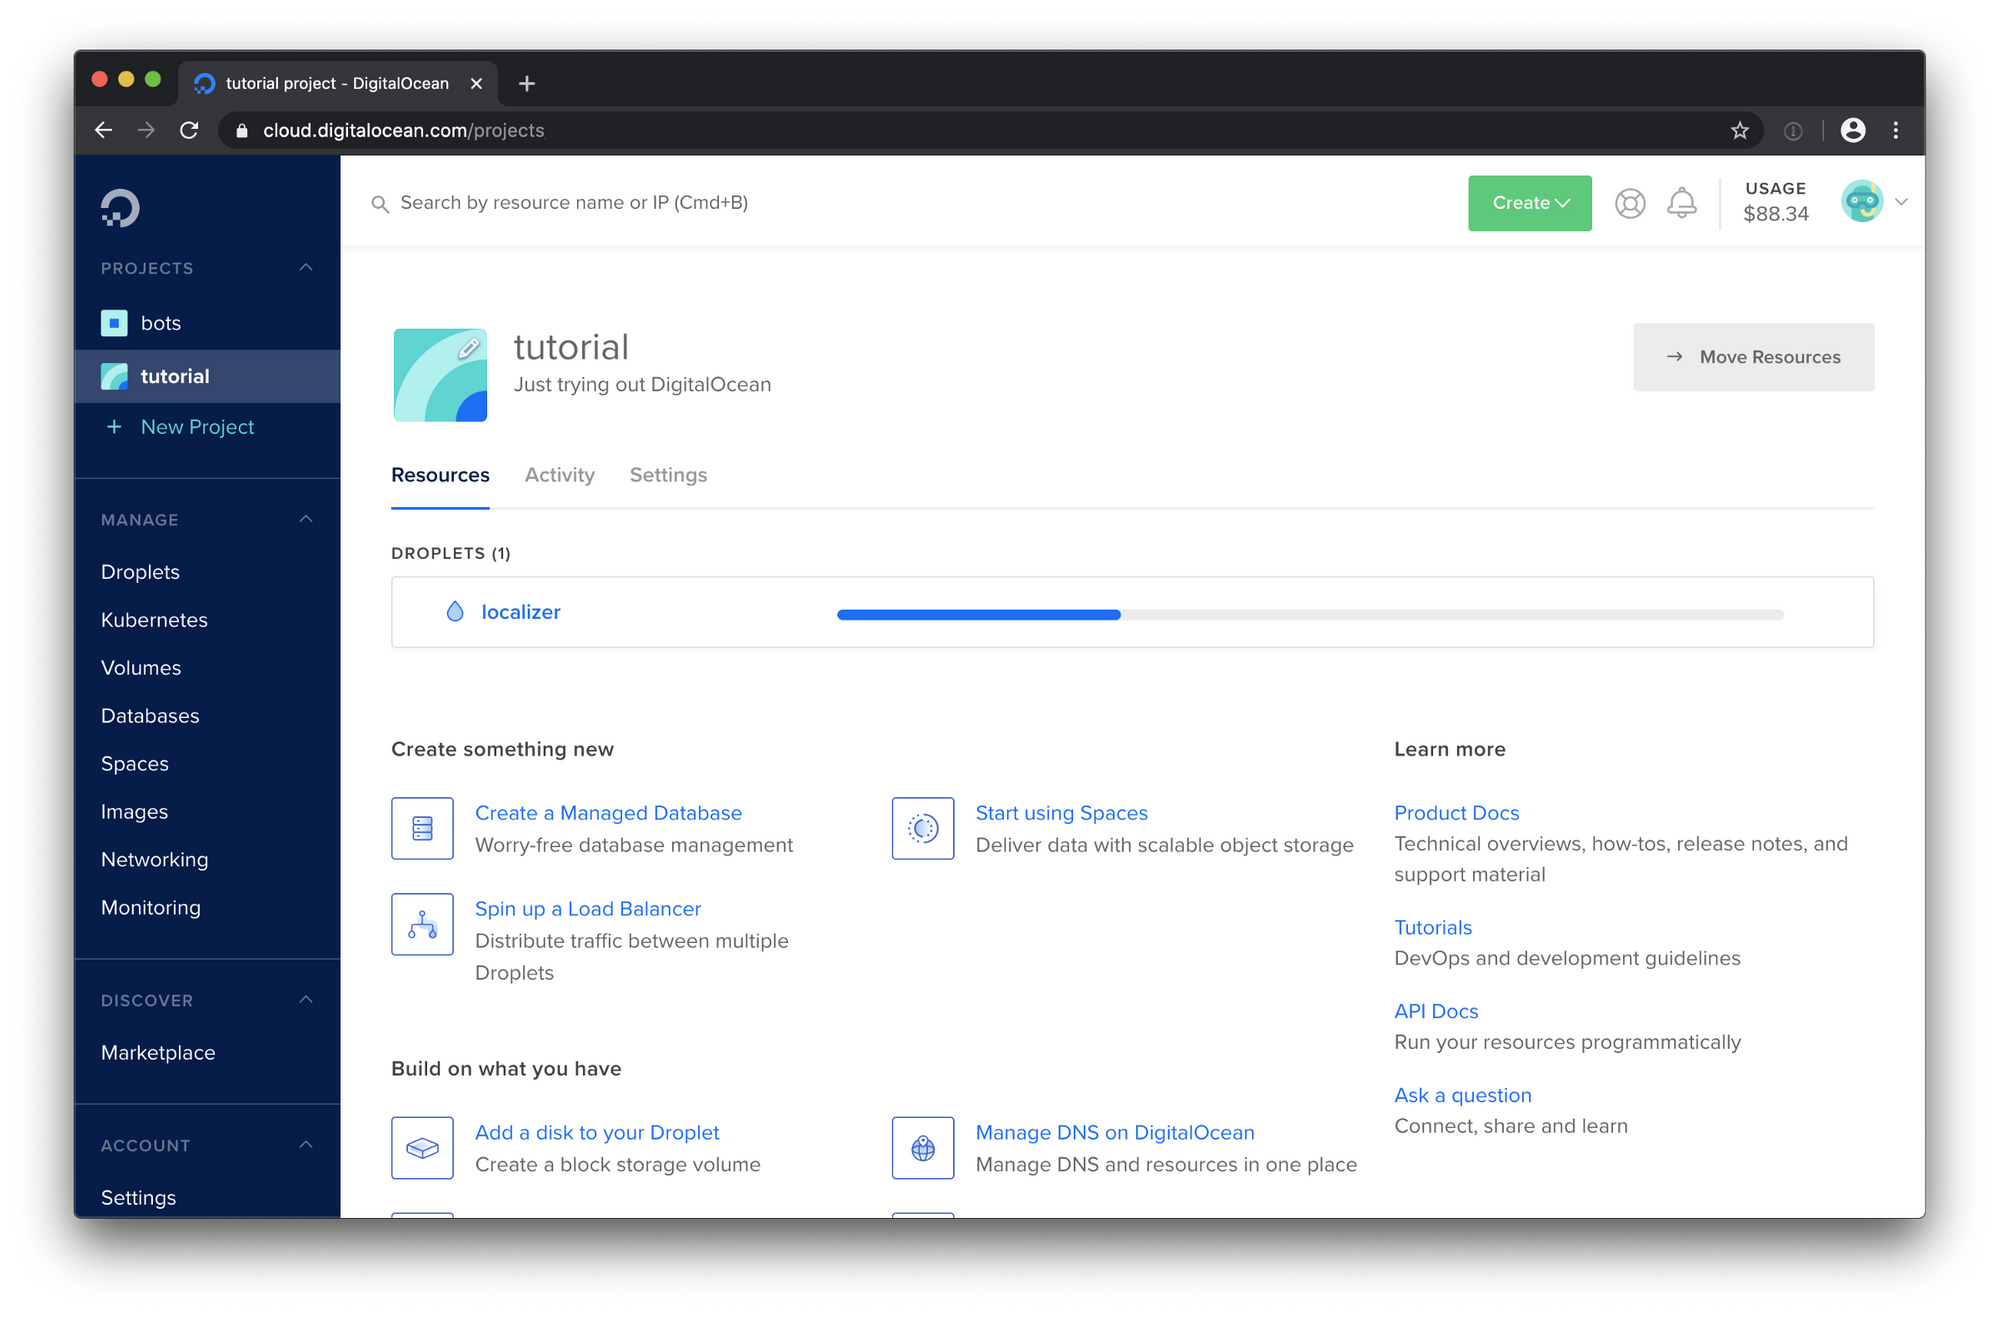
Note the IP address of your droplet. From now on — this is the thing you’re going to use most, you can forget about the Digital Ocean dashboard now, it has served its purpose. From now on, this tutorial is going to be compatible with any VPS servers running Ubuntu or other Linux distros.

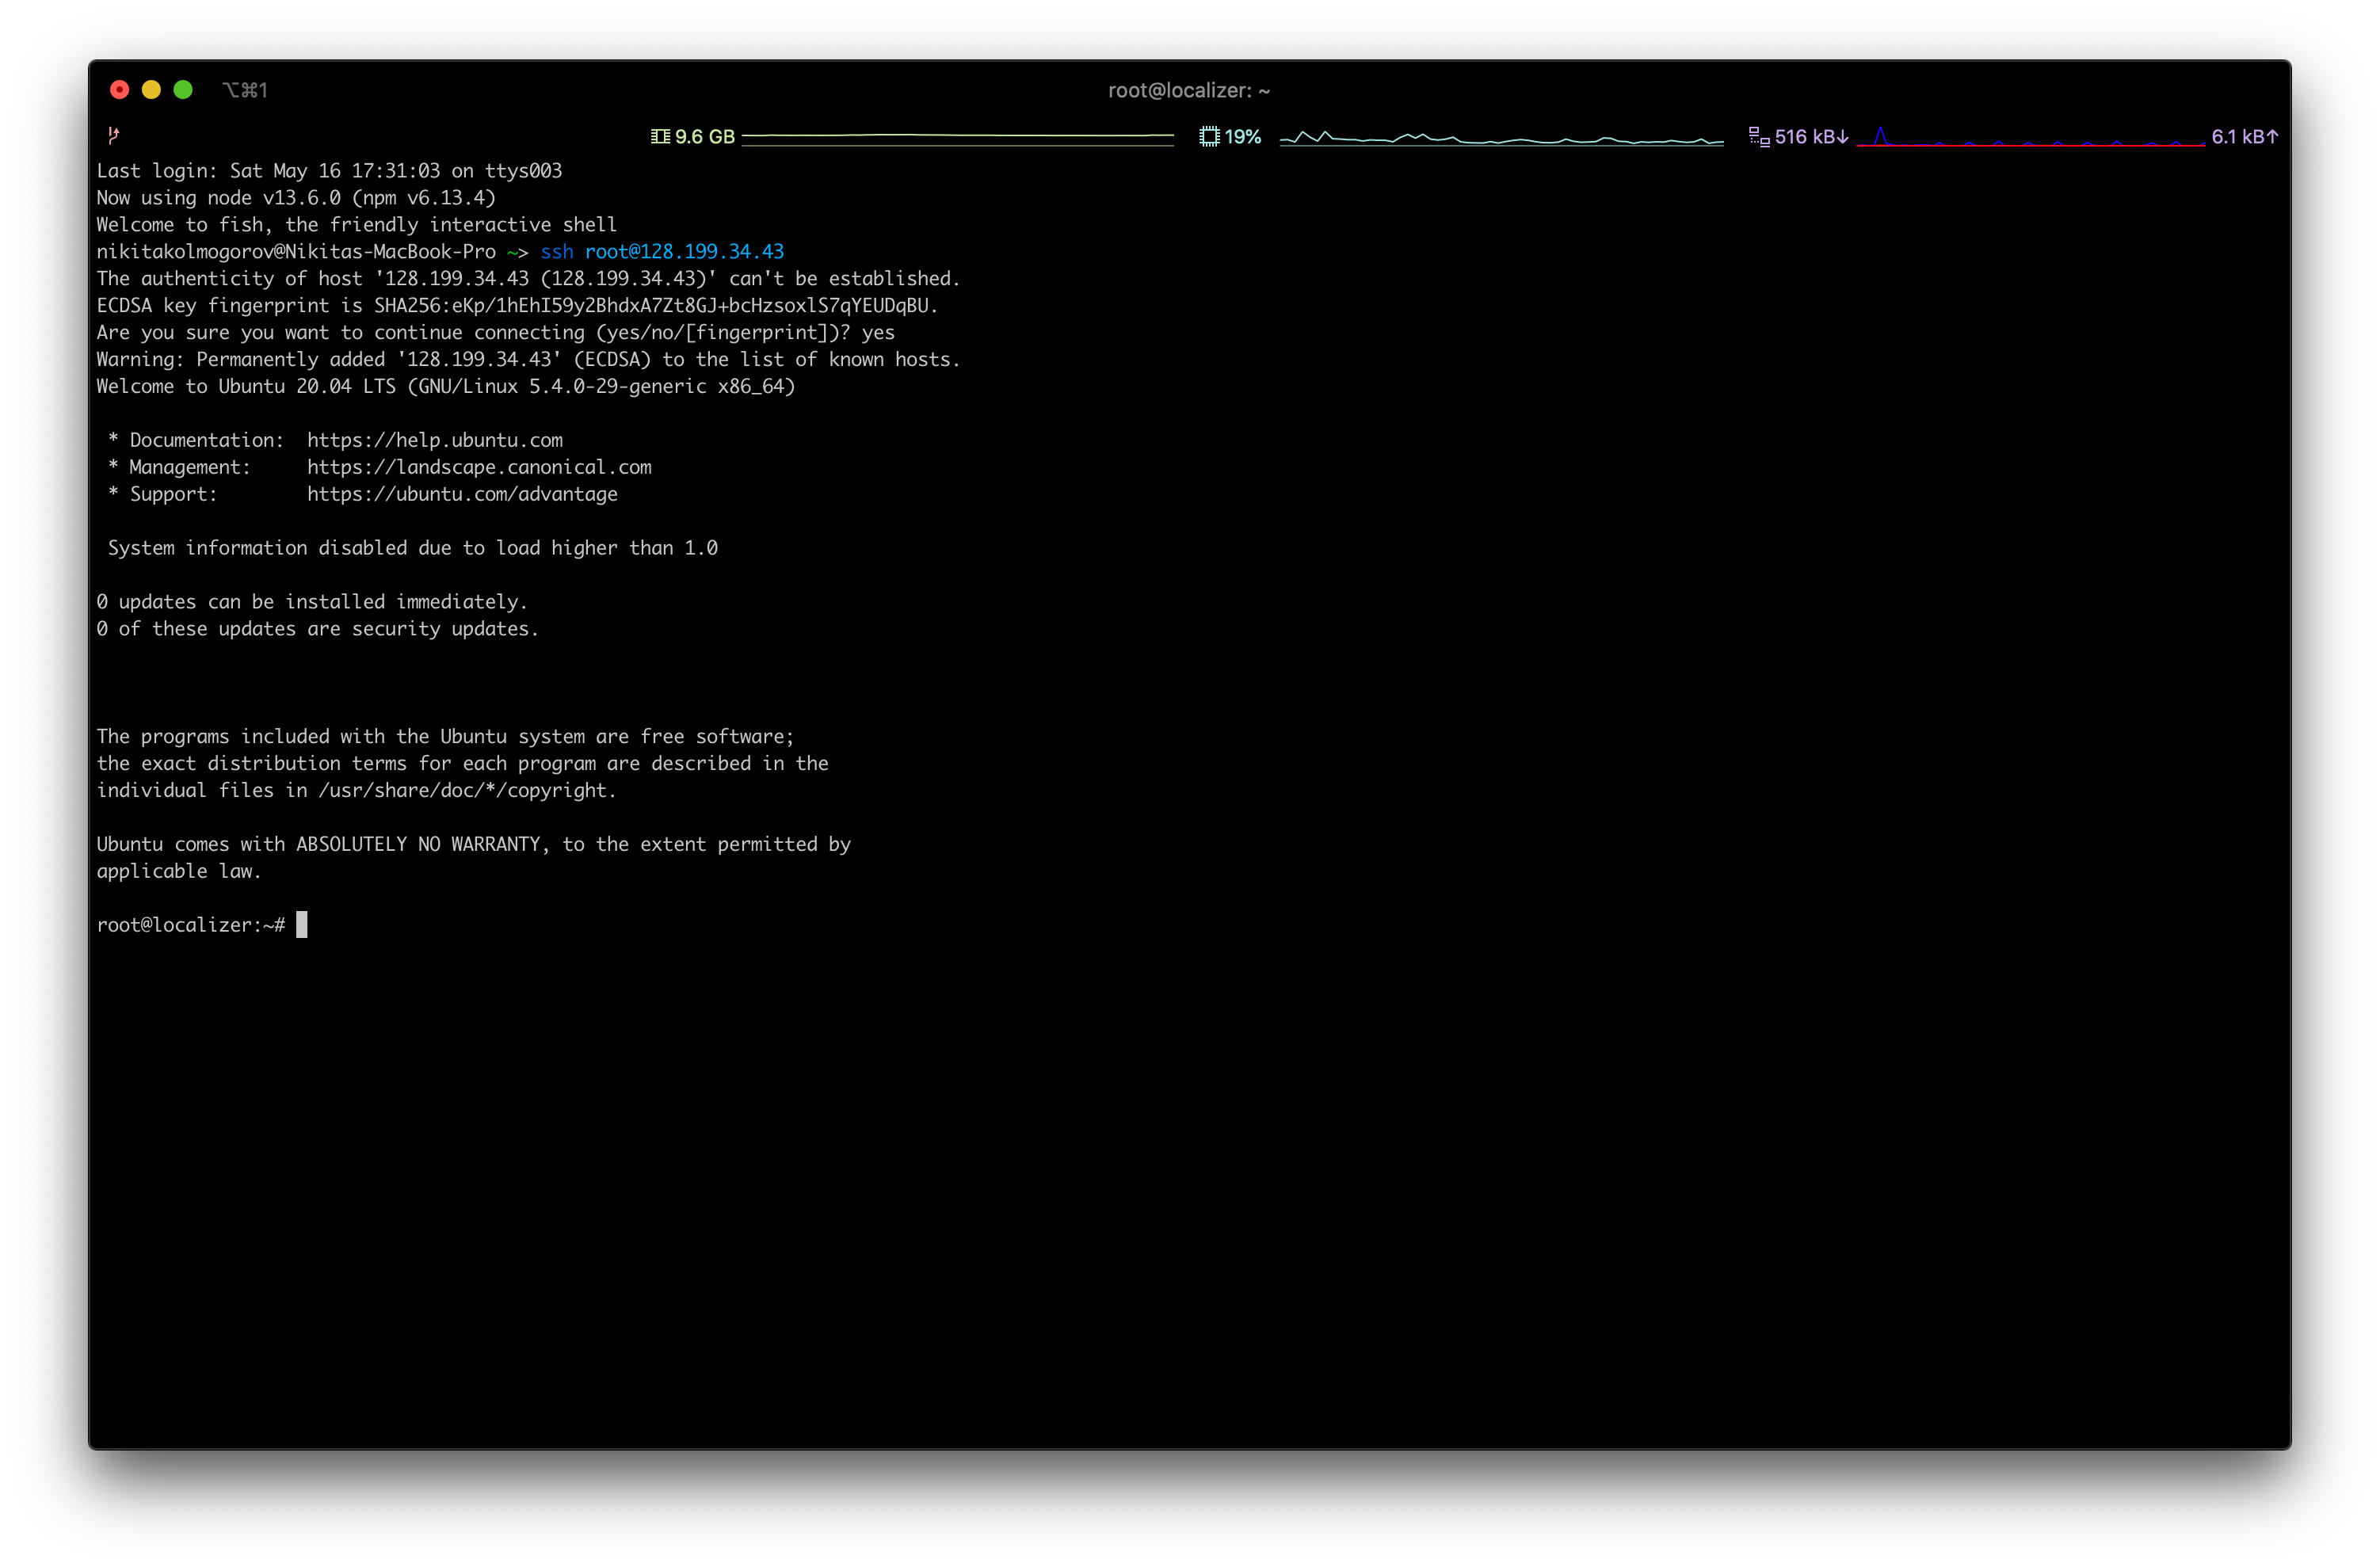
Ok, now SSH into your server. I usually do it like ssh [email protected] — obviously, you are going to have your own IP address of the VPS machine that you have created. For the sake of this tutorial, I’m going to use the root user, but I highly discourage you to use the root user at any time. There are plenty of cool tutorials like this one about how to manage user roles on your VPS, go do the research, it will pay off eventually.

Let’s install nvm, node, yarn, MongoDB — the tech stack used by Localizer.
Installing nvm is simple. You just copy and paste the command from the official repo: curl -o- https://raw.githubusercontent.com/nvm-sh/nvm/v0.35.3/install.sh | bash. It’s better to copy the line from the repo though to download the latest version.

Relaunch your terminal (or just exit from your VPS) and SSH to your VPS again. Then do nvm install node to install the latest Node.js. It is this simple, yes. Run node -v to verify the installation.

Install yarn with the command npm i -g yarn. We will use yarn instead of npm, because this article is highly opinionated and the author thinks that yarn is a bit faster than npm.

Then just follow the most recent official documentation on how to install MongoDB on your Ubuntu VPS. But it all comes down to running a few commands:
wget -qO — https://www.mongodb.org/static/pgp/server-4.2.asc | sudo apt-key add -

echo "deb [ arch=amd64 ] https://repo.mongodb.org/apt/ubuntu bionic/mongodb-org/4.2 multiverse" | sudo tee /etc/apt/sources.list.d/mongodb-org-4.2.list

sudo apt-get update

sudo apt-get install -y mongodb-org

systemctl enable mongod

systemctl start mongod
You can check if installation succeeded by running systemctl status mongod.

Now we need to modify the MongoDB config file. You can do it by running nano /etc/mongod.conf. Change it to something like:
storage:
  dbPath: /var/lib/mongodb
  journal:
    enabled: true
systemLog:
  destination: file
  logAppend: true
  path: /var/log/mongodb/mongod.log
net:
  port: 27017
  bindIp: "127.0.0.1,128.199.34.43"
processManagement:
  timeZoneInfo: /usr/share/zoneinfo
Hint: ctrl+k deletes a line in nano. Replace 128.199.34.43 with your VPS IP address. Notice how we didn’t set the authorization flag yet. We will do so after we create the admin user for the DB. Save the file (ctrl+x, then y, then return). Now restart the MongoDB instance with systemctl restart mongod and verify that it works with systemctl status mongod.

Let’s create an admin user for our MongoDB. You can read more on how to create more restricted users in this article, but here we’ll roll with the admin user for the sake of simplicity. Run mongo which will open Mongo Shell and write the following two commands:
use admin

db.createUser(
  {
    user: "useradmin",
    pwd: passwordPrompt(),
    roles: [ "userAdminAnyDatabase", "readWriteAnyDatabase" ]
  }
)
Then enter a strong enough password. Remember it — you will need it later. Run nano /etc/mongod.conf again and change it to (don't forget to change your IP):
storage:
  dbPath: /var/lib/mongodb
  journal:
    enabled: true
systemLog:
  destination: file
  logAppend: true
  path: /var/log/mongodb/mongod.log
net:
  port: 27017
  bindIp: "127.0.0.1,128.199.34.43"
processManagement:
  timeZoneInfo: /usr/share/zoneinfo
security:
    authorization: "enabled"
Notice the last part where we enable the authorization. This will ensure that no one can access the database without the password.

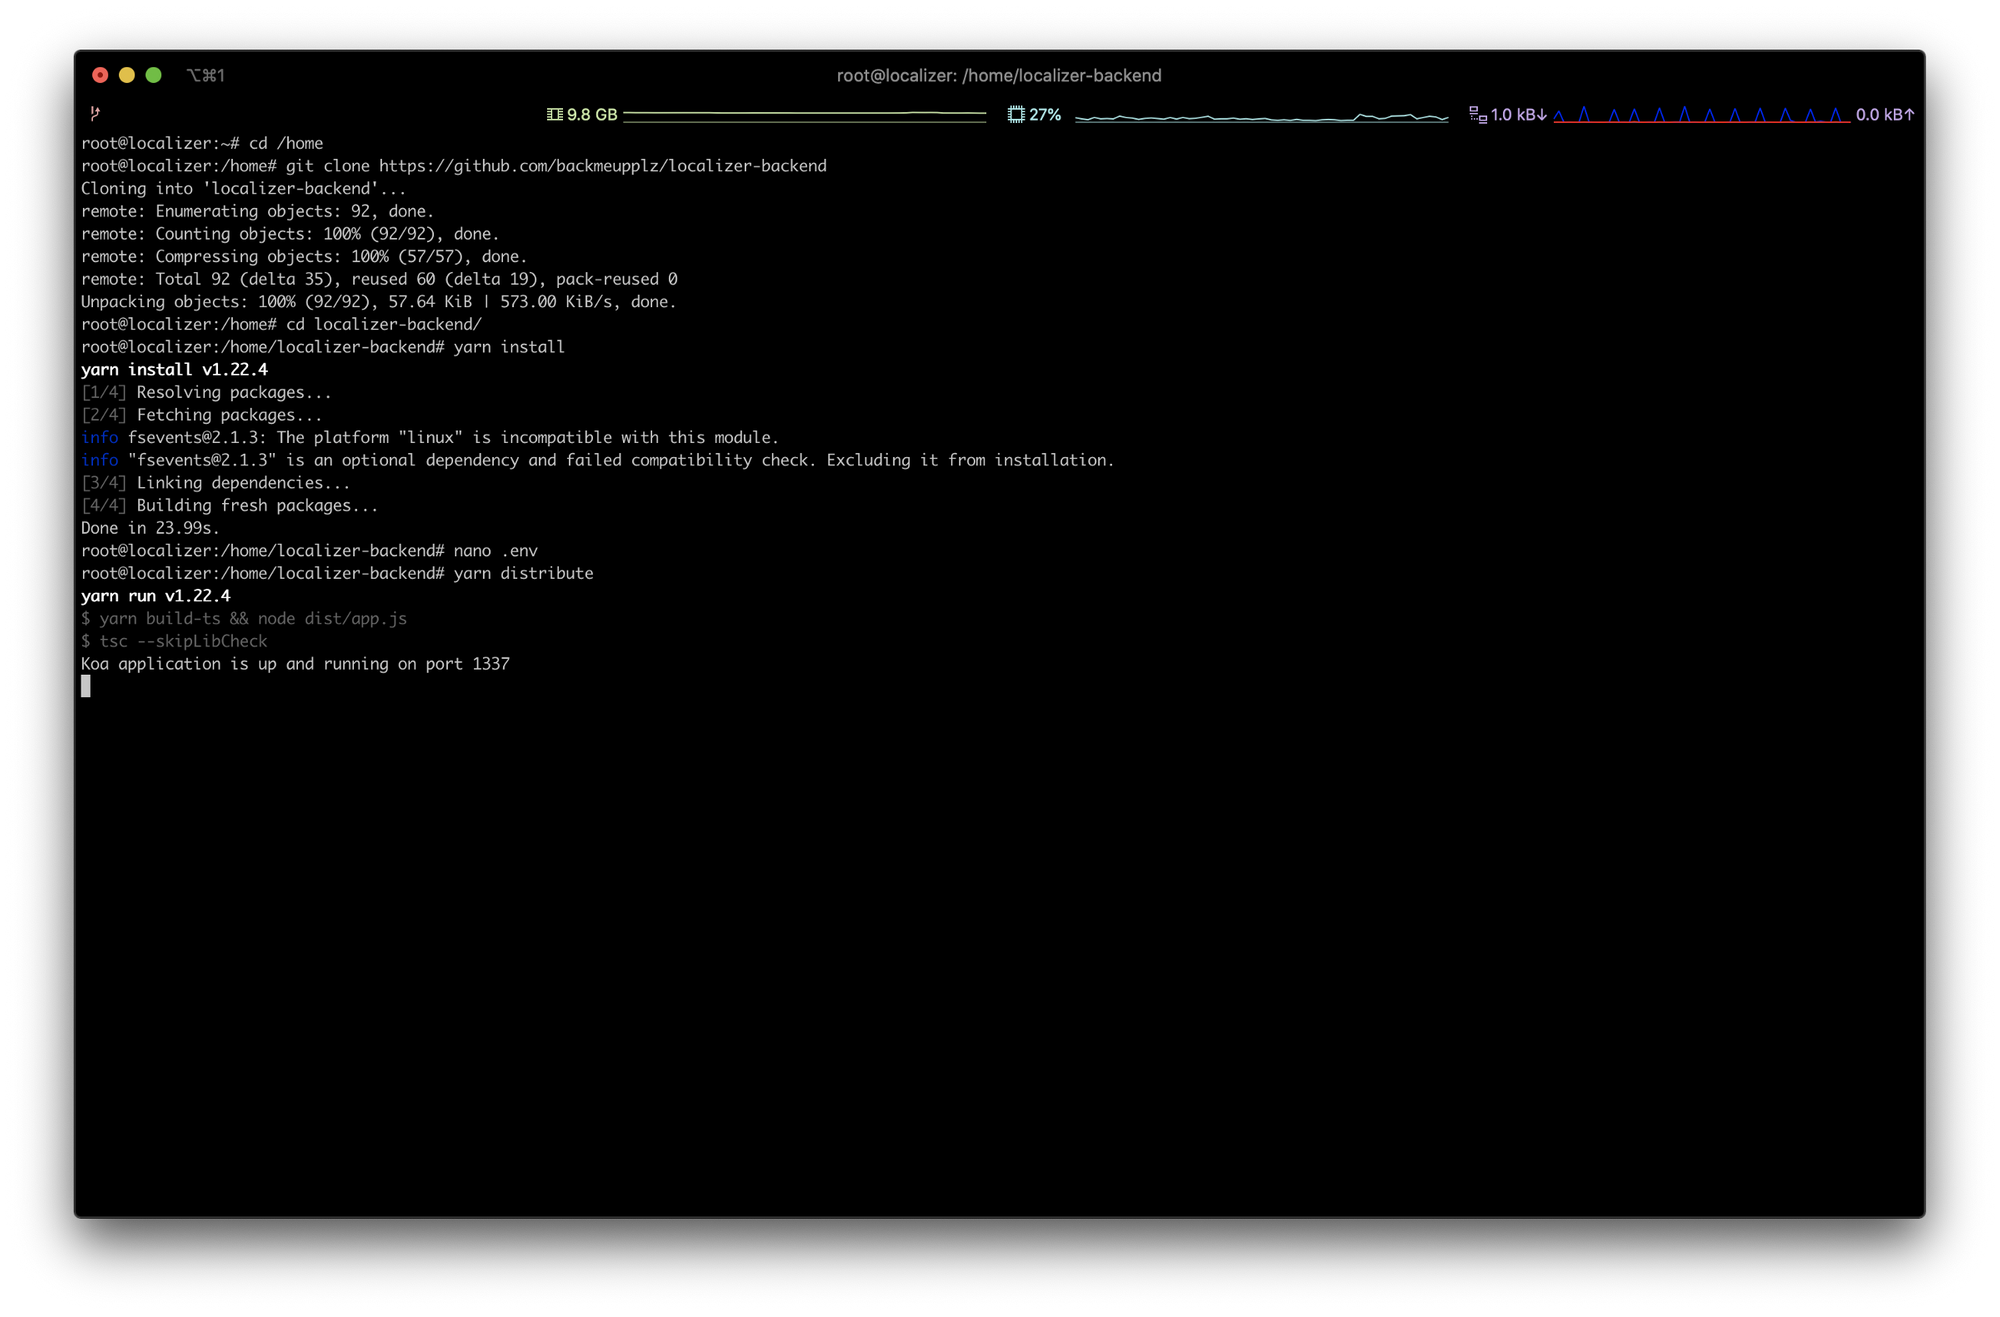
Now is the time when we actually setup the Localizer backend, we’ve completed all the prerequisites. Run the following commands:
cd /home

git clone https://github.com/backmeupplz/localizer-backend

cd localizer-backend

yarn install
Now create the .env file with the command nano .env with the following content:
MONGO=mongodb://useradmin:DB_PASSWORD@localhost:27017/localizer
PASSWORD=ADMIN_PASSWORD
TELEGRAM_TOKEN=123456789:A**********c
TELEGRAM_ADMIN=12345678
Replace DB_PASSWORD with the password you set for the useradmin when you were setting up MongoDB, ADMIN_PASSWORD with the password you will need to moderate content on the Localizer website, 123456789:A**********c with the token of a Telegram bot that will notify you if anything will go wrong, 12345678 with the Telegram chat ID of the chat that should receive the error reports. The Telegram variables are completely optional.
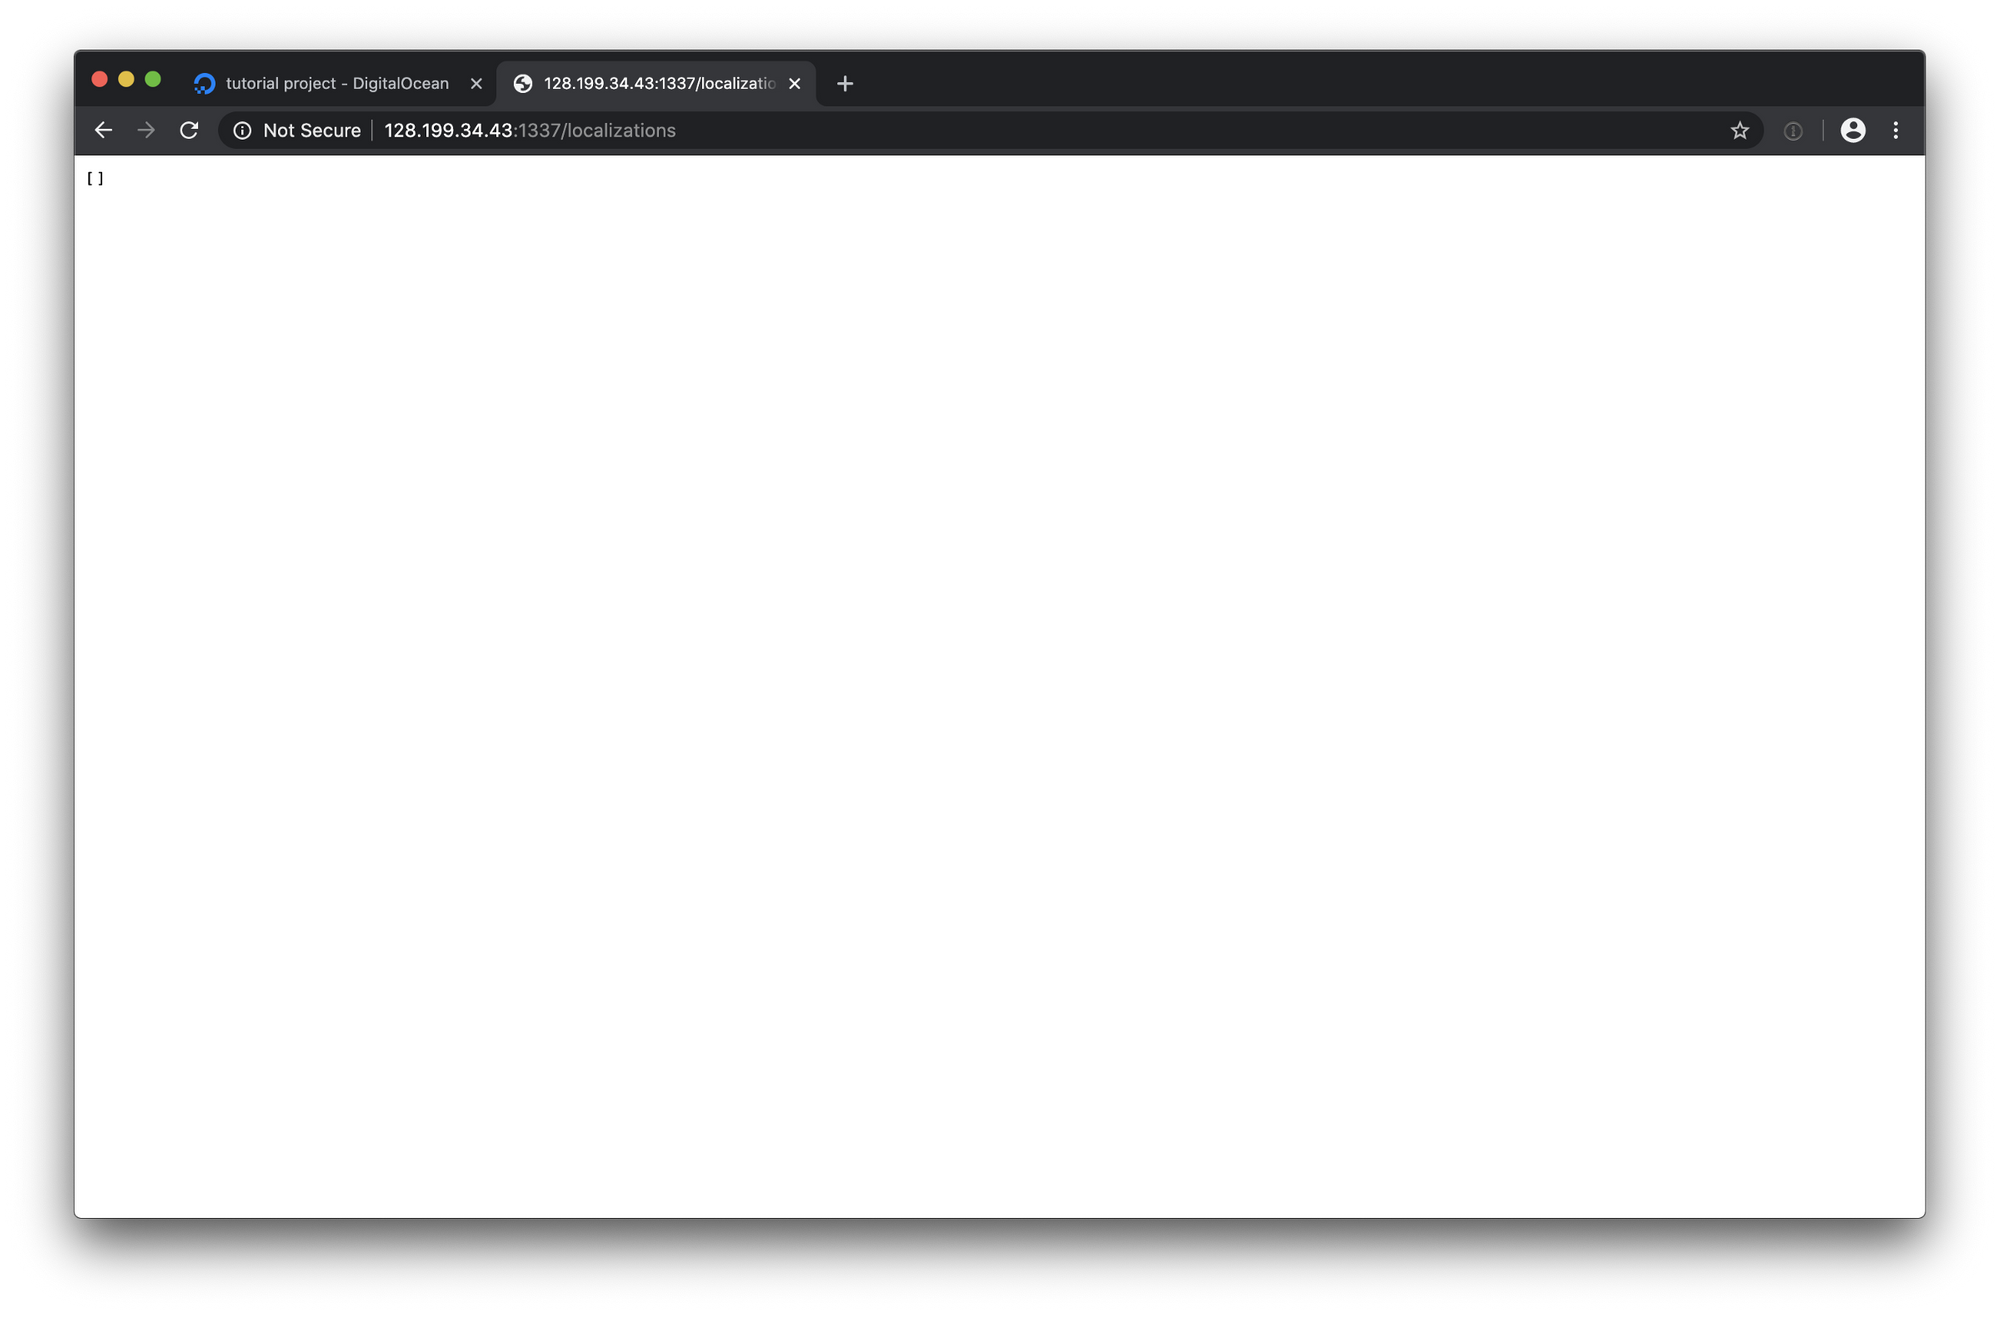
Running yarn distribute here should start the server and you should be able to get an empty list of localizations when opening your server in browser like http://128.199.34.43:1337/localizations! Congratulations, your server is up and running!
The only thing left is to forward a domain or a subdomain to it! You need to route your domain to the VPS’s IP address. One of the options is to connect your domain name to Cloudflare and add a DNS record to you IP address like I did below:

I will use localizer.borodutch.com for the Localizer backend and localize.borodutch.com for the Localizer frontend. Now let’s obtain the SSL certificates. Install nginx on the VPS with the commands:
sudo apt update

sudo apt install nginx
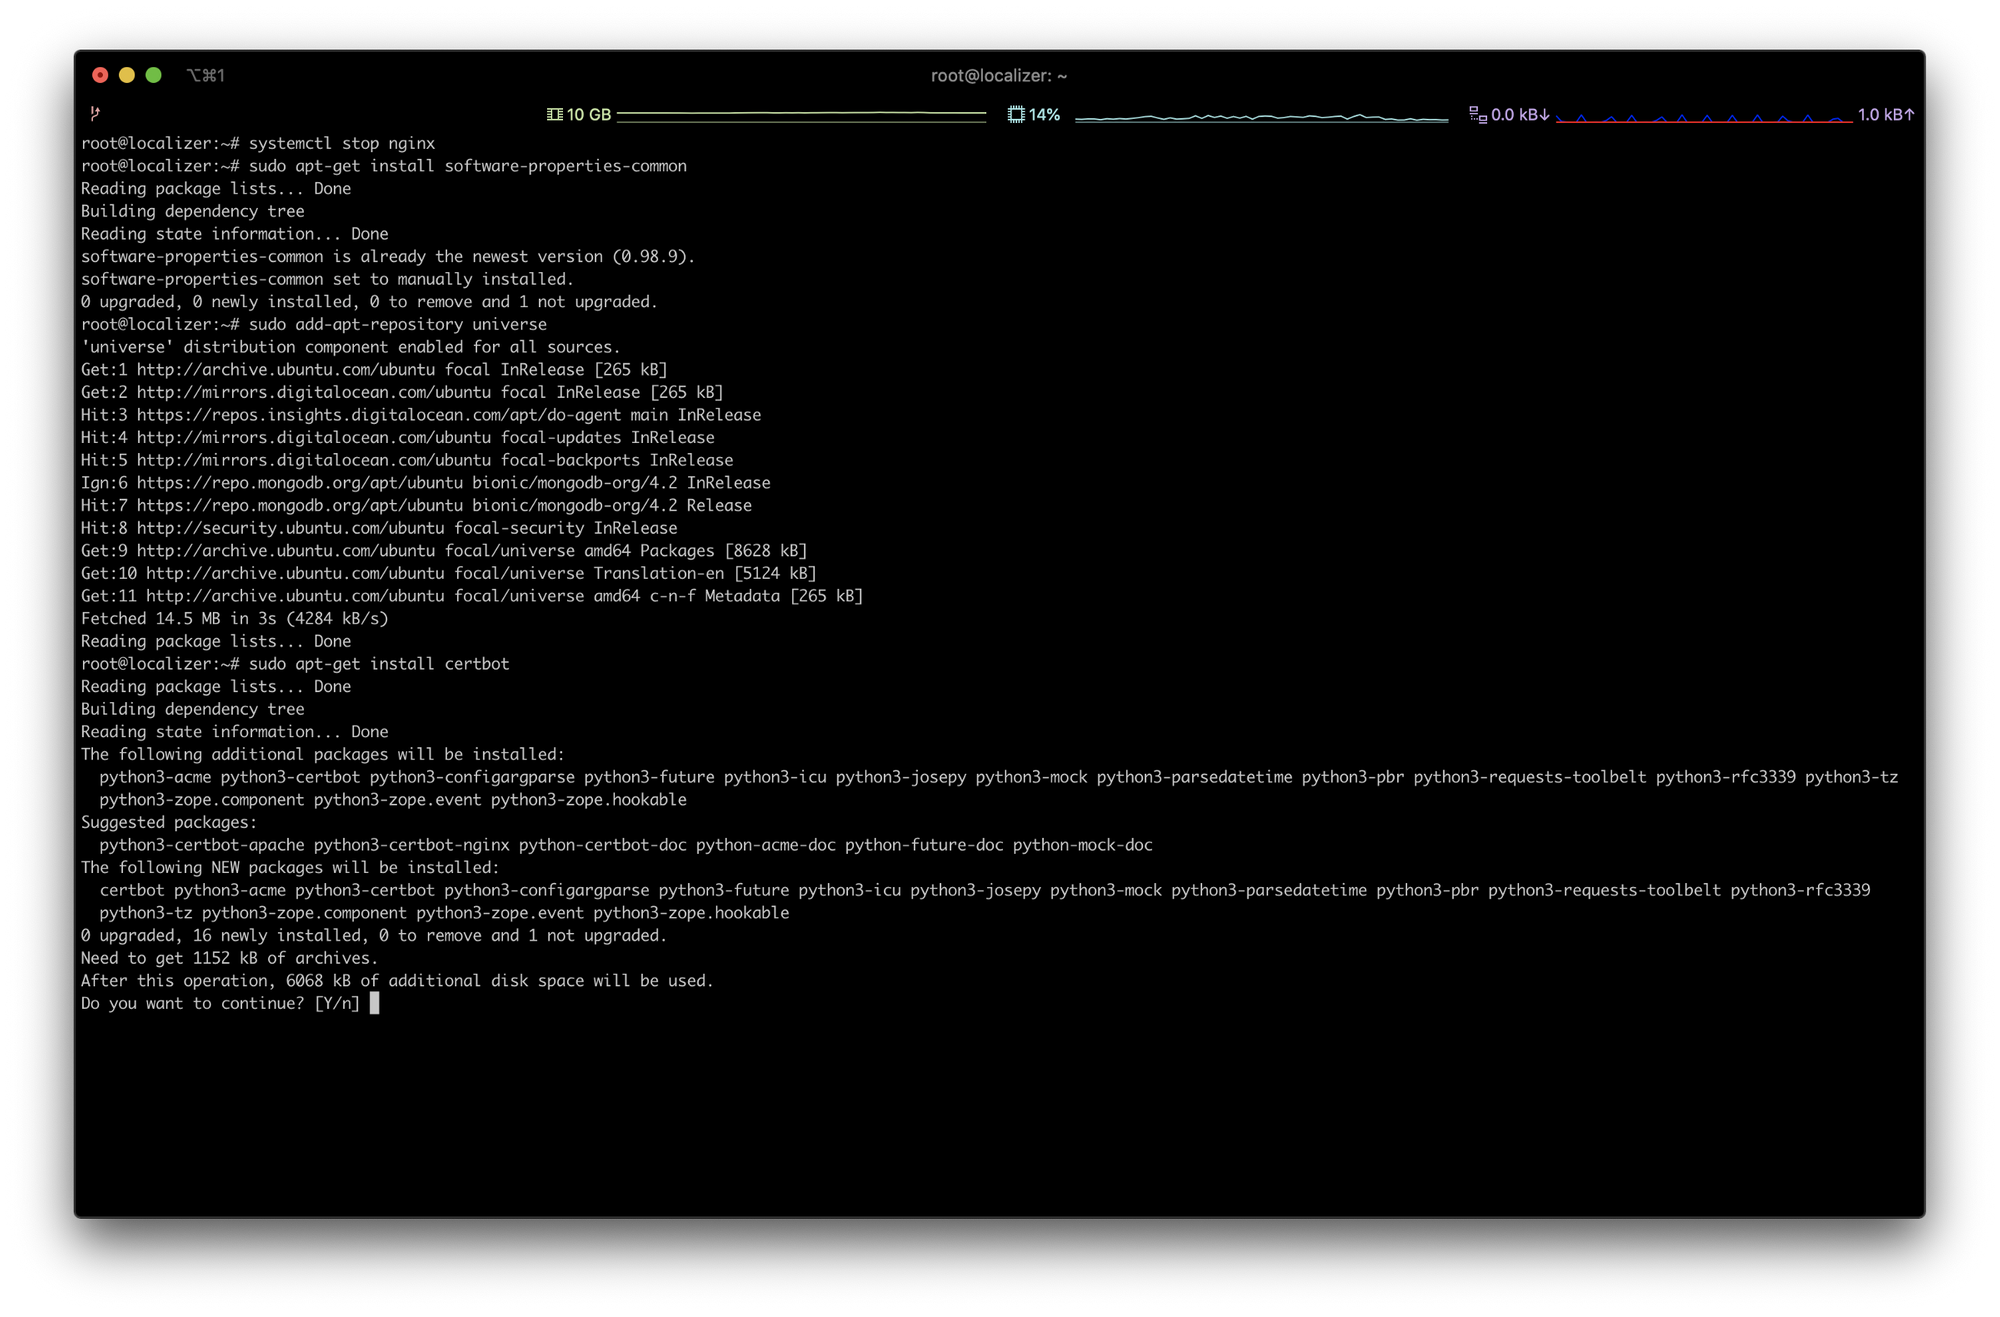
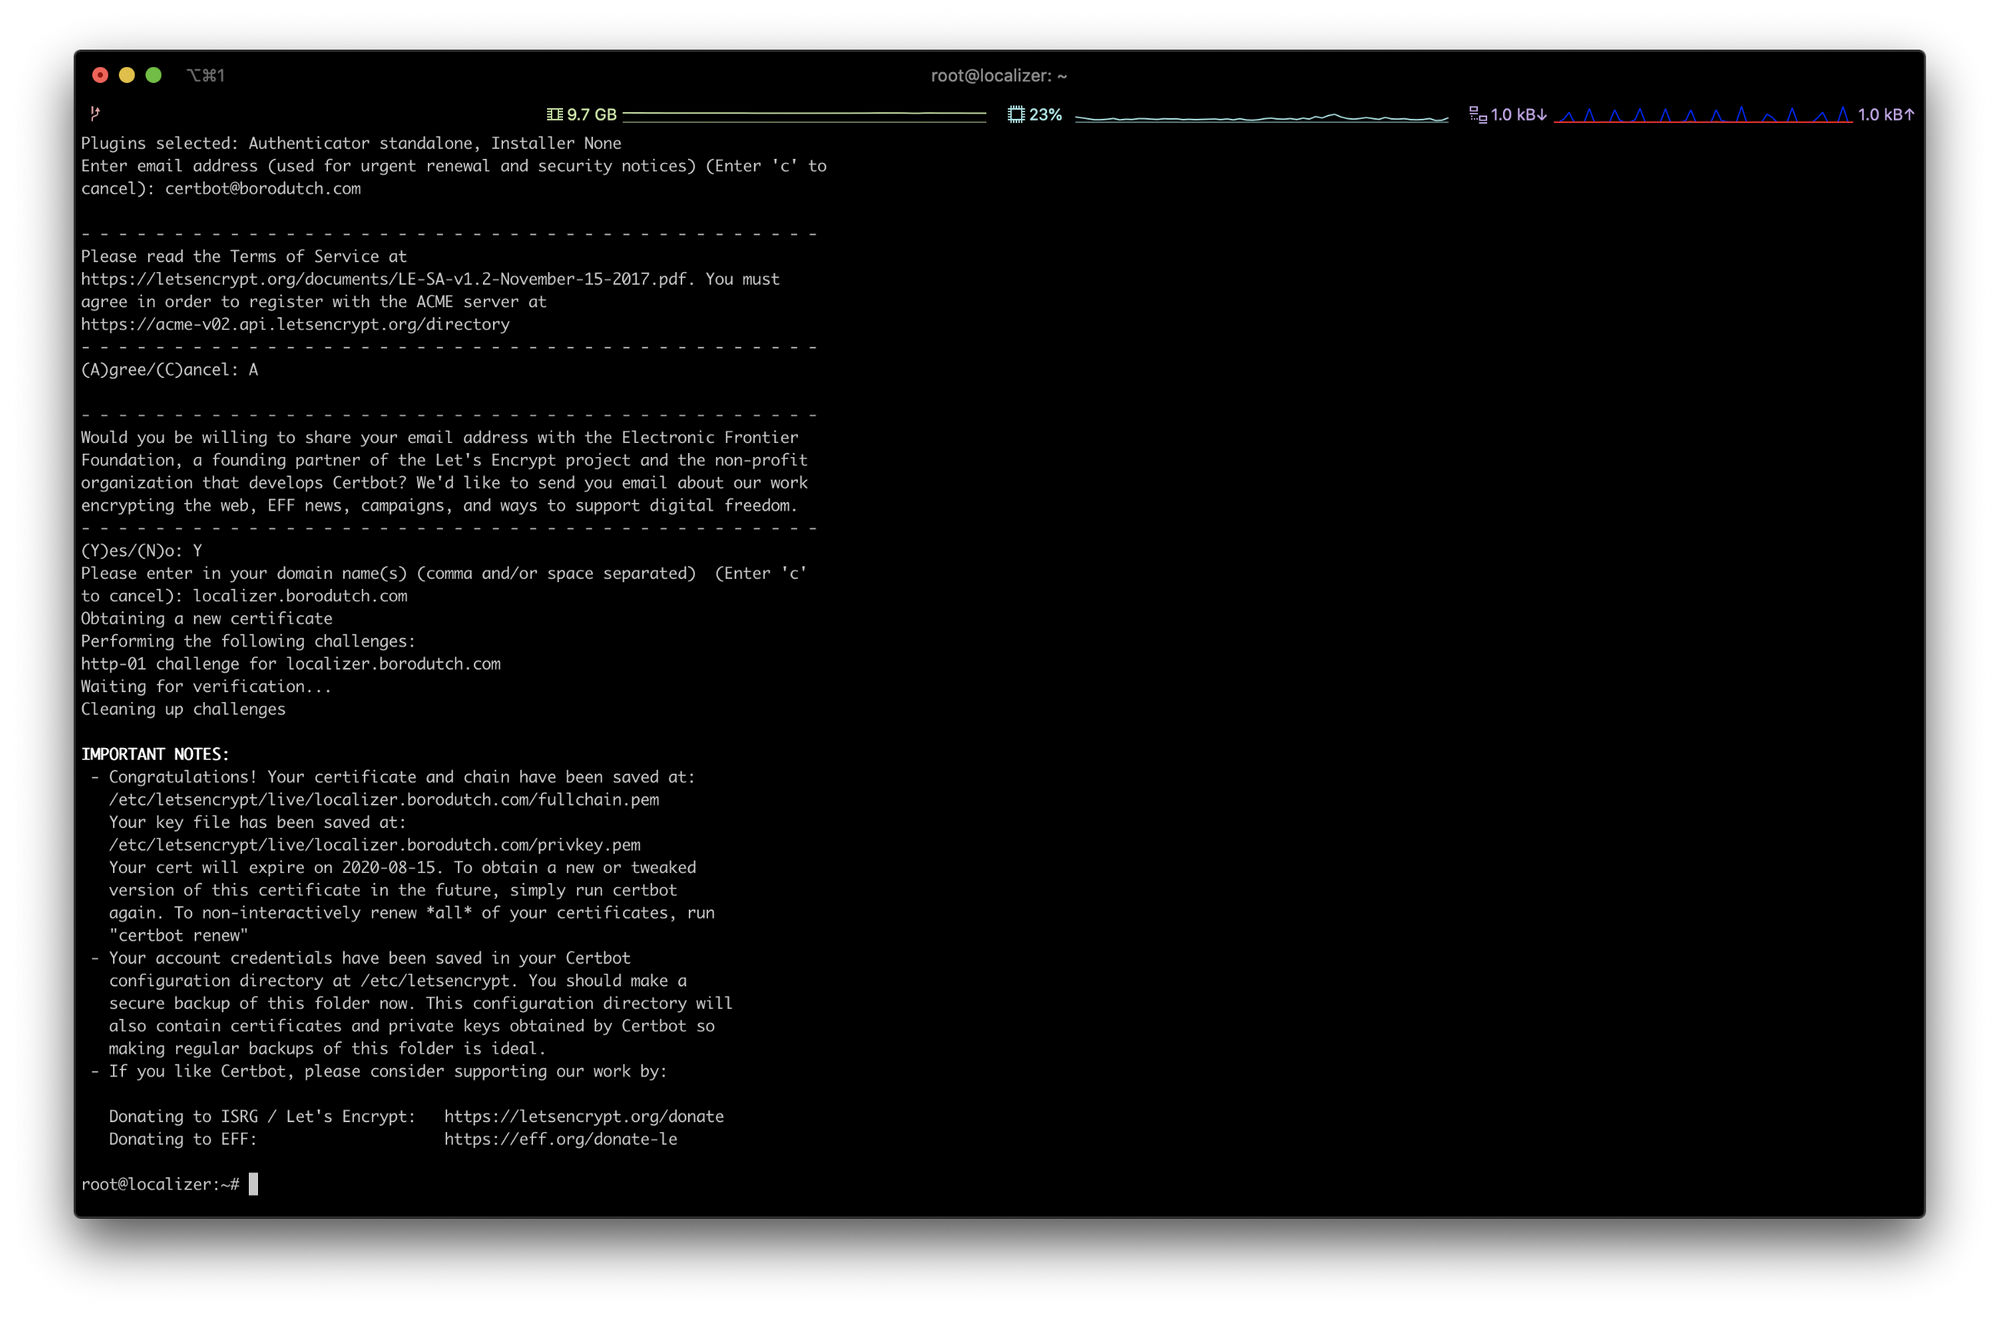
We will obtain an SSL certificate with certbot.eff.org. Run the following commands:
systemctl stop nginx

sudo apt-get install software-properties-common

sudo add-apt-repository universe

sudo certbot certonly --standalone
And finish the setup. In the end you should get the success message by the Certbot.
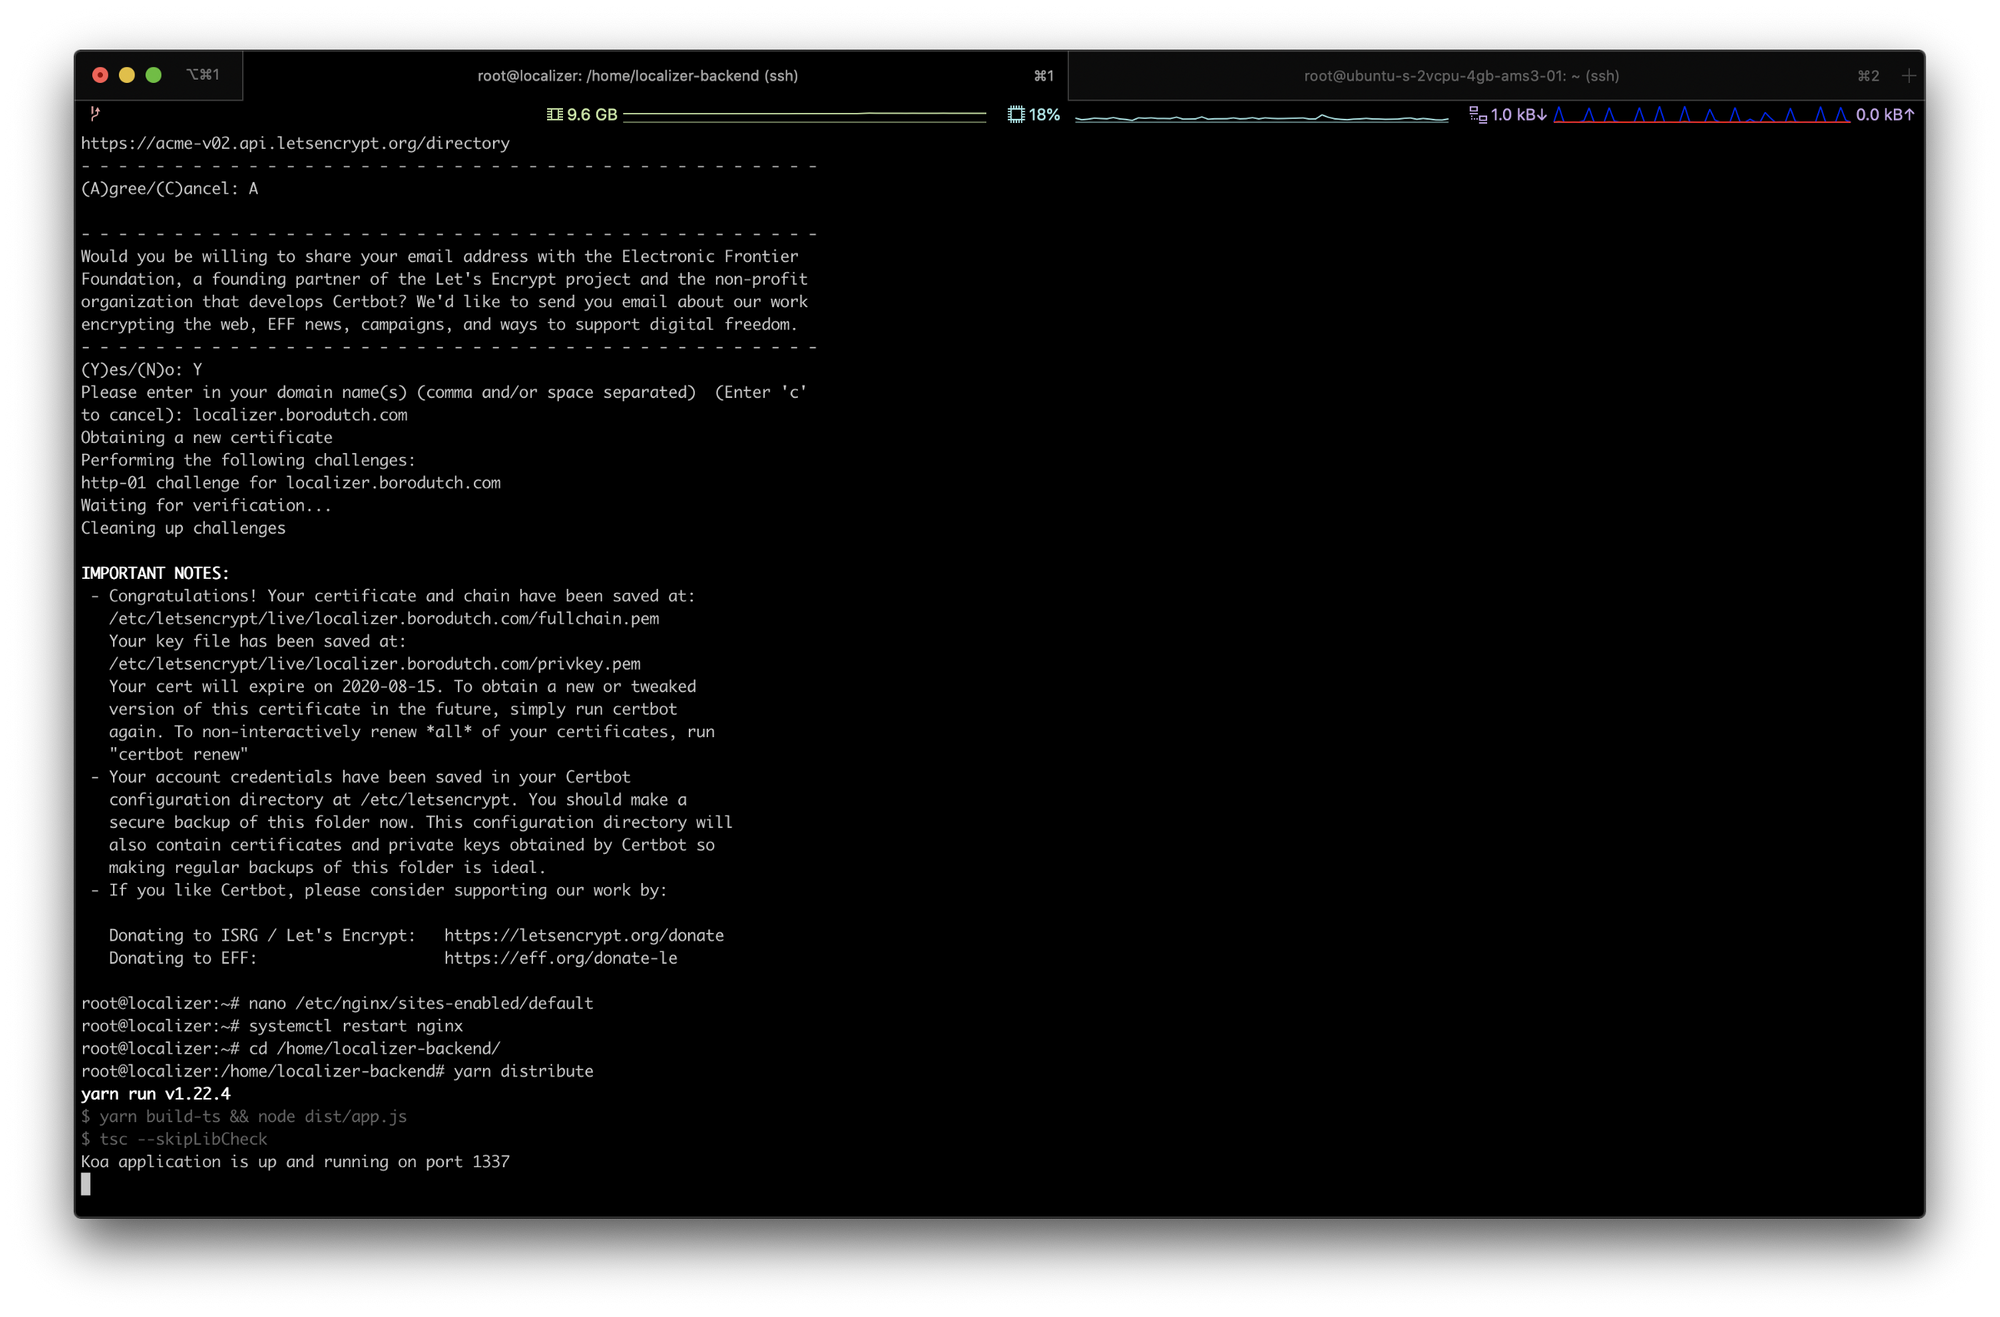
Almost there! Let’s setup nginx. Open the config file and change it to the following content with the command nano /etc/nginx/sites-enabled/default:
server {
        listen 80;
        listen [::]:80 default_server ipv6only=on;
        return 301 https://$host$request_uri;
}

server {
    listen 443;
    server_name localizer.borodutch.com;
    ssl on;
    # Use certificate and key provided by Let's Encrypt:
    ssl_certificate /etc/letsencrypt/live/localizer.borodutch.com/fullchain.pem;
    ssl_certificate_key /etc/letsencrypt/live/localizer.borodutch.com/privkey.pem;
    ssl_session_timeout 5m;
    ssl_protocols TLSv1 TLSv1.1 TLSv1.2;
    ssl_prefer_server_ciphers on;
    ssl_ciphers 'EECDH+AESGCM:EDH+AESGCM:AES256+EECDH:AES256+EDH';
    # Pass requests for / to localhost:1337:
    location / {
        proxy_set_header X-Real-IP $remote_addr;
        proxy_set_header X-Forwarded-For $proxy_add_x_forwarded_for;
        proxy_set_header X-NginX-Proxy true;
        proxy_pass http://localhost:1337/;
        proxy_ssl_session_reuse off;
        proxy_set_header Host $http_host;
        proxy_cache_bypass $http_upgrade;
        proxy_redirect off;
    }
}
Don’t forget to replace localizer.borodutch.com with the domain you used when you set up DNS. Now run the following commands to restart nginx and our server:
systemctl restart nginx
cd /home/localizer-backend
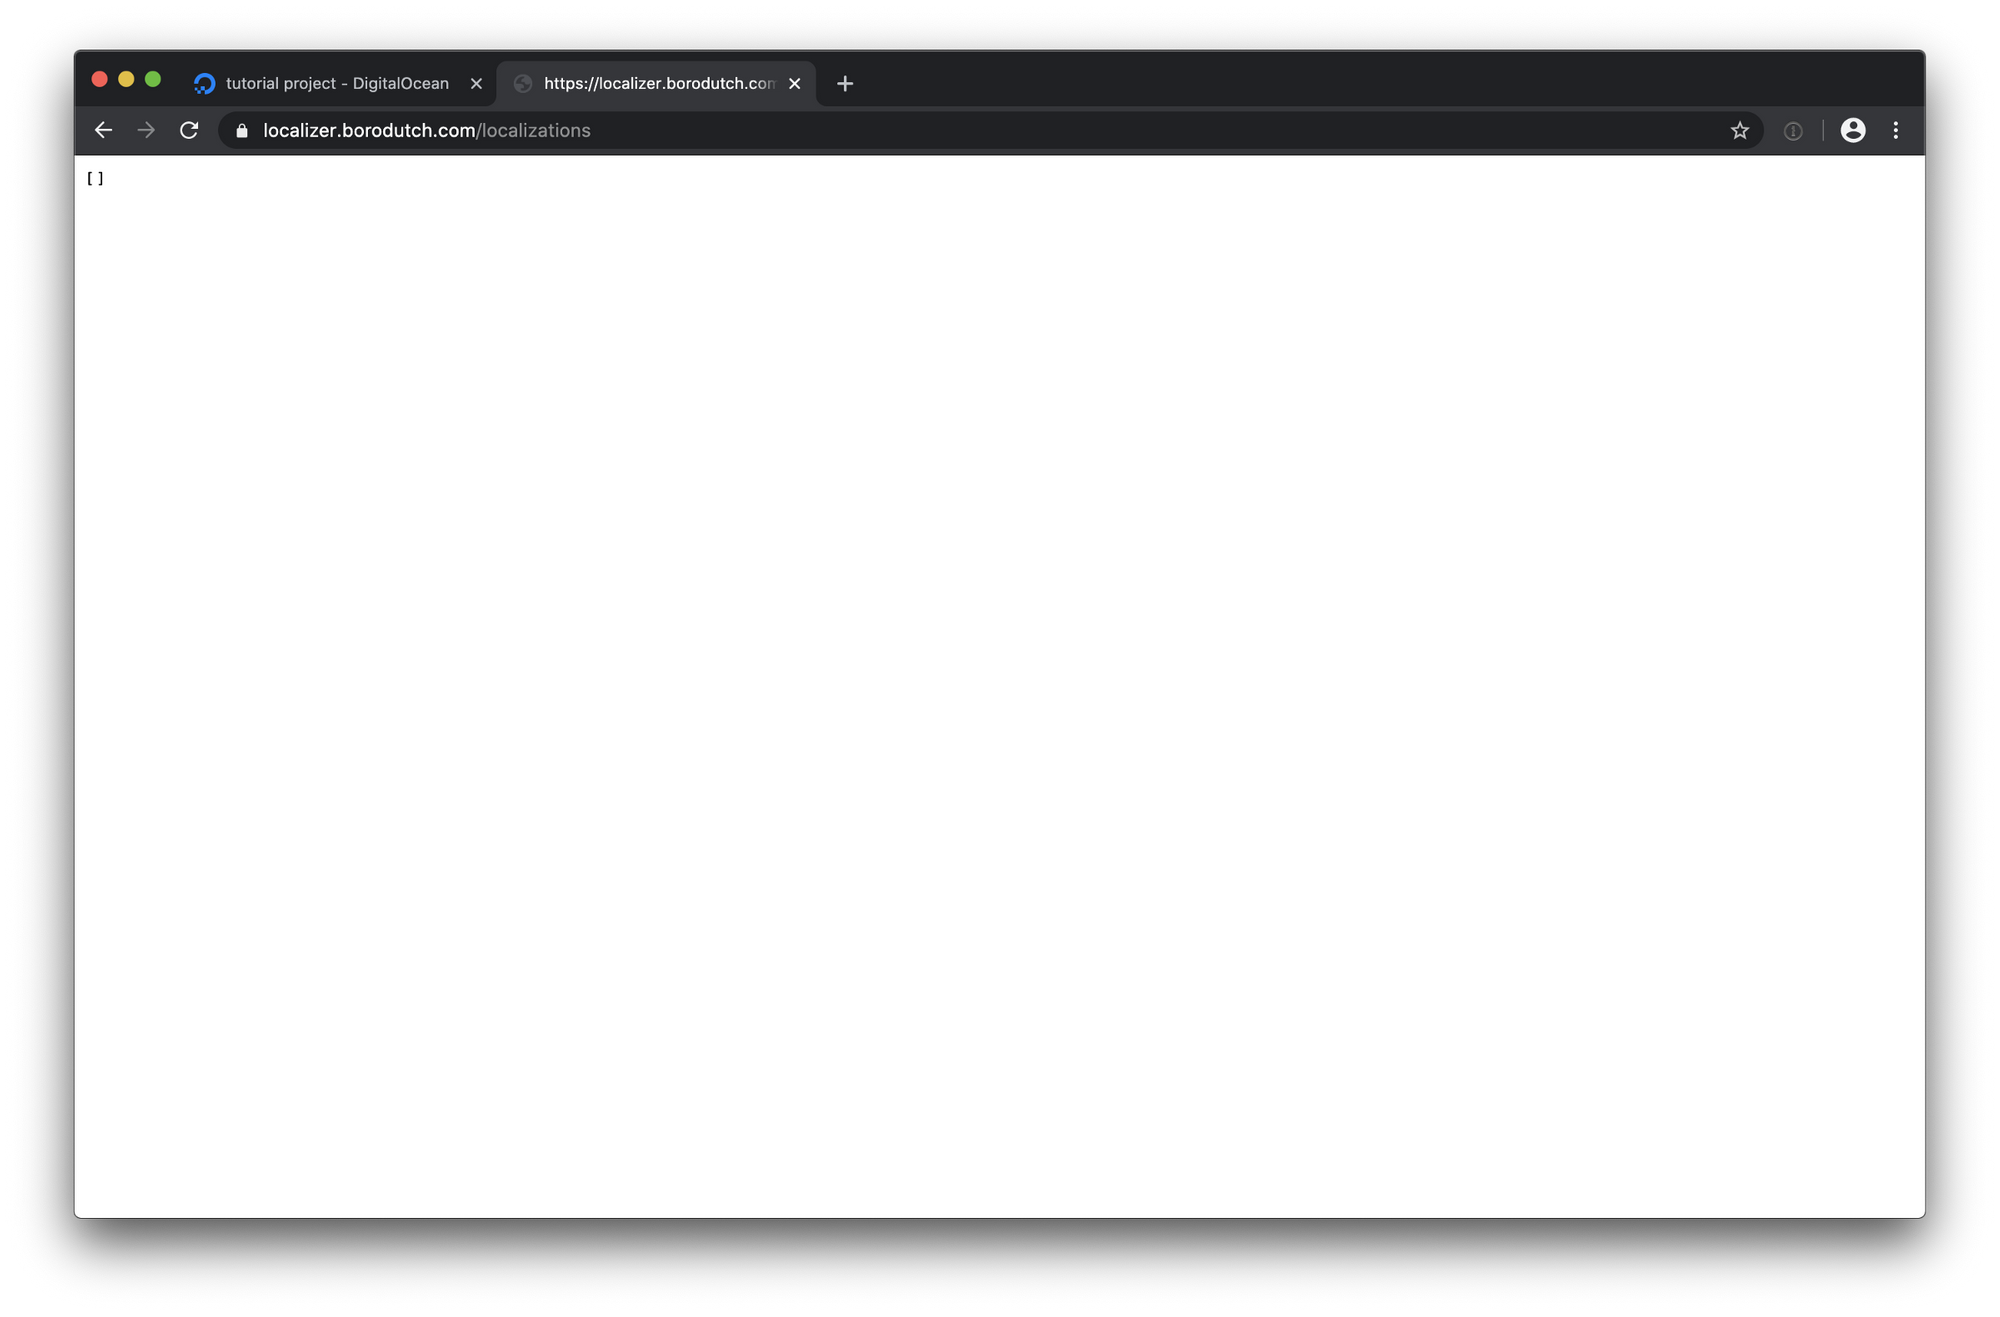
yarn distributeIf you did everything correctly, you should see be able to go to your website now like you can with localizer.borodutch.com/localizations and see the empty list of translations (also over https this time!):
The very last step for the backend is to make it run all the time, restart if it crashes and restart after rebooting the server. We will do this with the Linux services. Create a new service file with the following content by running the command nano /etc/systemd/system/localizer-backend.service:
[Unit]
Description=Localizer backend service
After=mongodb.service
[Service]
WorkingDirectory=/home/localizer-backend
ExecStart=/usr/bin/yarn distribute
Restart=always
RestartSec=3
[Install]
WantedBy=multi-user.target
Now run the following commands:
which node

ln -s /root/.nvm/versions/node/v14.2.0/bin/node /usr/bin/node

which yarn

ln -s /root/.nvm/versions/node/v14.2.0/bin/yarn /usr/bin/yarn

enable localizer-backend.service

start localizer-backend

status localizer-backend
And that’s it! Note your node and yarn folders — we have to show the system where nvm installs them. Your server now runs 24/7 for as cheap as you could get the Digital Ocean to go! Congratulations!

Quick note on updating the backend
We are improving Localizer all the time. If you want to get the latest features, just run git pull && yarn install && systemctl restart localizer-backend inside the /home/localizer-backend directory on your server!
Frontend
Now to the easy part! After all these things with the backend, setting up frontend will be a piece of cake. You don’t even need to SSH anywhere to get it working!
You need to setup node, yarn and git on your local computer. So if you don’t have them yet — go on and install them. By now you should be able to run node -v, yarn -v and git --version locally.
Go fork Localizer frontend and clone it somewhere locally. Change the .env file to something similar to:
VUE_APP_API="https://localizer.borodutch.comPut your Localizer backend URL here, the one you’ve set up the SSL certificates for. Then create a CNAME file with the content (this time use the URL you will use for the Localizer frontend):
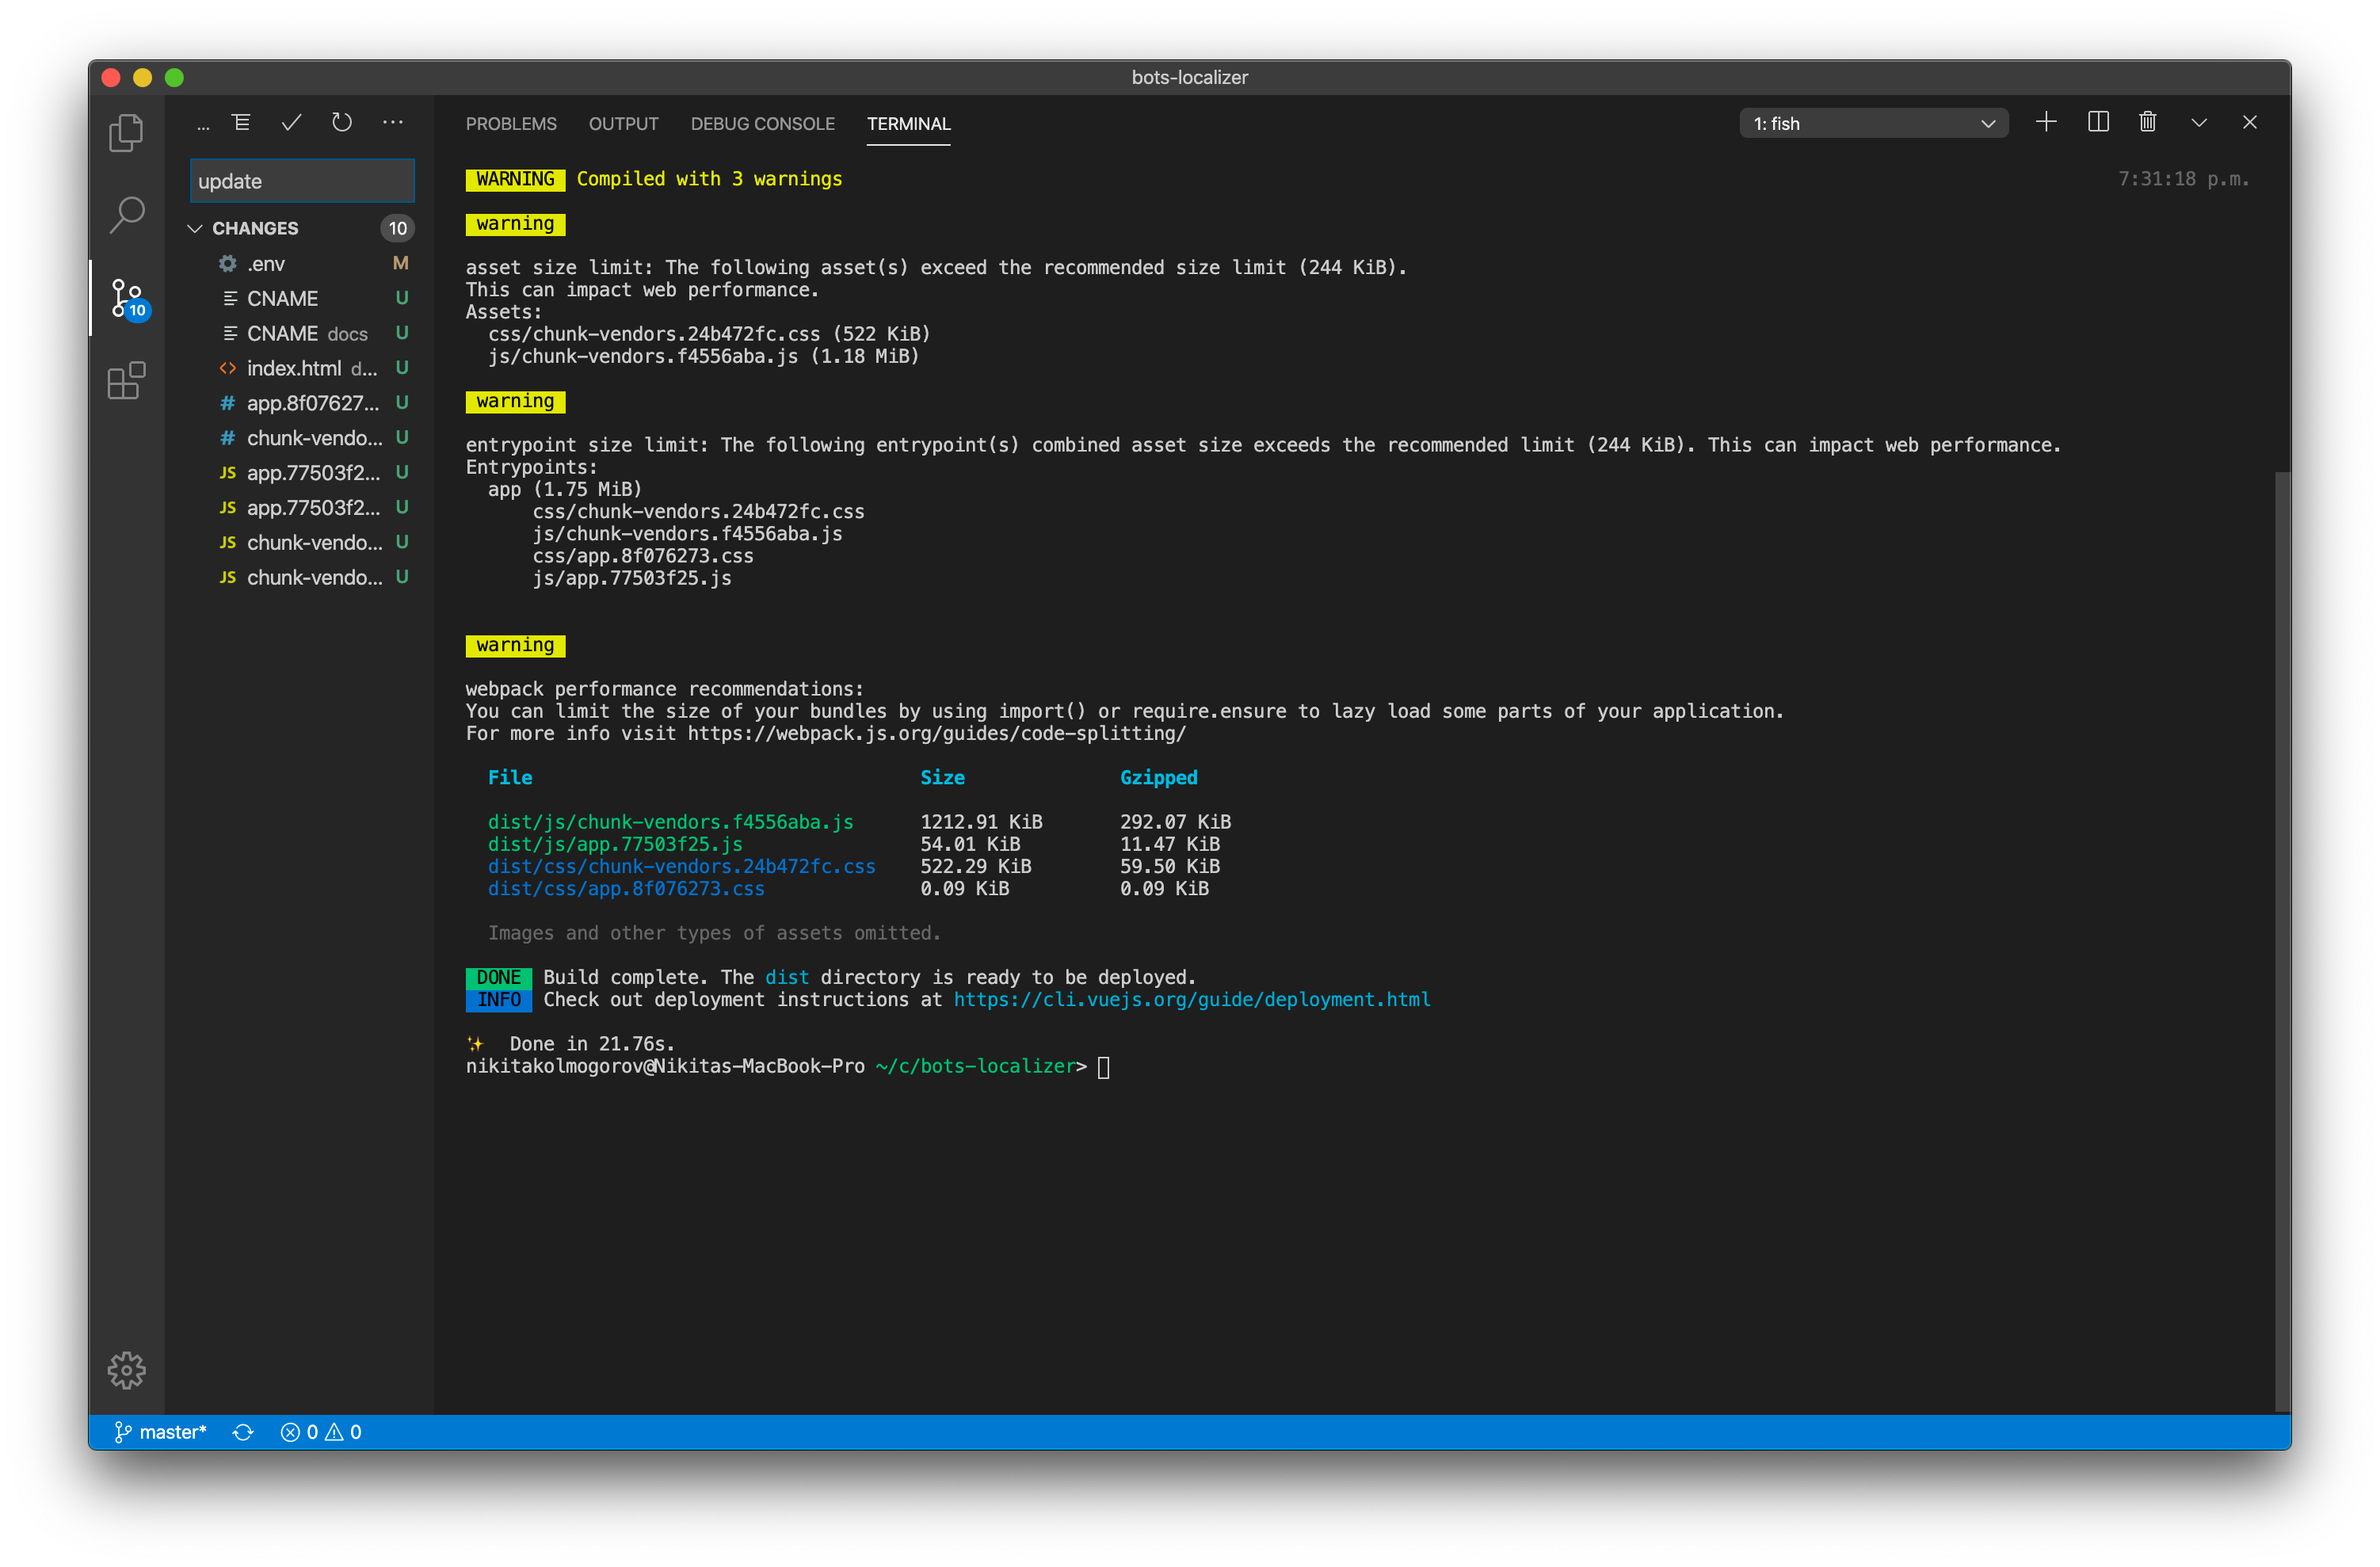
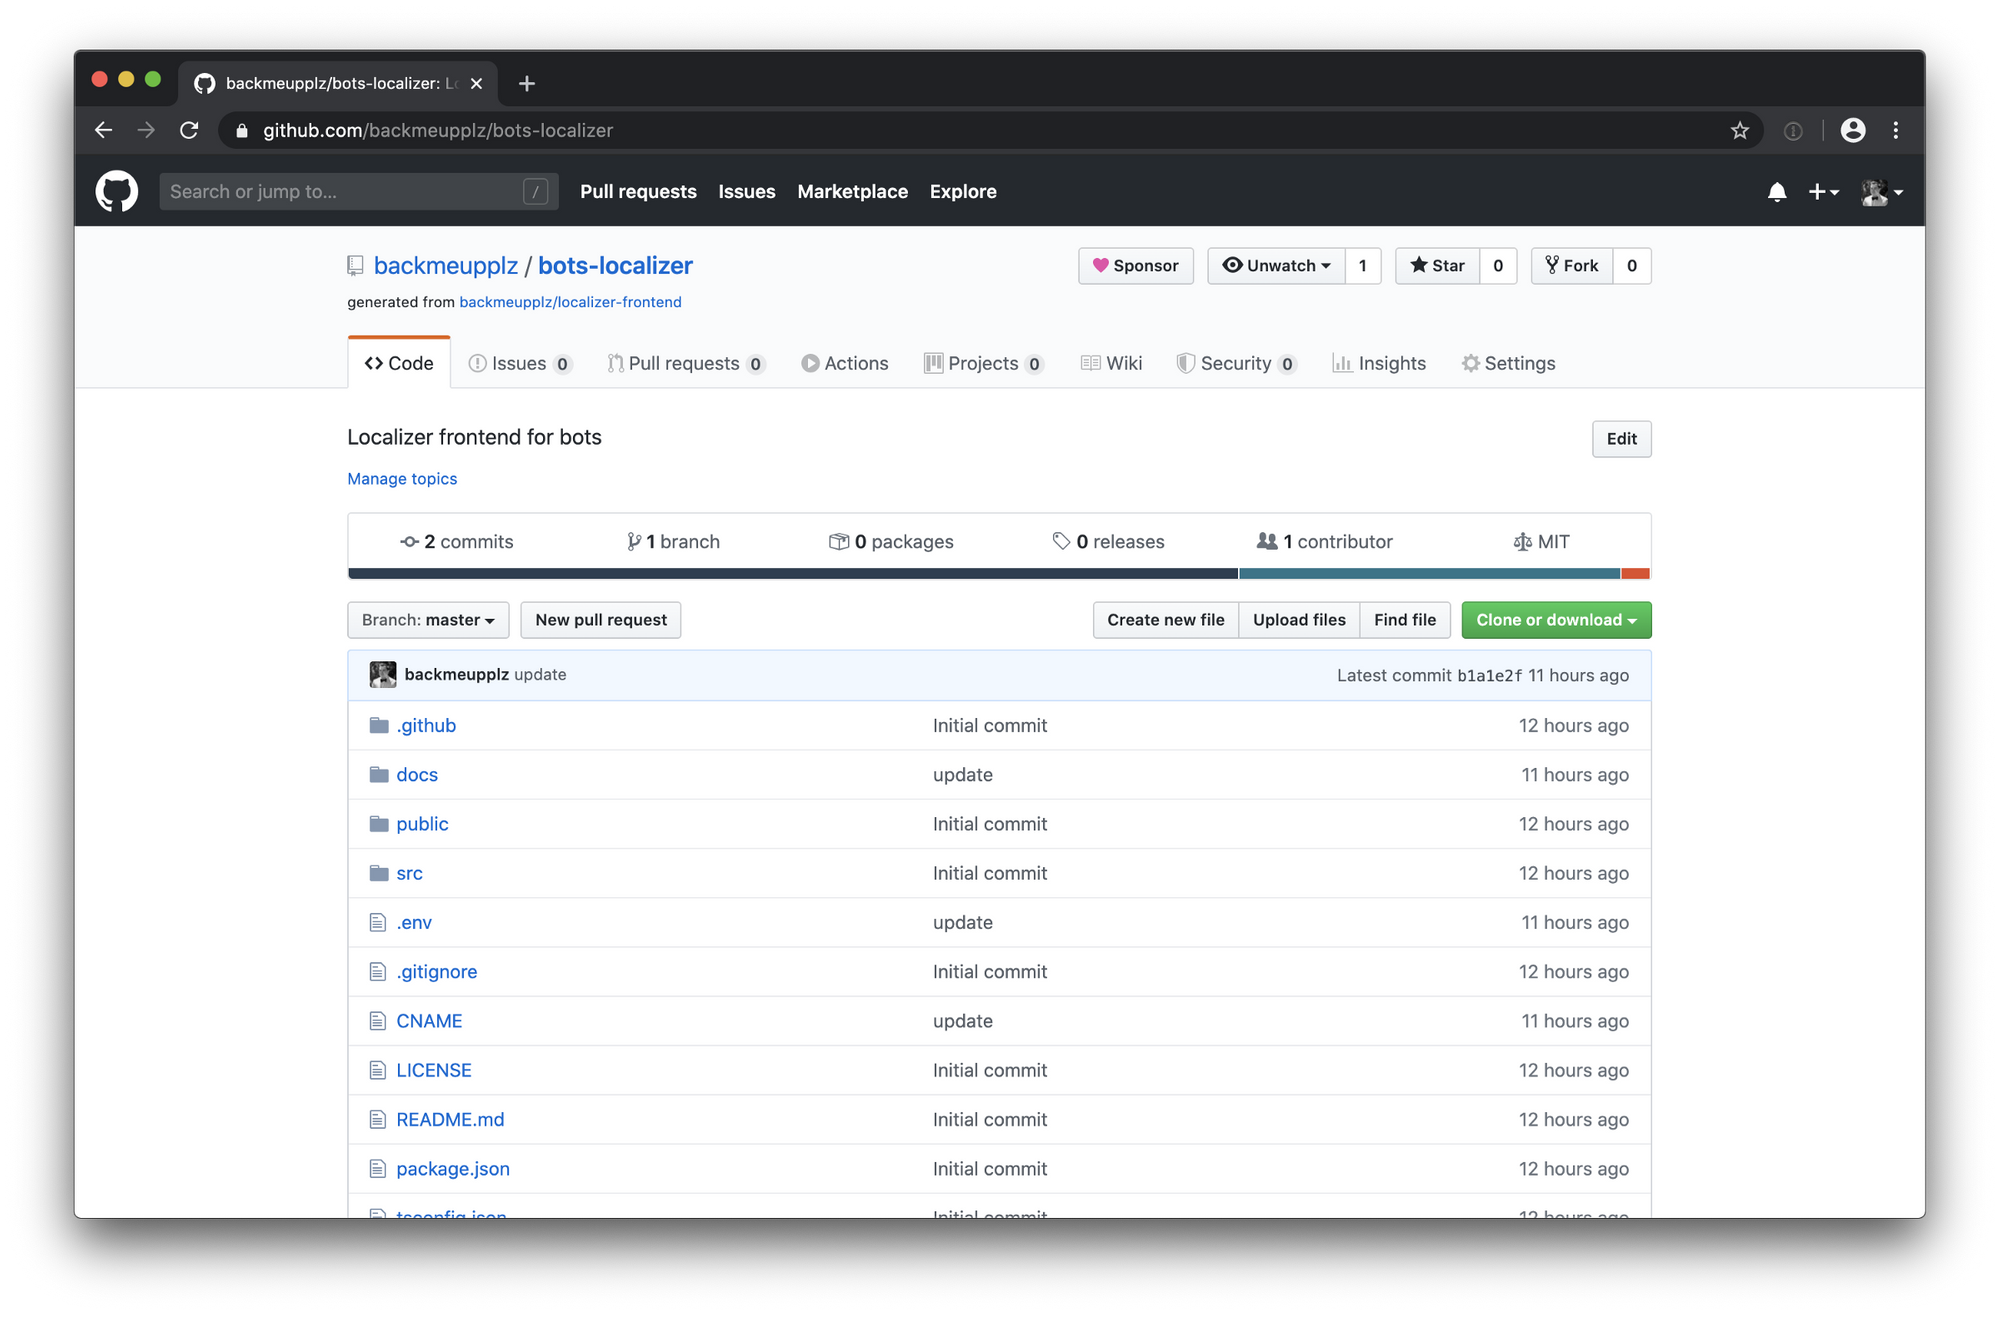
localize.borodutch.comNow run yarn install and yarn build. Then simply push to your repository.
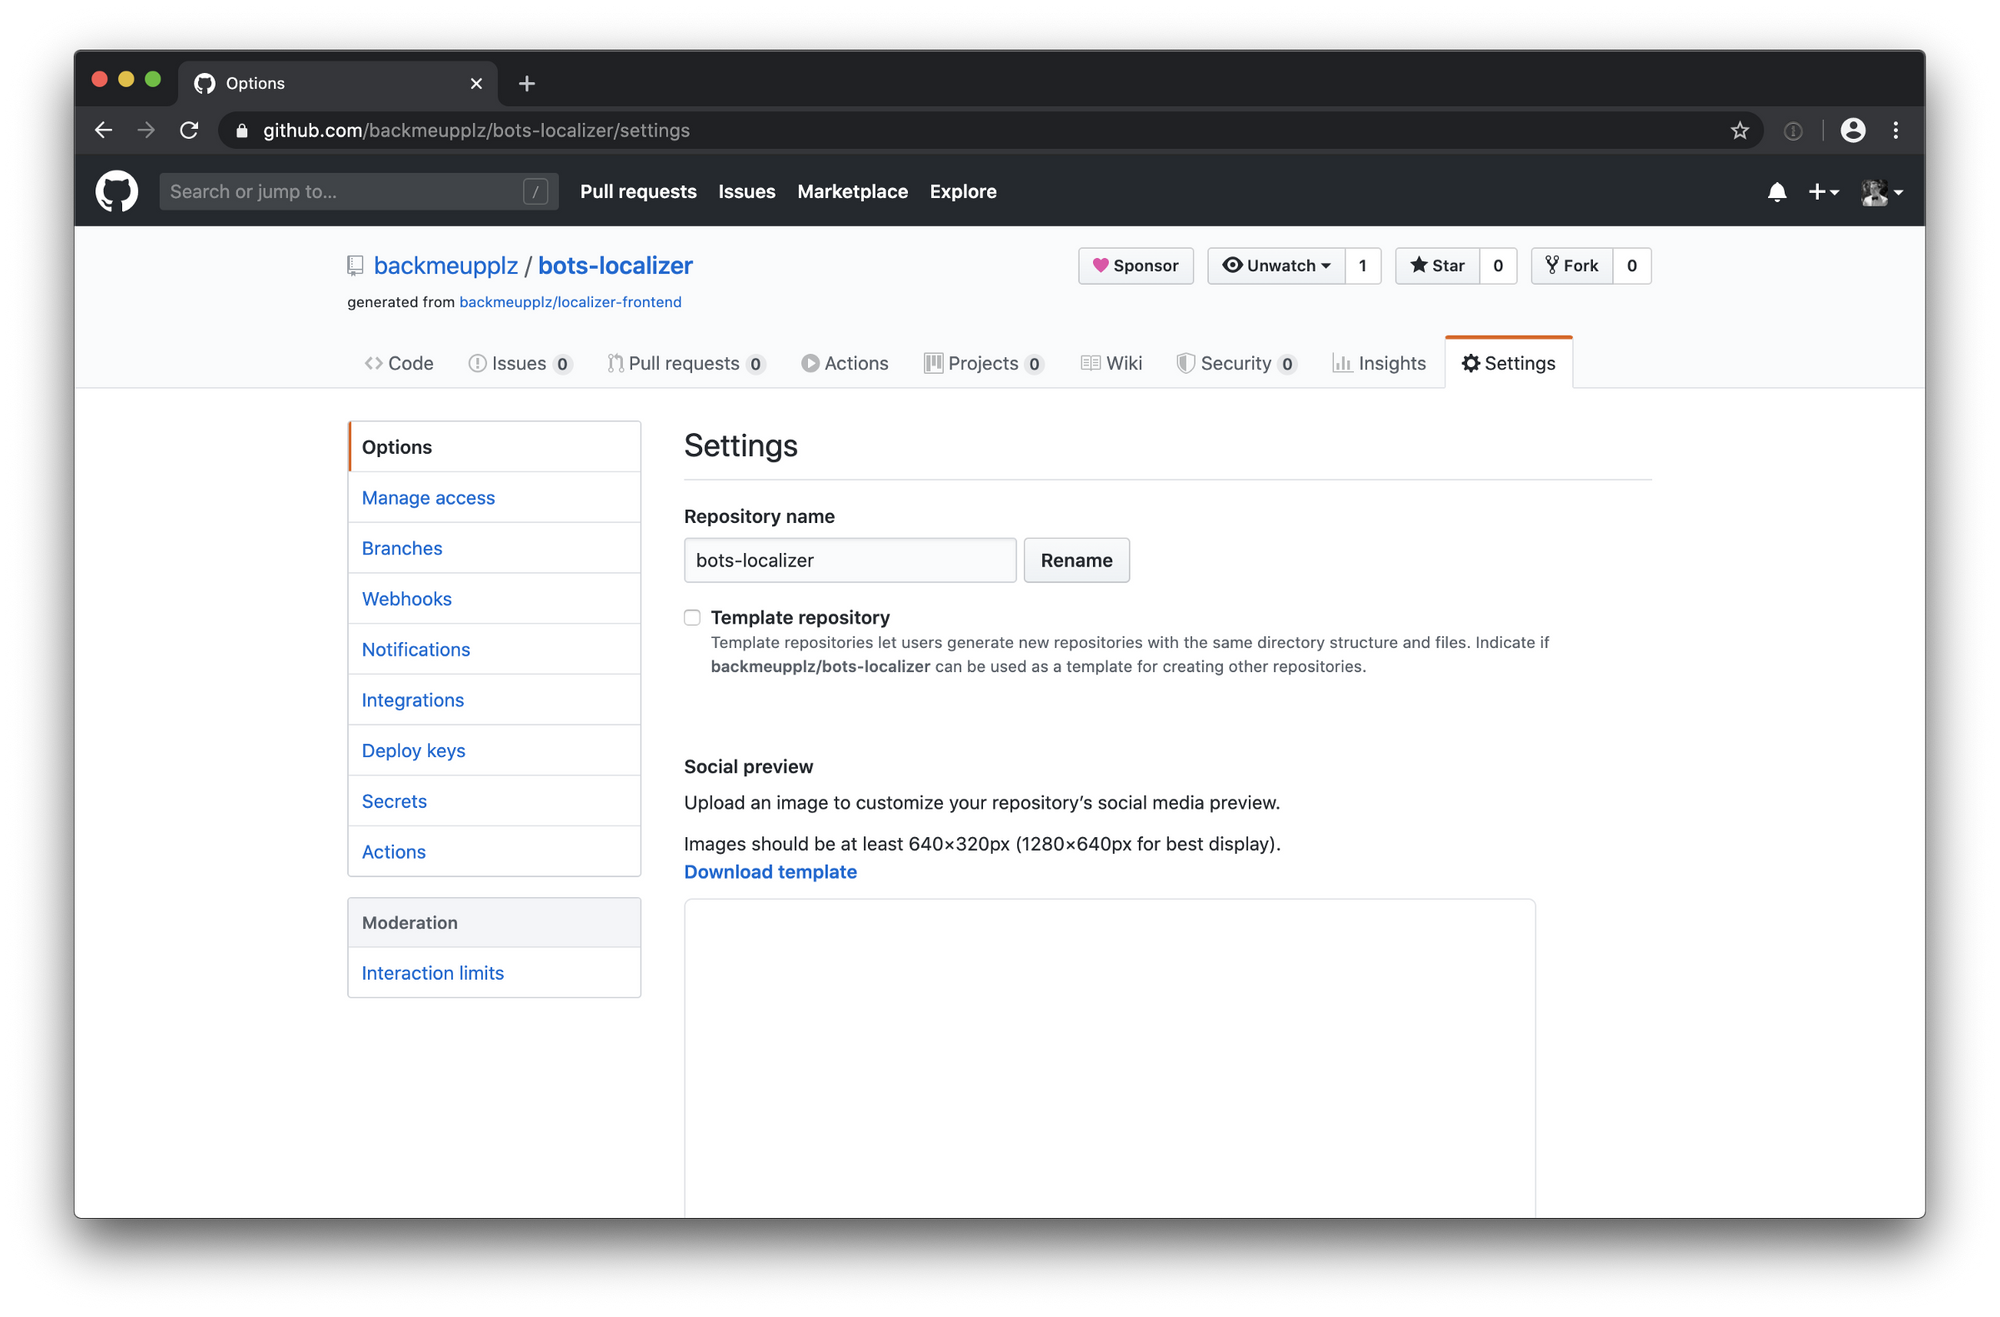
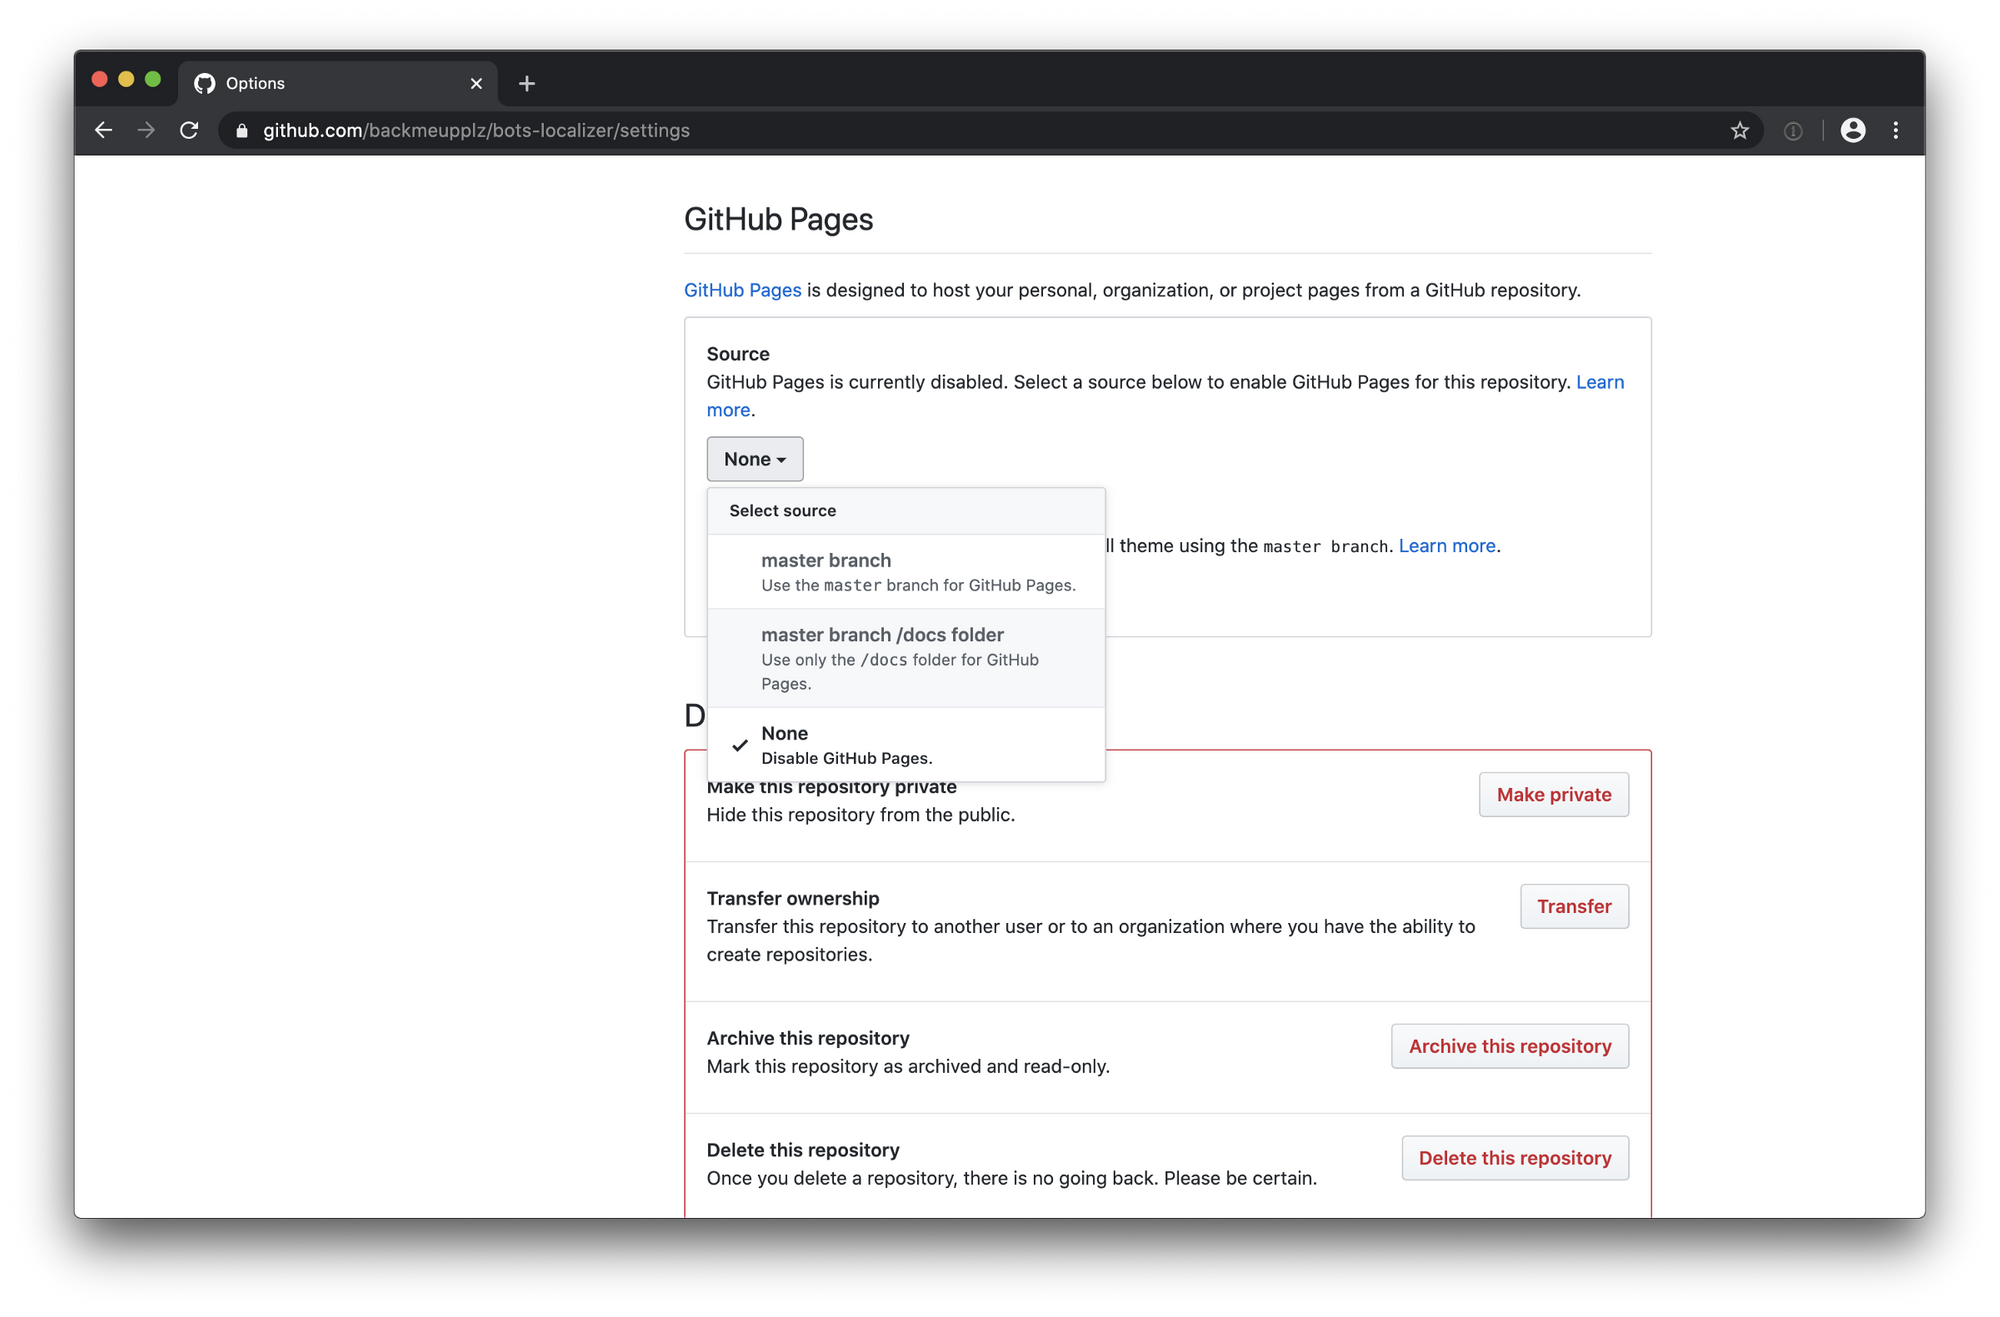
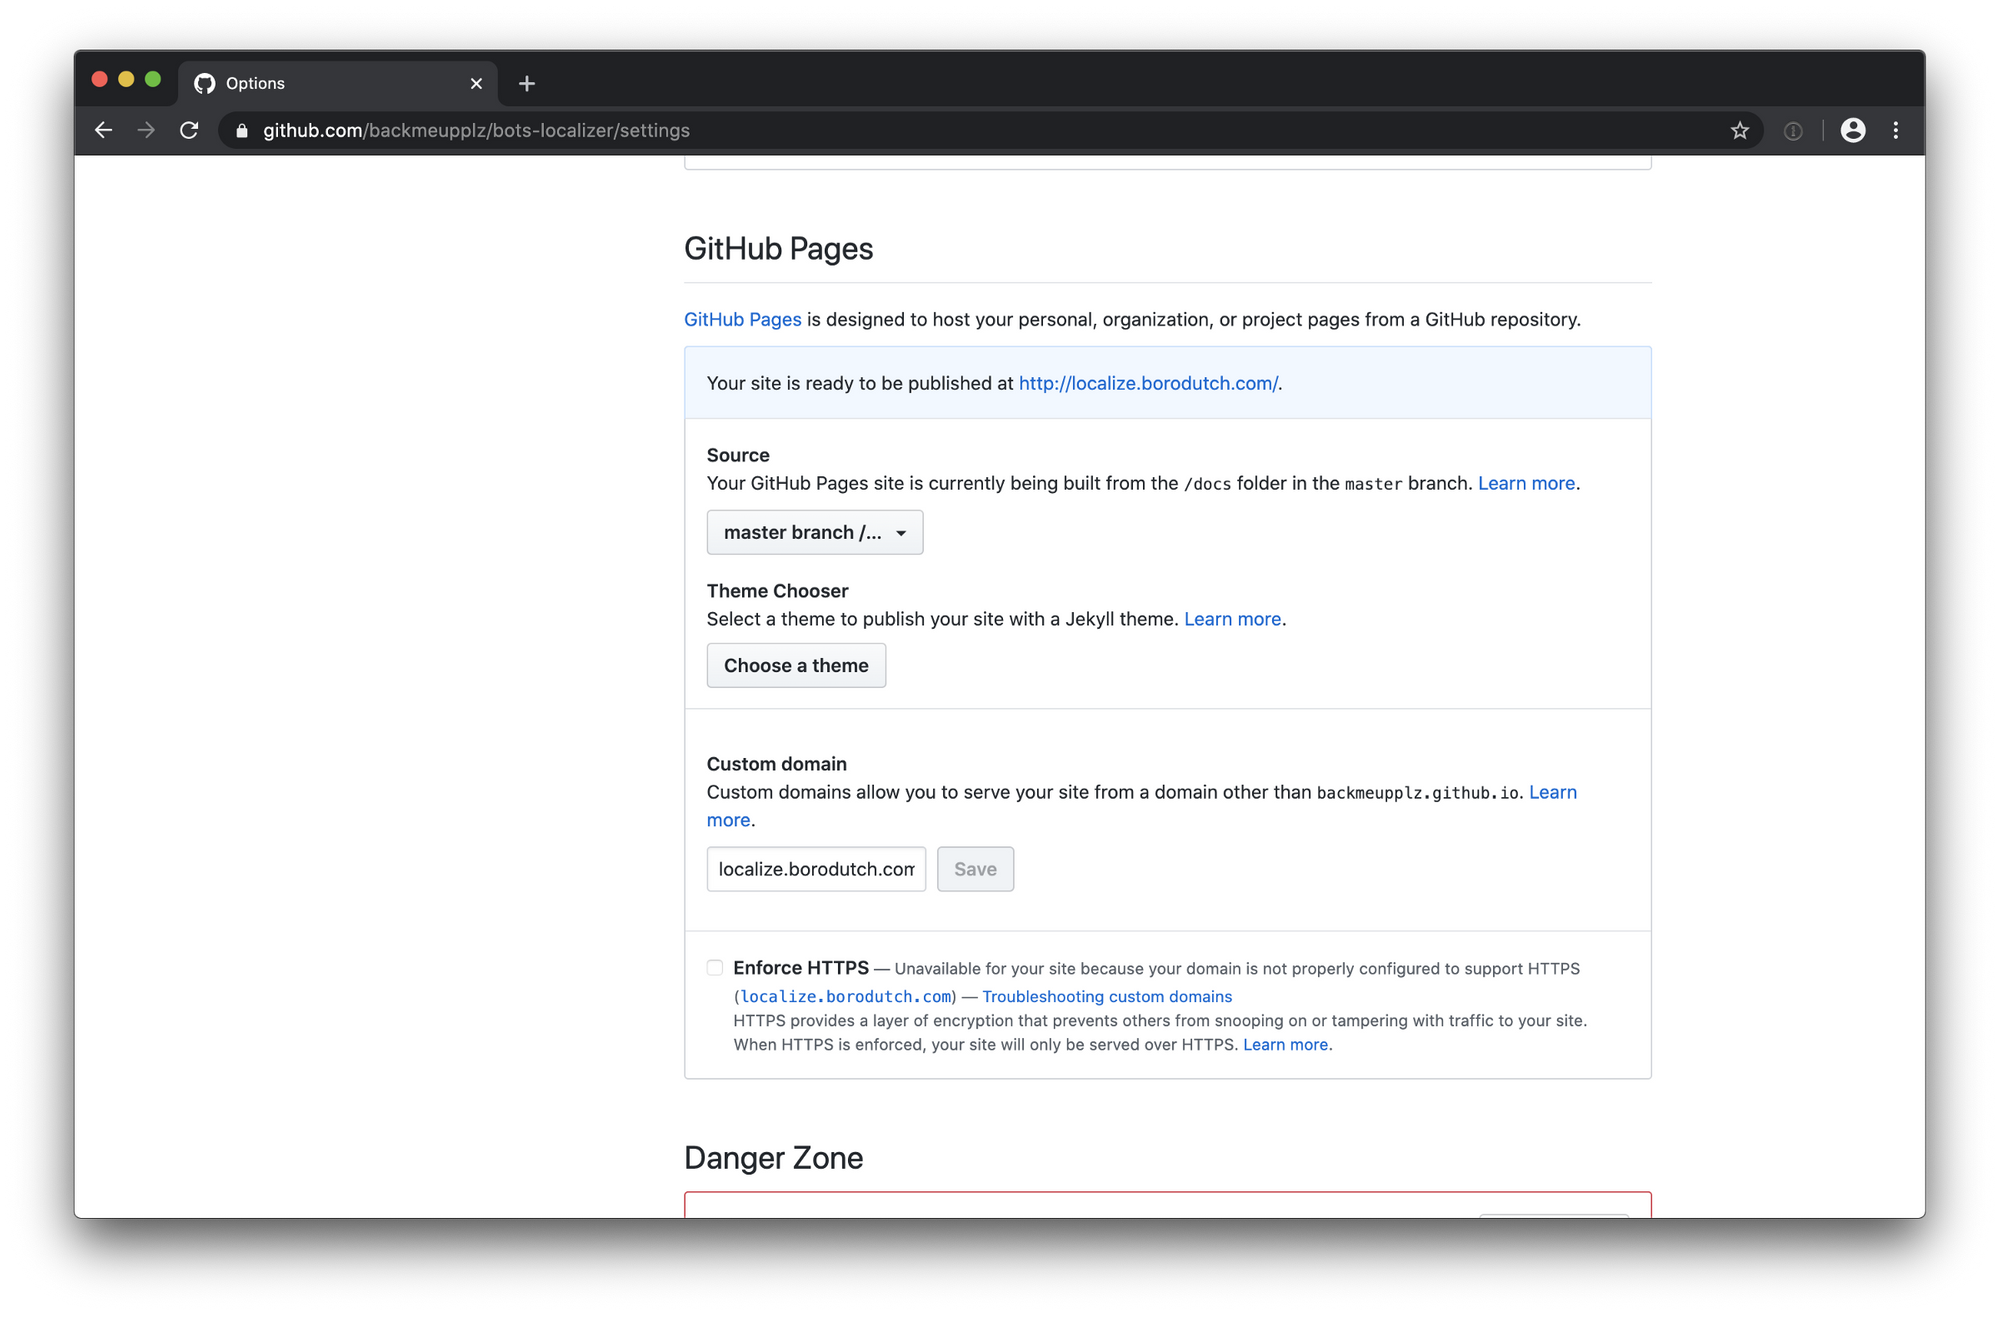
Then go to the GitHub repository -> Settings -> Options -> GitHub Pages and select the main branch /docs folder as the source. Because we added CNAME earlier, GitHub should pickup our custom domain name right away.
By now you should’ve added your website to Cloudflare. You can use the first part of this tutorial for that. The next step is to set up DNS so that your domain points at the GitHub Pages IP’s: 185.199.108.153, 185.199.109.153, 185.199.110.153, 185.199.111.153. Notice the Proxied keyword.

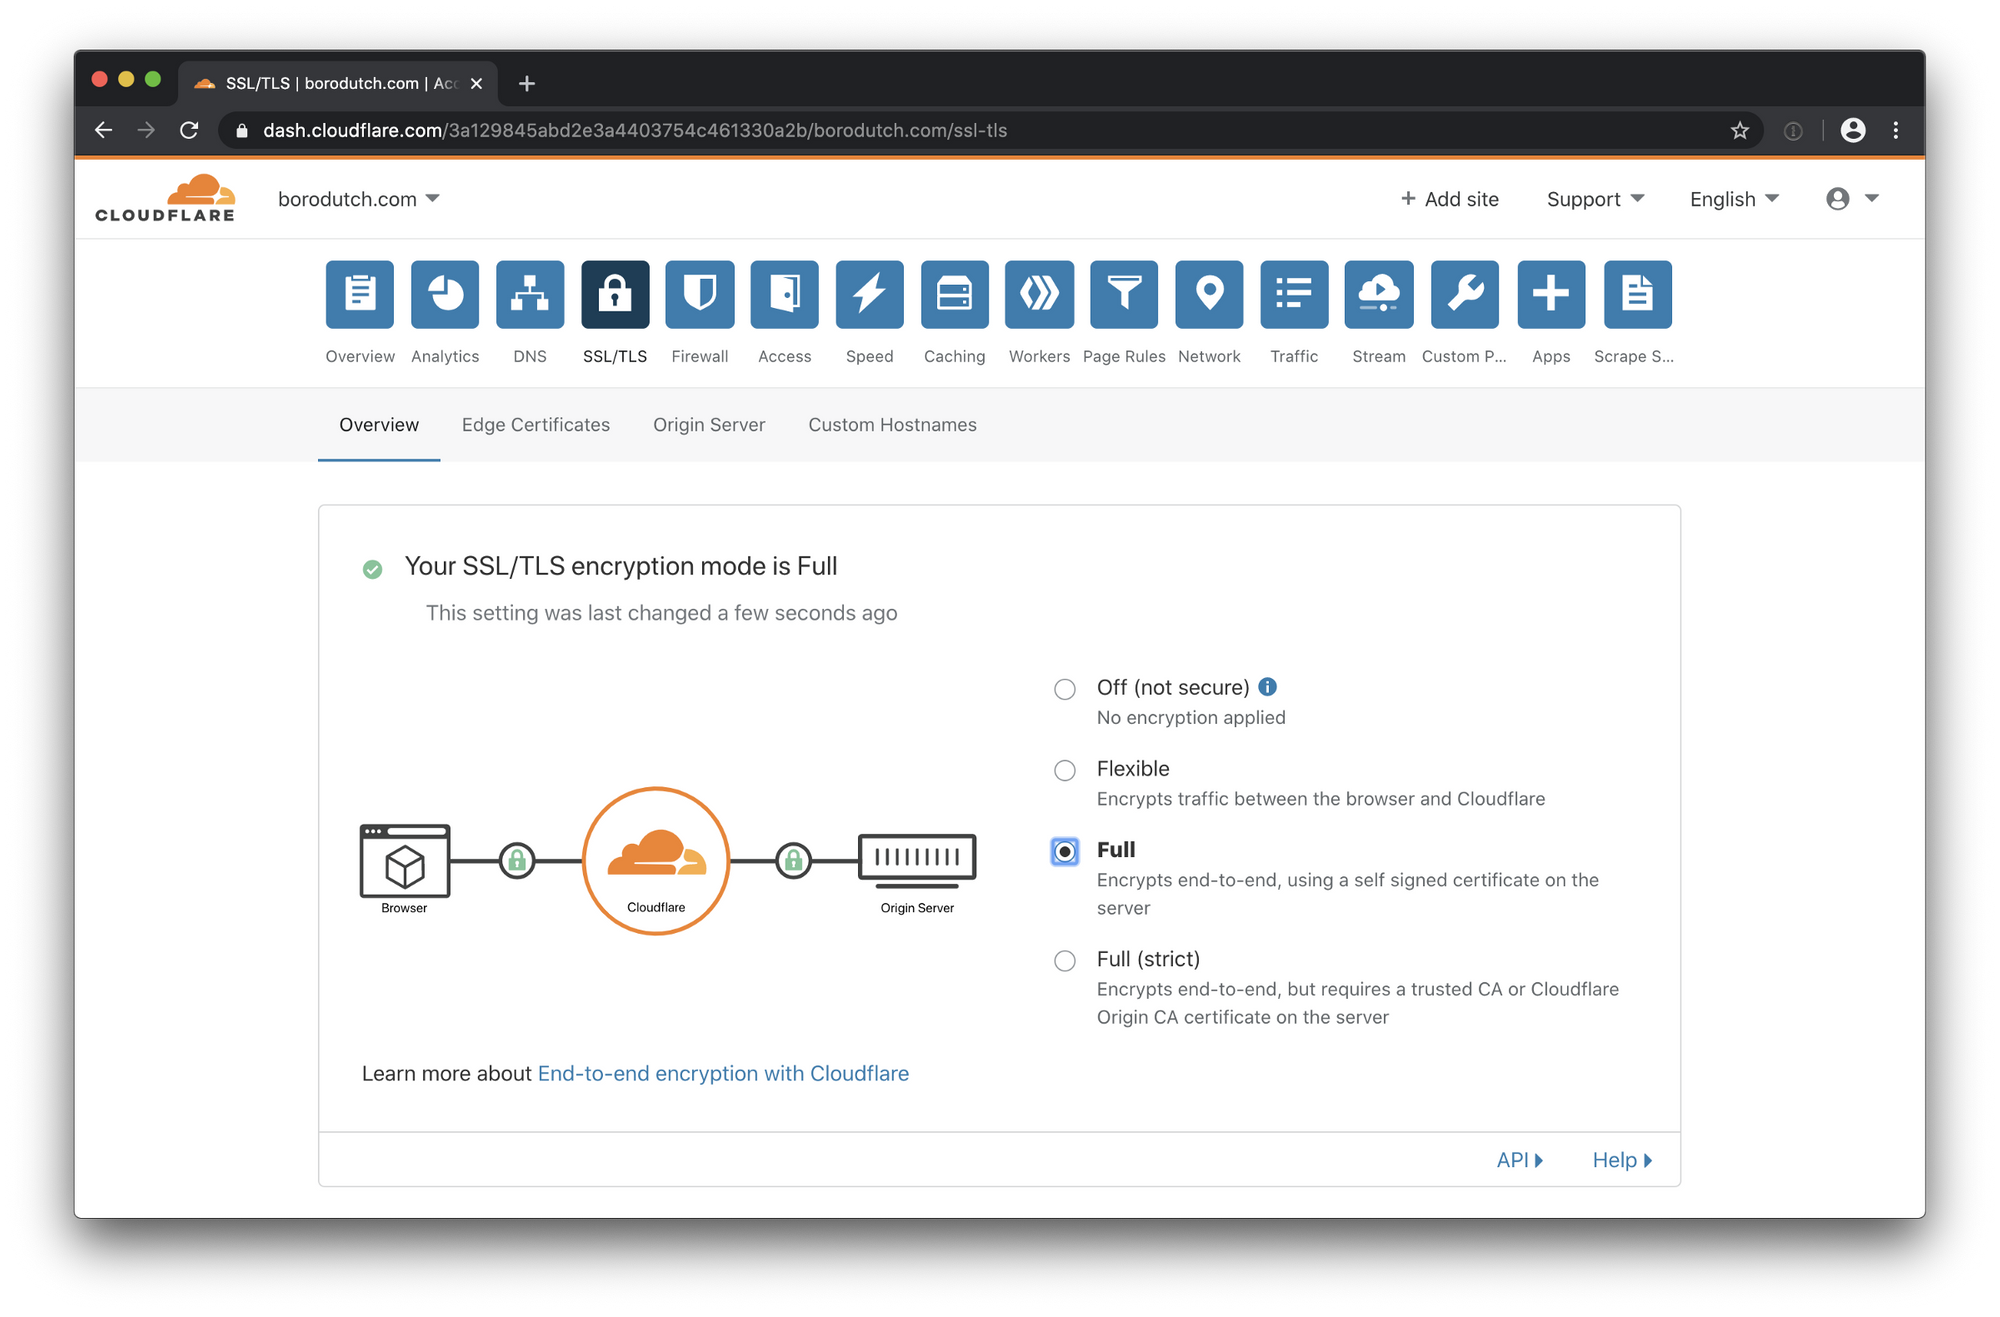
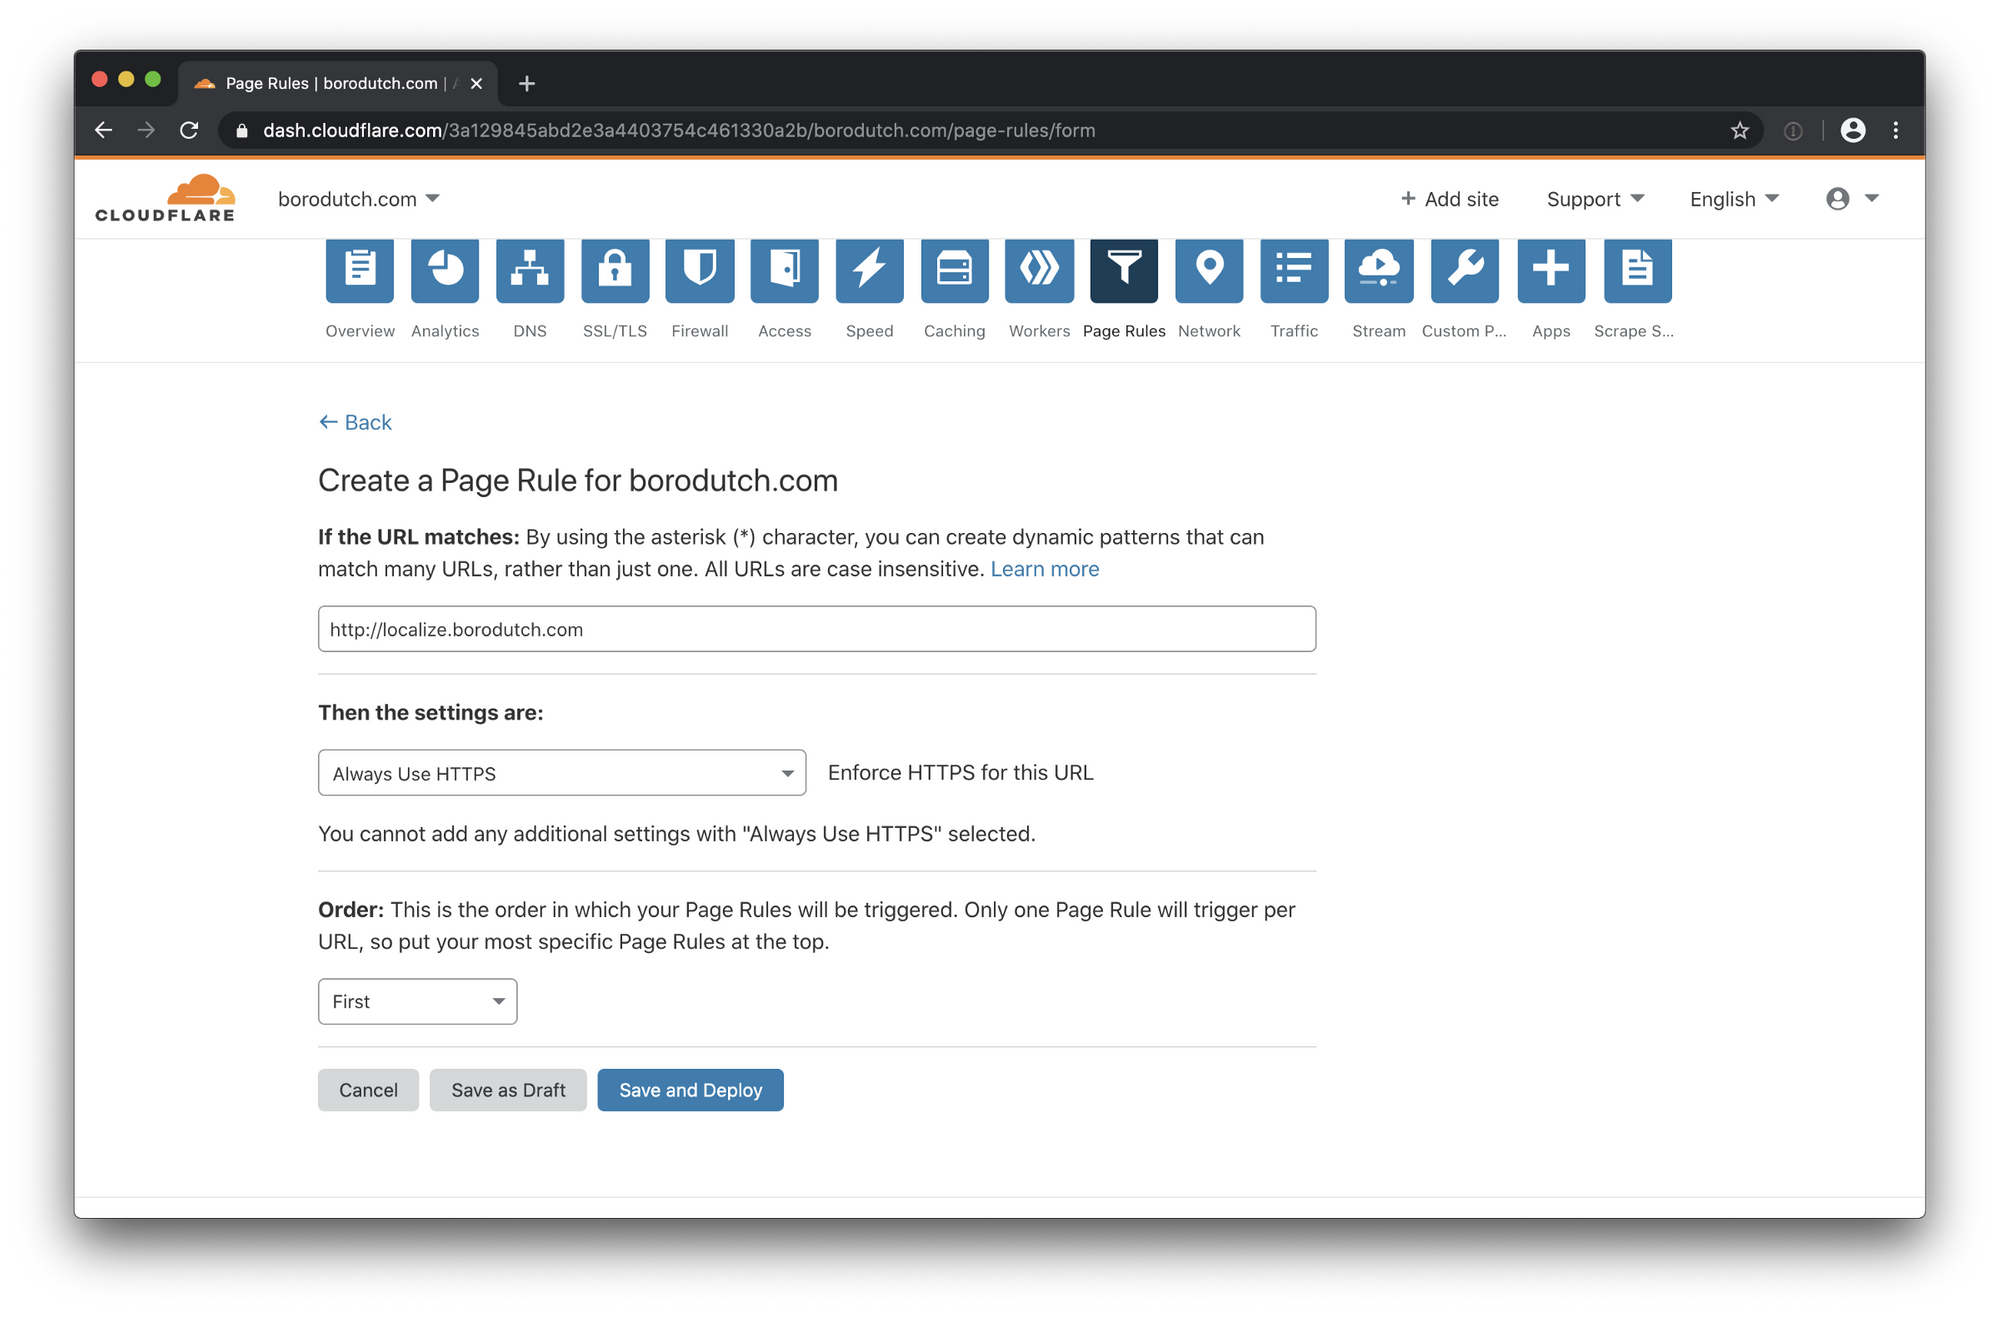
Go to “SSL/TLS” on Cloudflare and turn on Full encryptin. Now go to the page rules and add an “Always use HTTPS” rule for your website.
And you should be done! Your localizer instance should be accessible by now. Feel free to explore it.
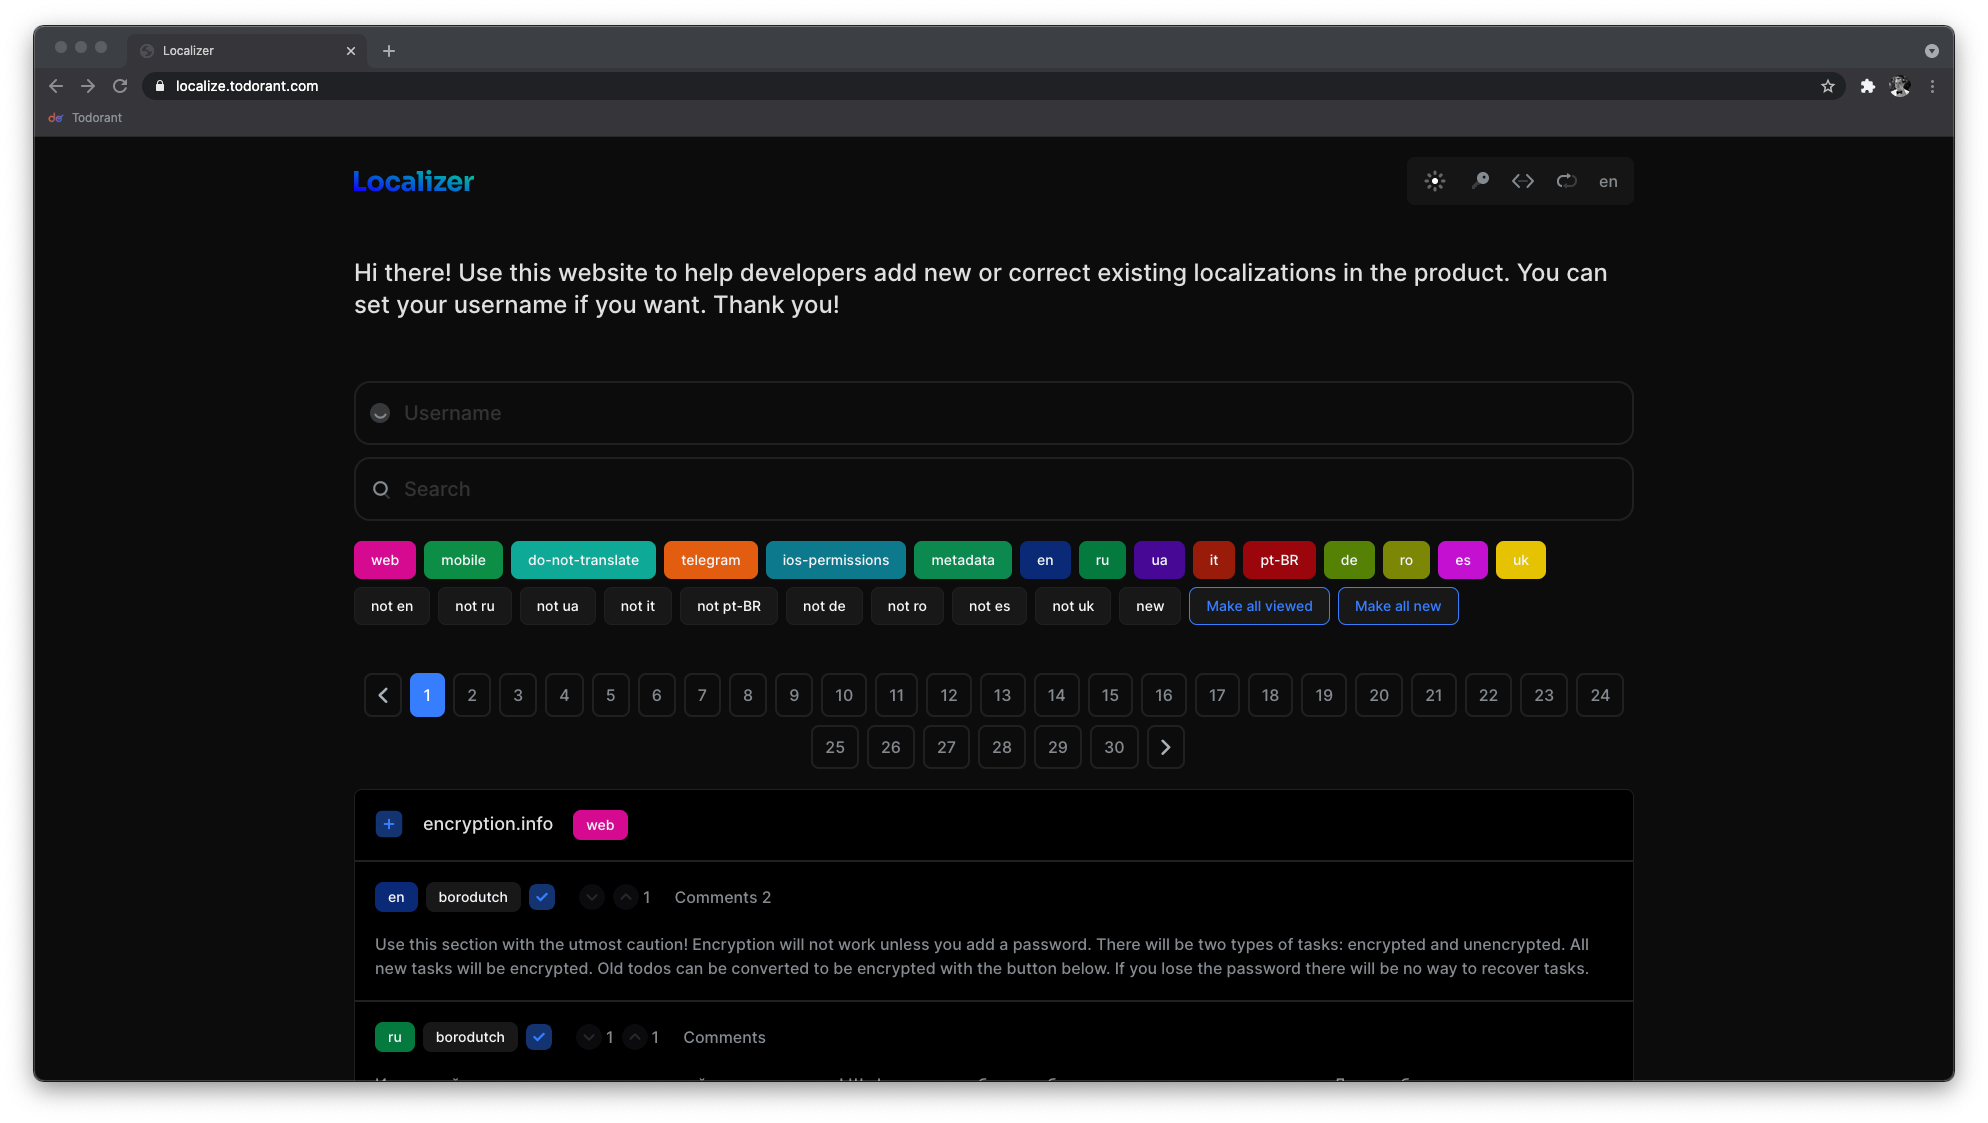
Notice the lack of data
It happens because you haven’t added any data yet! You need to add an initial set of localizations over API. In fact, there are two endpoints you need to be aware of:
You will need to write scripts that allow you to post and get the localizations to automate your development process. Here are a couple of examples from my projects:
- Todorant frontend upload and download scripts to localize.todorant.com
- Todorant Telegram bot upload and download scripts to localize.todorant.com
- Todorant Mobile upload and download scripts to localize.todorant.com
Careful: this is not the prettiest code I’ve written, I just needed to make it work and not to spend too much time on this. Use the code samples as an example for your own implementation.
I simply run node scripts/upload.js or even yarn upload-translations to upload my new translations. You can even make it a part of your CI process! Then, at some point in future, I run node scripts/download.js to get the most up to date translations. Magic!
Quick note on updating the frontend
If you forked my Localizer frontend GitHub Project, then the only two things you need to do are to update your fork with a pull request from my project, and to run yarn build, pushing the result to your fork. Then it’s done — you’ve the latest version working!
Conclusion
Aaaaaaand… you’re done! By now you should a Localizer instance running on your server and being avaliable to general public. Good luck with the project you’re working on and again, if Localizer helped you in any way, please, clap to this article (you can clap up to 50 times by holding the clap button!). It really helps!