How to deploy an Electron app with auto-updates enabled for free in 2021 with just one command
Here's how to deploy an Electron app to macOS, Windows and Linux with the auto-update feature for free and with just one command
Hi everyone! In this article I'll explain you how to make use of existing tools to deploy an Electron app with the auto-update enabled just like we are doing with the Todorant app. I assume that you have a working Electron app already that you want to deploy with one command in the command line and forget about all the troubles. In case if you don't have Electron app set up with the electron-builder, follow quick start here.
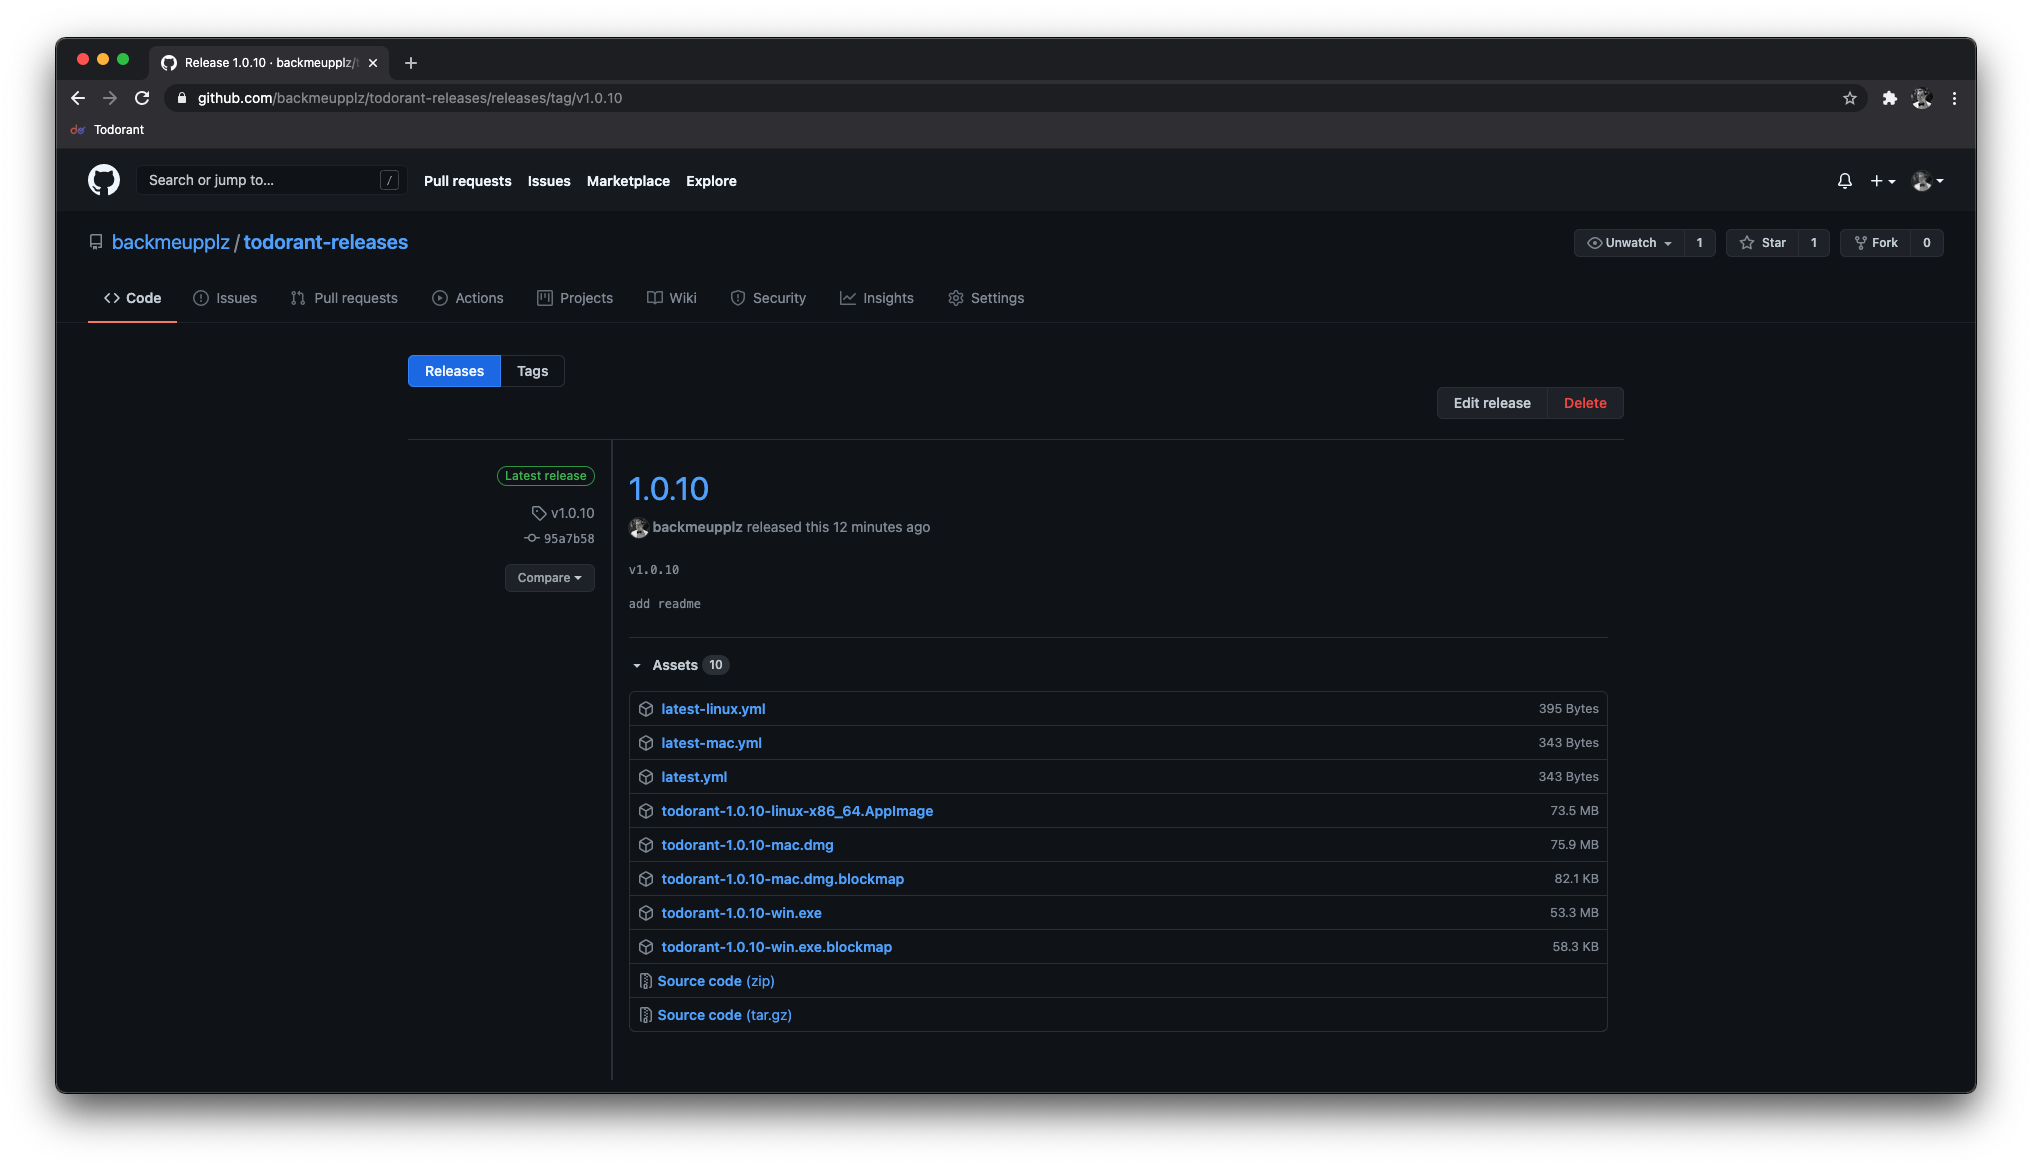
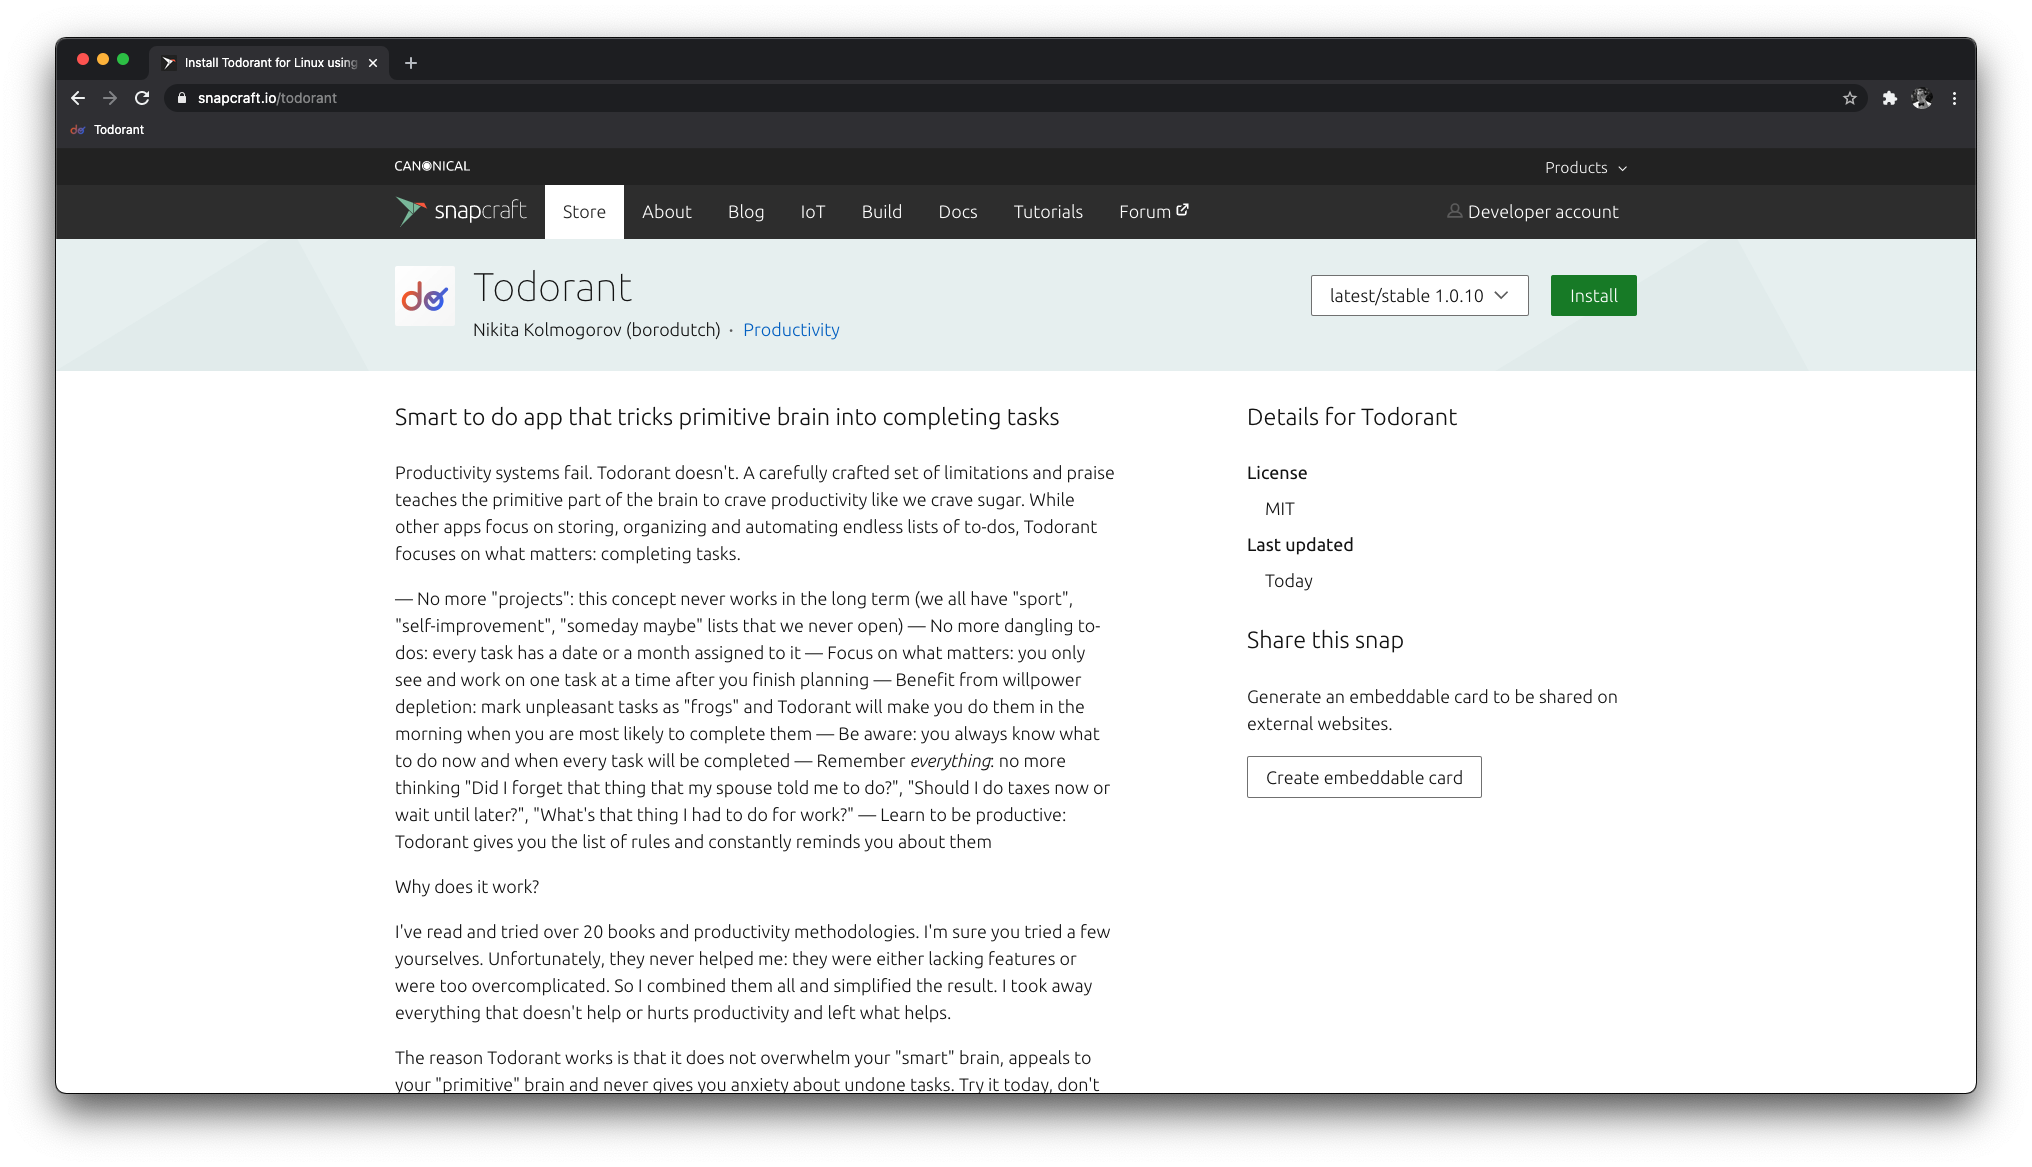
We will build the app for Linux, Windows, macOS and Snapcraft (a fancy linux app store). Snapcraft will be the only app store we'll use, only uploading other binaries to the GitHub Releases tab in a public repository. Apple isn't keen on approving the Electron apps recently, so not using the App Store to distribute the binary can be a good idea. However, if you want to avoid having an "untrusted developer" popup when installing the macOS app, you have to notarize the app with Apple — I'll show you how to do so later in the article.
To achieve the desired outcome we'll use electron-updater, versiony and good old electron-builder. I'm also building everything on macOS, because I couldn't find a way to build macOS binaries on Linux, so in case you are not using macOS, just omit the macOS build configs and steps in this article. Let's go!
Setting up auto-updates
We need to set up electron-updater so that it checks if there are any updates available in the public GitHub repository. Let's install it, run the following command:
yarn add electron-updater
Oh, I'll use yarn in this tutorial, feel free to use npm instead. Next, create an empty GitHub public repository with a readme file (even with just the name of the repository). We will store the binaries in the GitHub Releases tab of this repository and electron-updater will check this repository for the new updates.
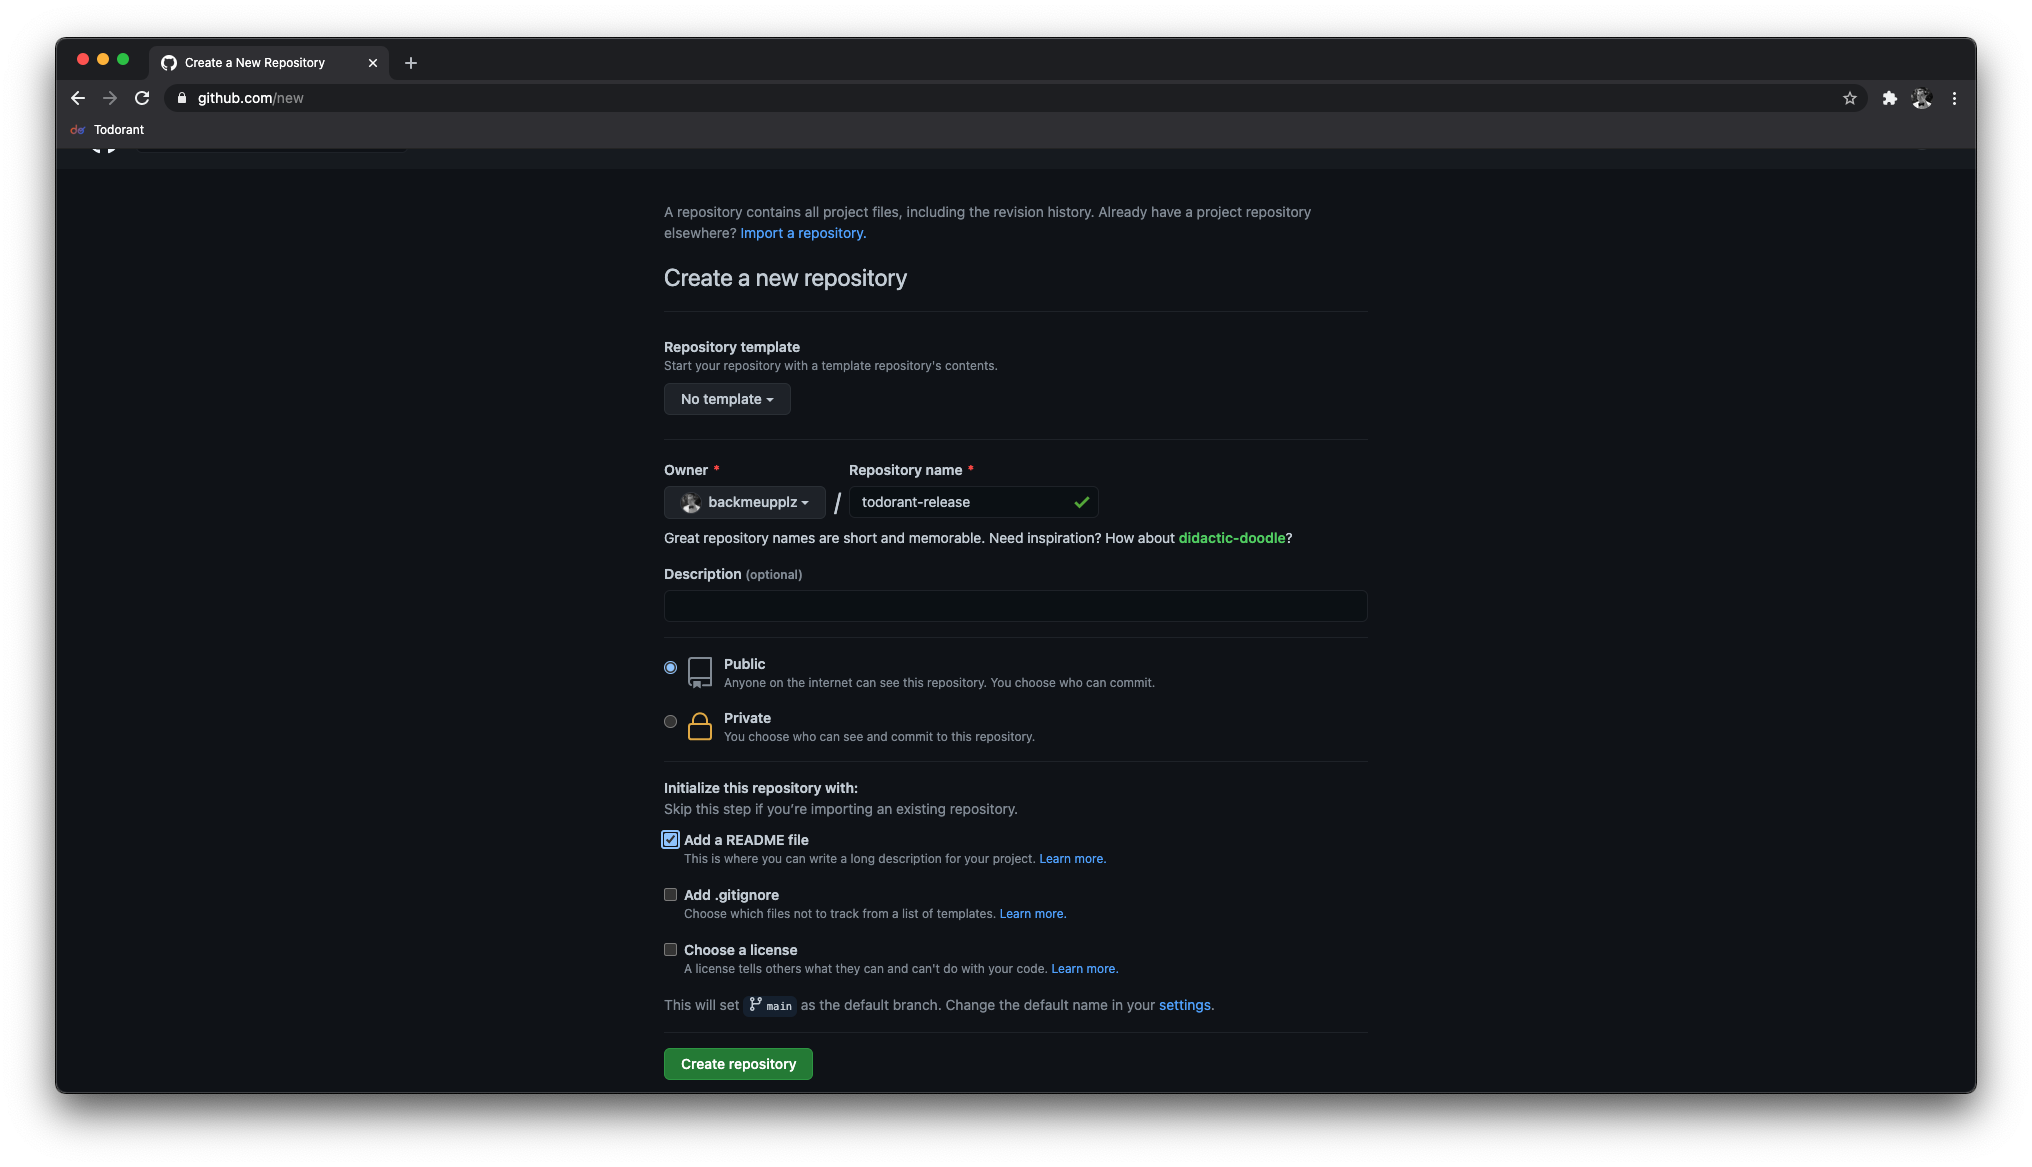
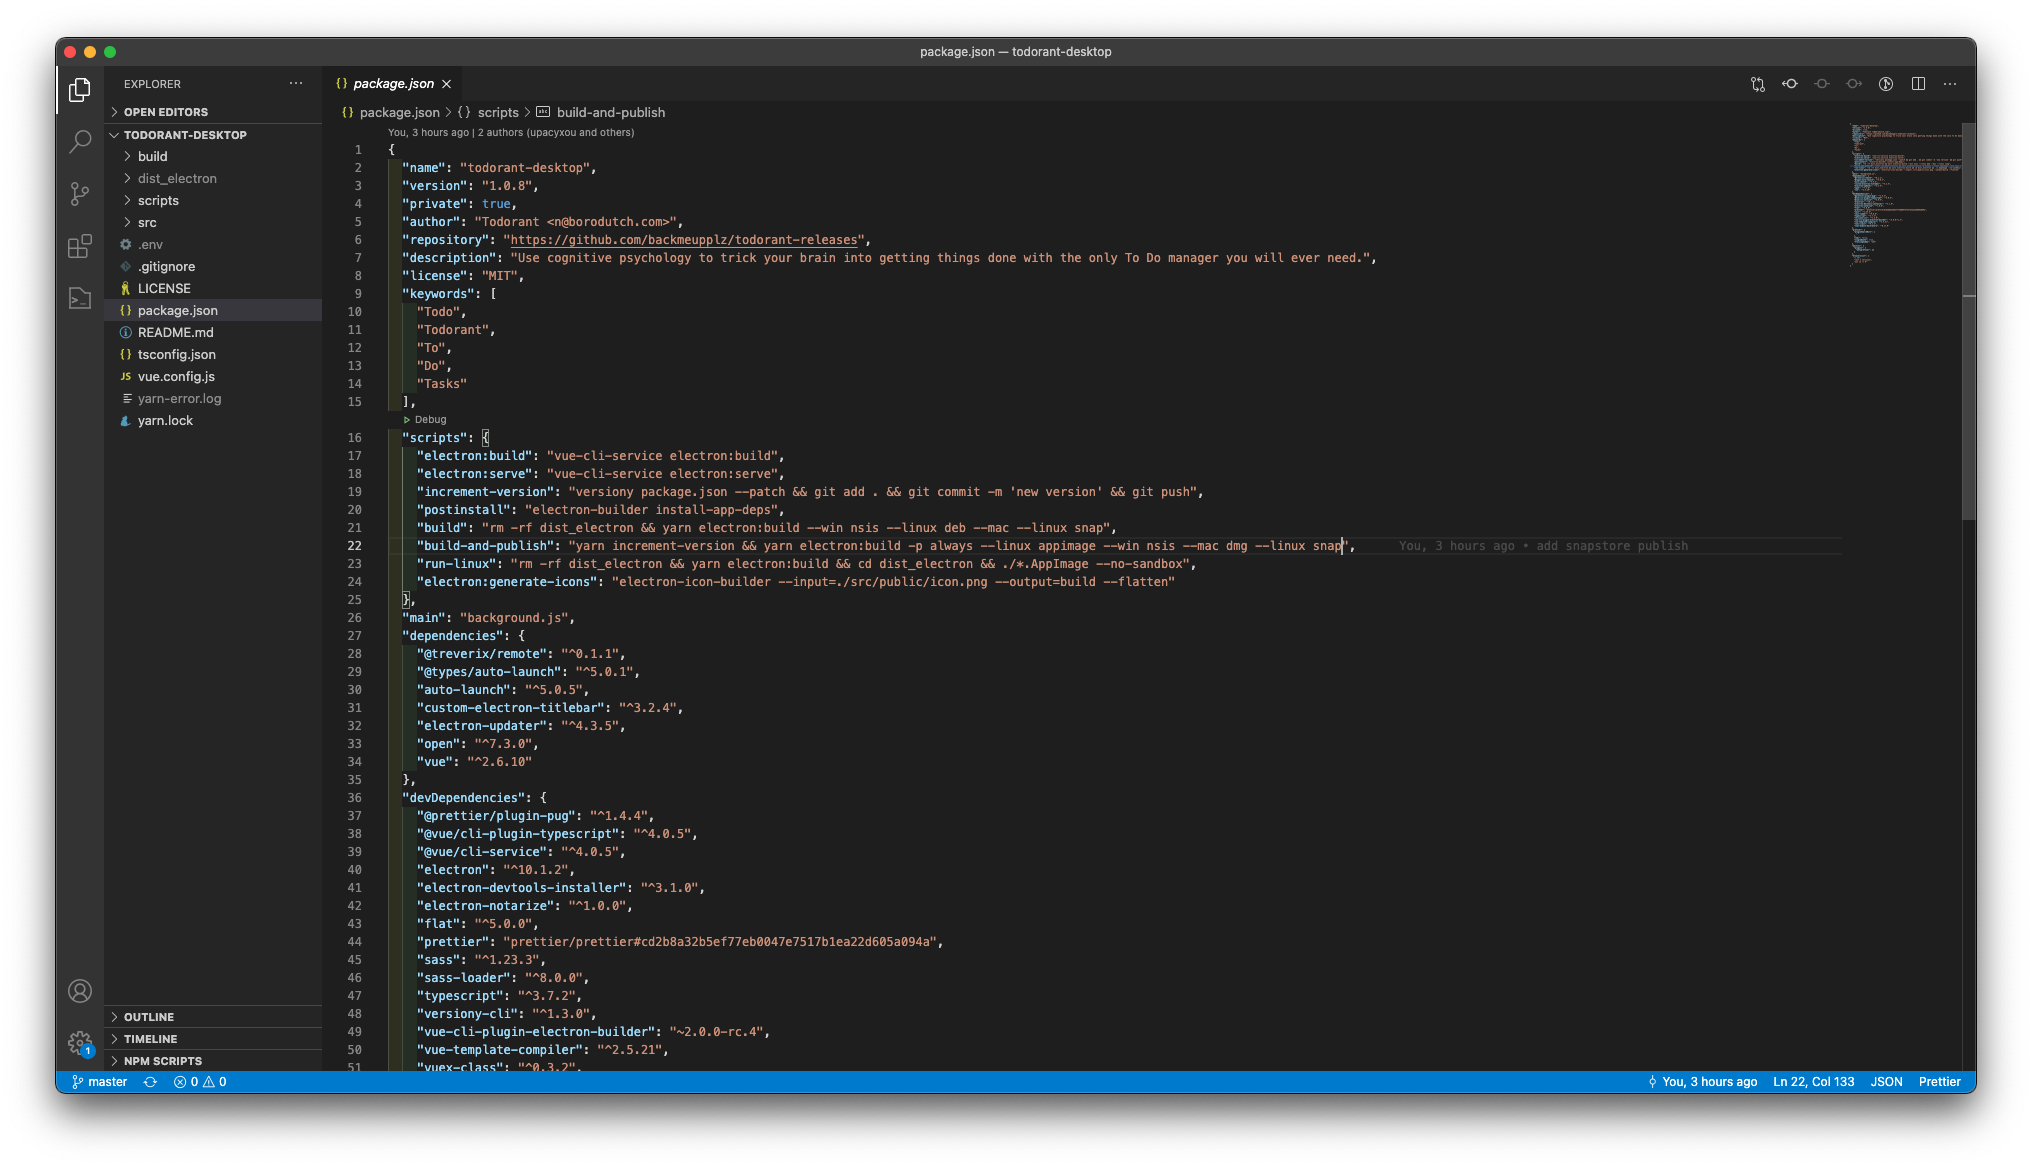
Now make sure that your Electron project's package.json has a valid name field, a valid version field and a repository field that uses the URL of the public repository you've just created. You can explore the rest of my package.json as an example, but most of the things there are irrelevant to this article.
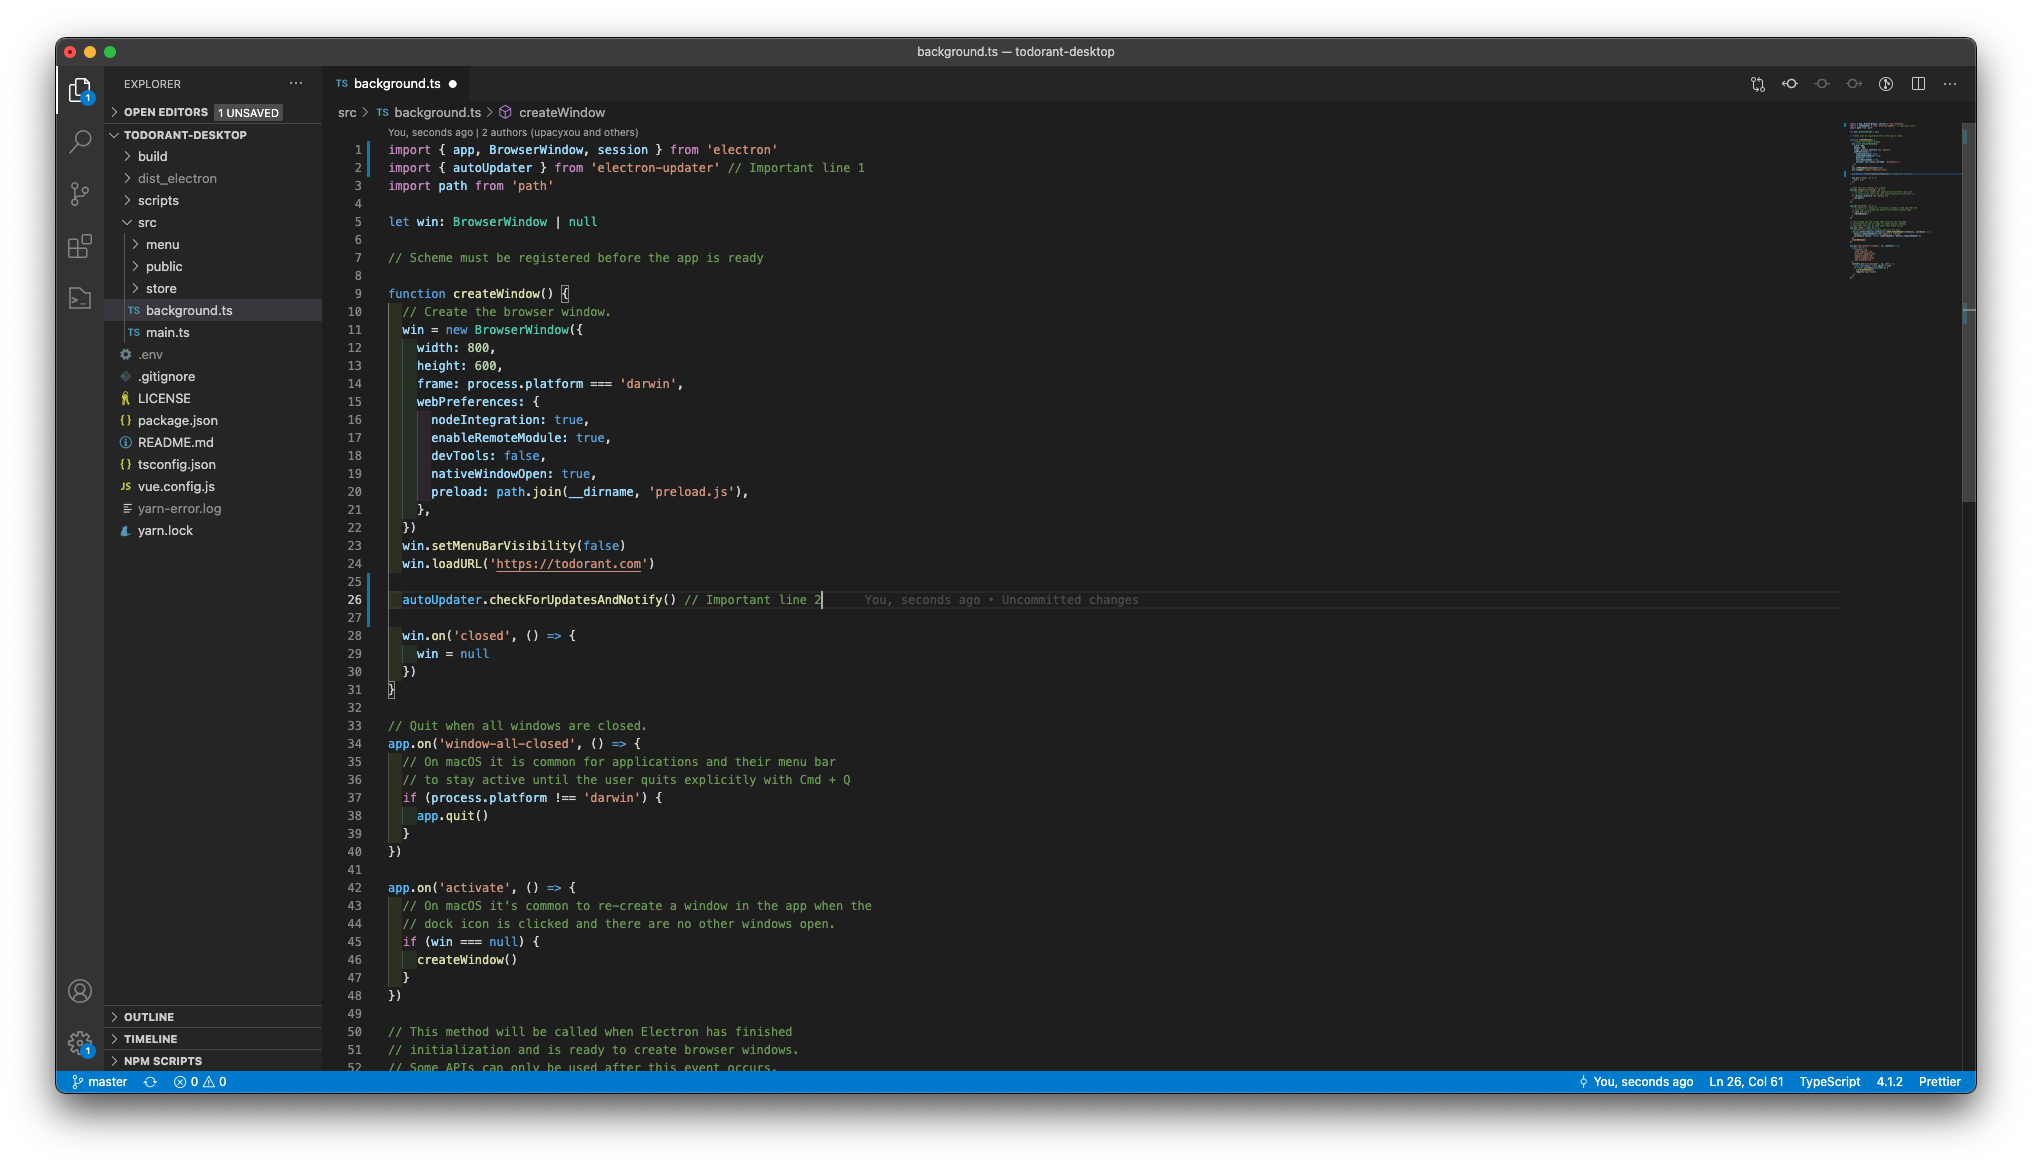
Now go to the entry point of your app and add two lines of code (yes, just two). The first one is the import statement:
import { autoUpdater } from 'electron-updater'
And the next one is the actual call to check for updates, add it to any place where you want to check for the updates, we added it to the app initialization function:
autoUpdater.checkForUpdatesAndNotify()
That's it! We are done with the electron-updater. Now it will check for the updates from the GitHub repository in the package.json and compare them against the version value in the package.json. You can also configure this function in a variety of cool ways, read the docs here.
Setting up incrementing the version
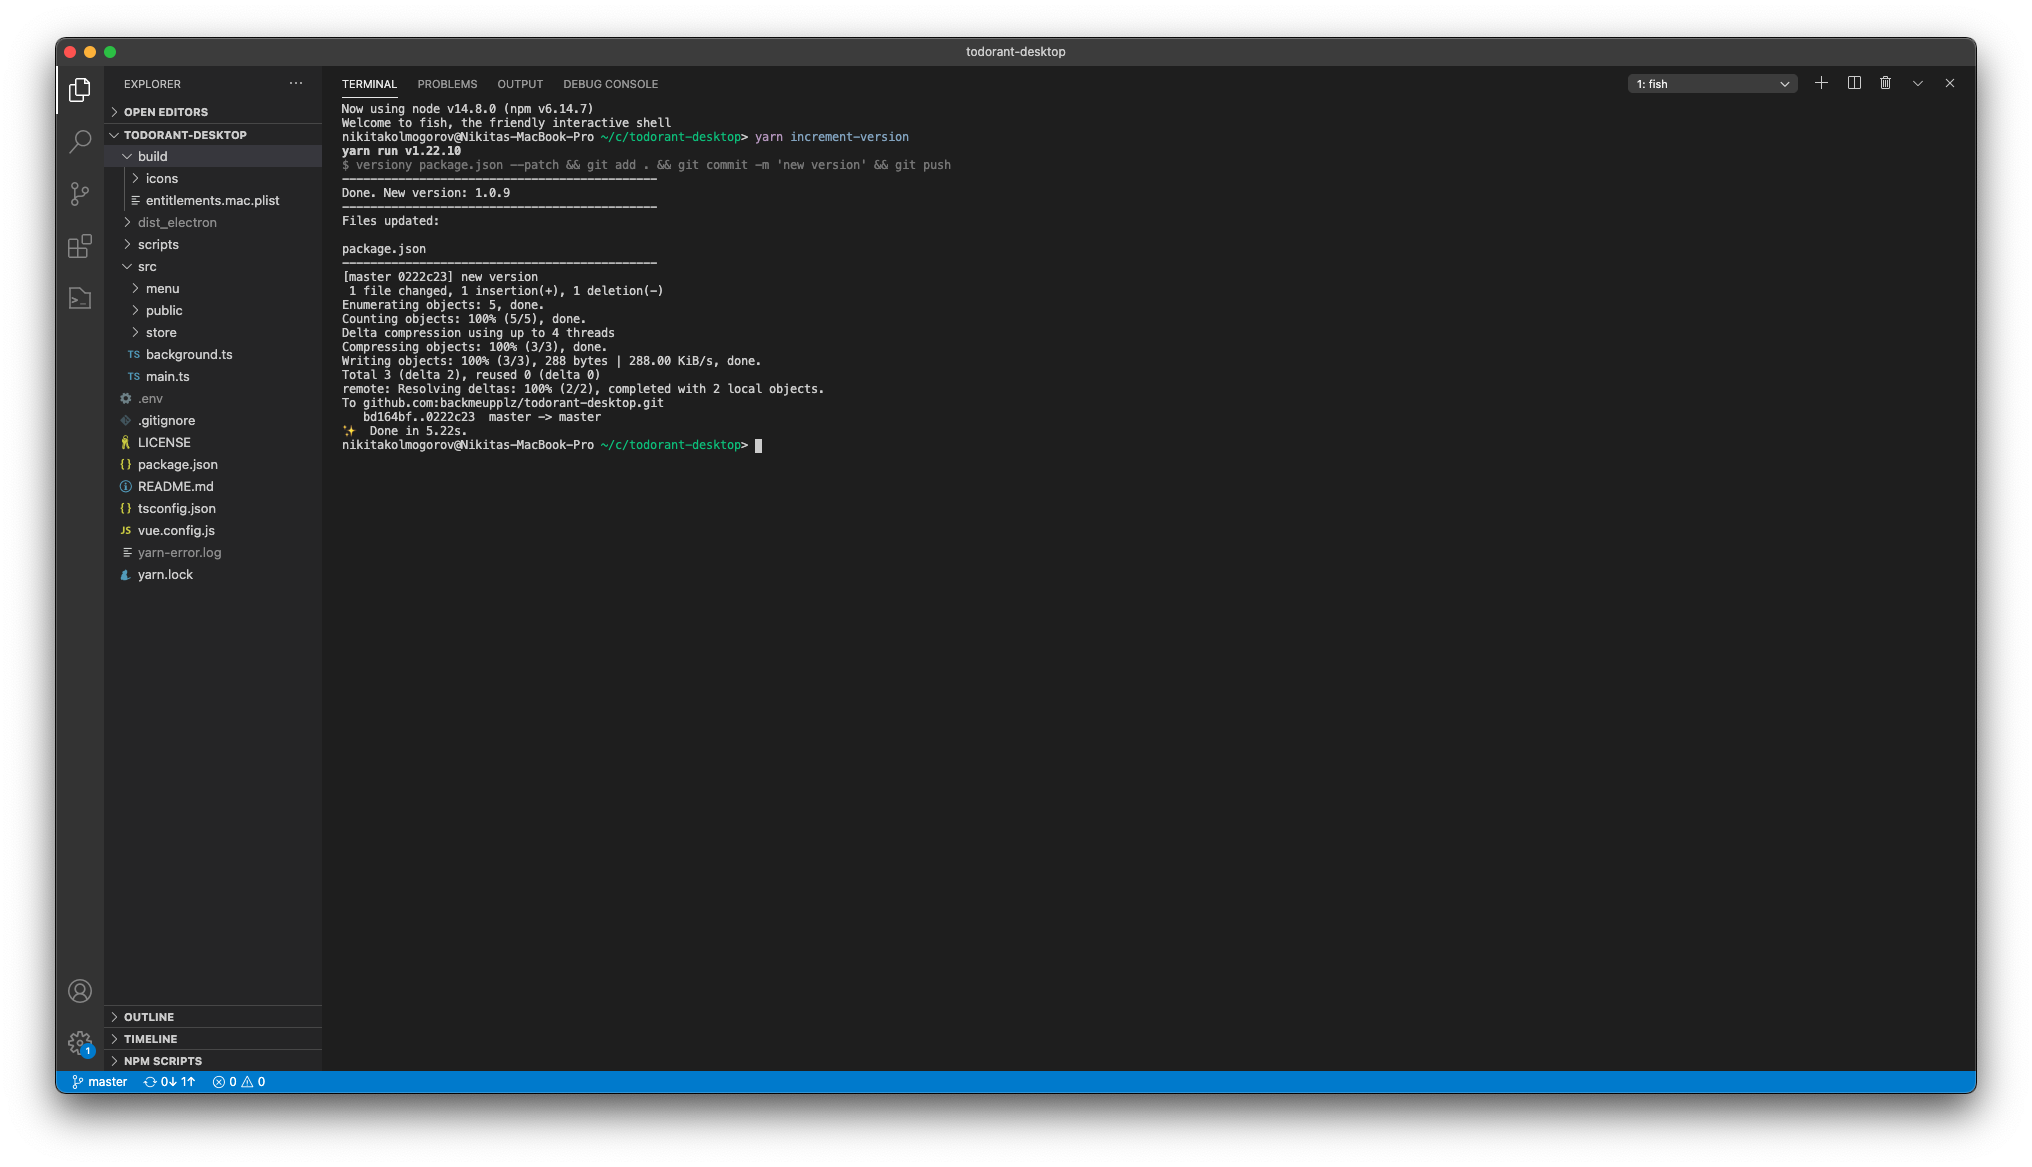
Let's assume that every time you want to make a new release, you want to increment its version. versiony tool will help us do just that, so install it by running the following command:
yarn add -D versiony
Now add a script to your package.json with the following content:
"increment-version": "versiony package.json --patch && git add . && git commit -m 'new version' && git push"
You can see an example of a package.json file in one of the screenshots above. Running yarn increment-version should now increment the version field of the package.json file, commit the change and push it. Feel free to tweak the script whatever way you like.
Setting up the deploy script
Alright, ideally I want to have a yarn build-and-deploy command that increments the app's version number, builds all the binaries and distributes them. You can actually find this command in one of the earlier screenshot! Well then, let's build this command step by step!
Add the following code to either the pluginOptions.electronBuilder field of the vue.config.js if you use vue-cli-plugin-electron-builder, or to the build field of the package.json if you use the plain vanila electron-builder. I'm using the vue-cli-plugin-electron-builder in my case.
builderOptions: {
  productName: 'Todorant',
  artifactName: 'todorant-${version}-${os}-${arch}.${ext}',
  publish: [
    { provider: 'github', private: false, releaseType: 'release' },
  ],
  mac: {
    hardenedRuntime: true,
    entitlements: 'build/entitlements.mac.plist',
    entitlementsInherit: 'build/entitlements.mac.plist',
  },
  afterSign: 'scripts/notarize.js',
  dmg: {
    sign: false,
  },
  snap: {
    publish: {
      provider: 'snapStore',
      channels: ['stable'],
    },
    grade: 'stable',
  },
  linux: {
    executableName: 'Todorant',
  },
},
Obviously, change the Todorant app name to your own. Note the executableName in the linux object — it is used to recognize the name of the snap on the Snapcraft! Make sure you register your app on the Snapcraft before proceeding.
Worth noting that I'm releasing everything directly to production here without going throug the "draft" state of pull requests or the development tracks in the Snapcraft. You can alter the config to your preference.
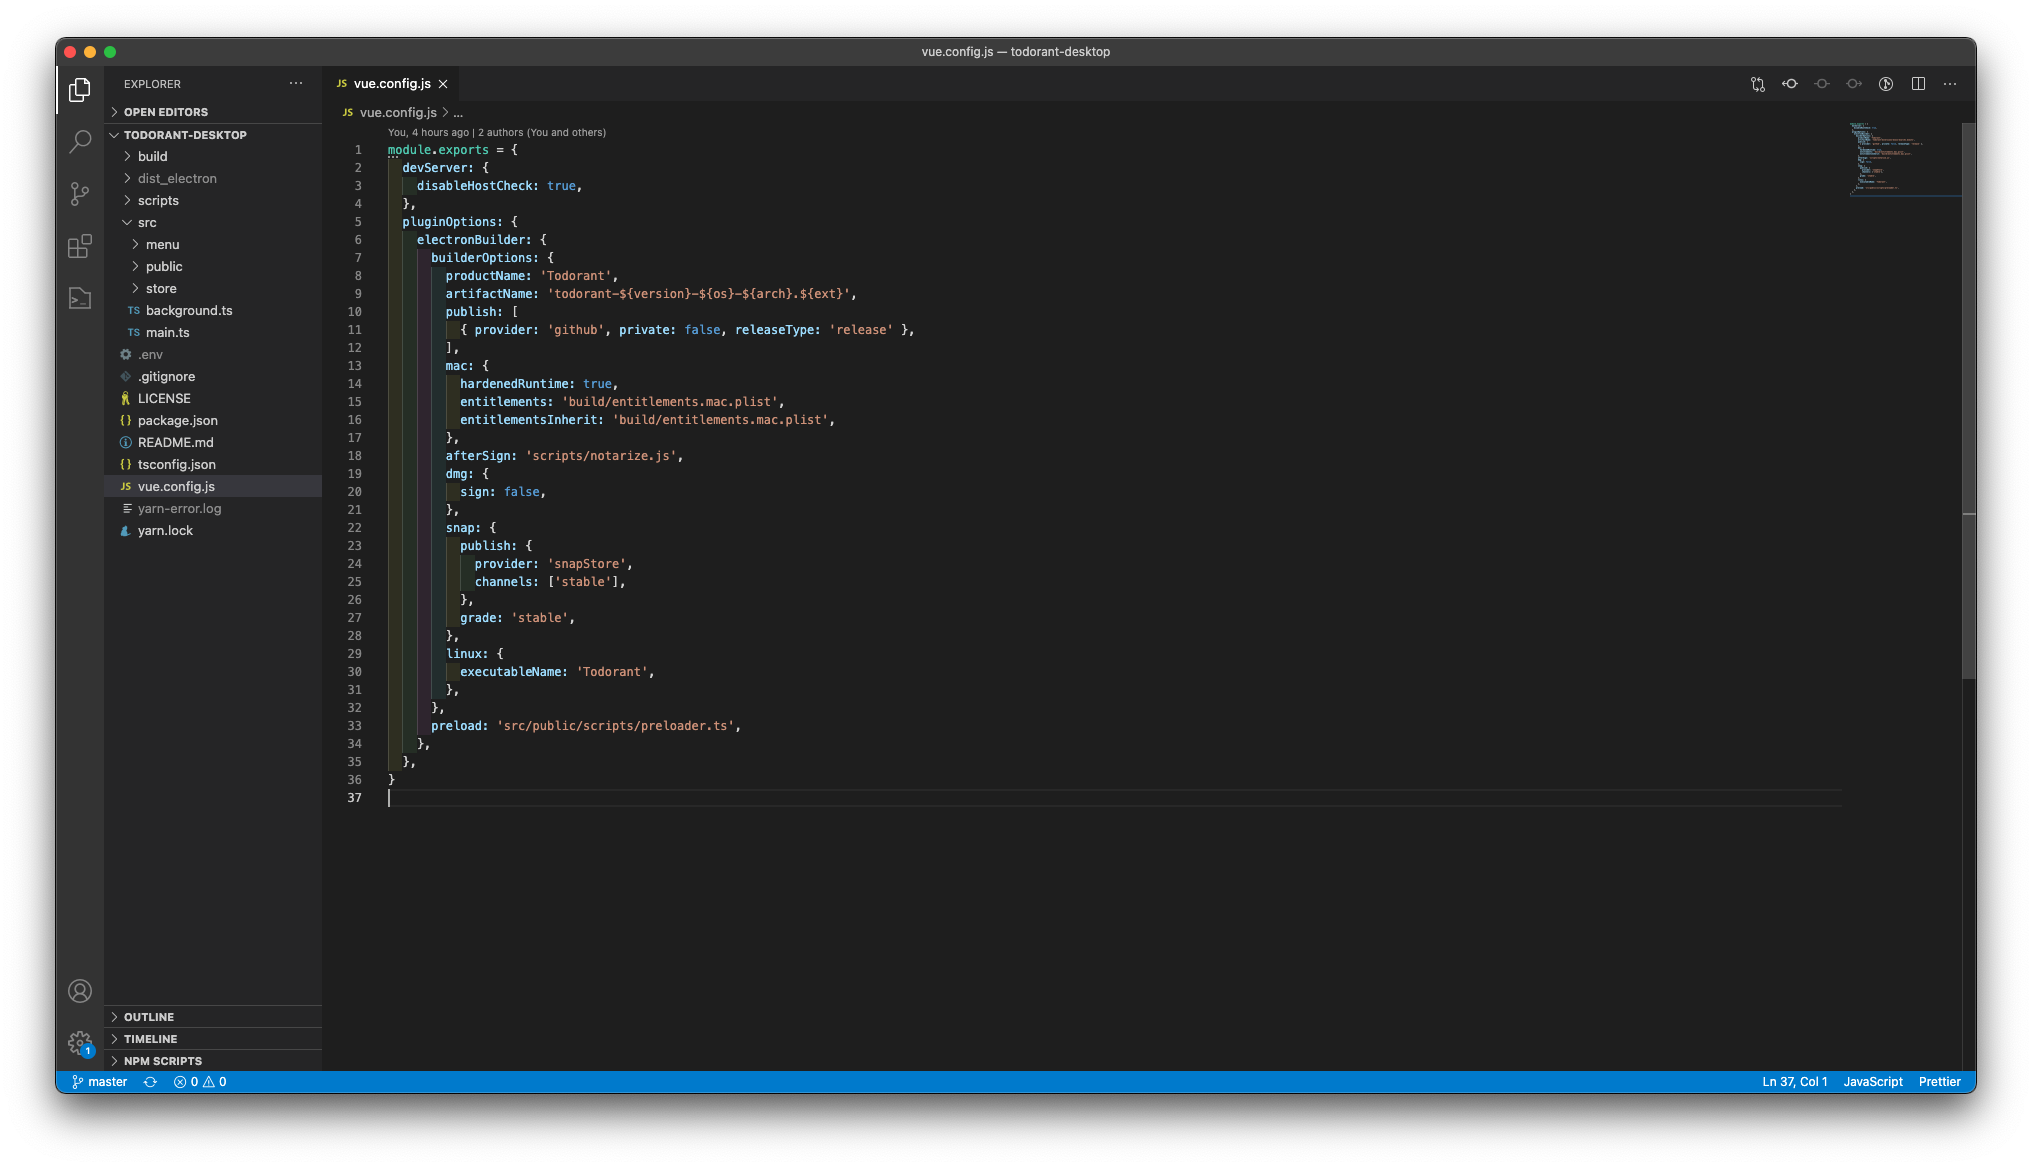
There are a lot of magic configs in this file. I highly encourage you to read about them in the official documentation. Now create the build/entitlements.mac.plist file with the following content. It is required for the Apple builds to successfully go through.
<?xml version="1.0" encoding="UTF-8"?>
<!DOCTYPE plist PUBLIC "-//Apple//DTD PLIST 1.0//EN" "http://www.apple.com/DTDs/PropertyList-1.0.dtd">
<plist version="1.0">
  <dict>
    <key>com.apple.security.cs.allow-unsigned-executable-memory</key>
    <true/>
  </dict>
</plist>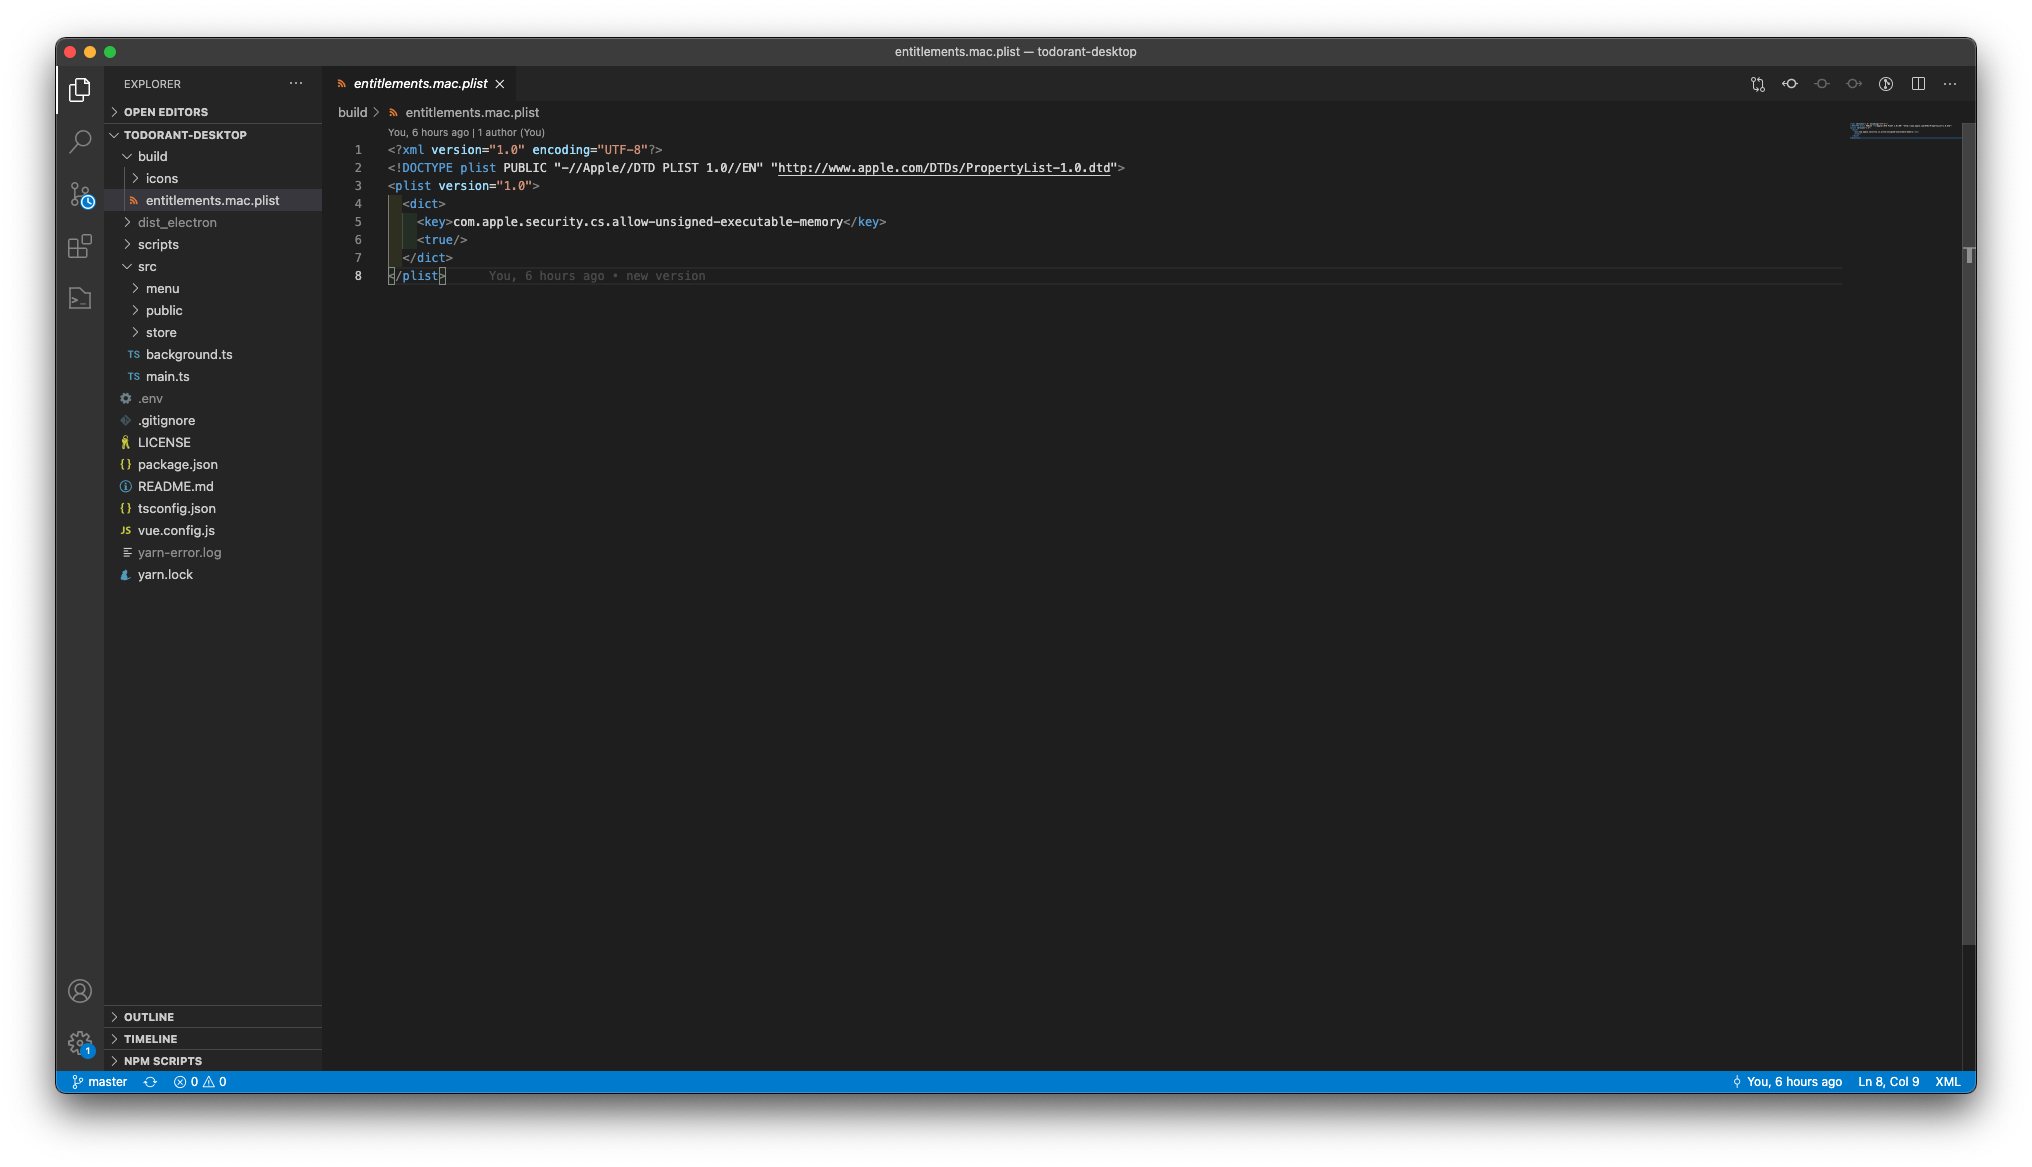
Now you need to create a new GitHub personal token with the repo scope checked here. You have to set it to the GH_TOKEN environment variable before you'll run the build scripts. Learn how to do so by searching the web for "How to set environment variable in Linux", for instance. From what I understood, this token does not get shipped into production. It is only used to upload the binaries to the GitHub.
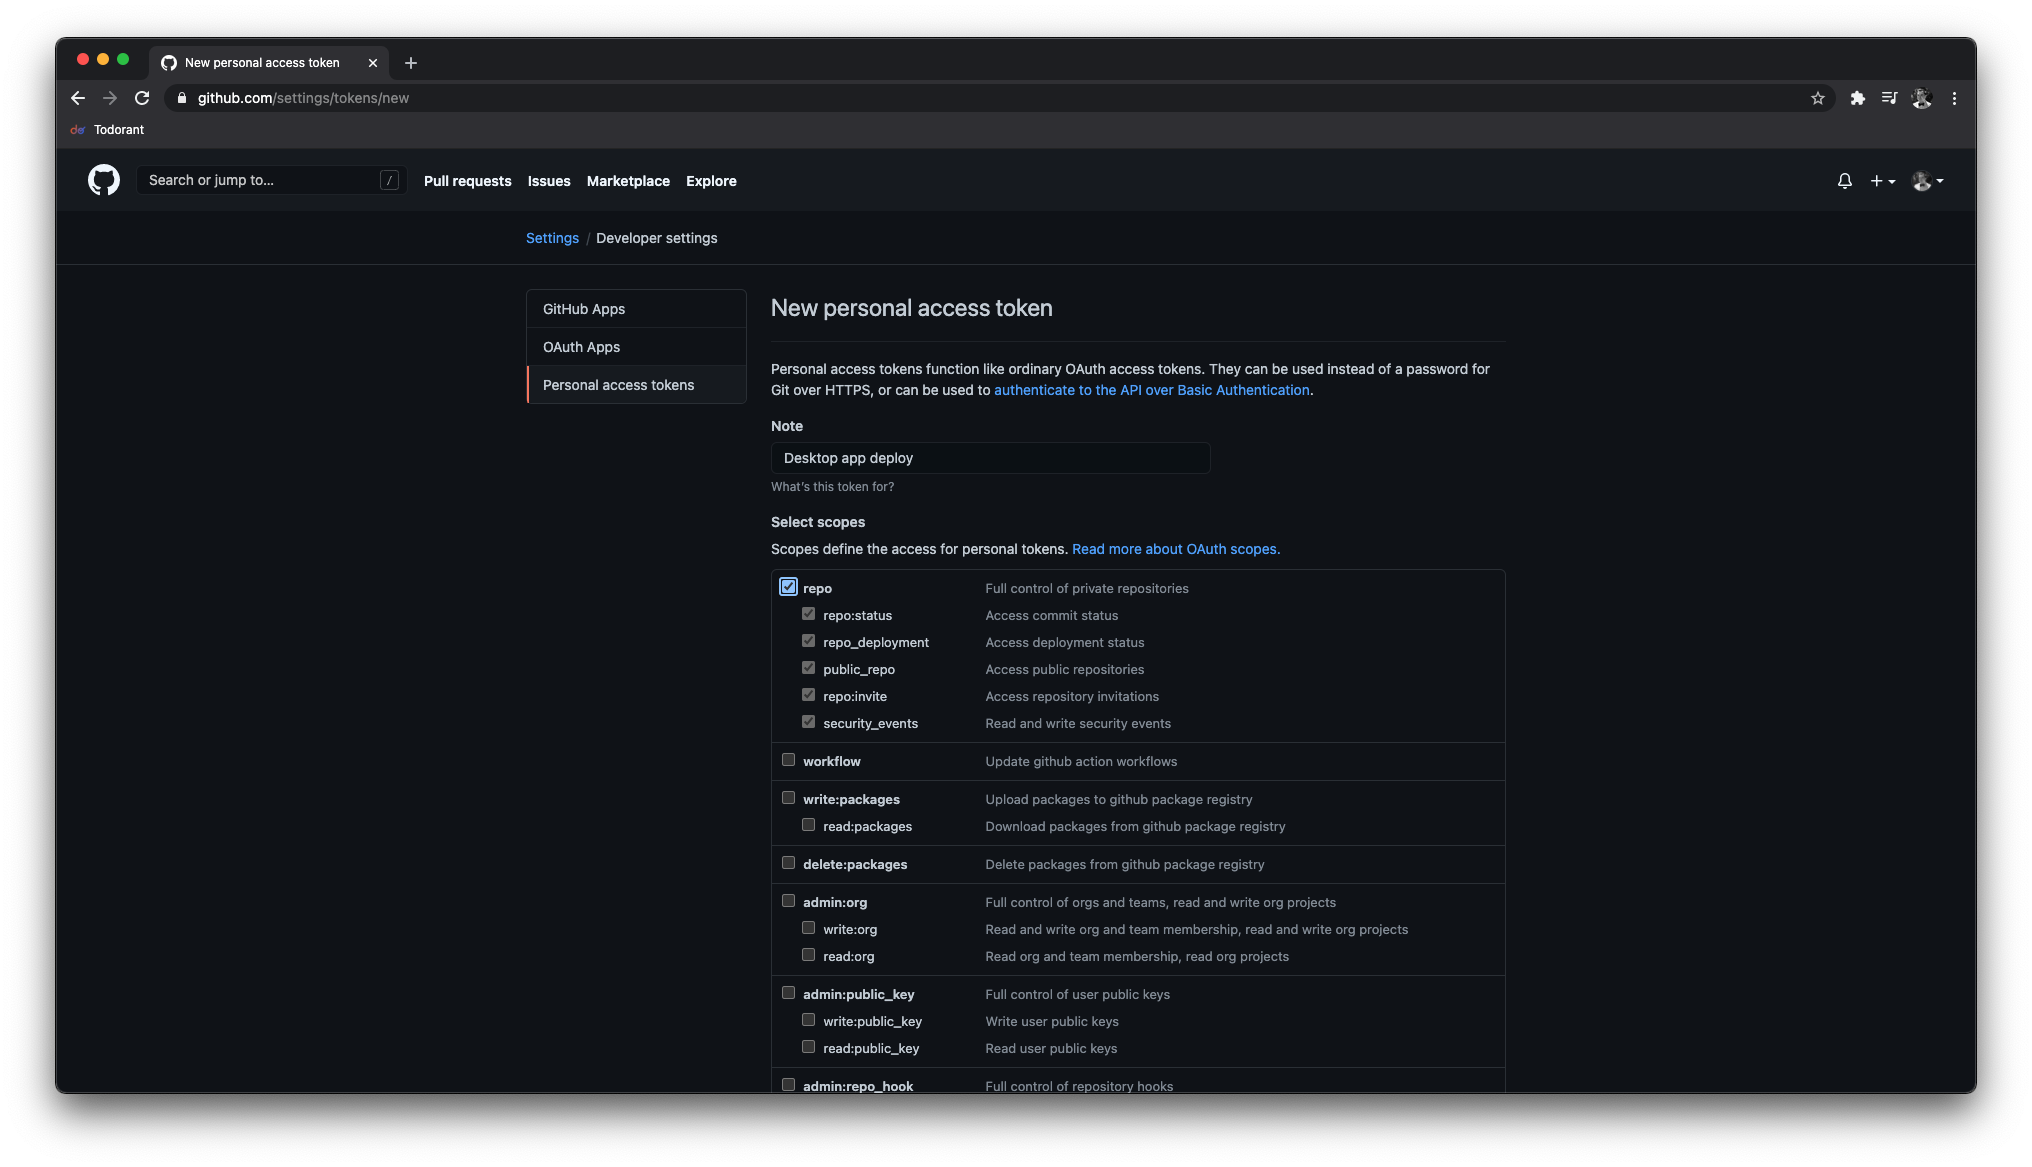
Also, there is a way to use private repos for the releases, but it requires more setup and probably you won't need it. I can't see the logical reason to use it as you will need to ship a GitHub token to achieve this (rendering the repo "public").
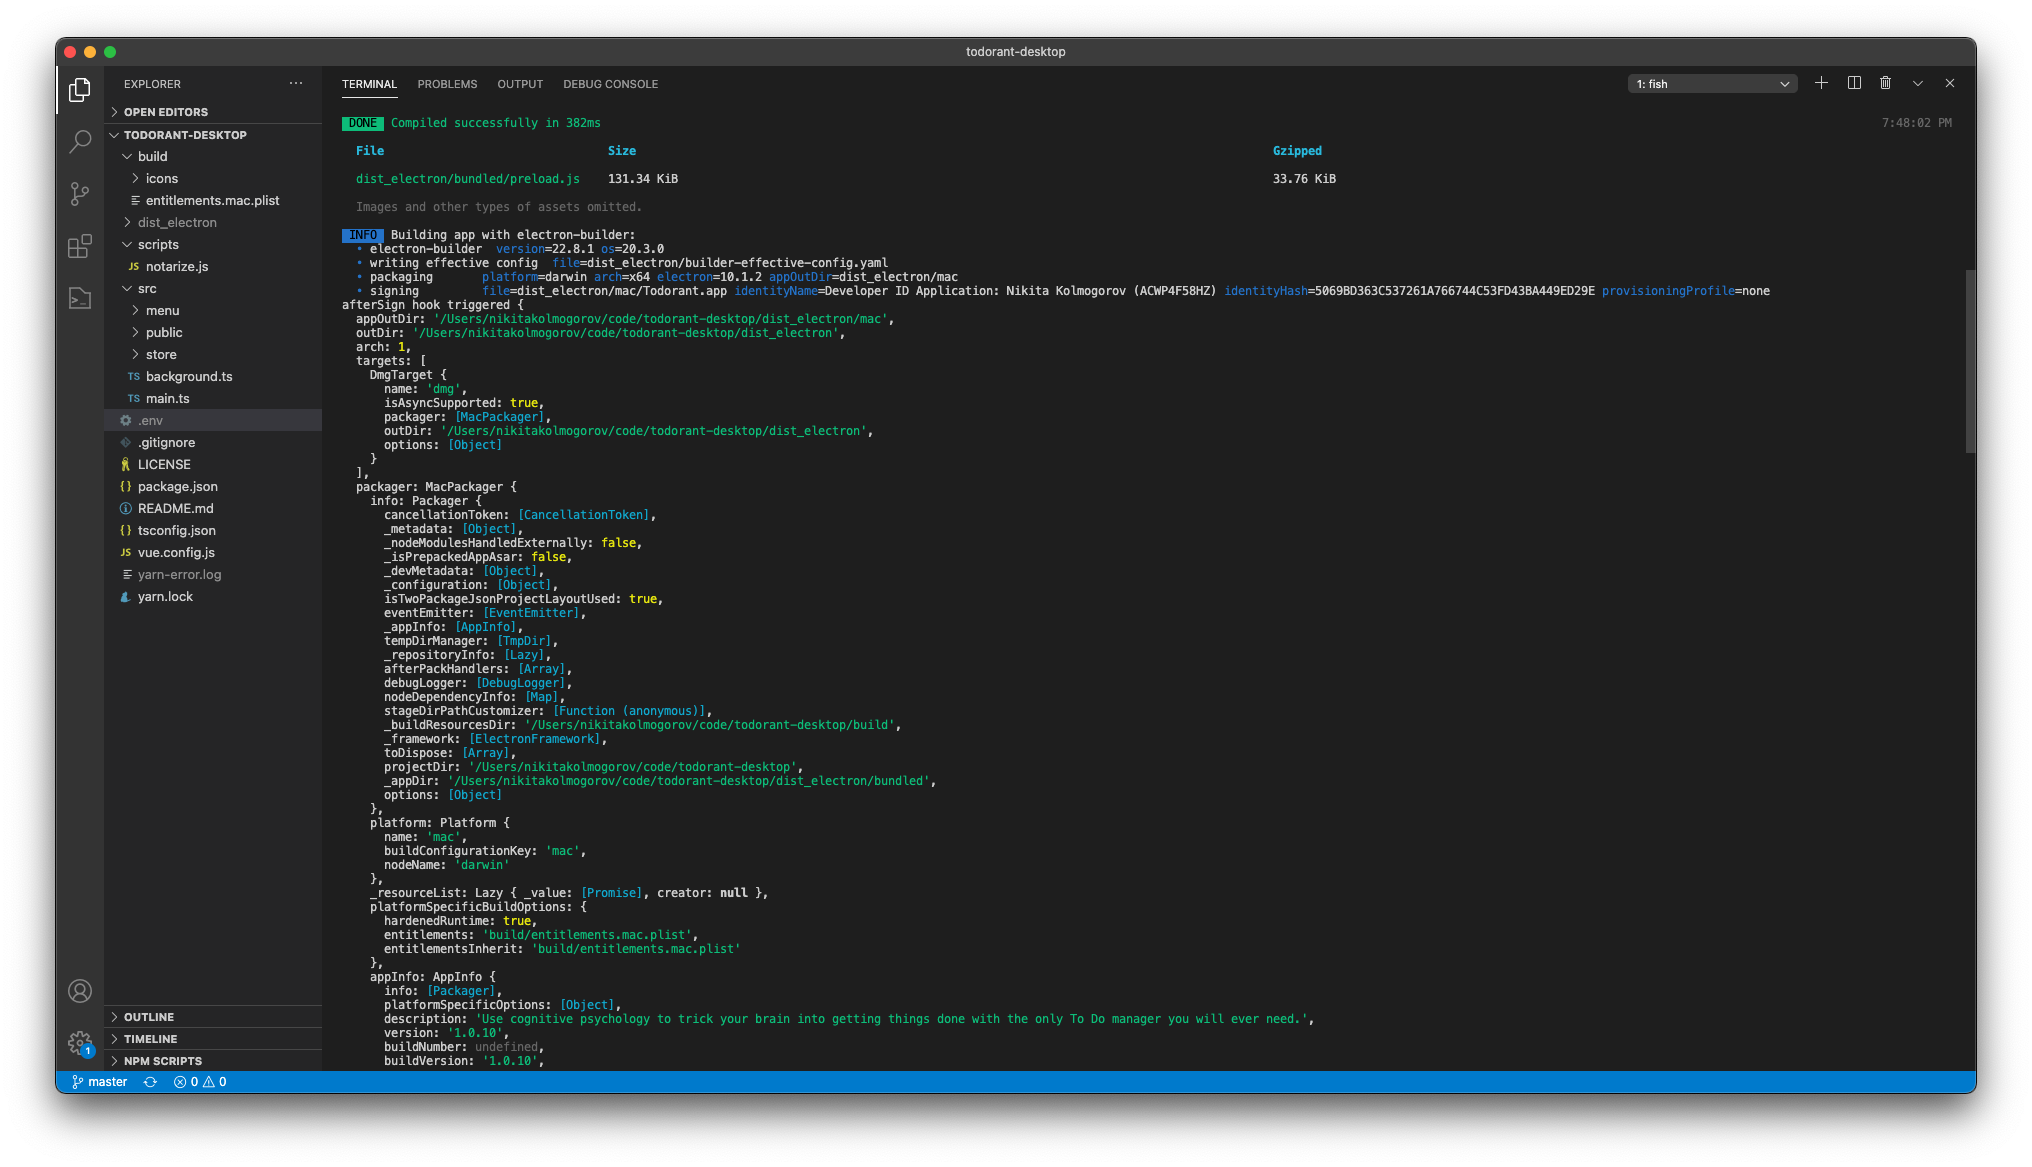
Now we need to deal with the scary devil — Apple certificates. Apple signing process still haunts me in the most sinister of the nightmares years after I mastered this witchcraft. This time though it's not that bad.
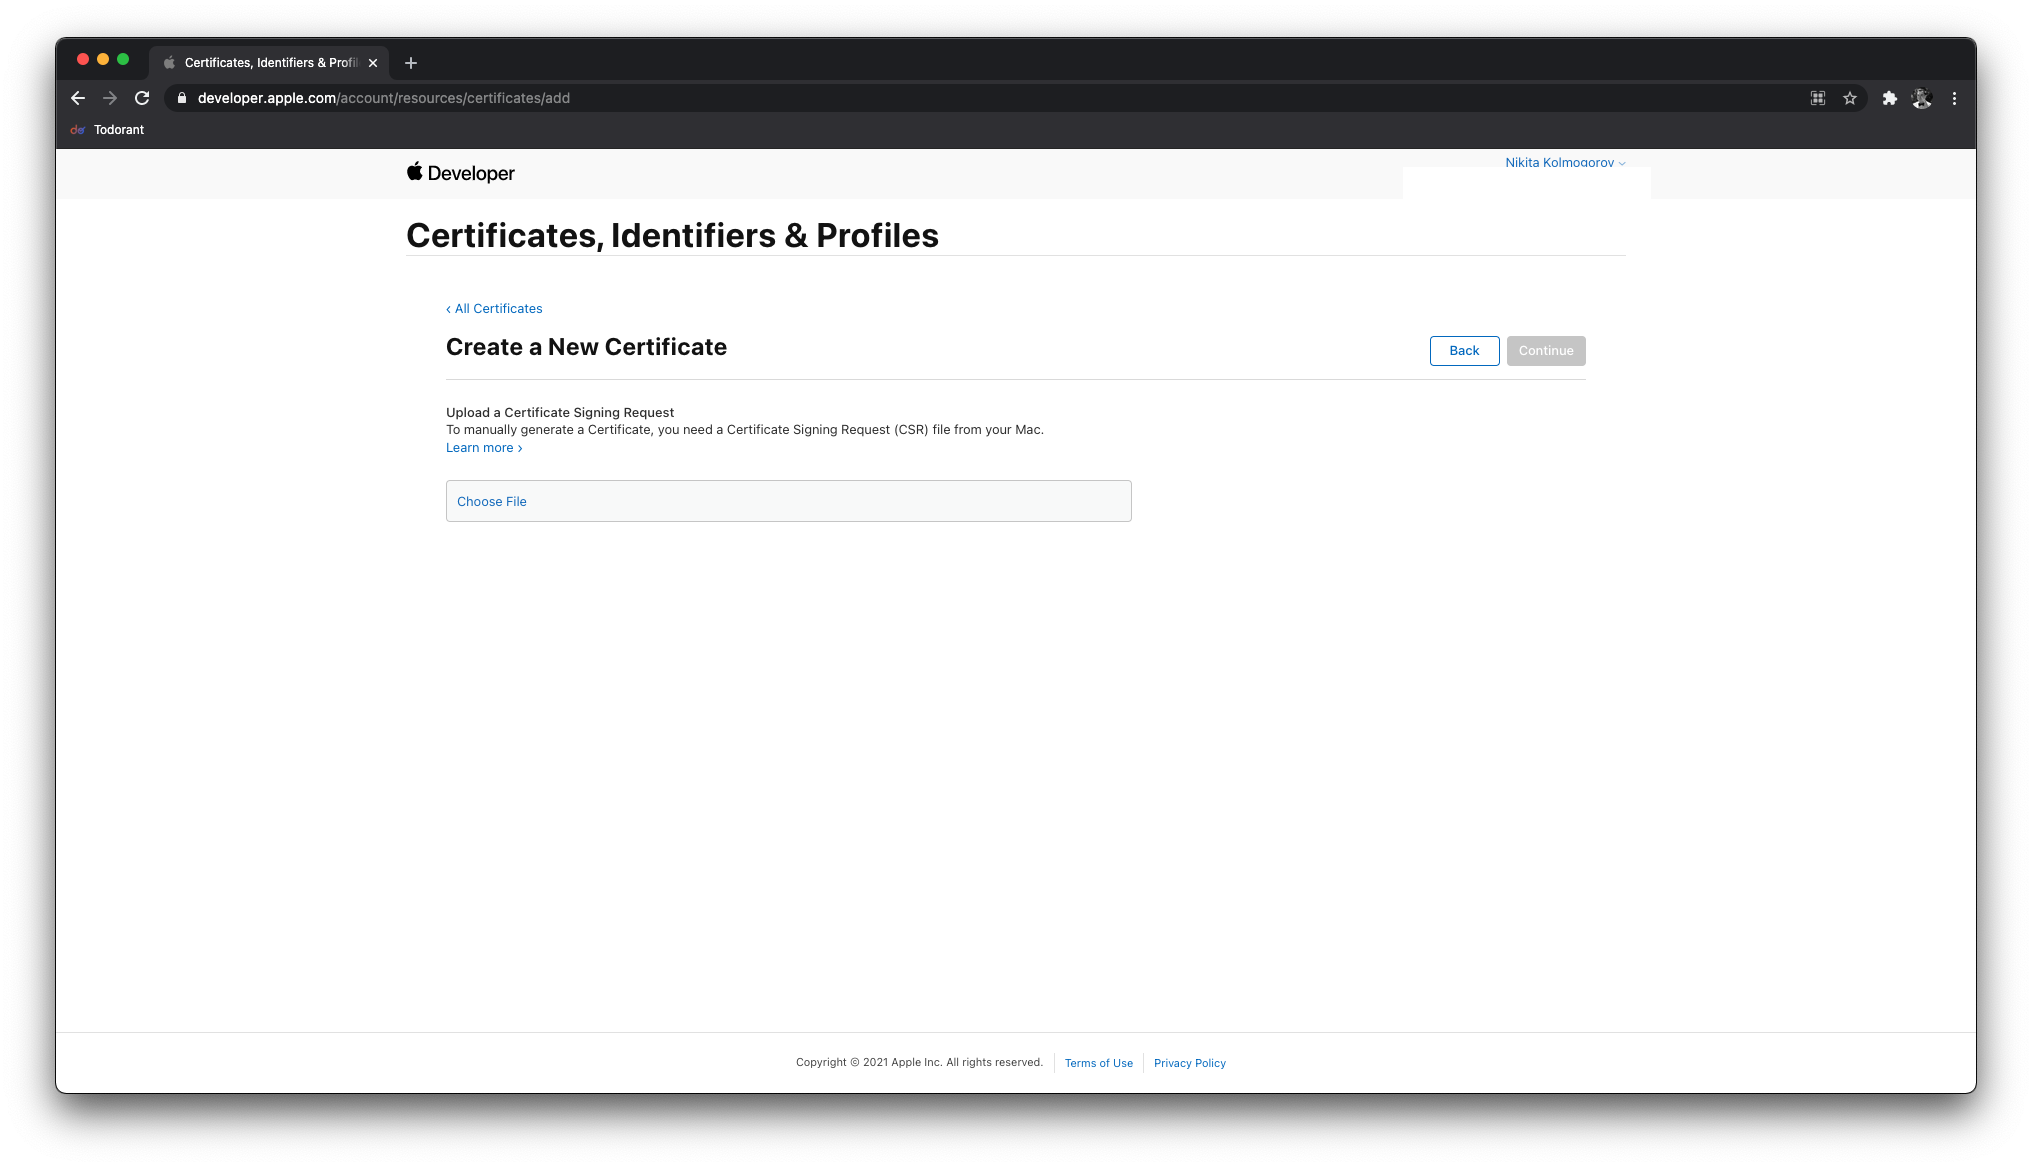
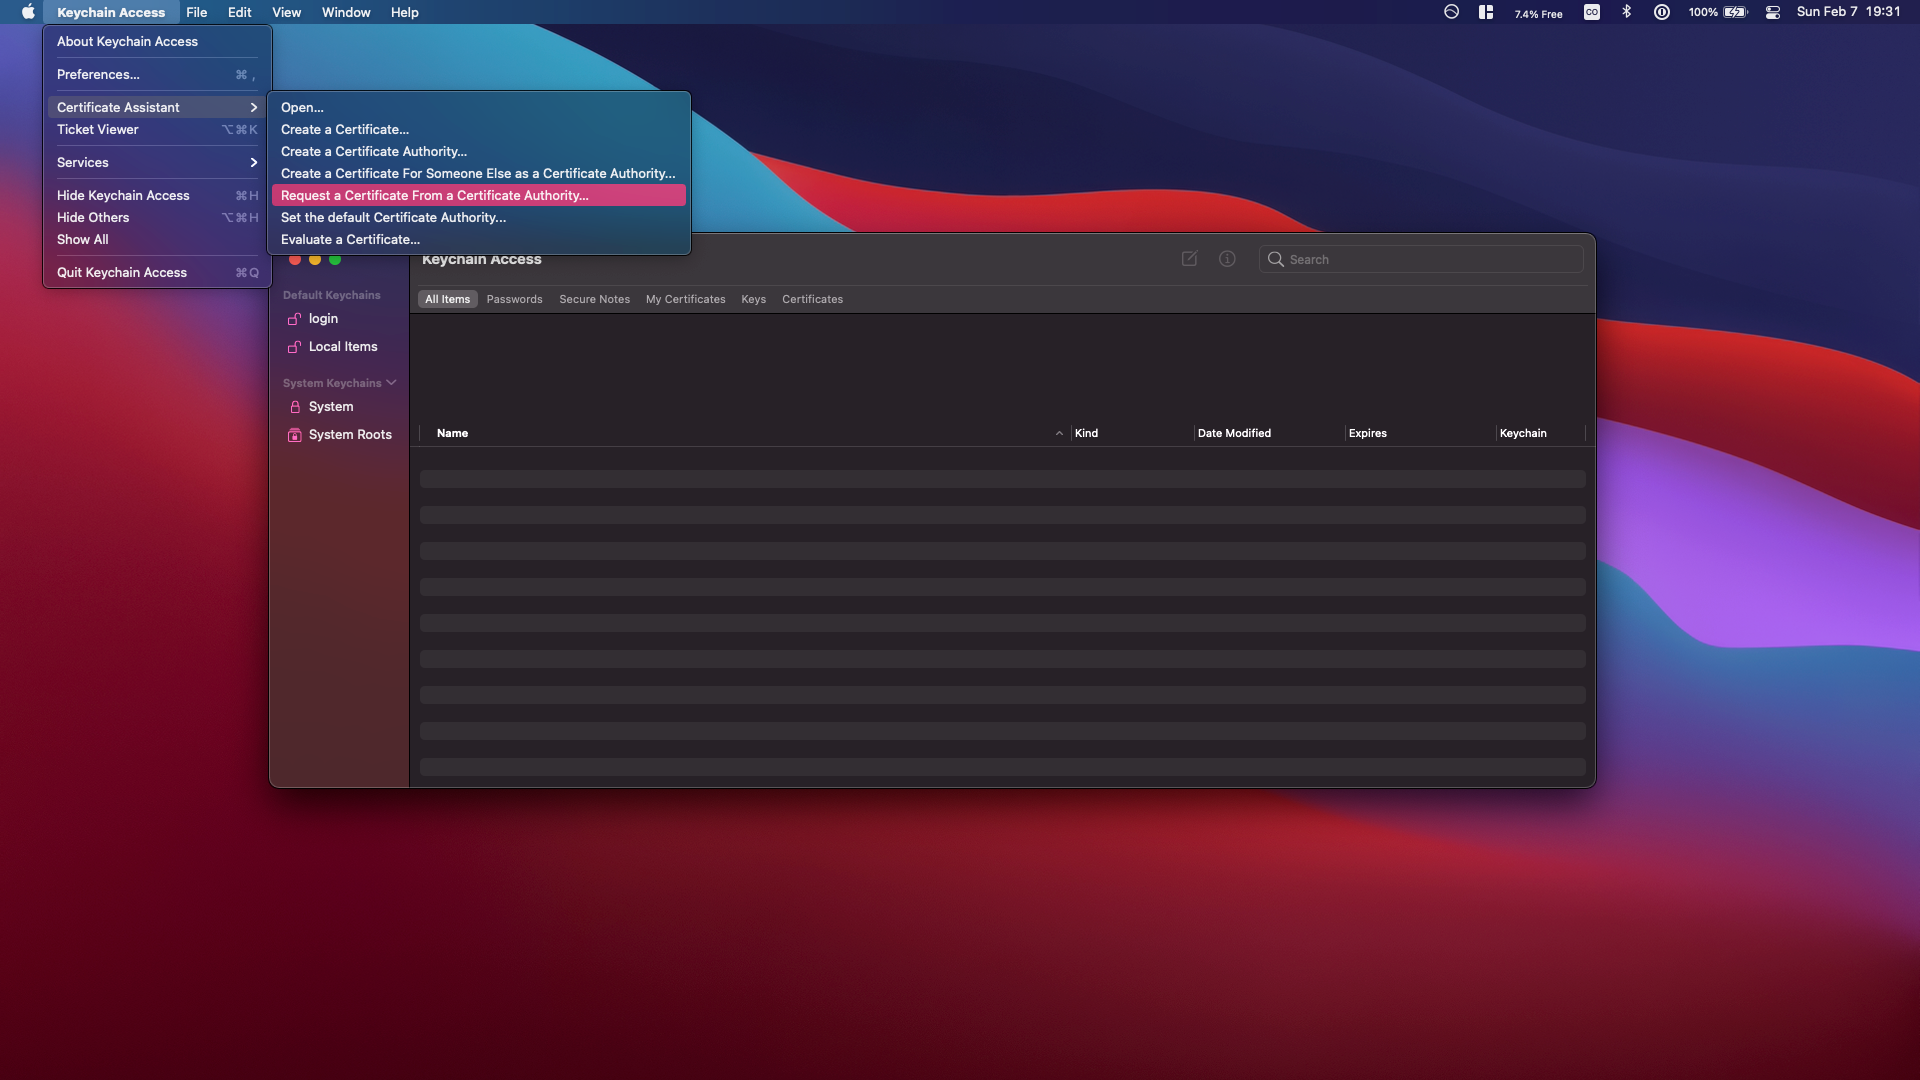
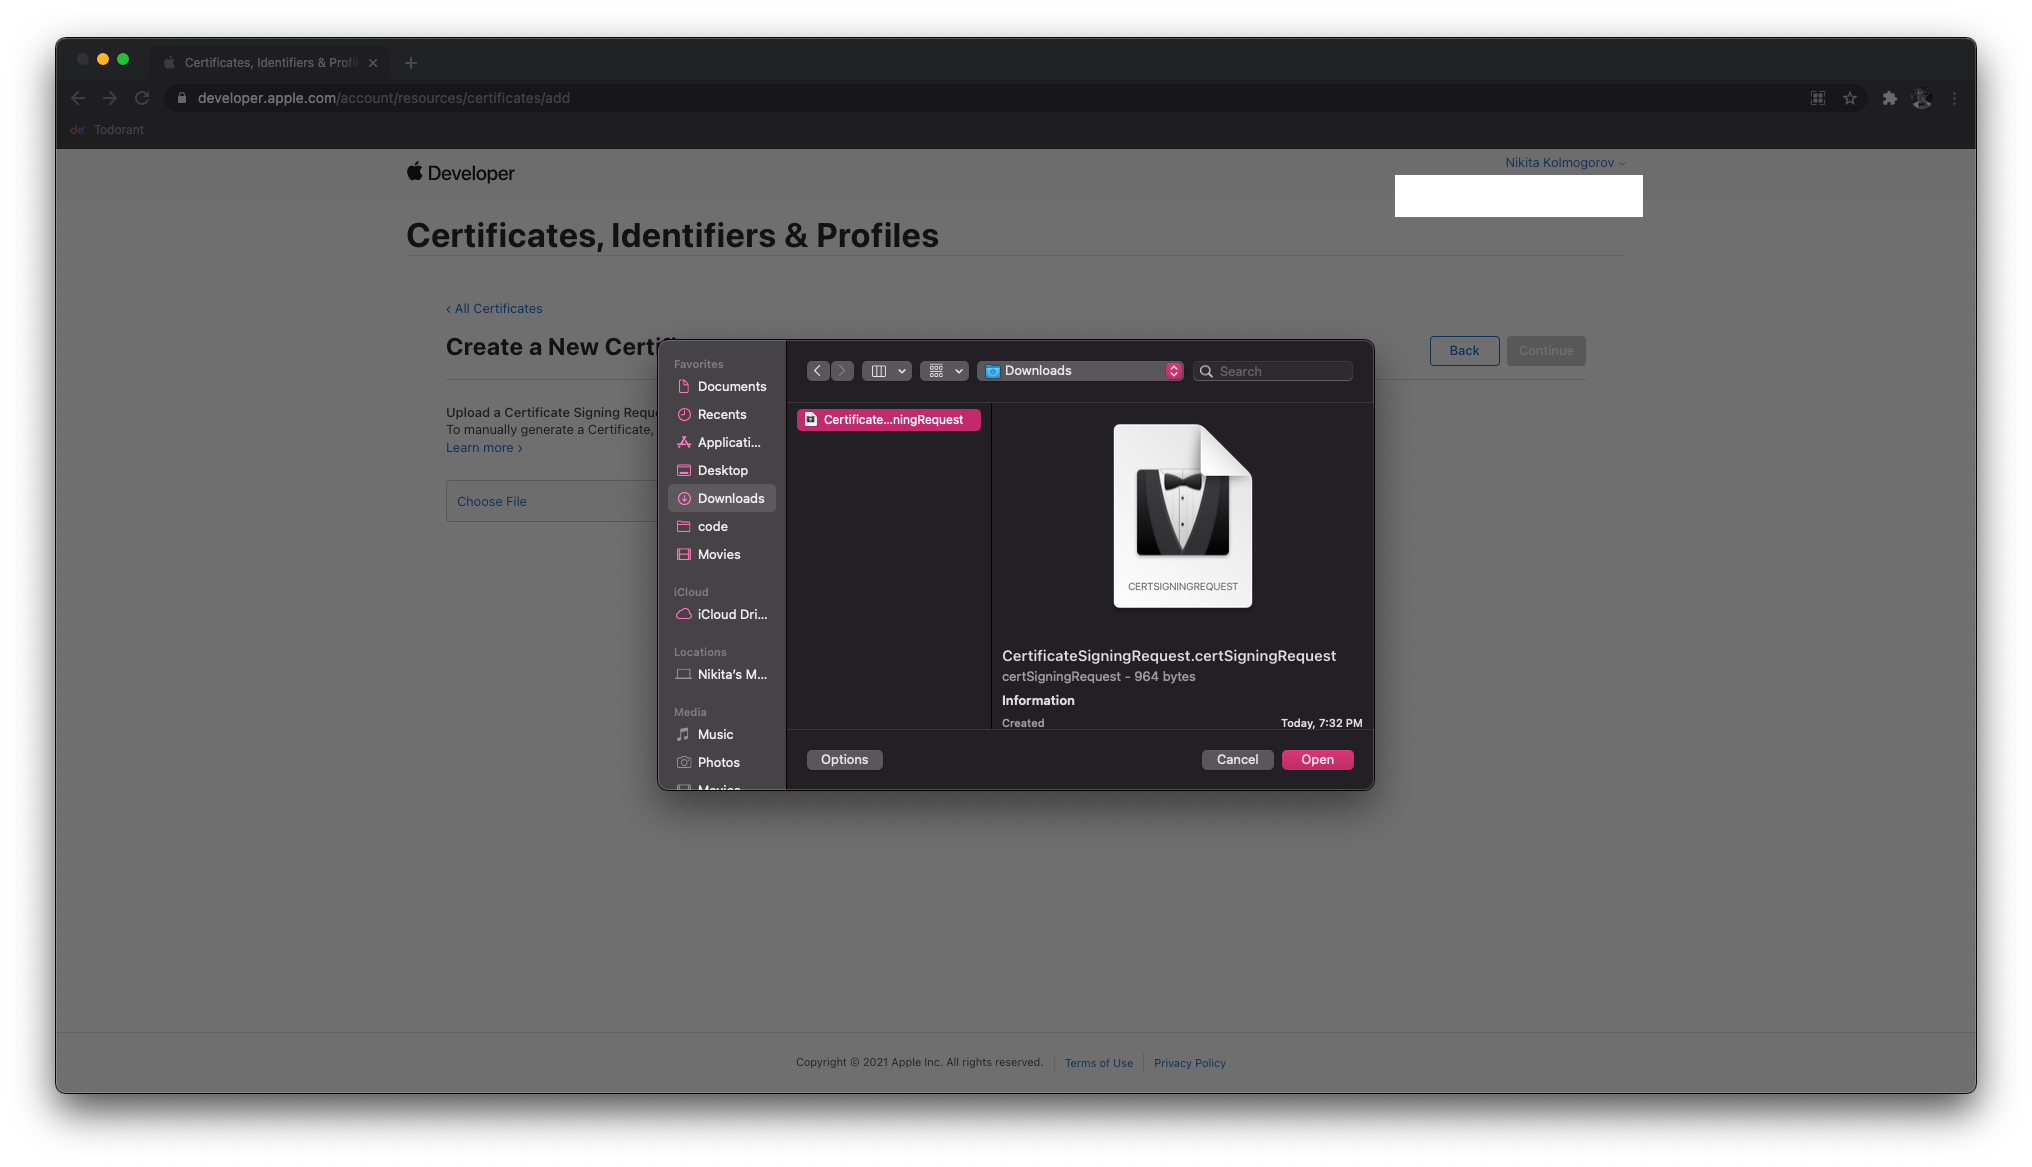
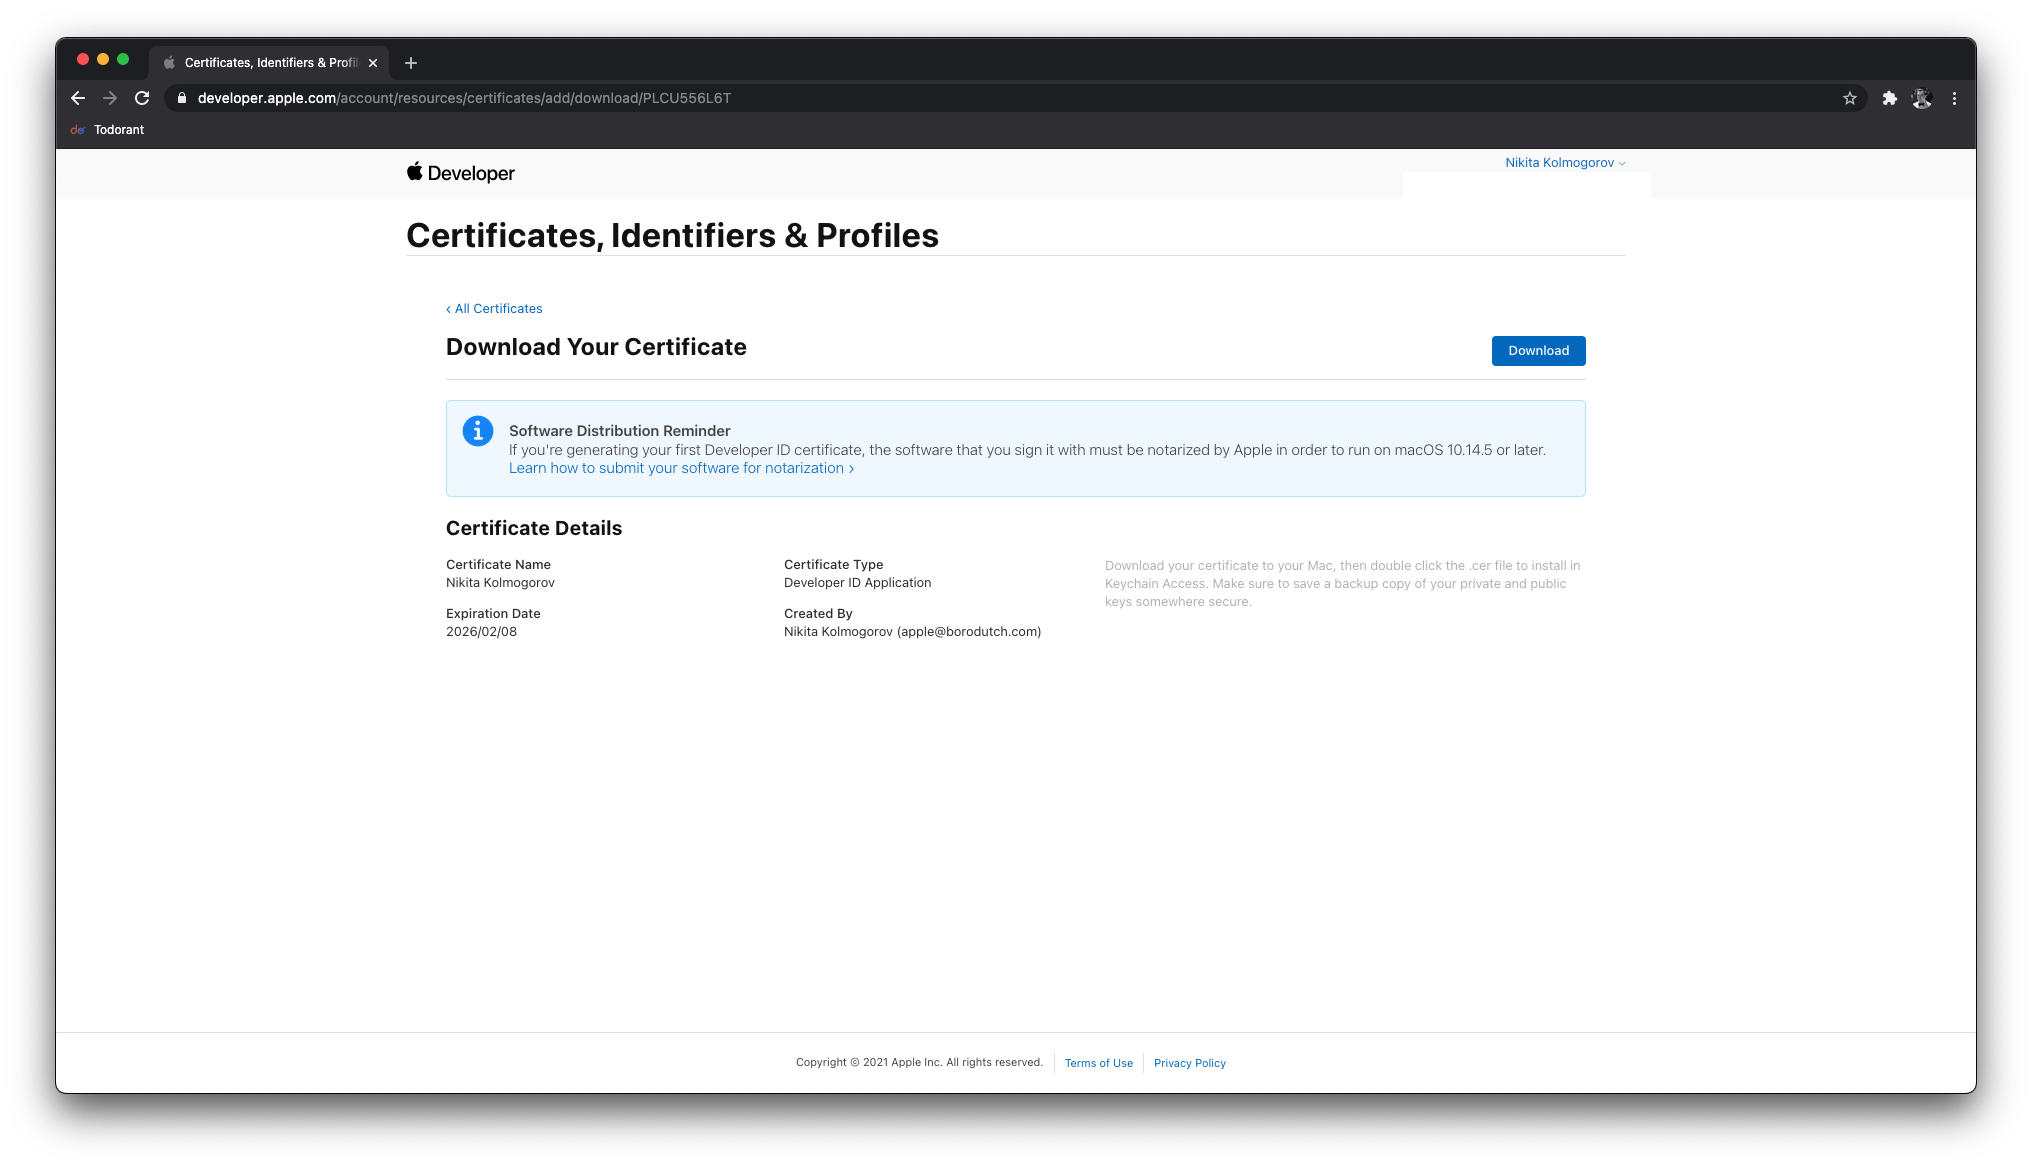
You have to register at the Apple Developer Portal, pay the $100 fee to become a developer. Then go to the Certificates section, specifically to the section "Create a New Certificate". Select "Developer ID Application". Then open the Keychain app and obtain a certificate signing request. Upload this request to the Apple Developer Portal. Then download the resulting certificate and make sure to open it by double-clicking to add it to your keychain. The rest will be handled automatically.

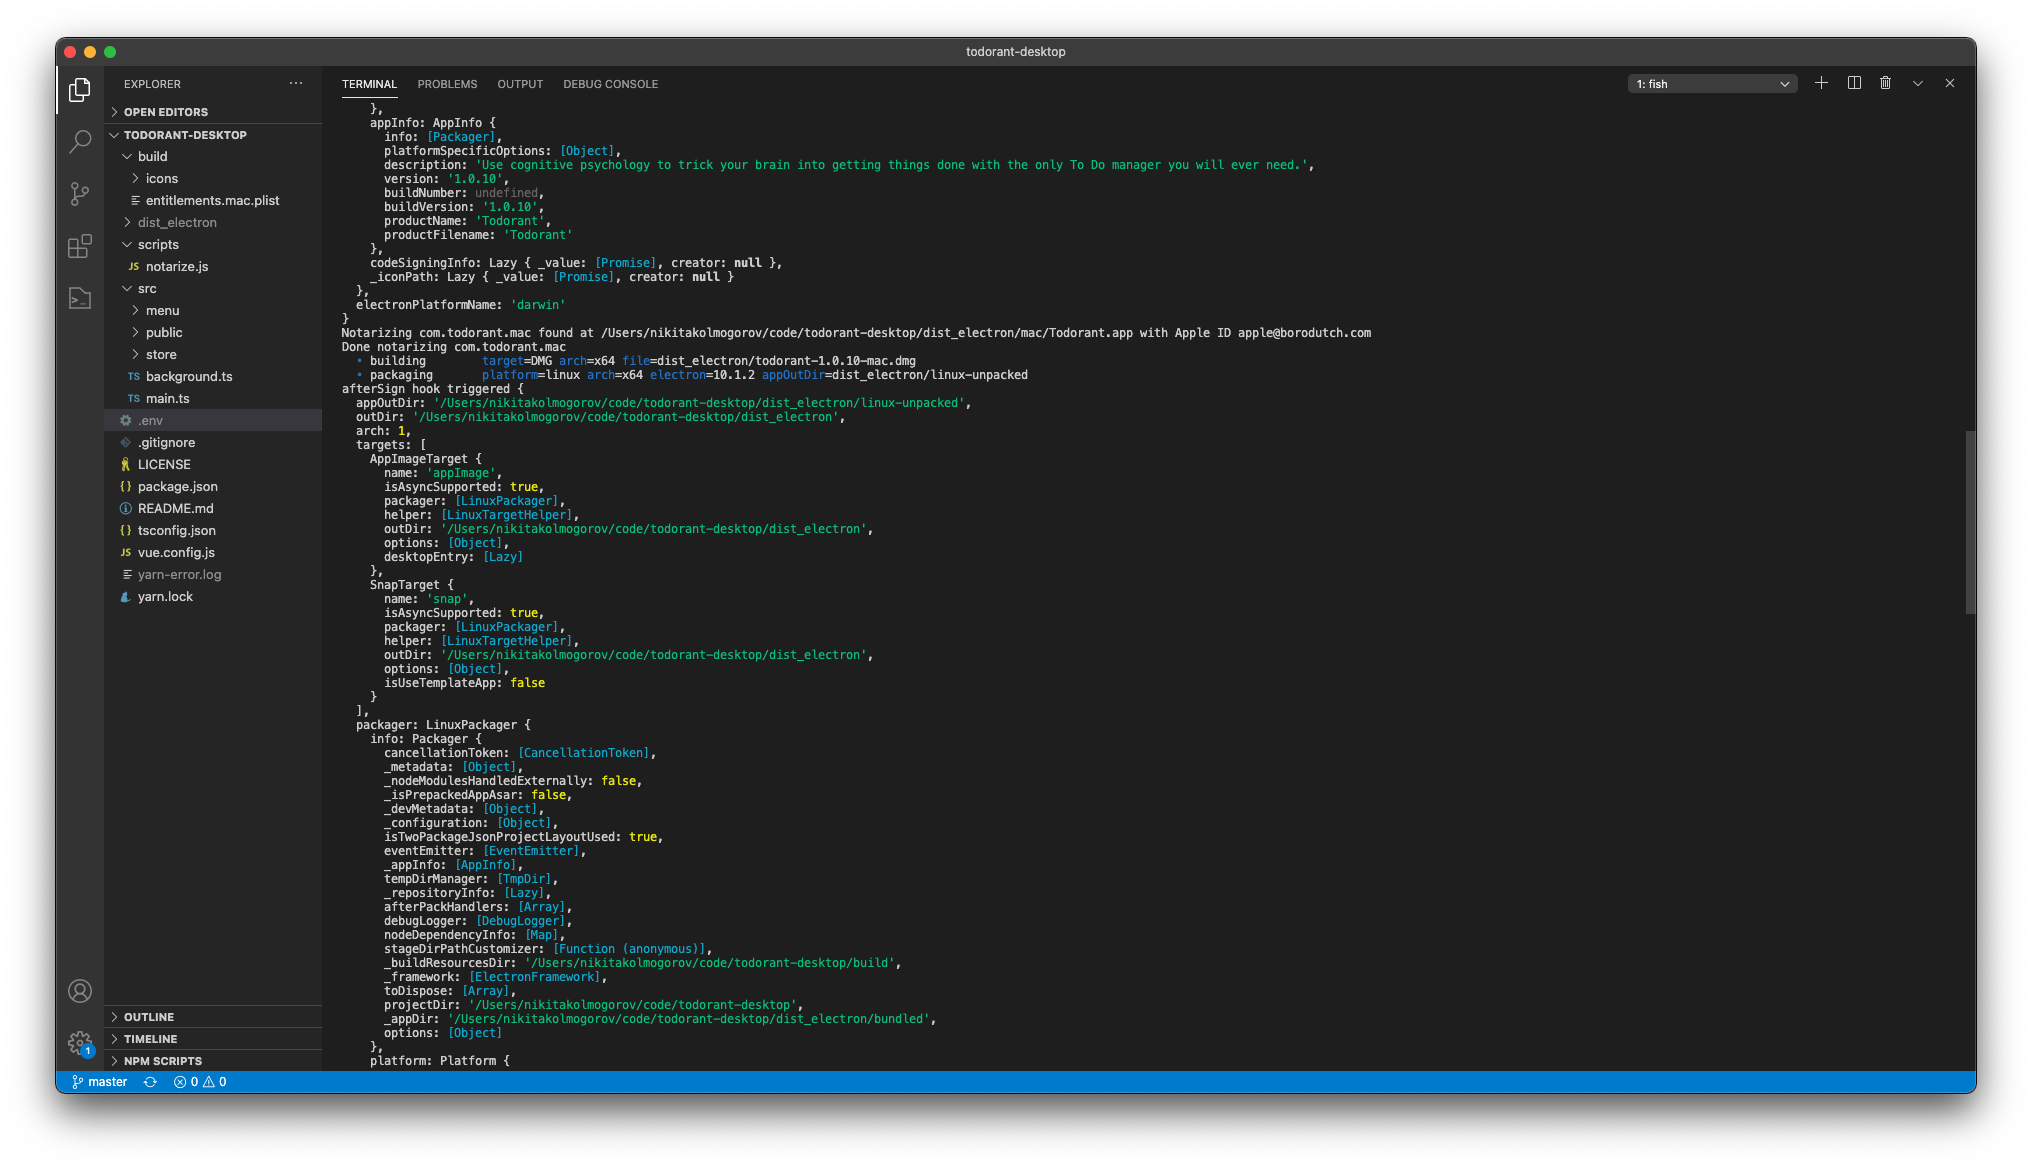
The only certificate-related step left is notarizing the app bundle so that macOS users don't see the "untrusted developer" warning. We will use electron-notarize to do so, let's install it:
yarn add -D electron-notarize
Now we need to create two files — one with the notarization script, another one for the environment variables for the notarization script. Create a file at scripts/notarize.js with the following content:
require('dotenv').config()
const fs = require('fs')
const path = require('path')
var electron_notarize = require('electron-notarize')

module.exports = async function (params) {
  if (process.platform !== 'darwin') {
    return
  }

  console.log('afterSign hook triggered', params)

  let appId = 'com.todorant.mac'

  let appPath = path.join(
    params.appOutDir,
    `${params.packager.appInfo.productFilename}.app`
  )
  if (!fs.existsSync(appPath)) {
    console.log('skip')
    return
  }

  console.log(
    `Notarizing ${appId} found at ${appPath} with Apple ID ${process.env.APPLE_ID}`
  )

  try {
    await electron_notarize.notarize({
      appBundleId: appId,
      appPath: appPath,
      appleId: process.env.APPLE_ID,
      appleIdPassword: process.env.APPLE_ID_PASSWORD,
    })
  } catch (error) {
    console.error(error)
  }

  console.log(`Done notarizing ${appId}`)
}
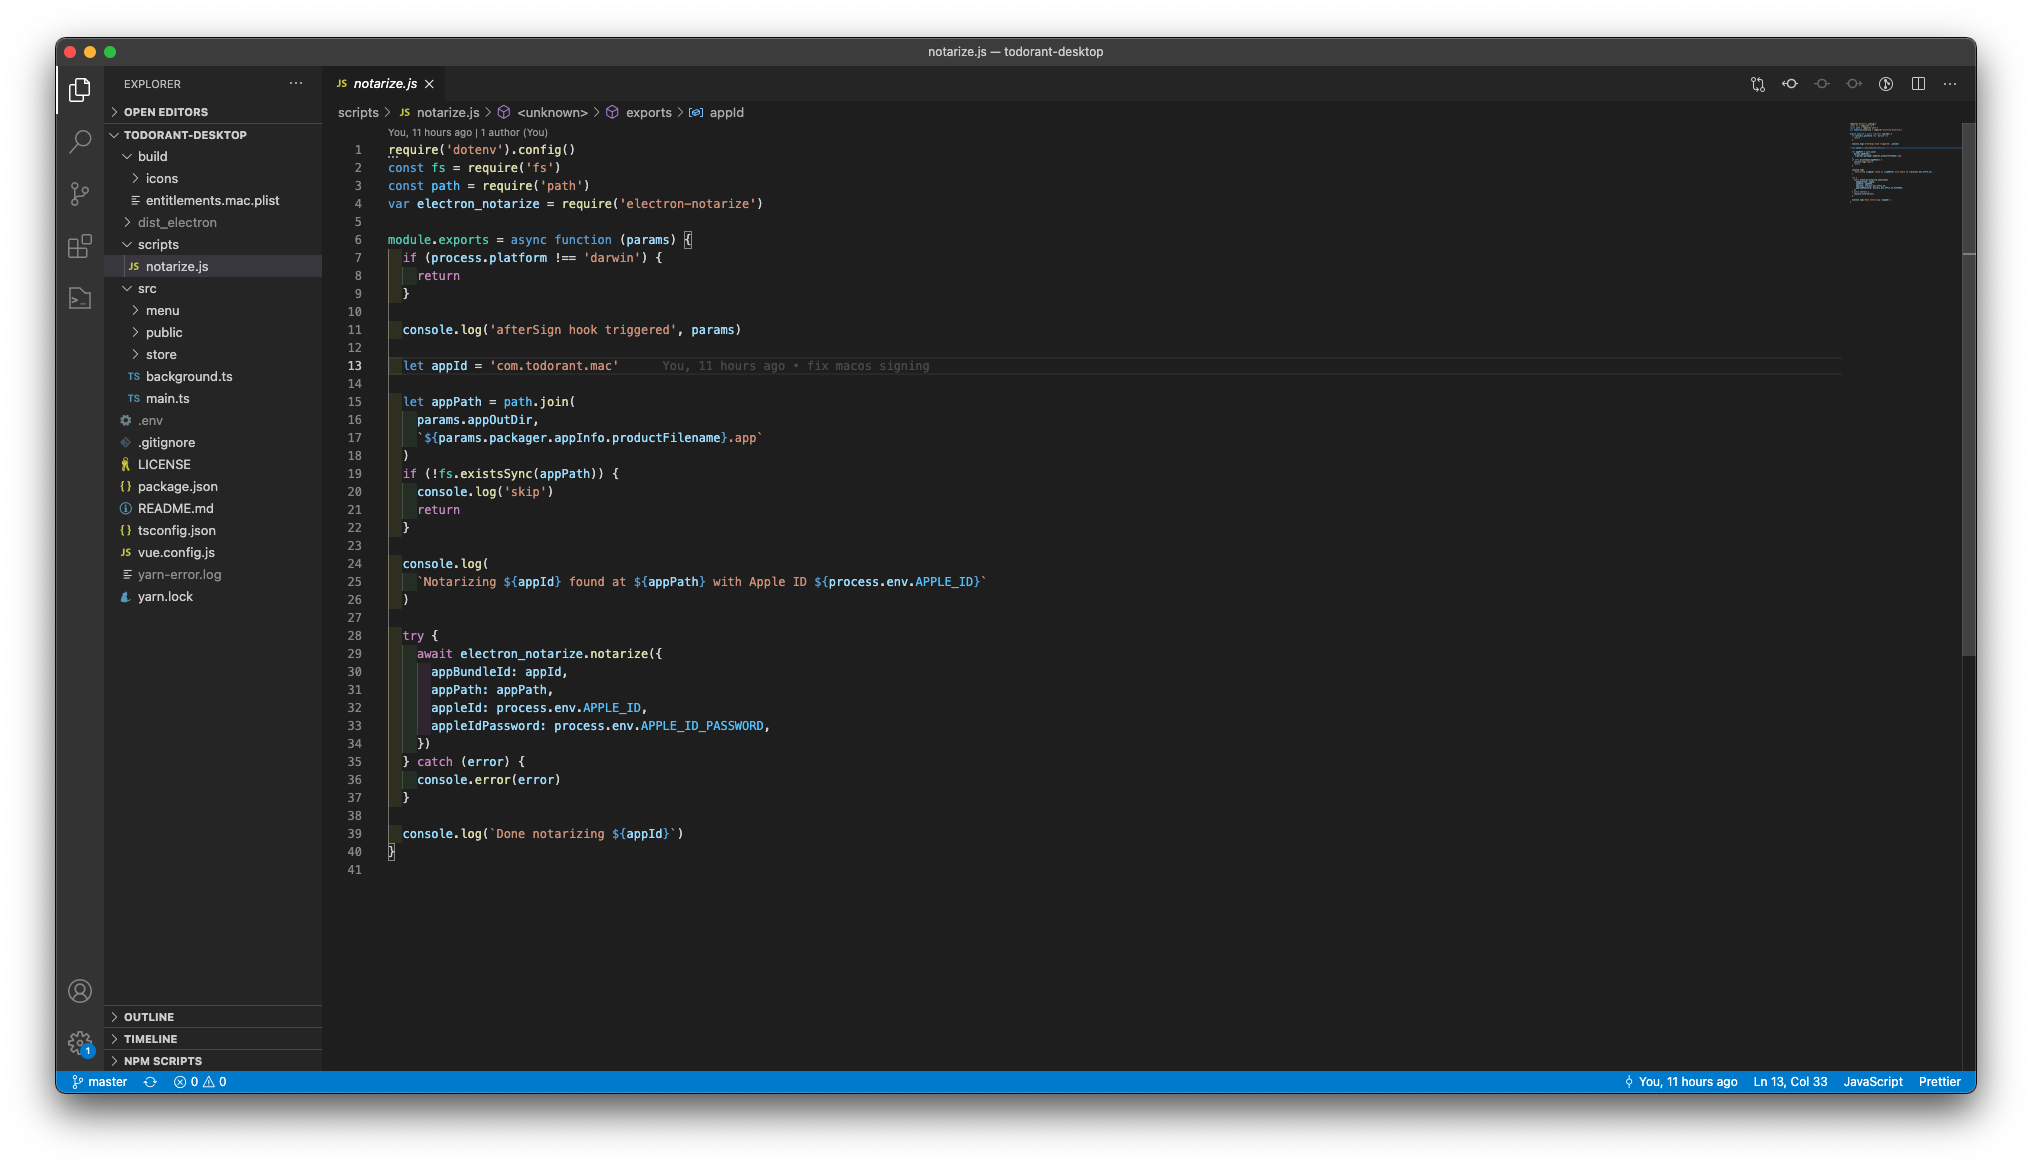
You can explore the file if you want, it's pretty simple and straight-forward. You will need an app-specific password from apple for this step. So go to the Apple ID management website and create one.
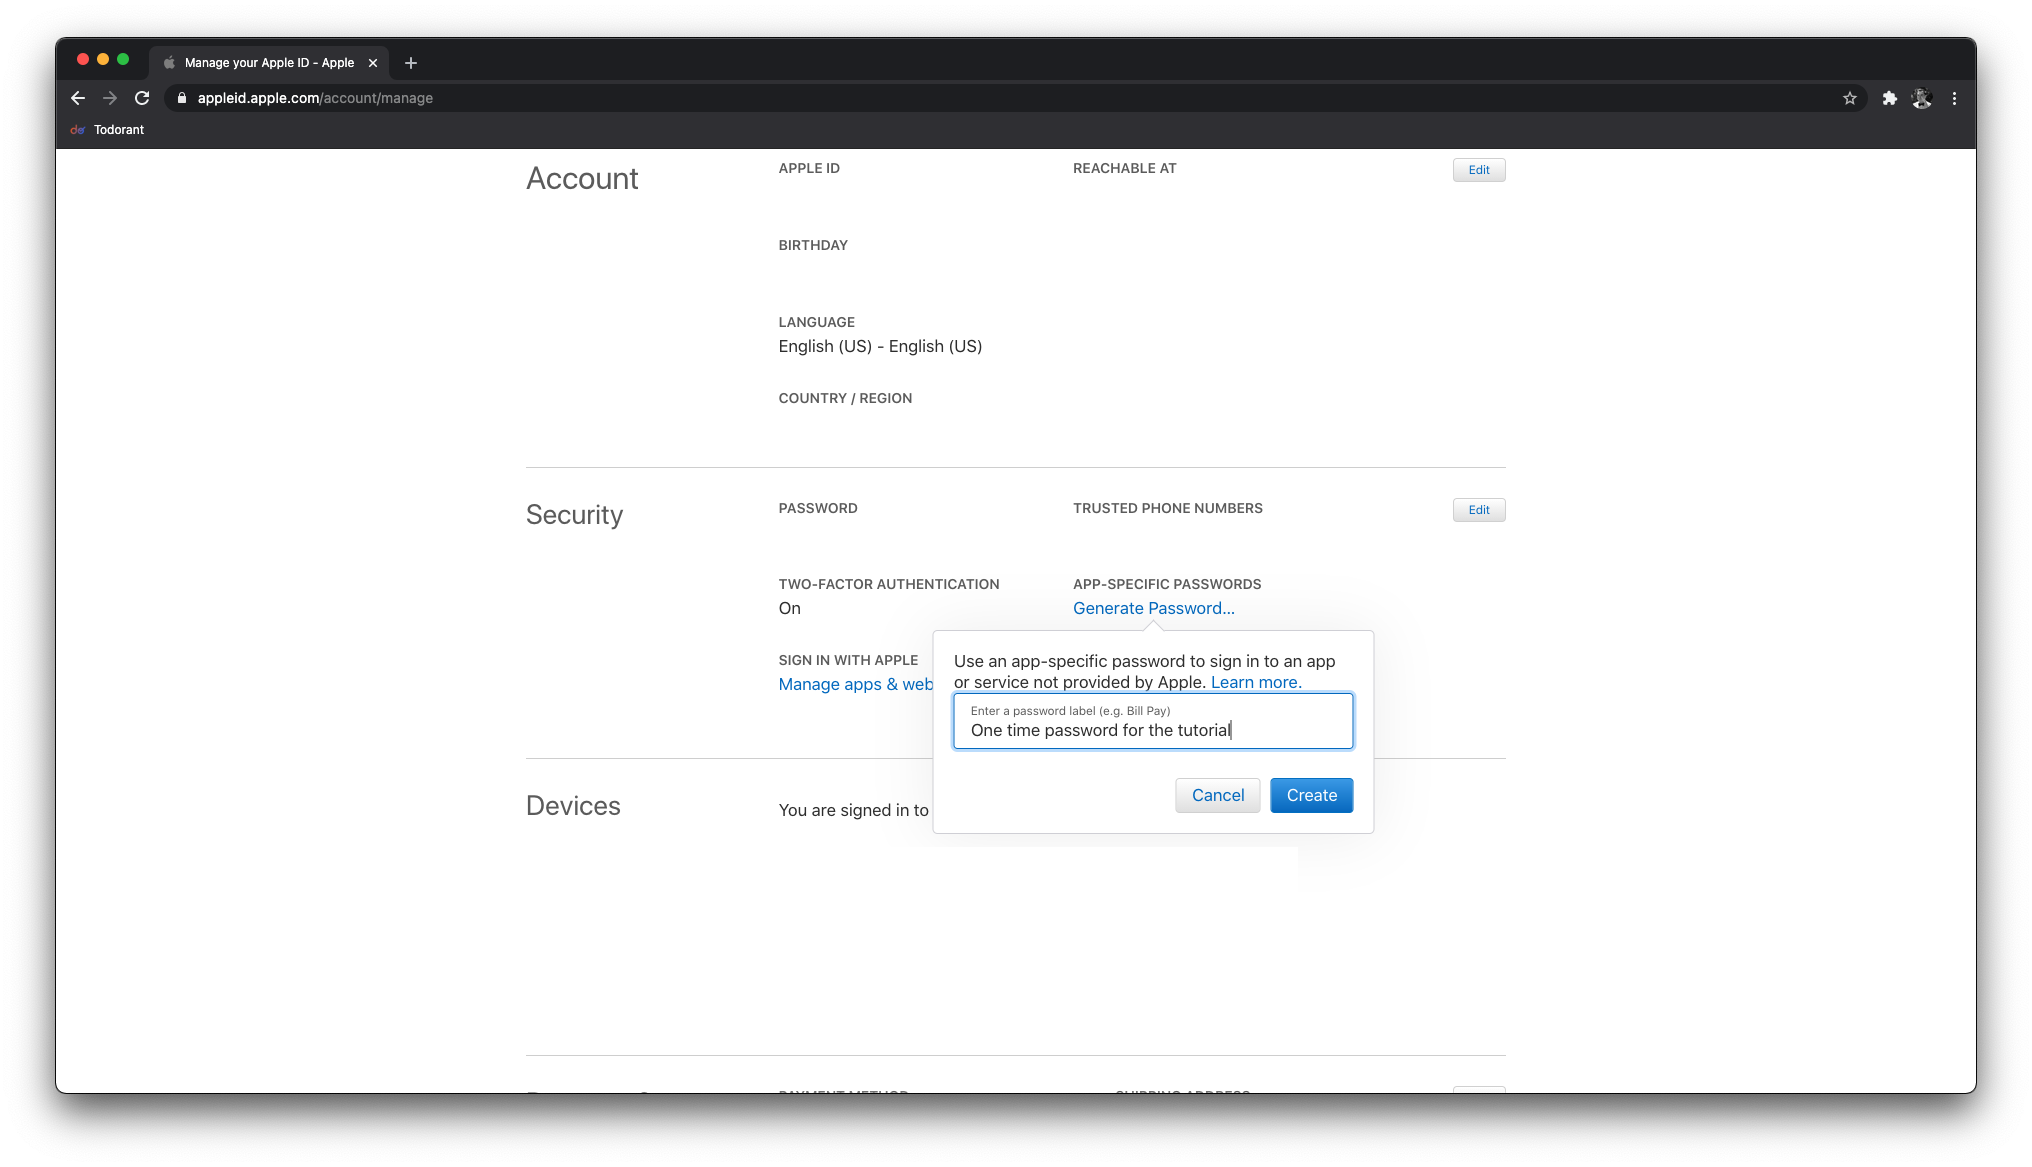
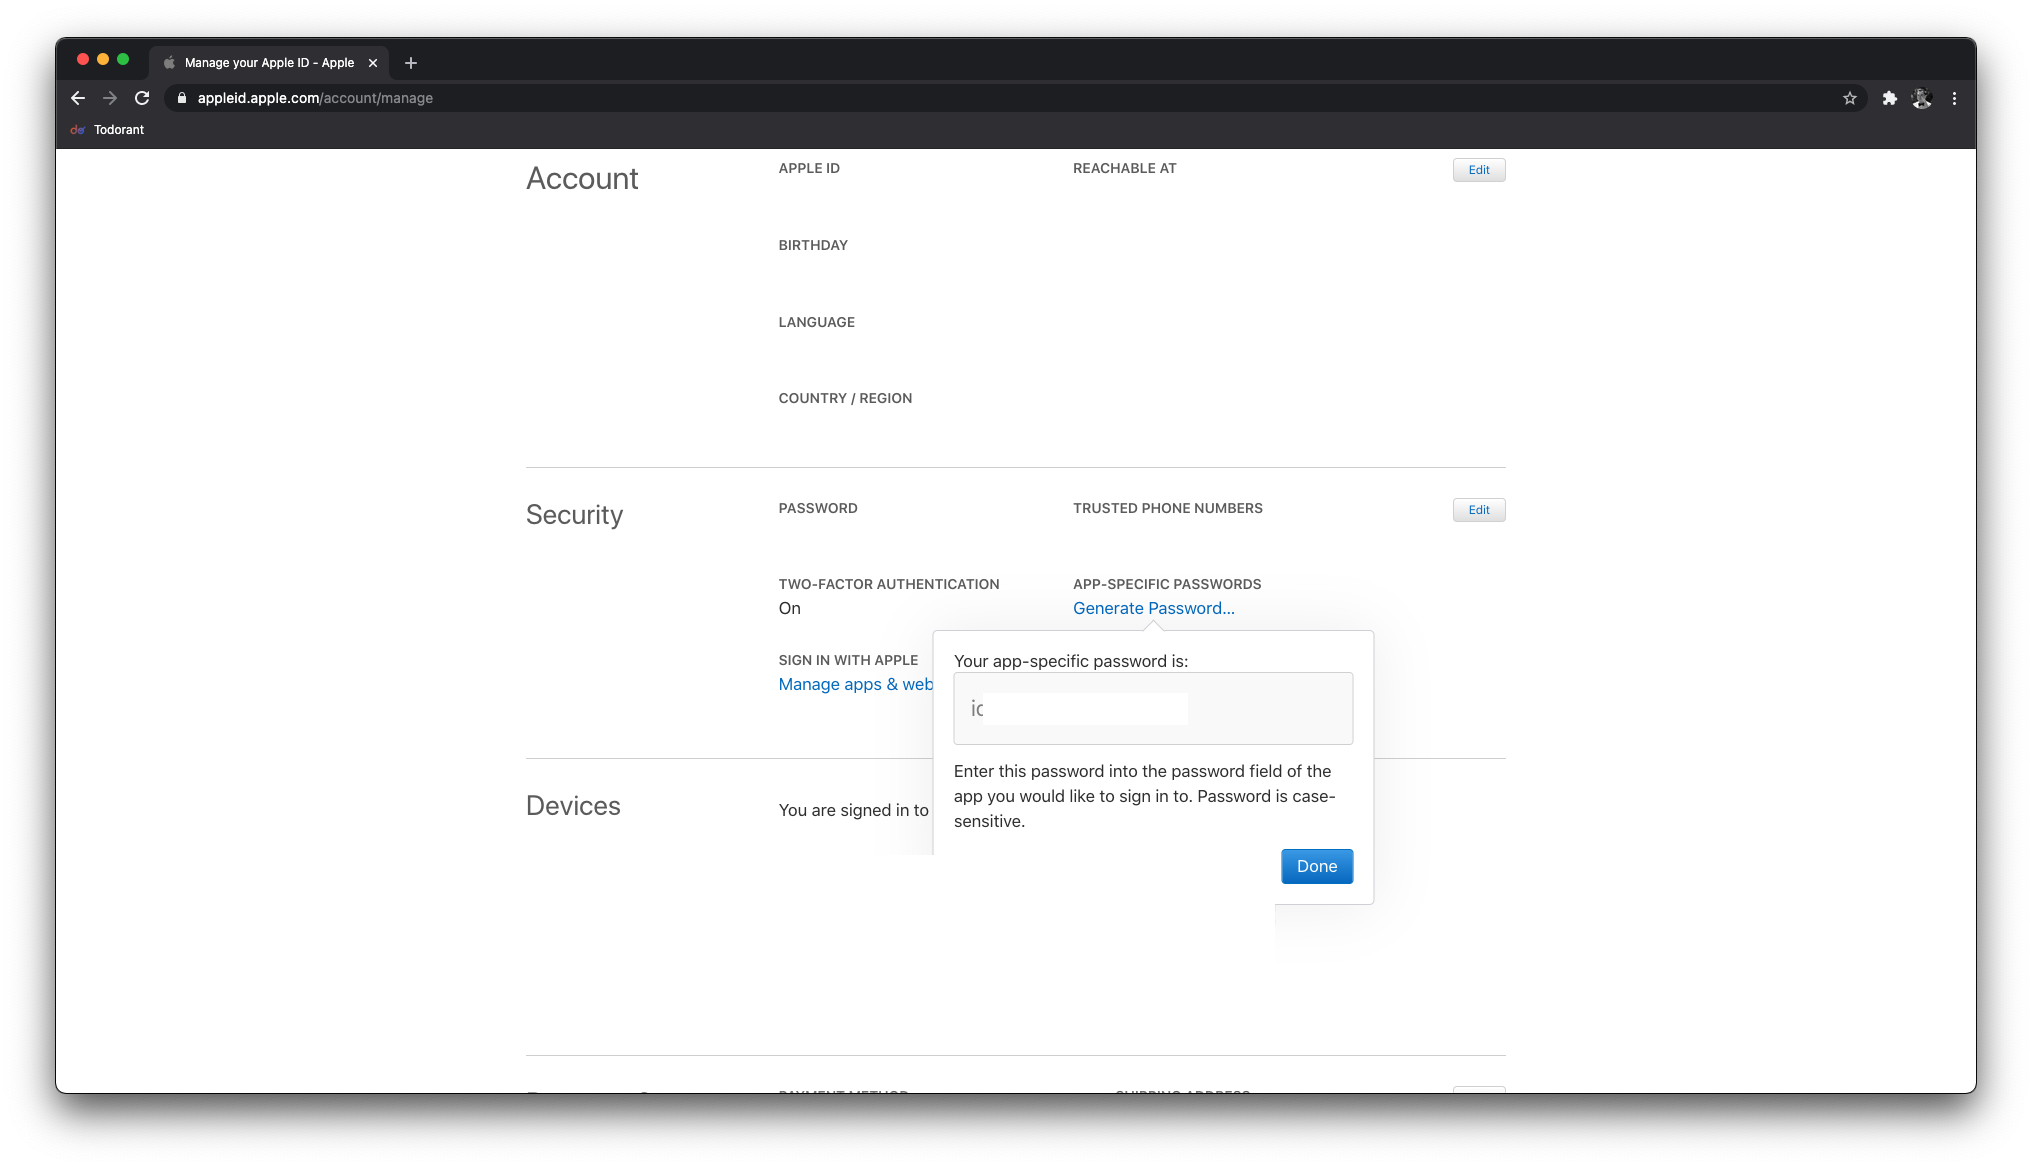
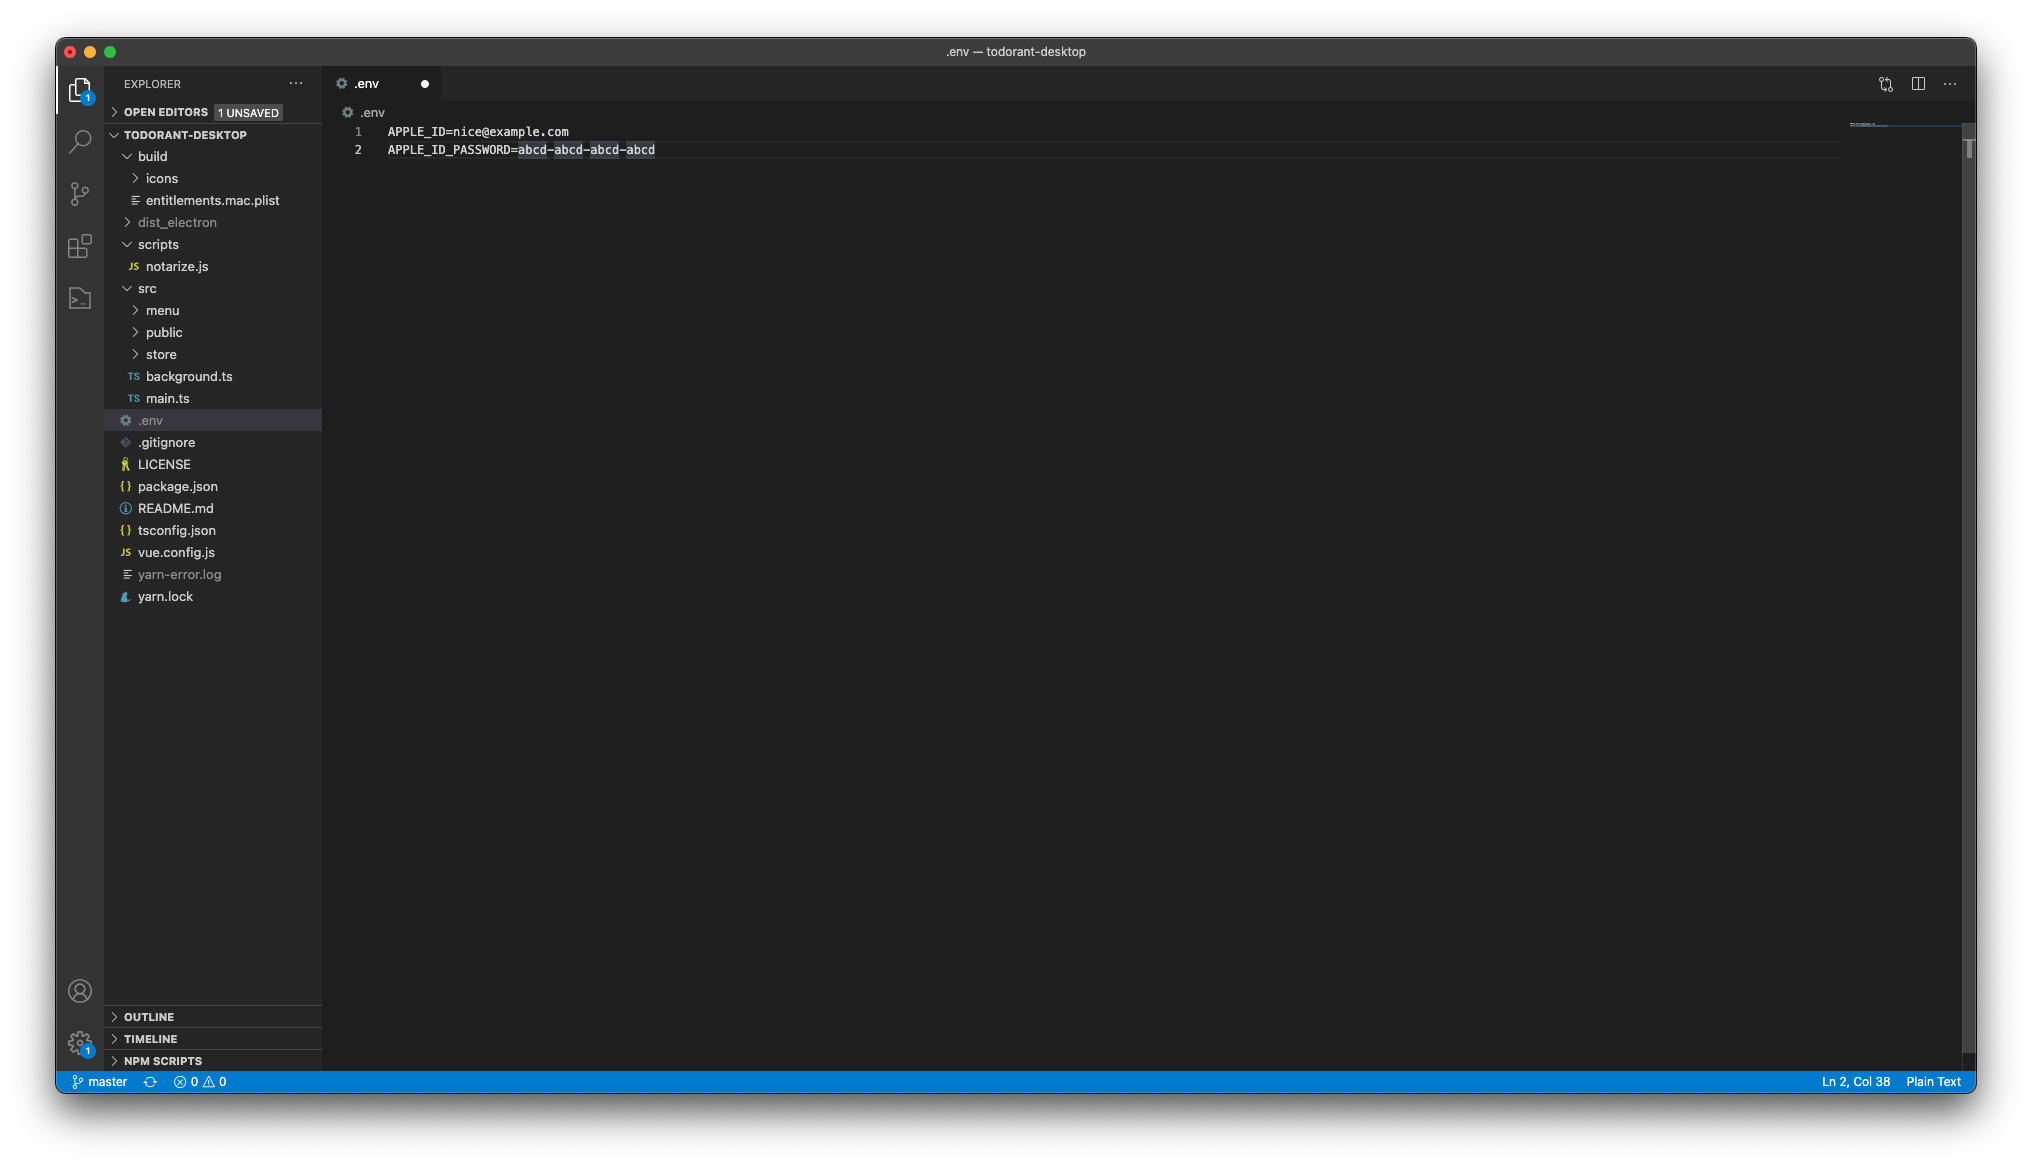
Add the APPLE_ID and APPLE_ID_PASSWORD environment variables to the .env file like shown on the screenshot below. You guessed it right, the app-specific password you just created goes here.
Now add another script to the package.json file. Again, you can see an example package.json in one of the screenshots above.
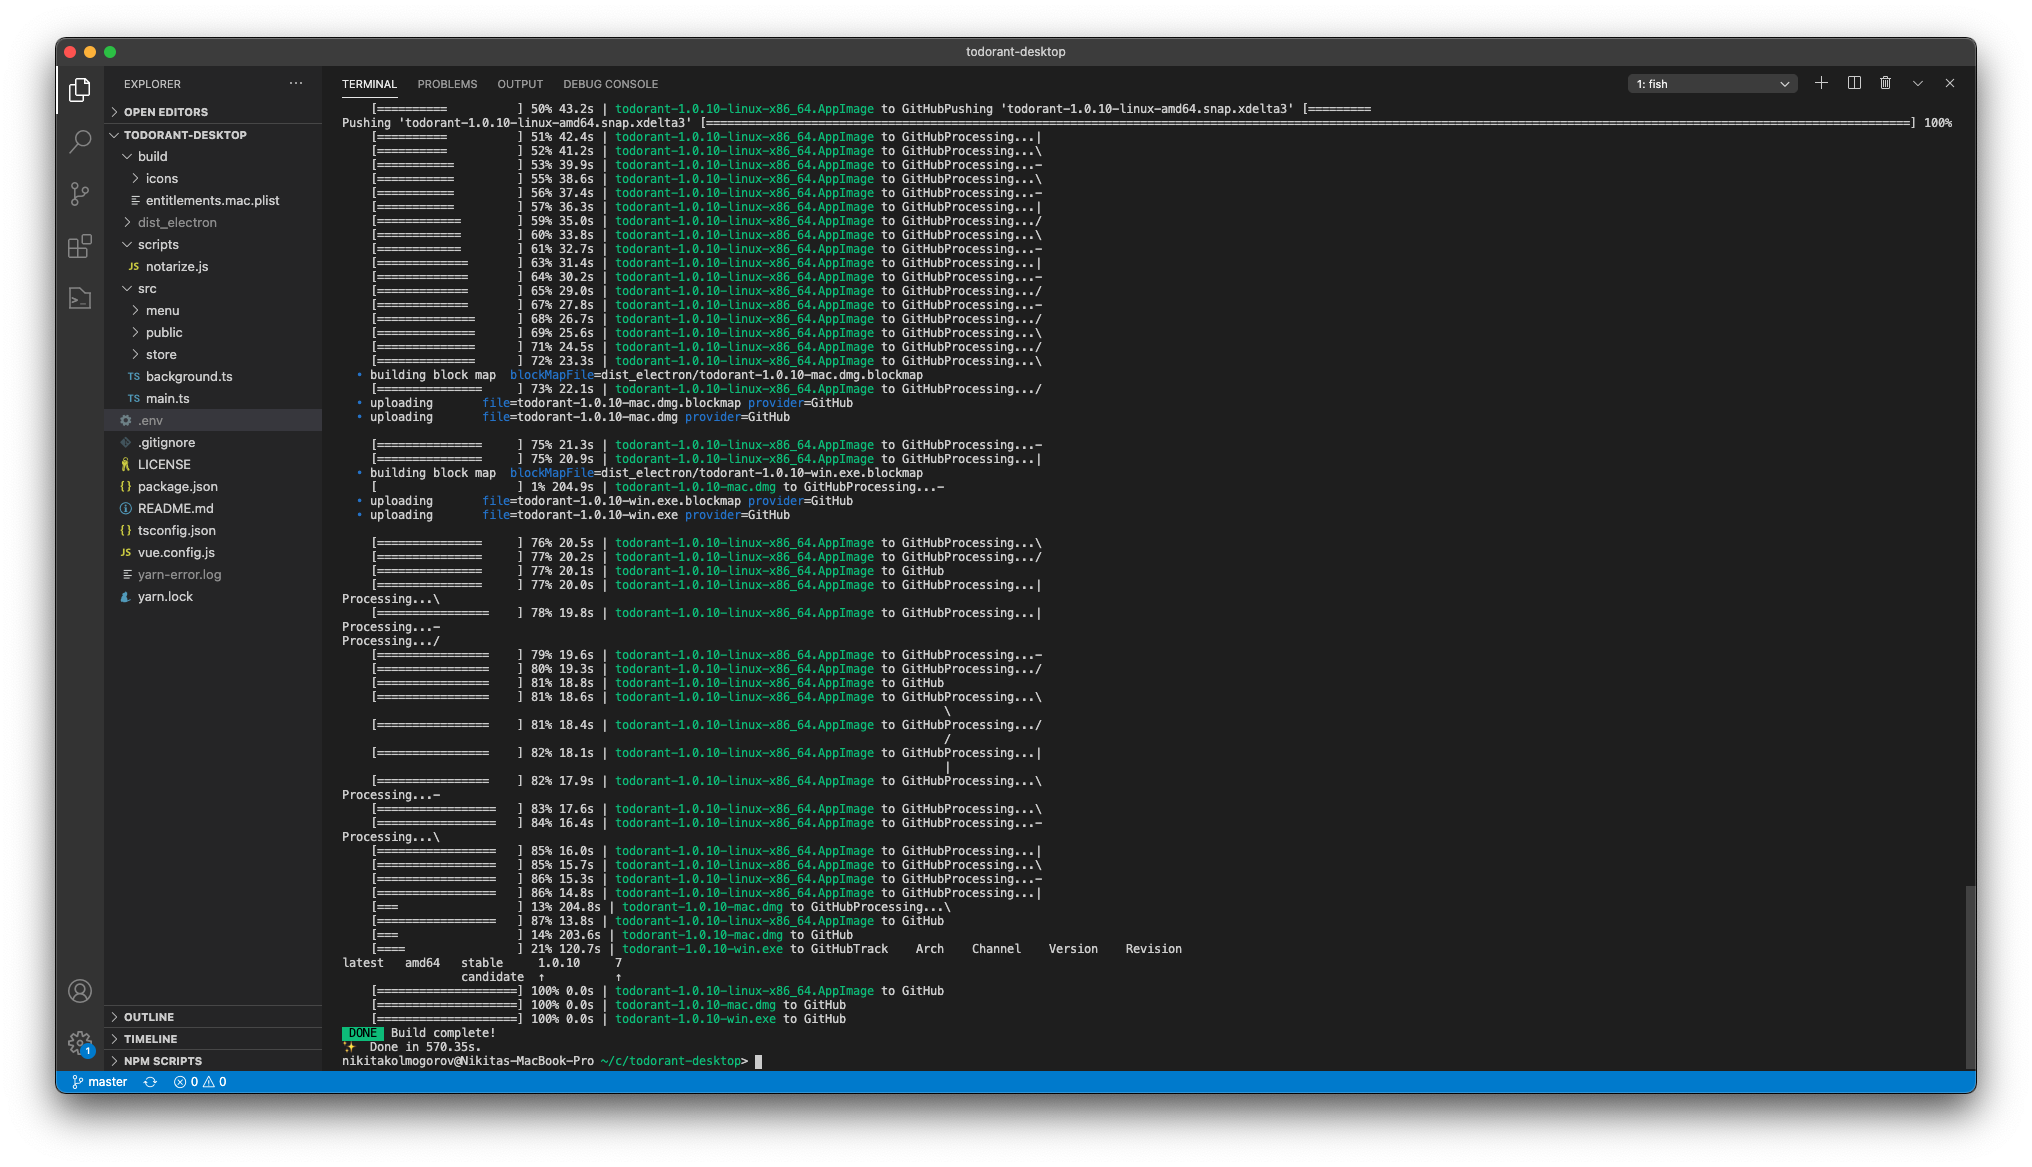
"build-and-publish": "yarn increment-version && yarn electron:build -p always --linux appimage --win nsis --mac dmg --linux snap"
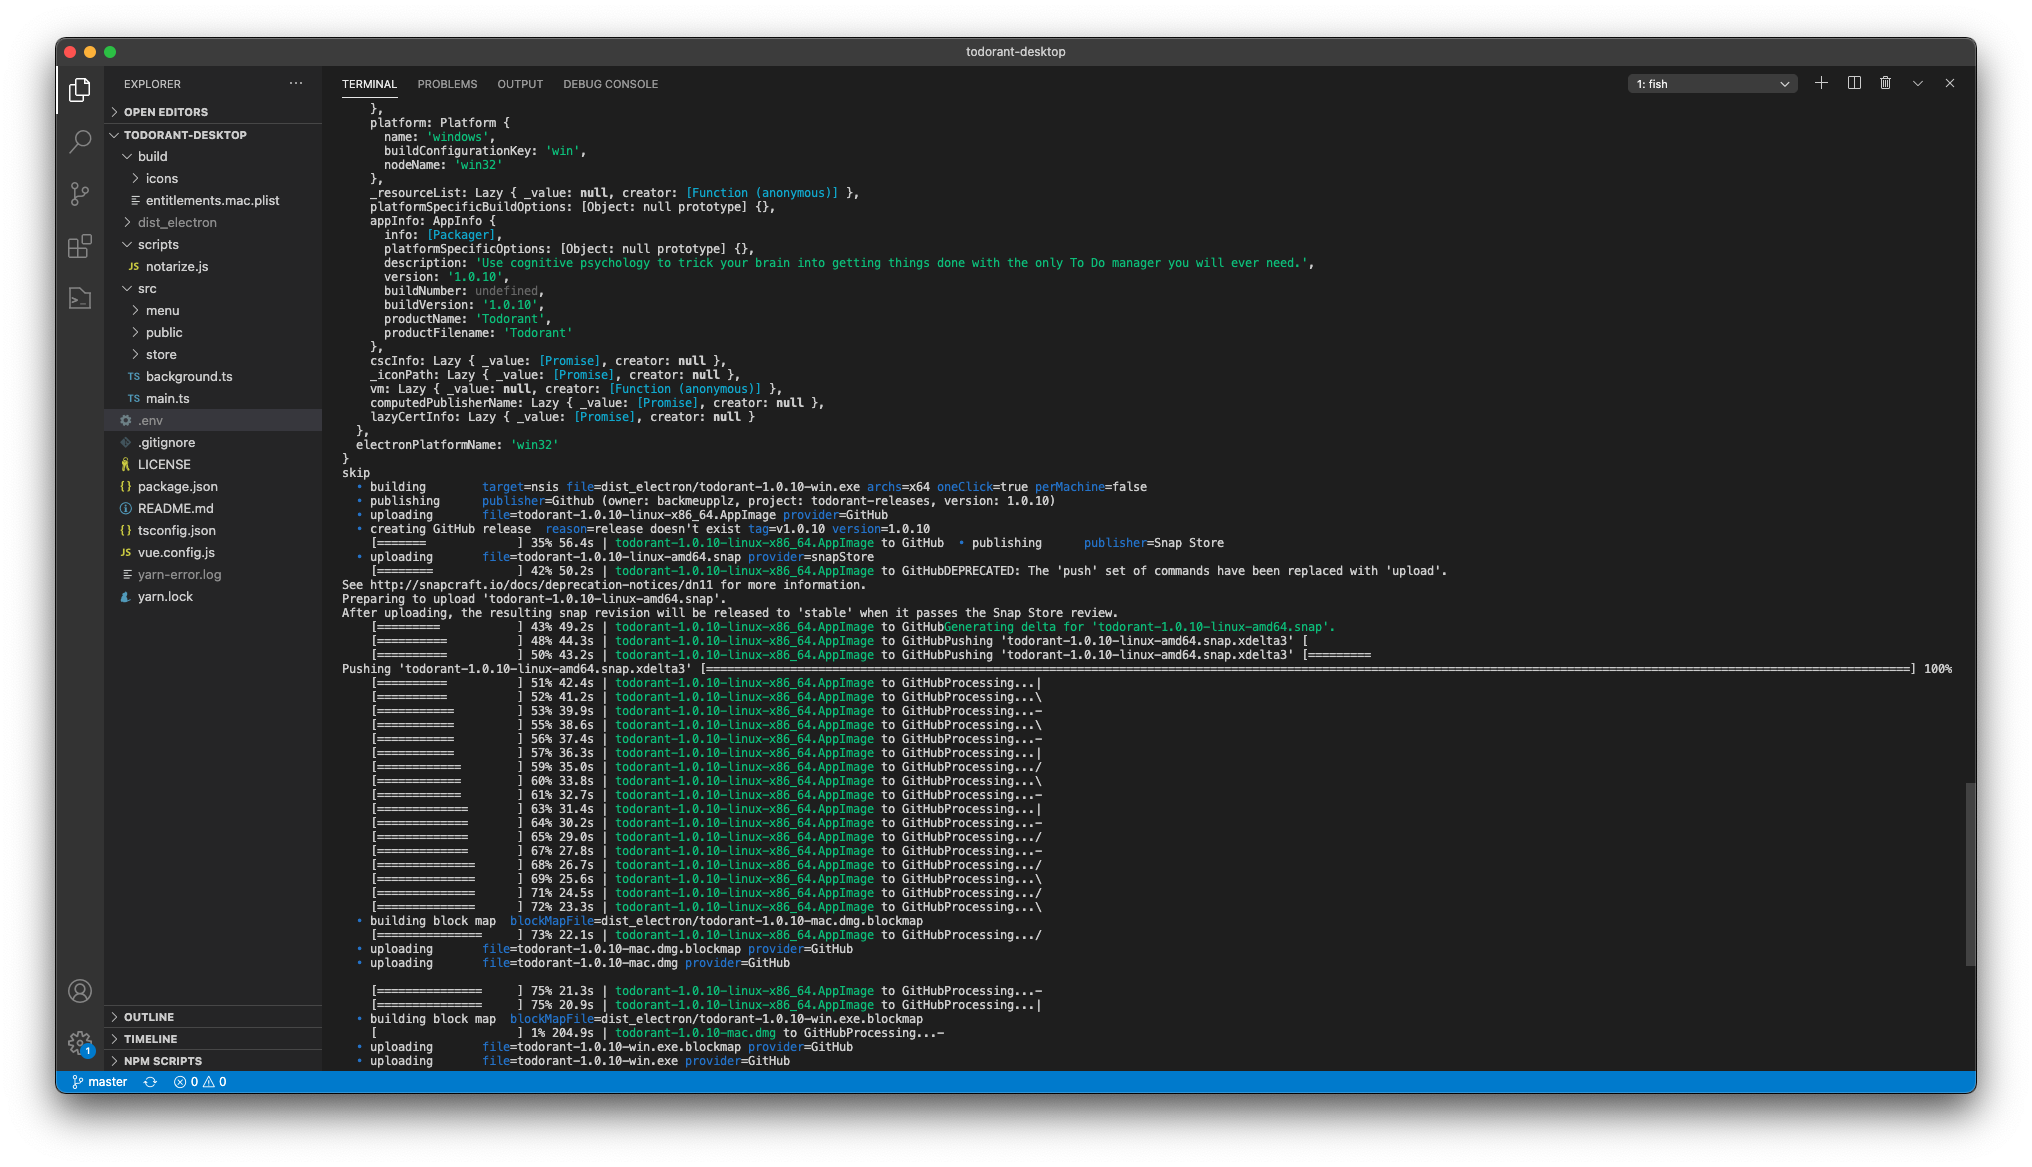
This will call the increment-version script and then run the Electron build command that will build the binaries for Linux, Windows, macOS and Snapcraft. Then it will upload the binaries to the GitHub repository you specified earlier and to the Snapcraft! All in one command!
Note: you can use the GitHub API to fetch the most recent binaries by running a GET request at a URL like https://api.github.com/repos/backmeupplz/todorant-releases/releases/latest. It can be helpful to keep the frontend links to the binaries up-to-date.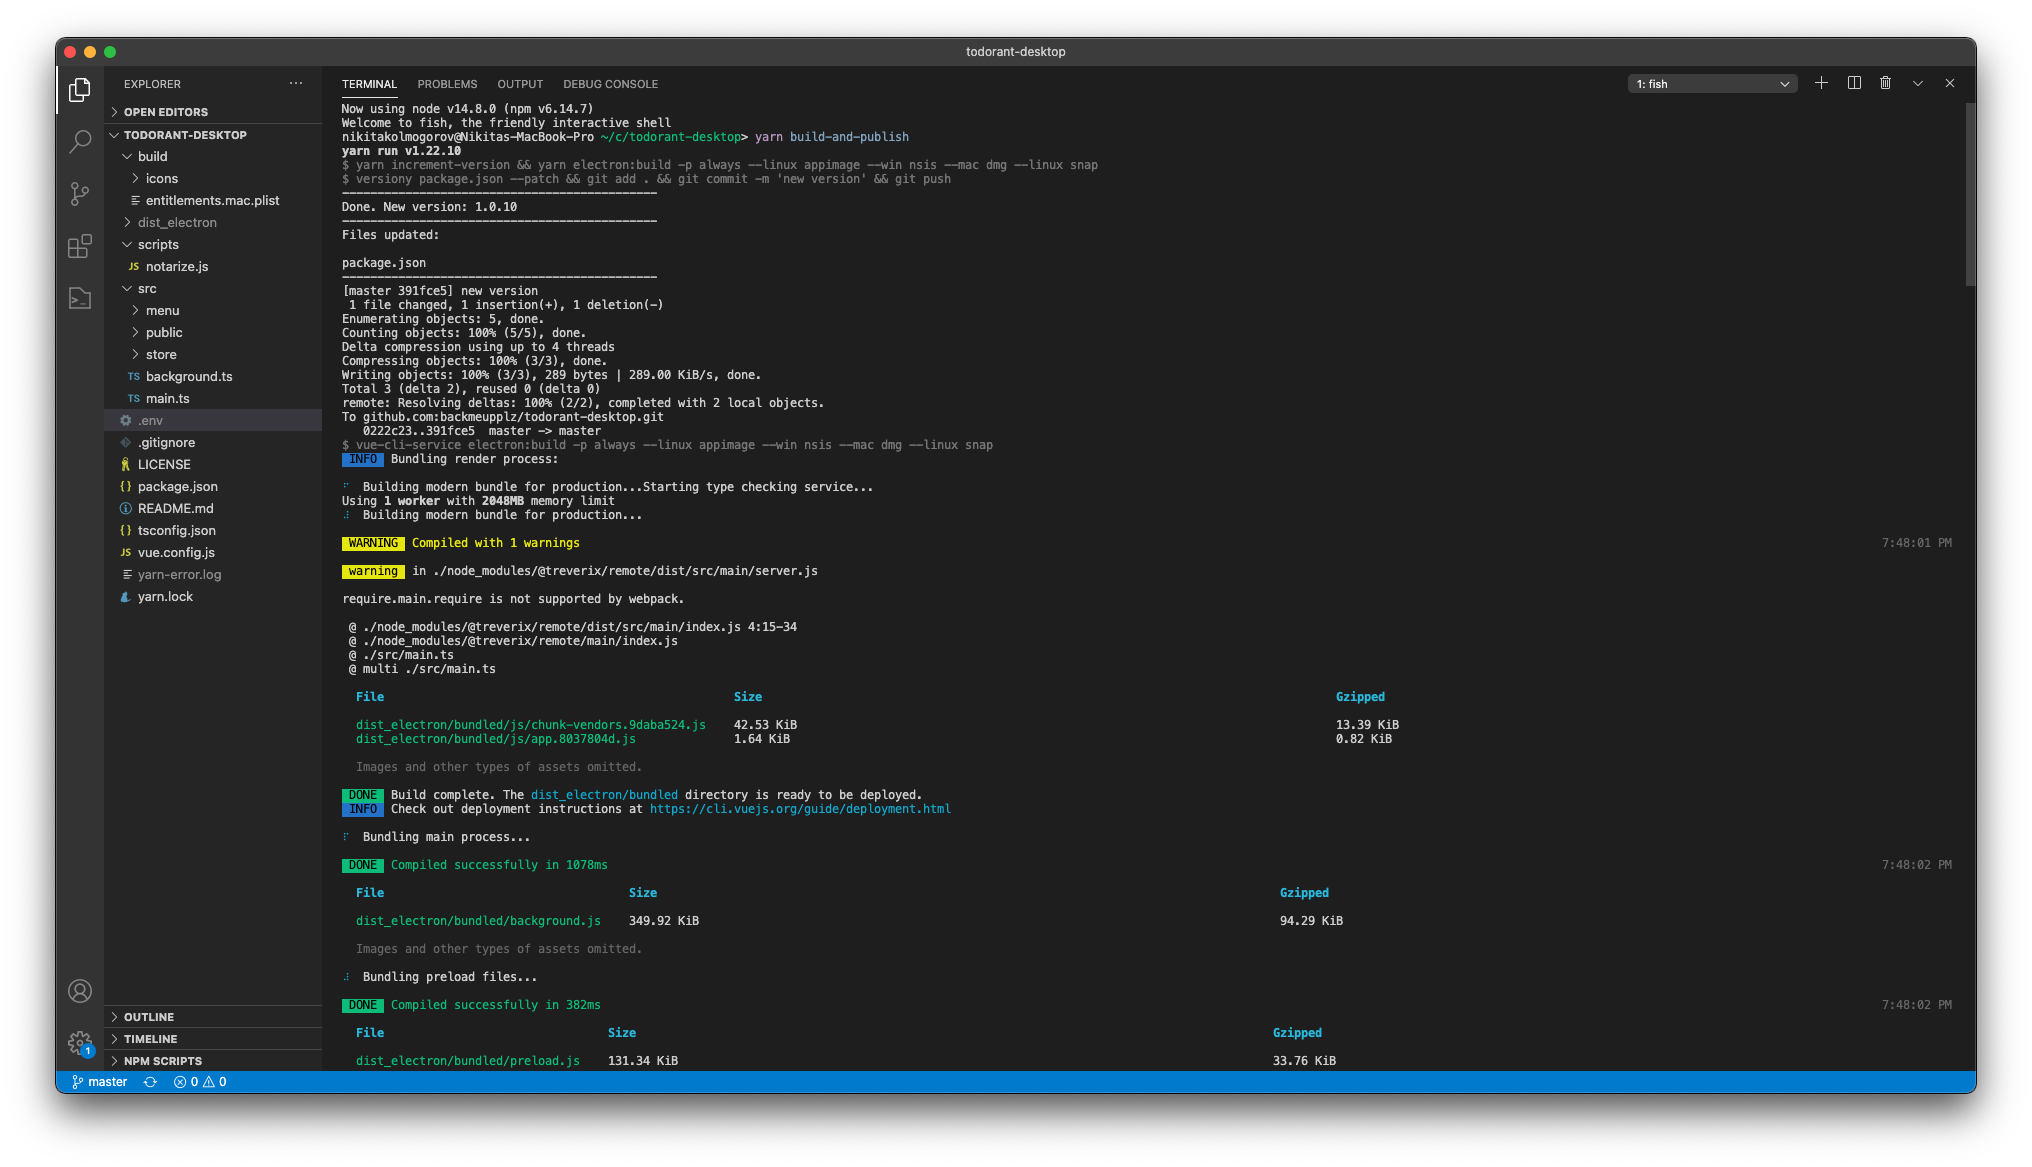

Conclusion
That's it, folks! As easy as 1-2-3 you got yourselves a nicely working deploy process for the Electron app you've built. And all for free! You don't even pay for hosting at GitHub or Snapcraft!
Now your users can safely forget that they have to keep their Electron app up-to-date. It will update on its own! Harry, you are a wizard now. Go have fun!