Zero-knowledge is easy or the ultimate how-to article
Finally, you can read an article and start building zero-knowledge products without a degree in computer science and math!

G'day Internet! Nikita's here, the CTO of Big Whale Labs — we build consumer products based on zero-knowledge (ZK for short) cryptography. Our focus is to apply the research to real-life problems instead of solving hypotheticals. We've made SealCred to mint zk-NFTs based on NFT and email ownership; Sealcaster to post on Farcaster anonymously; SealCred echo to post on Twitter anonymously (but with verified credentials); and most recently, ketl to enable pseudonymous communication between VCs and founders (and more — but that'll happen in the future).
The web is full of tutorials on ZK. However, if you're like me, the only thing you thought after completing Awesome ZK is, "What the hell is even going on?!" After spending a few years building real products in the field (not the theoretical stuff the tutorials mainly teach you), I realized you don't need 95% of everything they show you. And when you encounter an issue — then you can dive deeper.
- You don't need to know about finite field math or primes — simply don't use numbers larger than the prime outlined here.
- You don't need to know about Graph Coloring, Where's Waldo, or any other typical ZK examples — it's all hidden inside the tools you'll be using.
- You don't need to know every DSL to build in ZK — you only need to know about Circom and how to use it.
- You probably won't need anything beyond the
<==and===operands plus templates in Circom — it's that simple! - You don't need to tinker with configs and setting up the environment — use my ZK template to start coding today!
- You don't need to figure out "how to hide facts that you don't want to disclose inside proofs" — it's handled by Circom; simply go with the flow.
- You don't need to know about polynomials or any other lower-level math stuff — again, it's handled by Circom!
In this article, I will try to walk you through building a simple ZK product. After you finish the article, you will have enough knowledge to understand monstrous ZK products like my Farcantasy Arena (a card game to fight NFTs) and Tornado Cash mixer contracts.
Setting up the environment
Good news: we've set everything up, so you don't have to tinker with configs. Simply clone the starter repository and start building! Do the following:
git clone [email protected]:backmeupplz/zk-starter.git
cd zk-starter
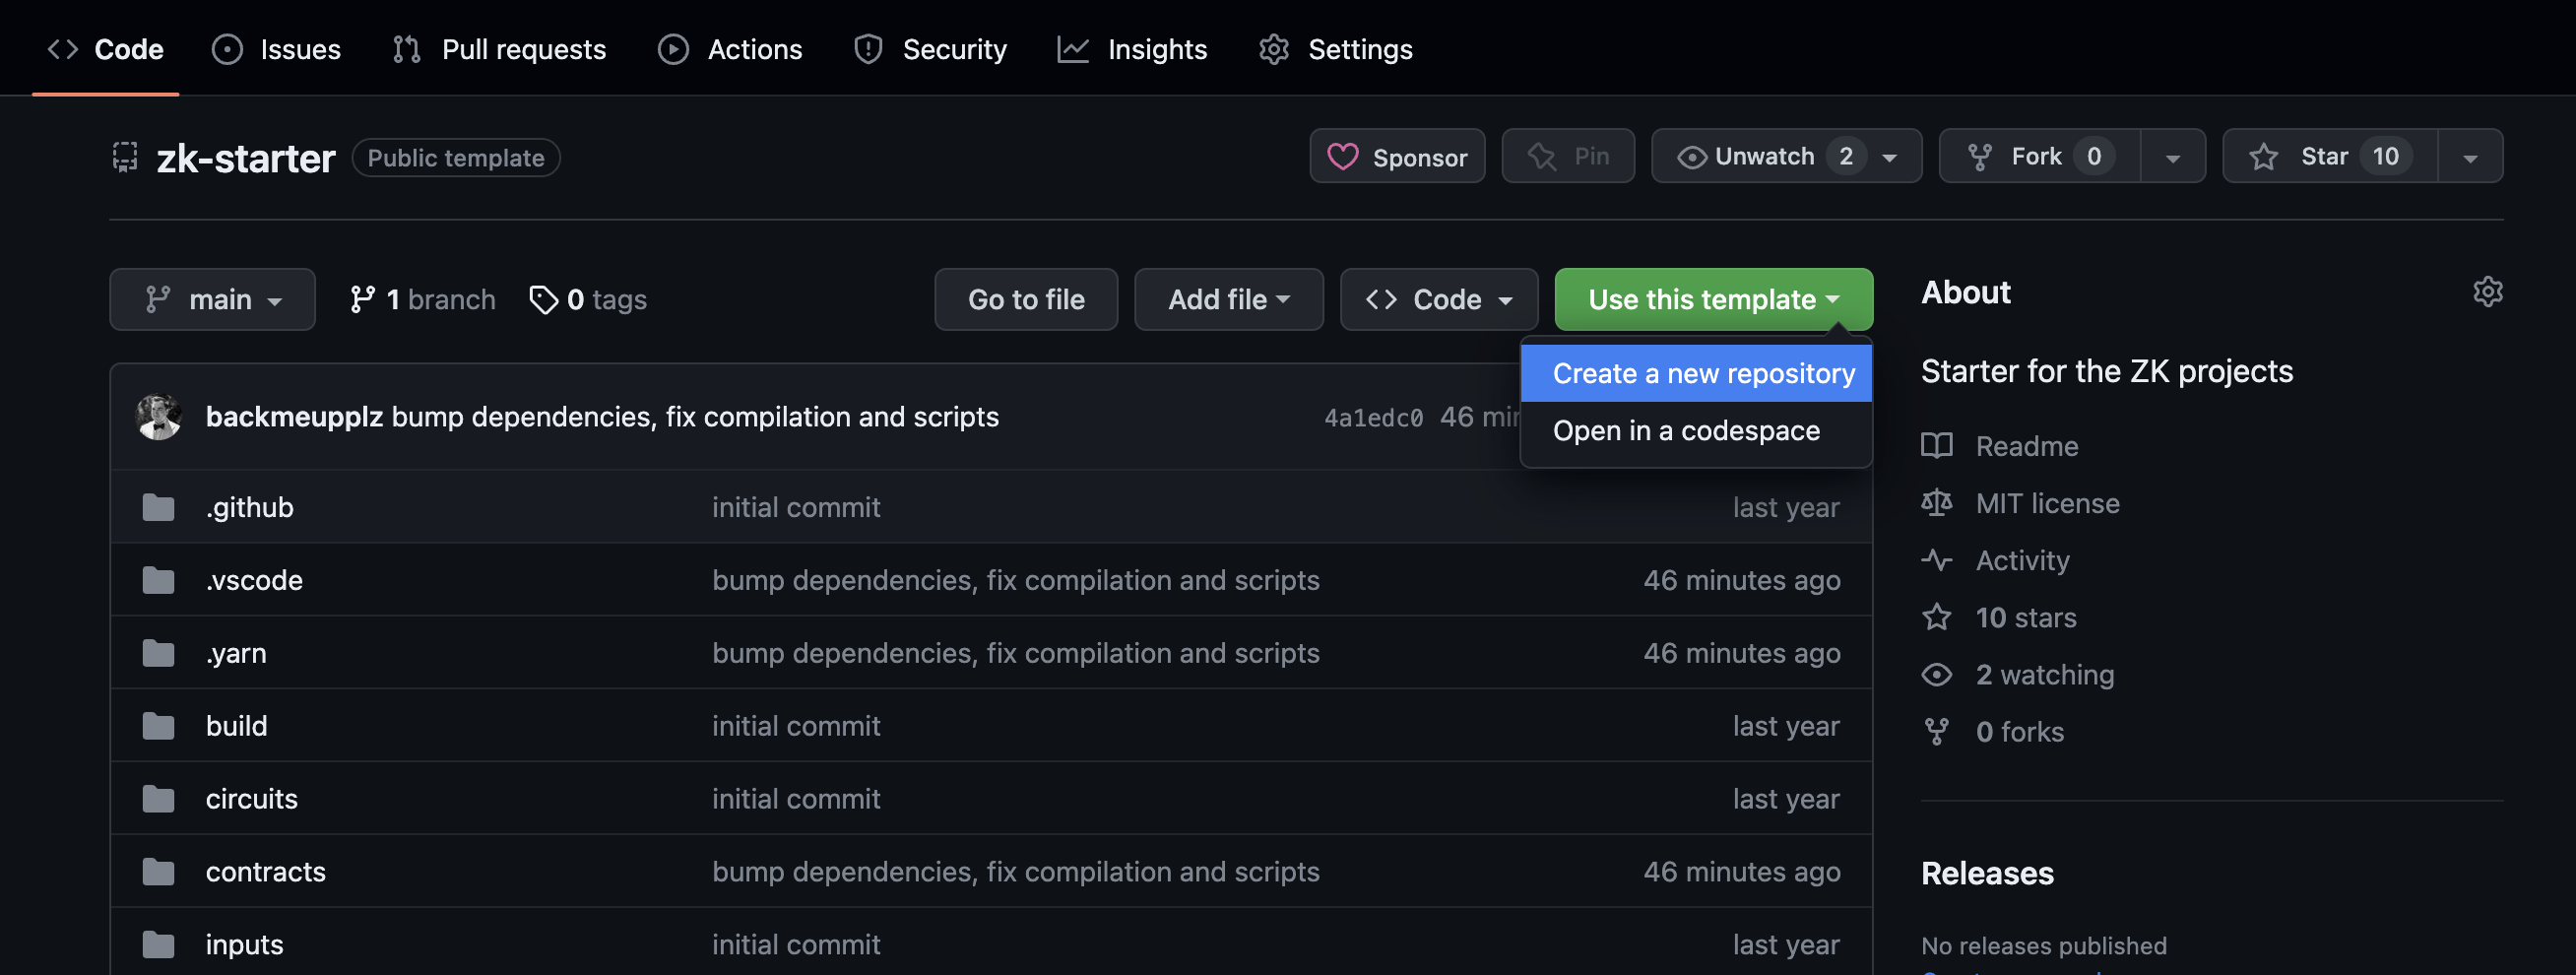
yarnAnd you're good to go! You can also create a brand new repository from the template, as shown below:
Make sure to explore the package.json file for the available scripts, read the README.md file, and run a bunch of given commands to familiarize yourselves with the process. It's as easy as yarn compile, yarn build, yarn deploy, etc.
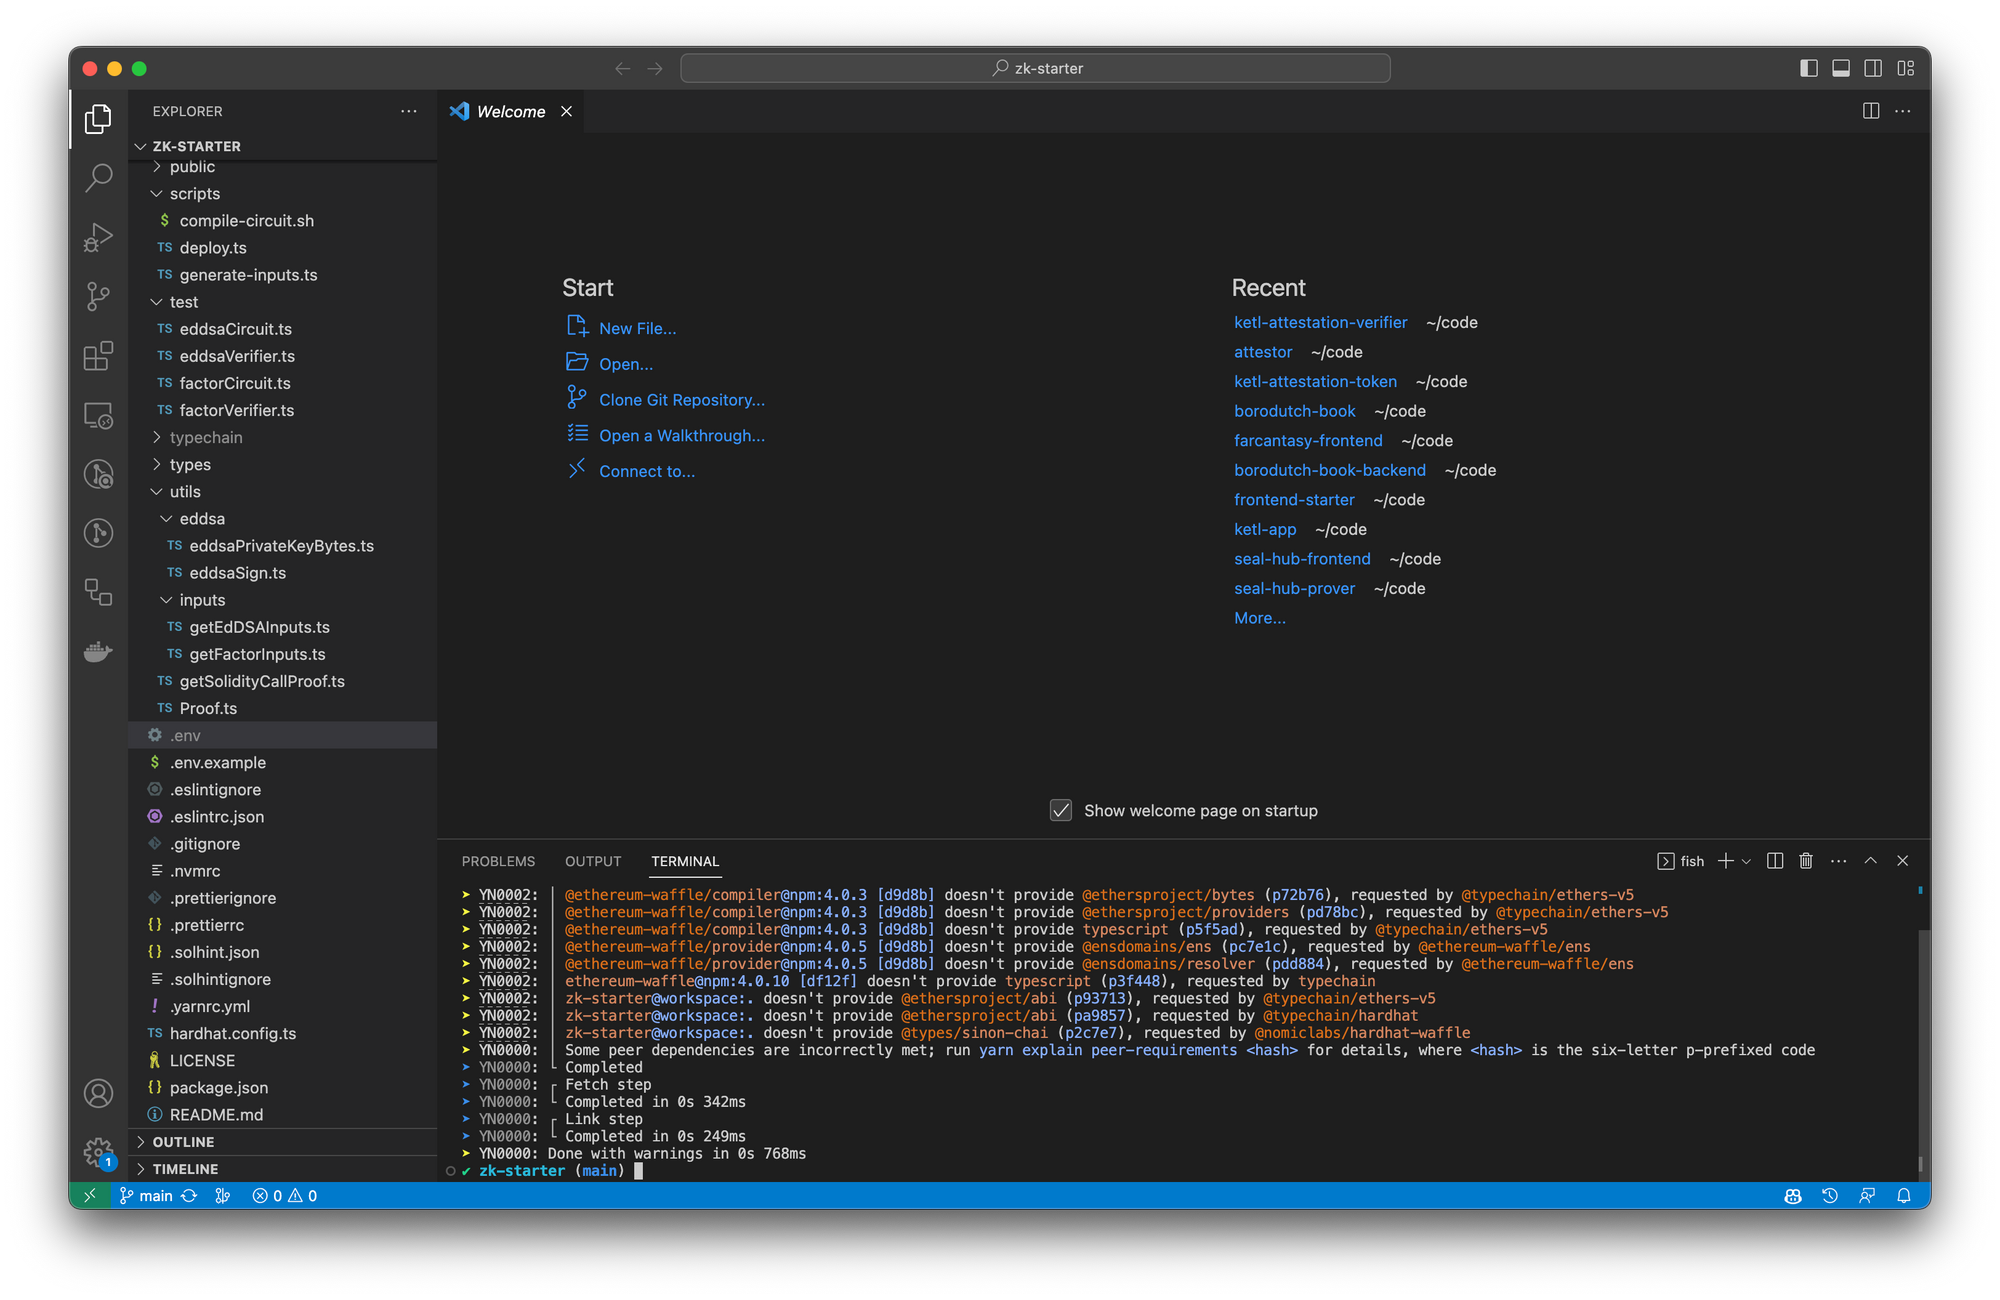
In the end, your environment should look like the screenshot that follows. If you aren't using VSCode yet, start using it immediately.
Quick Circom primer
Head to circuits/FactorChecker.circom. Here it is to save you some time:
pragma circom 2.0.4;

template FactorChecker() {
  signal input x;
  signal input y;

  signal output sum <== x * y;
}

component main{public [y]} = FactorChecker();
This sample circuit has everything you need to know about ZK, short of templates. We'll explore templates later, but let's dissect this particular factor checker circuit. Read the official documentation on Circom language; it answers many questions. But what are we looking at?
- Circom is a domain-specific language that is only used to build ZK circuits.
- ZK circuits are these small files, or these small templates, or the self-sufficient applications, or these small programs. Whatever you call them, the industry refers to
.circomfiles as "circuits." - You can see that we created the
FactorCheckertemplate and assigned it to themaincomponent. The template used as the main will be compiled into the ZK files. - Templates have "signals." You can think of a signal as a variable. Yes, Circom also has actual variables but don't mind them for now.
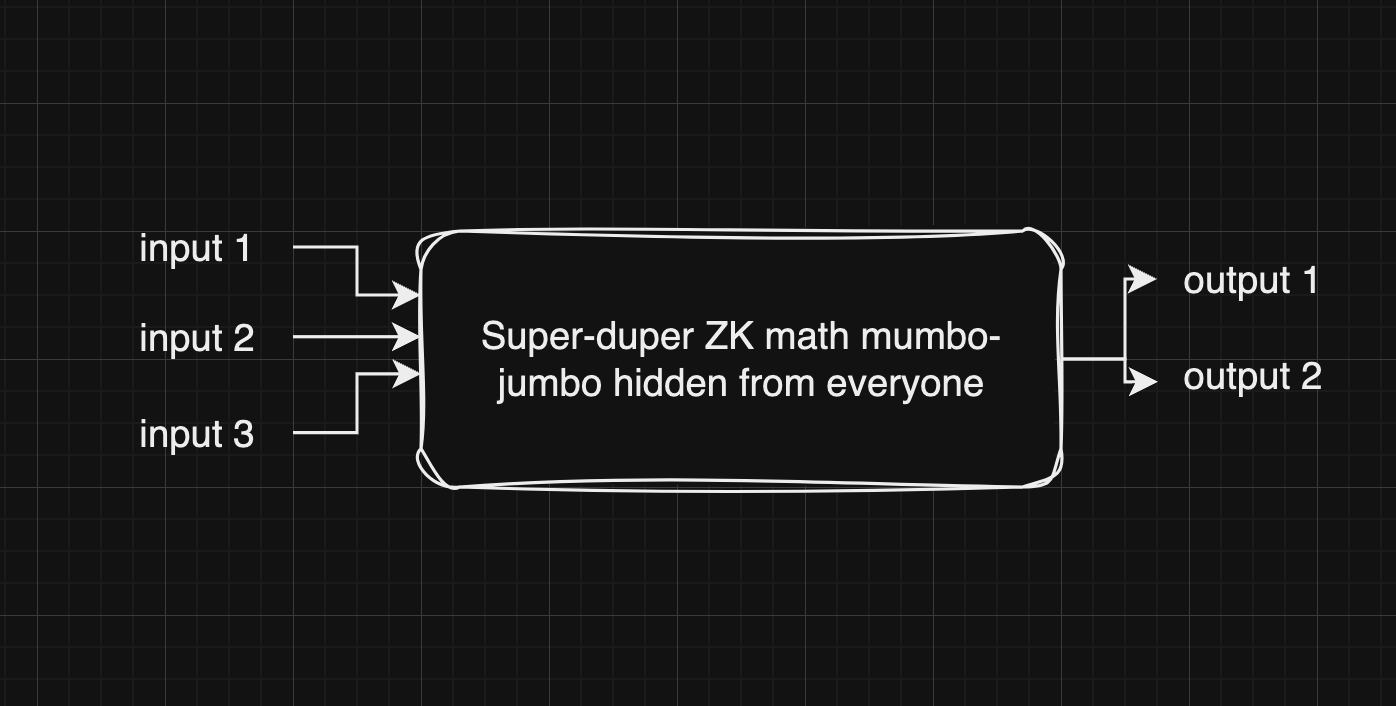
- Signals can be public inputs, private inputs, and public outputs (also "internal" signals, but you'll learn this on your own). Think of them as inputs and outputs for a black box that is your ZK files. Here's my artistic representation of a "zk circuit":
- When you compile a ZK circuit, you get the ZK proof generator function (usually usable in JavaScript) and the ZK proof verifier function (usually either in Solidity, usable in JavaScript, or both).
- You can then feed inputs as simple arguments into the ZK proof generator function and get a ZK proof as the output. The ZK proof will consist of all the public inputs, all the outputs, and a dozen-or-so numbers that will look random to you.
- When you need to verify a ZK proof (e.g., in a smart contract that you know private inputs that satisfy the constraints), you will plug the ZK proof as an argument to either a Solidity smart contract
verifyfunction or give it to a backend that will verify the ZK proof, similar to how it usually verifies a password. - OMG, what are "constraints"? You hear this term thrown around a lot. Basically, whenever you write
<==or===, you create rules like "this must be equal to this." That's it. - The more constraints you have, the more resources and time are required to generate a ZK proof. The higher the number of constraints, the higher powers of tau you will need.
- What are the "powers of tau"? You shouldn't care for now. When you compile your circuit, you'll see something similar to the screenshot below:
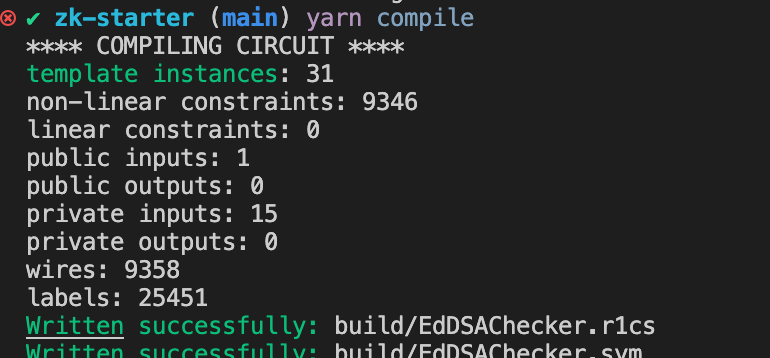
- Pay attention to the "non-linear constraints" part. Select the lowest powers of tau file from this list that can support your number of constraints. Fewer constraints are always better.
zk-starterrepo comes with thepot/pot16_final.ptaufile, and we use it to compile our template circuits. Anything above 19 would be unfeasible on mobile. Anything above 21 is close to impossible to use in real-life scenarios.- The whole ZK compilation process is well-encapsulated in
scripts/compile-circuit.sh, read through the file, and understand what it's doing. - You use the
compile-circuit.shfile like./scripts/compile-circuit.sh EdDSAChecker eddsa 16, whereEdDSACheckeris what the Solidity contract will take as the name,eddsais a shorthand for various intermediary files and16is the power of tau used. - If you want to use different power of tau, make sure to replace
pot/pot16_final.ptauwith a.ptaufile of your choice (keep the naming convention, though,compile-circuit.shdepends on it). - Damn, we're so deep below that you probably don't remember the original file we've discussed, here it is again:
pragma circom 2.0.4;

template FactorChecker() {
  signal input x;
  signal input y;

  signal output sum <== x * y;
}

component main{public [y]} = FactorChecker();
pragma circom 2.0.4;specifies the version of Circom to be used when compiling the circuit.template FactorChecker() {...}is the template we use. Think of it as a class in OOP.component main{...} = FactorChecker();this is using the class we've created. You can also pass arguments toFactorCheckerso, in fact, it behaves more like a function than a class. Well, whatever.- These arguments passed directly to
FactorChecker(...)won't be signals, though, keep this in mind. {public [y]}this exposes the input signalyas public. Unless you specify a signal as public here (the[y]is an array), it will be private.signal input x;andsignal input y;are the declarations for the inputs for this template. Think of them as arguments for the functionFactorChecker.signal output sum <== x * y;does a few things simultaneously: it declares the output signalsum(it will get into ZK proof and will be public) and assigns the result ofx * yto this signal.- The ZK proof here would be "I know an
xthat results inx * y = sumbeing valid given specified publicyandsum." I'm not telling youx, though. - Anyone can verify this ZK proof, even offline!
- I know, I know. There is little value to such a ZK proof, but this is the first building block for everything else.
Boom! You're the master of Circom. Well, short of templates, of course. You know what, let's fix this. Here's the second circuit we have in the zk-starter:
pragma circom 2.0.4;

include "./helpers/EdDSAValidator.circom";

template EdDSAChecker(messageLength) {
  // Check if the EdDSA signature is valid
  signal input pubKeyX;
  signal input pubKeyY;
  signal input R8x;
  signal input R8y;
  signal input S;
  signal input message[messageLength];
  signal input messageHash;

  component edDSAValidator = EdDSAValidator(messageLength);
  edDSAValidator.pubKeyX <== pubKeyX;
  edDSAValidator.pubKeyY <== pubKeyY;
  edDSAValidator.R8x <== R8x;
  edDSAValidator.R8y <== R8y;
  edDSAValidator.S <== S;
  edDSAValidator.messageHash <== messageHash;
  for (var i = 0; i < messageLength; i++) {
    edDSAValidator.message[i] <== message[i];
  }
}

component main{public [pubKeyX]} = EdDSAChecker(10);
OMG, what's that?
- See how we import
helpers/EdDSAValidator.circom— this file includestemplate EdDSAValidator(messageLength)that verifies an EdDSA signature. - EdDSA is basically ECDSA regarding the interface, so don't be discouraged from figuring it out. It's asymmetric encryption — if you don't know what that is, read it up.
- See how I passed an argument to
EdDSAChecker(...). - We create an instance of
EdDSAValidatorwith message length10(from the argument). Then we use it by filling up all of its inputs with values. - All loops and recursion in Circom need to be known on compilation time! You can't run a loop
input signal ntimes. You can run itvar ntimes, though, because allvarare known on compilation time. EdDSACheckersimply takes an EdDSA signature and has only one public output: the public key of the signer. The ZK proof here is "I know a signature signed by the private key that corresponds to the given public key."- Again, this example doesn't have much value, I just showed you how to use templates and how to pass arguments to them. Also, see how we work with the loops.
- All the inputs are an EdDSA signature deconstructed. ECDSA signatures look similar. We use EdDSA here because ECDSA signatures are notoriously inefficient in ZK.
- Yes, some algorithms will be ridiculously inefficient in ZK due to some math mumbo-jumbo you don't have to know (but it would be nice to read it up). Most of the time, ZK researchers either search for ways around inefficient algorithms (like we did with SealHub) or implement existing algorithms in circuits.
See? It is not that bad, is it? You now know literally everything there is to know to start writing your first ZK circuits. The zk-starter we provide also has a linter, a code highlighter, and a compiler baked-in. He-he, it's compilation time!
Compilation time!
So far, you've written 0 lines of code in this tutorial. Good, I intended to teach you how simple it is to build ZK apps, not give you coding practice. So you have all the files downloaded for the zk-starter. You know that you have the main templates in both circuits. Where do we put the inputs in?
Well, check out scripts/generate-inputs.ts. Also, run it: yarn generate-inputs.
import { BigNumber, utils } from 'ethers'
import { buildEddsa } from 'circomlibjs'
import { cwd } from 'process'
import { resolve } from 'path'
import { writeFileSync } from 'fs'
import eddsaPrivateKeyBytes from '../utils/eddsa/eddsaPrivateKeyBytes'
import getEdDSAInputs from '../utils/inputs/getEdDSAInputs'
import getFactorInputs from '../utils/inputs/getFactorInputs'

void (async () => {
  const eddsa = await buildEddsa()
  console.log('EdDSA private key', utils.hexlify(eddsaPrivateKeyBytes))
  console.log(
    'EdDSA public key',
    BigNumber.from(eddsa.prv2pub(eddsaPrivateKeyBytes)[0]).toString()
  )
  const inputs = {
    eddsa: getEdDSAInputs,
    factor: getFactorInputs,
  }
  for (const [name, fn] of Object.entries(inputs)) {
    const inputs = await fn()
    // Writing inputs
    writeFileSync(
      resolve(cwd(), 'inputs', `input-${name}.json`),
      JSON.stringify(inputs),
      'utf-8'
    )
    console.log(`Generated input-${name}.json!`)
  }
})()
This script is pretty self-explanatory. It generates two files:
{"x":10,"y":20}{"message":[48,49,50,51,52,53,54,55,56,57],"pubKeyX":"4877328357478890623967823018480272757589824716691017530689013849938564609461","pubKeyY":"19319156333180214350448676801453385628019589905553133160599925263402925020311","R8x":"18048104488841983681100031378672361658884754908995062792577289013941983324692","R8y":"14370313388154339758544676769865498369921510647431217220258997649072559998466","S":"29887262005302205008378414317680064092320631224702281032353154464560726318","messageHash":"9269011776871329098771265900779021648879945307228126762468519672935253052154"}First are the inputs for the FactorChecker, second are the inputs for EdDSAChecker. We're doing some simple value generation in the background, so check it out.
These two files will not go into the resulting ZK proof generator and ZK proof verifier functions. We need them for the compilation step so that the compiler can check that everything is correct. The thinking here is that you're going to generate these inputs for every use case locally, plug them into the ZK proof generator function and send the resulting ZK proof to wherever you'd like to verify it (e.g., a Solidity smart contract or a backend using the ZK proof verifier).
Now, run yarn compile, which looks like the following:
"compile": "yarn compile-eddsa && yarn compile-factor",
"compile-eddsa": "scripts/compile-circuit.sh EdDSAChecker eddsa 16",
"compile-factor": "scripts/compile-circuit.sh FactorChecker factor 16"
We're using ptau 16 here for both circuits, but we could probably use lower numbers. As a result, the script will generate the following files:
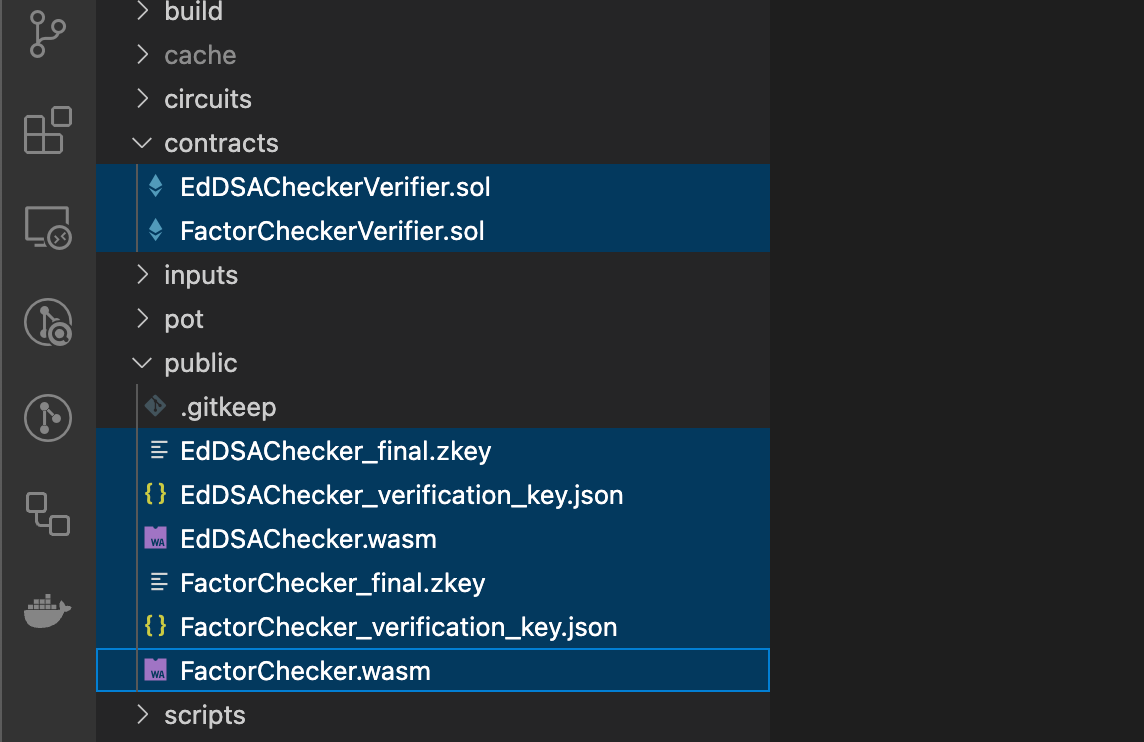
These are all you need to start generating ZK proofs and verify them! To generate ZK proofs, you will be using snarkjs as outlined in the documentation here. You can do this in Node.js or in a browser! You will need the wasm and the zkey files per each circuit, and you must provide all the inputs (including both private and public ones). But the ZK proof will be generated locally, so the inputs never leave the local client, only the ZK proof does.
Let's say you've generated a proof, it will look something like this:
{
 "pi_a": [
  "21362890427786513721868047244791520727035382188480189985806629427851746766461",
  "21177017053289137243728617178852429337839871390994291450266659008965515121512",
  "1"
 ],
 "pi_b": [
  [
   "11175387644024638517530238890324952982093580513751713071922815344515584333544",
   "17947677980310203278877769343612008877303614500700250387701326508537036962511"
  ],
  [
   "11297191048796002233162062252094814572684403458792329527647537362945820686123",
   "1530637349505062824120842980888323174923348826382870089954667920827493186252"
  ],
  [
   "1",
   "0"
  ]
 ],
 "pi_c": [
  "11090662412970959020466049687442007283218611222222167884794263674441974383197",
  "21097208401723004253388207563924432087310252719402667367176162238912794597508",
  "1"
 ],
 "protocol": "groth16",
 "curve": "bn128"
}
[
"200",
"20"
]The top file is the "meat" of the ZK proof, and the bottom file is all the public signals (inputs and outputs). These two JSONs are going to the verifier! A way to verify ZK proofs in JavaScript is noted in the snarkjs documentation, and the way to verify these ZK proofs in Solidity is contained in the .sol files generated. They have the following function:
function verifyProof(
  uint[2] calldata _pA,
  uint[2][2] calldata _pB,
  uint[2] calldata _pC,
  uint[1] calldata _pubSignals
) public view returns (bool)
Obviously, _pubSignals will be the array from the second file, whereas the first three arguments are taken from the first file. Make sure to convert the bare JSONs to Solidity-friendly calldata, snarkjs has helper functions for that!
Now, this function of the verifier that you can deploy with yarn deploy (make sure to fill out the .env file as outlined in the readme) will go to the EVM chain of your choice and can be used by any other external contract. Here's how I use one of my verifiers in the Farcantasy Arena:
function submitCardSelectionProof(
    uint256 lobbyId,
    uint[2] memory a,
    uint[2][2] memory b,
    uint[2] memory c,
    uint[1] memory input
  ) external {
  ...
  require(
    cardSelectionVerifierContract.verifyProof(a, b, c, input),
    "The card selection proof is not valid."
  );
  ...
}
Now, the .zkey file gets larger and larger with larger ptau! Partially, this is the reason you'd want to keep the ptau small.
Anti-climactic conclusion
"What? No math? No finite fields? No polynomials? Is this really a ZK tutorial?"
Yes, it is, dear reader. Feel free to read the mathematical mumbo-jumbo from other authors, I usually only focus on the specifics and practical applications. With the knowledge above, anyone can start building ZK apps. So go build some!
Or send this article to your dev friends. Believe me, they'll appreciate it! Without much hassle, you're now a ZK expert, congratulations! 🎉